26 Rental Kitchen Makeover Ideas Without Losing Your Deposit
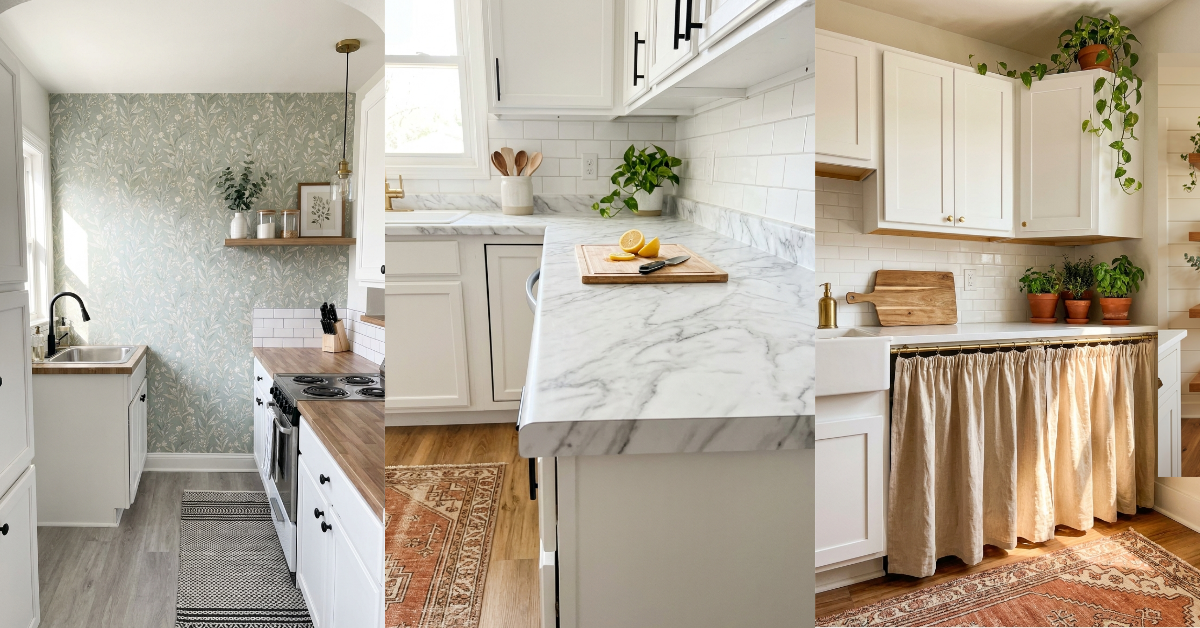
You’ve been staring at those builder-grade cabinets for six months now. The yellowing countertops, the dated hardware, that sad rental-white everything — it’s enough to make you want to order takeout forever just to avoid being in there. But here’s the thing: you don’t need your landlord’s permission to make your kitchen feel like yours. You don’t need thousands of dollars or a contractor on speed dial. What you need are smart, removable updates that transform the space without risking your security deposit. I’m talking peel-and-stick magic, contact paper wizardry, and hardware swaps that take twenty minutes but look like a complete renovation. These aren’t band-aid fixes that scream “temporary.” They’re legitimate design upgrades that’ll make you actually want to cook dinner. And when you move? Everything comes right off. Let’s get into it.
1. Peel-and-Stick Subway Tile Backsplash
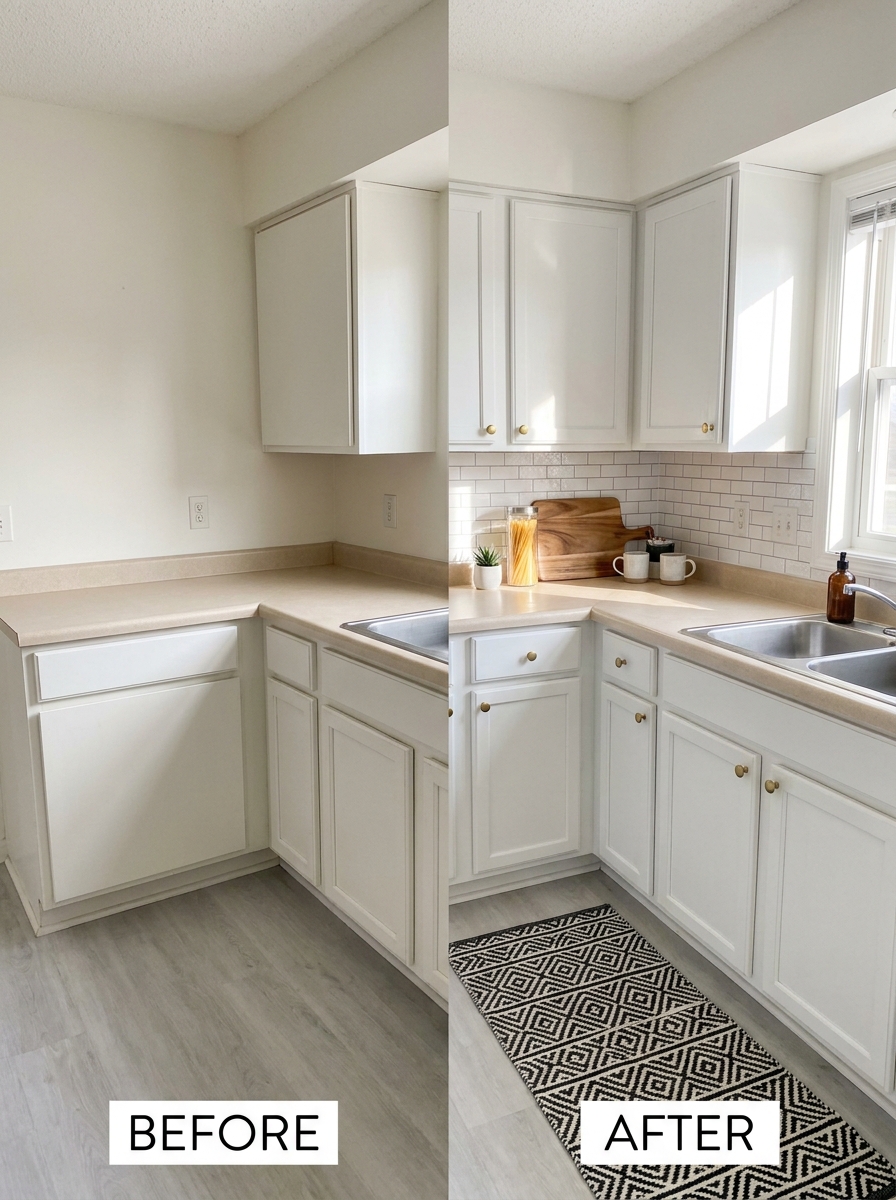
This is the change that makes people think you knocked down walls and hired a tile guy. Peel-and-stick subway tiles have come so far that guests won’t believe they’re removable. The secret is picking one with a bit of dimension — those slightly raised edges catch light like real tile and sell the illusion completely.
Application takes an afternoon if you’re careful about your first row. Start level, work in small sections, and don’t rush it. I’ve seen renters transform entire kitchens with just the wall behind the stove, and suddenly the whole space reads expensive.
The white subway is classic for a reason, but don’t sleep on colored options. A soft sage green or navy blue backsplash against white cabinets creates that custom kitchen vibe without touching anything permanent. And when it’s time to move? It peels off clean, leaving your landlord none the wiser. Just keep your heat sources a reasonable distance away, and you’re golden.
2. Contact Paper Marble Countertops
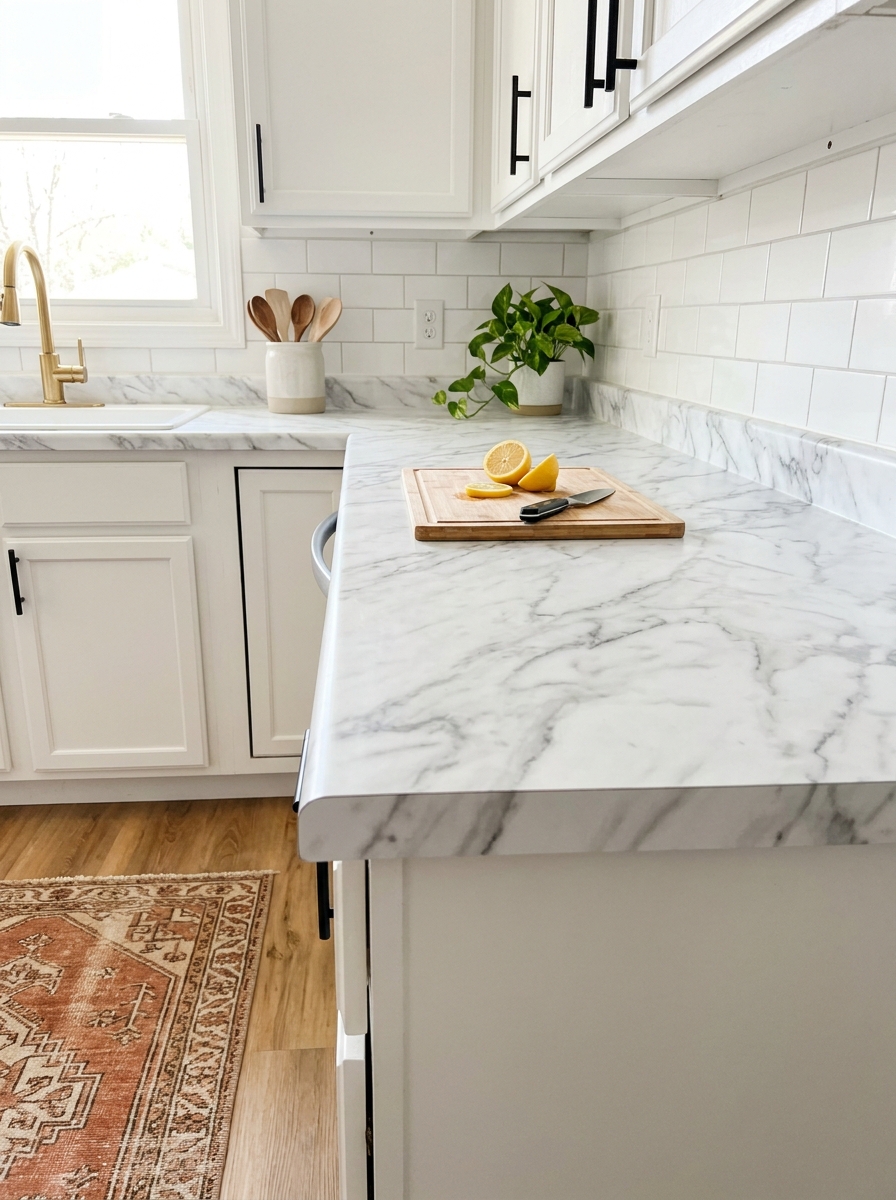
Listen, I was skeptical too. Contact paper on countertops sounds like something that’ll peel up the first time you set down a hot pan. But the thick, quality stuff? It actually holds up to real kitchen life, and the marble patterns available now are shockingly convincing.
The trick is in the prep and the application. You need a squeegee, a sharp blade, and patience. Measure twice, cut once, and work out those bubbles like your life depends on it. The seams are the giveaway, so plan them strategically — along the back edge near the backsplash, or where your cutting board usually sits.
I’ve seen this turn orange Formica into Carrara marble lookalikes that completely change the kitchen’s personality. Pair it with that subway tile backsplash and suddenly your rental looks like a Pinterest save. The best part? It’s protecting your actual countertops from stains and scratches, so you might actually get more of your deposit back.
3. Cabinet Hardware Upgrade
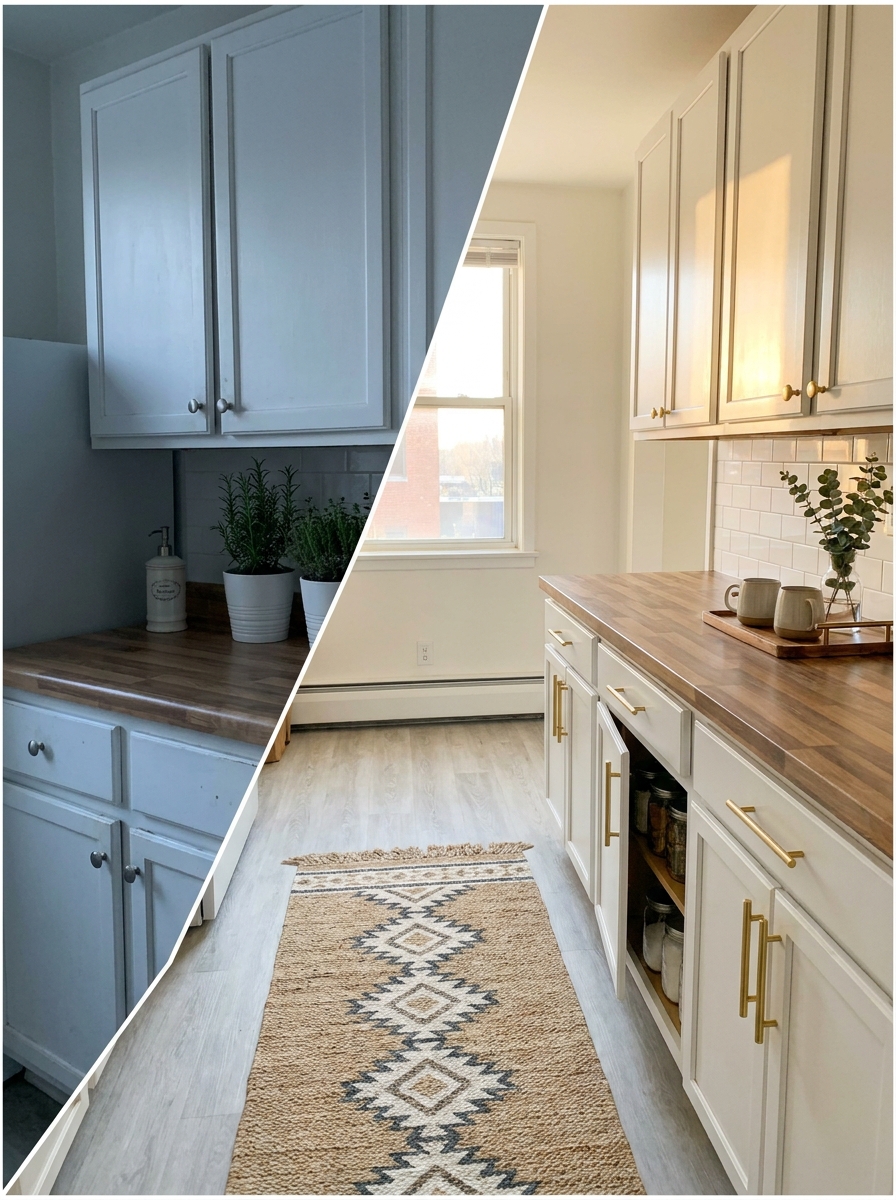
You will not believe the difference this makes until you do it. Swapping out those builder-grade brushed nickel knobs for something with personality takes maybe thirty minutes and costs less than dinner out. It’s the easiest transformation on this entire list.
Brass is having a moment, and for good reason — it warms up a kitchen instantly. Black matte hardware creates drama and works with literally everything. Even simple glass knobs can make basic cabinets look vintage-charming instead of apartment-generic. Keep your old hardware in a labeled baggie, and you can swap everything back before your move-out inspection.
The only trick here is matching your hole spacing. Most standard cabinets use 3-inch or 3.75-inch spacing for pulls. Bring one of your old pieces to the hardware store if you’re not sure. Or go with knobs instead of pulls — they only need one screw hole, so you’ve got more flexibility. This tiny change makes opening your cabinets feel like an upgrade every single time.
4. Removable Wallpaper Accent Wall
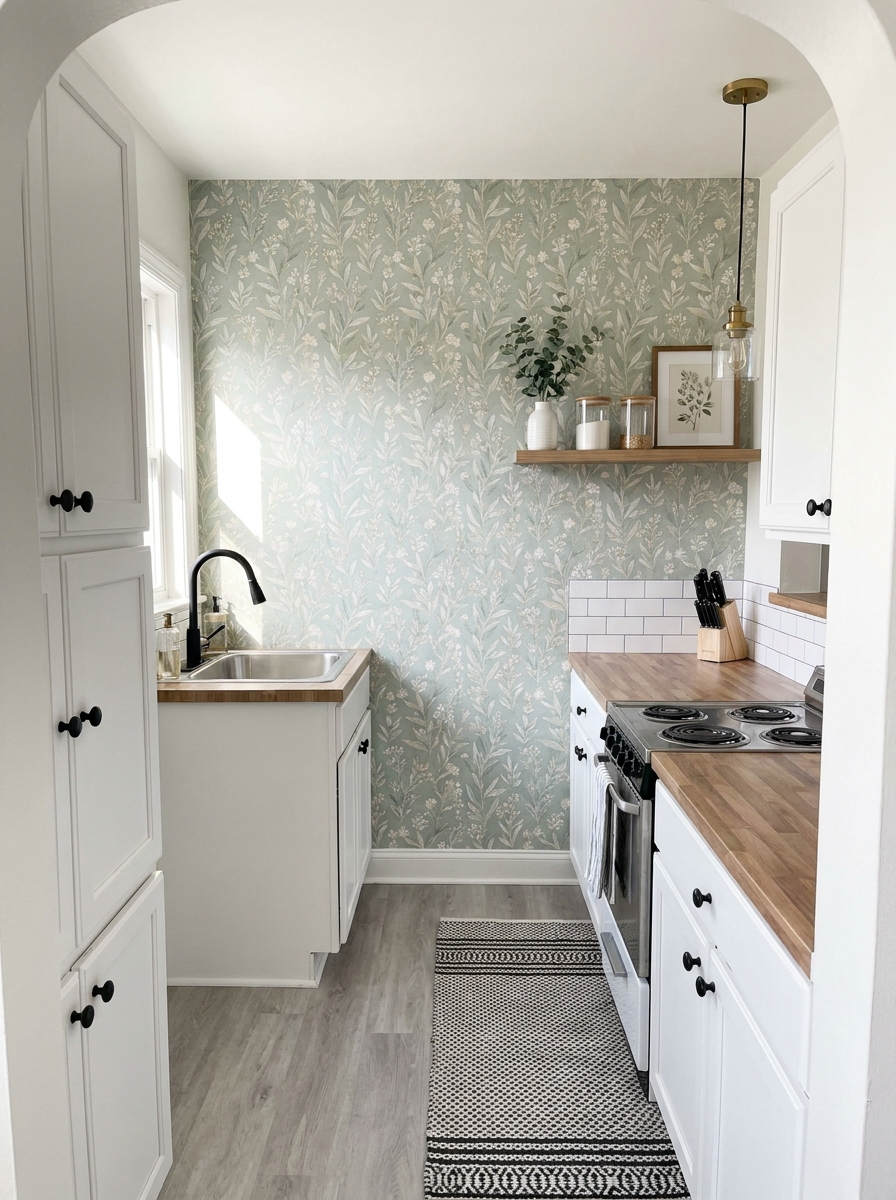
Who says wallpaper is just for living rooms? A single accent wall in your kitchen — maybe the one you face while doing dishes — can completely shift the mood of the space. And removable wallpaper has gotten so good that it looks like the real thing.
Pick a wall that’s relatively smooth and doesn’t get splattered constantly. The wall opposite your sink or stove works beautifully, or that awkward short wall at the end of a galley kitchen that’s usually just… there. Patterns with depth or texture photograph gorgeously and make your kitchen feel designed instead of default.
I love a subtle geometric or a moody botanical print for kitchens. It adds personality without overwhelming the space, and it gives you something interesting to look at besides your dishes. The application is easier than contact paper — most peel-and-stick wallpapers are forgiving enough to pull up and reposition. Just avoid super cheap options that peel at the seams after a few months.
5. Open Shelving with Command Strips
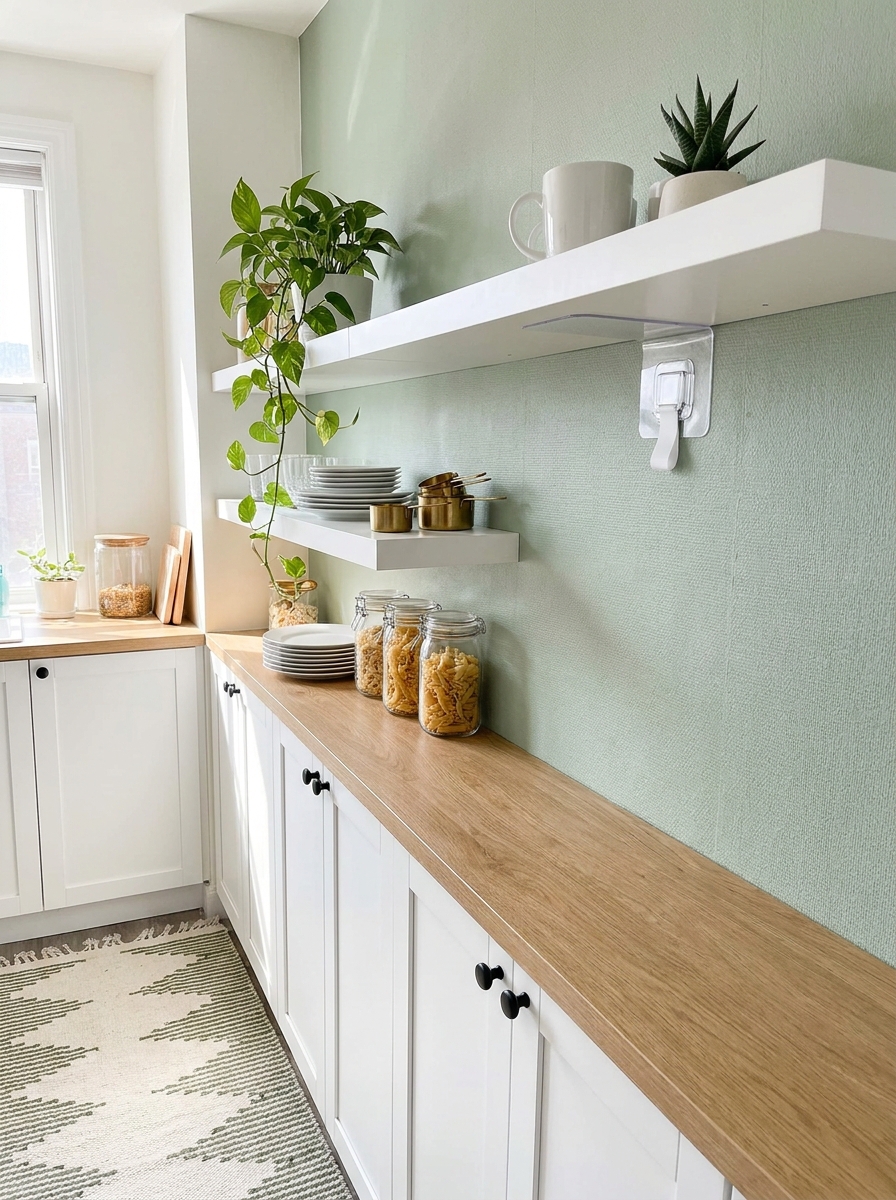
Here’s a secret: you don’t need to drill holes to get those gorgeous open shelves everyone’s obsessed with. Heavy-duty adhesive strips and floating shelf brackets made for renters can hold more weight than you’d think—I’ve had mine up for two years!
The transformation is instant. Remove those clunky upper cabinet doors (keep them in the closet!) or install new floating shelves right on a blank wall. Style them with your prettiest dishes, coffee mugs, and a few plants. Suddenly your kitchen looks custom and curated instead of builder-basic.
I love mixing everyday items with decorative pieces—white dishes, a wooden cutting board, some vintage containers. It forces you to keep things tidy, which honestly helps me stay organized. Plus, reaching for your morning coffee mug feels so much better when it’s displayed beautifully instead of hidden behind a cabinet door. The open look makes small kitchens feel bigger too, which is magic in a rental.
6. Under-Cabinet LED Strip Lighting
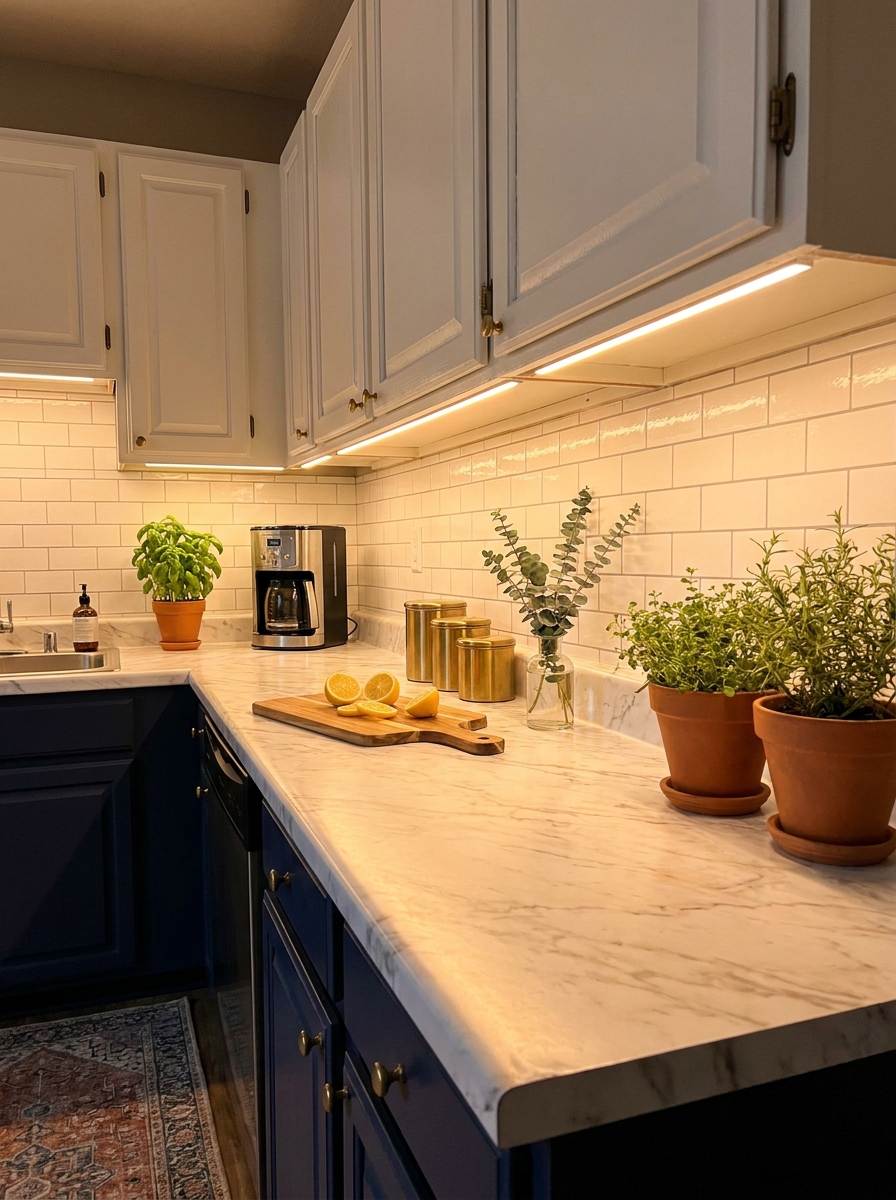
This might be the easiest upgrade with the biggest wow factor. Plug-in LED strip lights transform your kitchen from dim and dingy to restaurant-worthy in about fifteen minutes. No electrician needed—just peel, stick, and plug in.
I added mine on a random Tuesday night and literally texted photos to everyone I know. The difference is that dramatic. Your countertops get this beautiful ambient glow that makes cooking actually enjoyable. You can finally see what you’re chopping! Plus it creates this cozy atmosphere that makes your whole kitchen feel more expensive.
Most LED strips come with a remote so you can dim them or change the warmth. I keep mine on warm white during the day and dim them in the evening. They’re also crazy energy-efficient, so you can leave them on without guilt. When you move out? Just peel them off. The adhesive backing is strong enough to stay put but gentle enough not to damage cabinets.
7. Painted Lower Cabinets (Landlord-Approved)
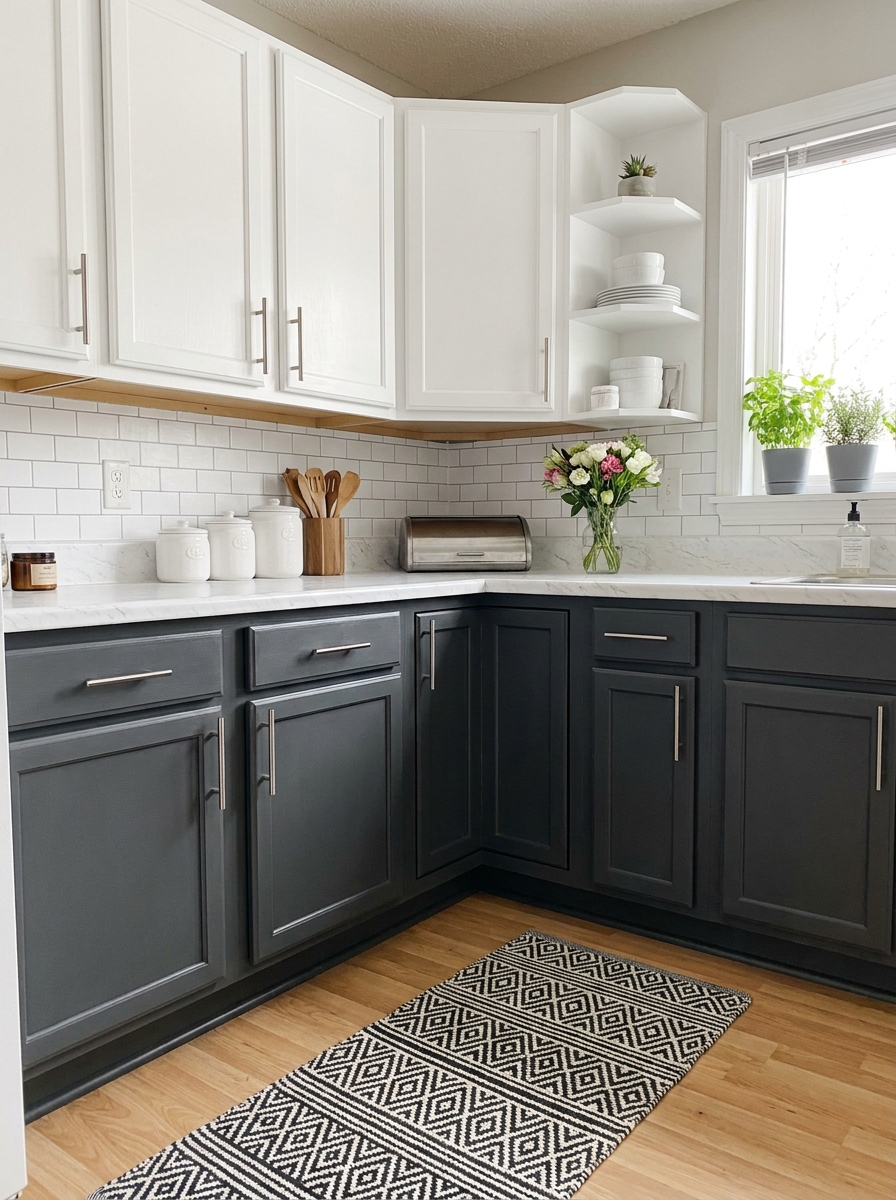
If your lease allows paint, this is your golden ticket. Painting just the lower cabinets while keeping uppers white creates a custom two-tone look that’s wildly popular right now—and costs maybe forty bucks in supplies.
I’ve seen rentals go from total snoozefest to magazine-worthy with this one change. Navy, sage green, even a moody charcoal gray—pick a color that makes your heart happy. Use a good primer and a durable cabinet paint, and those cheap builder-grade cabinets suddenly look intentional and designed.
The key is doing proper prep work. Clean everything with TSP, lightly sand, prime, then paint two thin coats. Yes, it’s a weekend project, but it’s so worth it. And here’s the thing—most landlords actually appreciate it because you’re improving their property. Just check first! When you move, you can either paint them back or leave them since you’ve increased the value.
8. Curtain Instead of Cabinet Doors
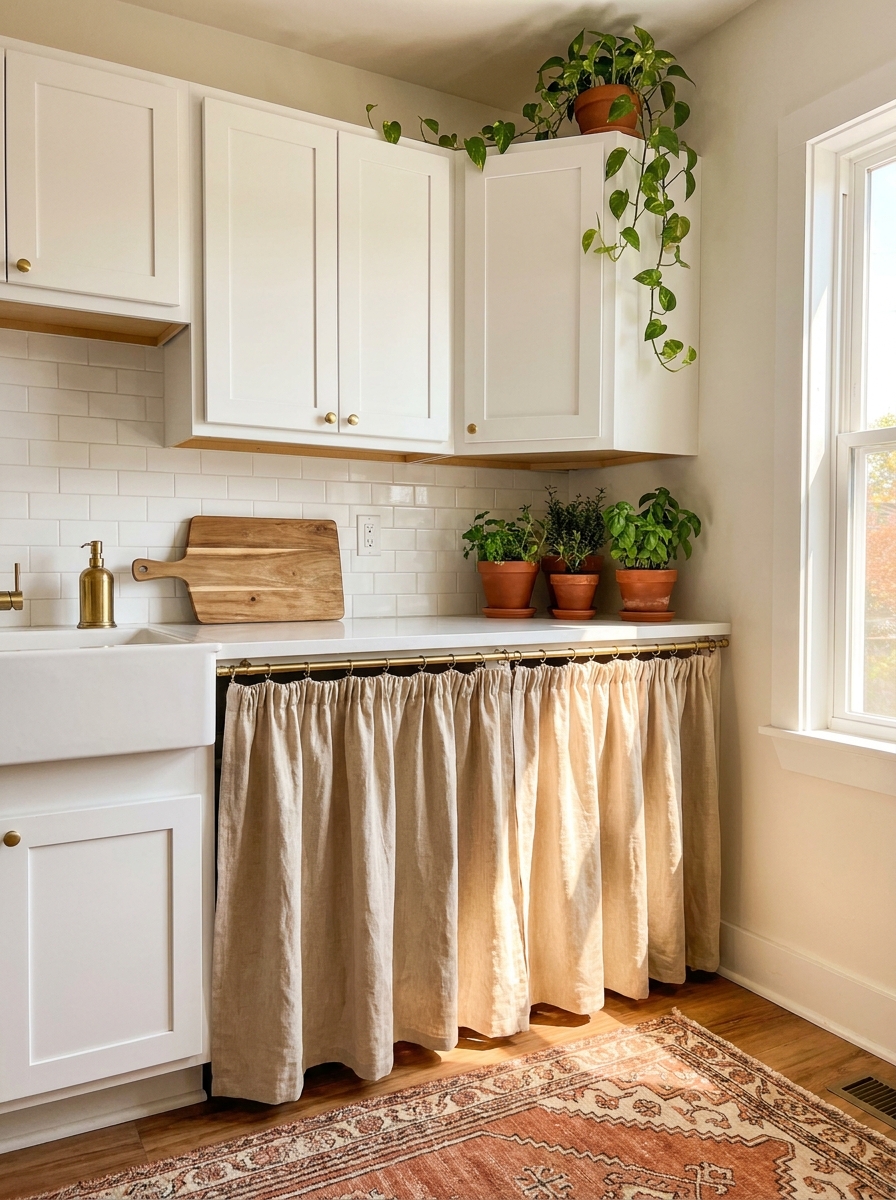
Okay, hear me out on this one—it sounds weird but looks amazing. Replace one section of cabinet doors with a tension rod and a pretty curtain. It’s giving French country cottage, and it completely changes the vibe of a boring rental kitchen.
I first saw this in a tiny apartment where someone covered the open space under their sink with a gathered linen curtain. Genius! It hides cleaning supplies and trash bins while adding softness and texture. You can also do this on upper cabinets if you remove the doors—just use a small tension rod and a café curtain.
The fabric you choose sets the whole mood. Ticking stripe feels farmhouse, a bold pattern reads eclectic, and simple linen looks Scandinavian. It’s also practical because you can toss the curtain in the wash when it gets grubby. And switching out the fabric is an easy way to refresh your kitchen seasonally. Plus, tension rods require zero installation damage.
9. Stick-On Tile for Dated Floors
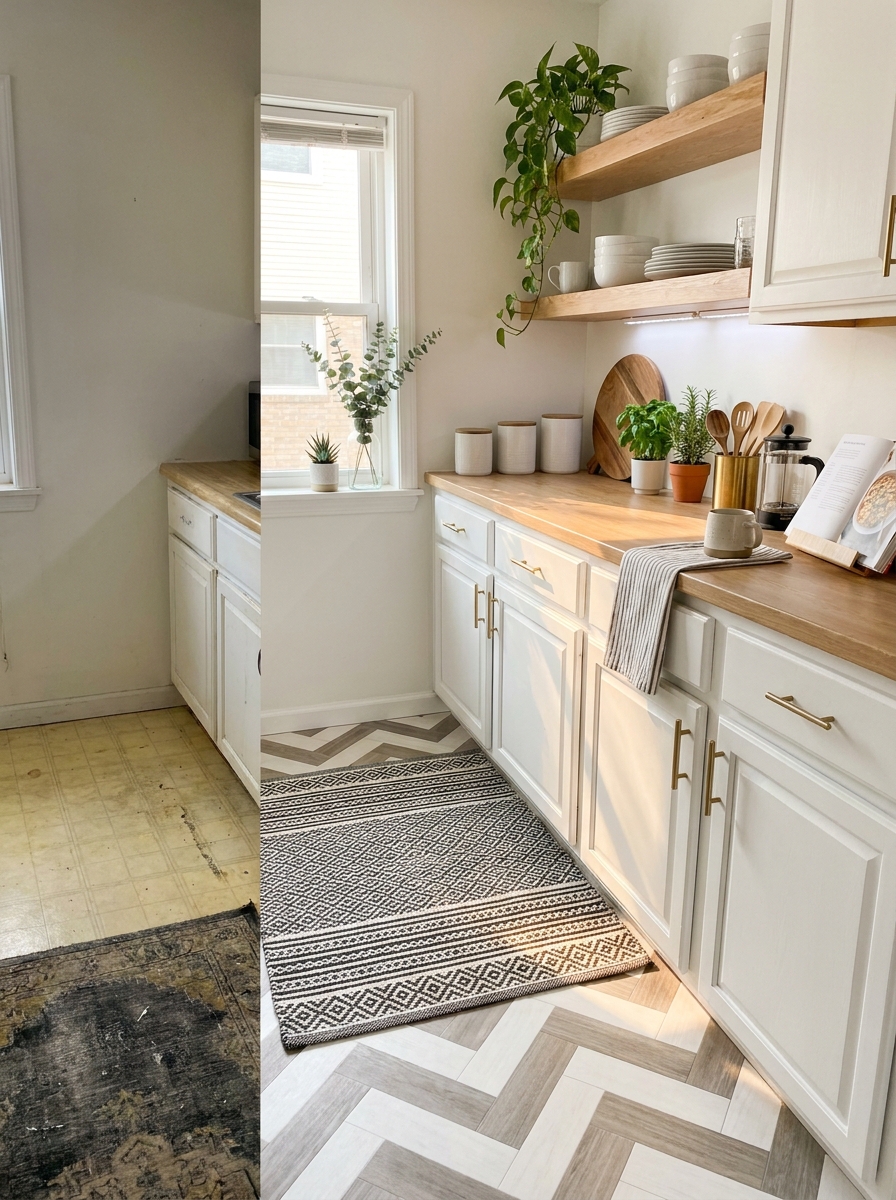
That yellowing vinyl floor is probably what bugs you most, right? I totally get it. The good news? Peel-and-stick floor tiles have come SO far. We’re talking realistic wood-look planks, gorgeous ceramic patterns, even terrazzo styles that look absolutely legit.
I laid these in my last rental kitchen over a truly unfortunate beige-and-brown checkered situation. Took me one Saturday afternoon and completely changed how the whole space felt. The trick is prepping the floor really well—sweep, mop, let it dry completely. Any grit or moisture will mess with the adhesion.
Start in the corner farthest from your door and work your way out. Most of these tiles can be scored with a utility knife and snapped, so cutting around corners isn’t as scary as it sounds. When you move out, they peel right up without damaging the original floor. Some even leave zero residue. It’s honestly one of those changes where you’ll walk in and feel like you’re in a different kitchen entirely.
10. Magnetic Knife Strip and Hanging Rails
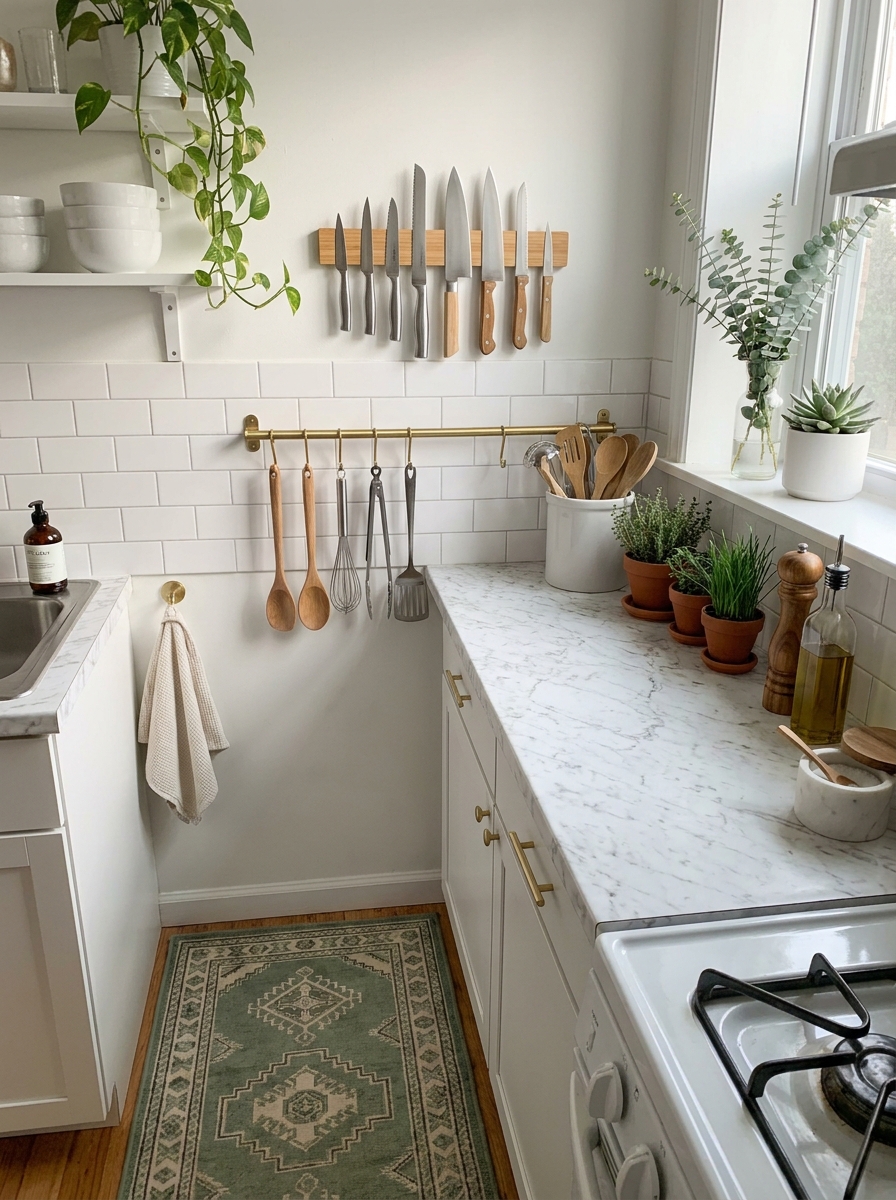
Drawer space in a rental? Ha! Usually there’s like one sad drawer for everything. That’s where wall-mounted magnetic knife strips and hanging rails become absolute lifesavers—and they look professionally styled too.
I installed a sleek wooden magnetic knife strip with heavy-duty adhesive backing (no drilling required) and suddenly had all my knives visible and accessible. Paired it with an adhesive-mounted rail underneath for hanging my most-used utensils on S-hooks. Game changer for workflow and it freed up that precious drawer space for other stuff.
The visual impact is real too. It gives your kitchen that chef-inspired, organized vibe without any permanent installation. When you’re cooking, everything’s right there within reach. No more digging through a jumbled drawer for the right knife. And because it’s all displayed, you naturally keep only what you actually use. It’s functional AND it makes your kitchen look way more intentional and grown-up. Plus, removing them later takes like five minutes.
11. Removable Window Film for Privacy
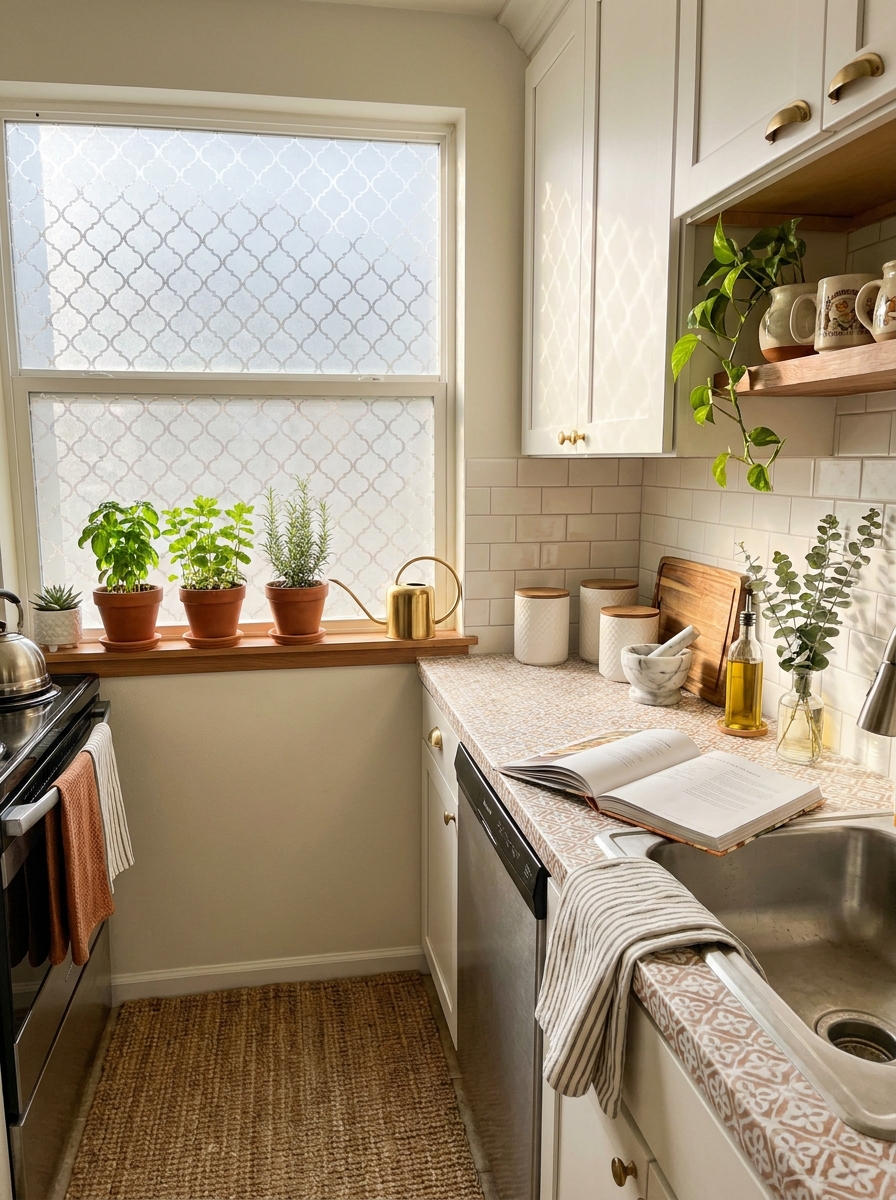
If your kitchen window faces a neighbor’s wall or you’re on a ground floor, you know that weird feeling of cooking while potentially being watched. But those sad mini blinds that came with the place? Not exactly stylish.
Window film is your answer. The frosted or textured styles let light flood in while giving you total privacy. I used a geometric etched pattern in my last place and it looked like custom glass. Seriously, people thought it was original to the building. You just measure, cut, and apply with soapy water—it smooths on like magic.
The best part is how much light you still get. Unlike curtains or blinds that block everything, frosted film diffuses the light beautifully. Your kitchen stays bright and airy, you get privacy, AND it looks incredibly polished. Some patterns are really elegant—think Art Deco geometric, subtle bamboo designs, or clean frosted stripes. Peels off completely clean when you leave.
12. Chalkboard or Magnetic Paint Feature Wall
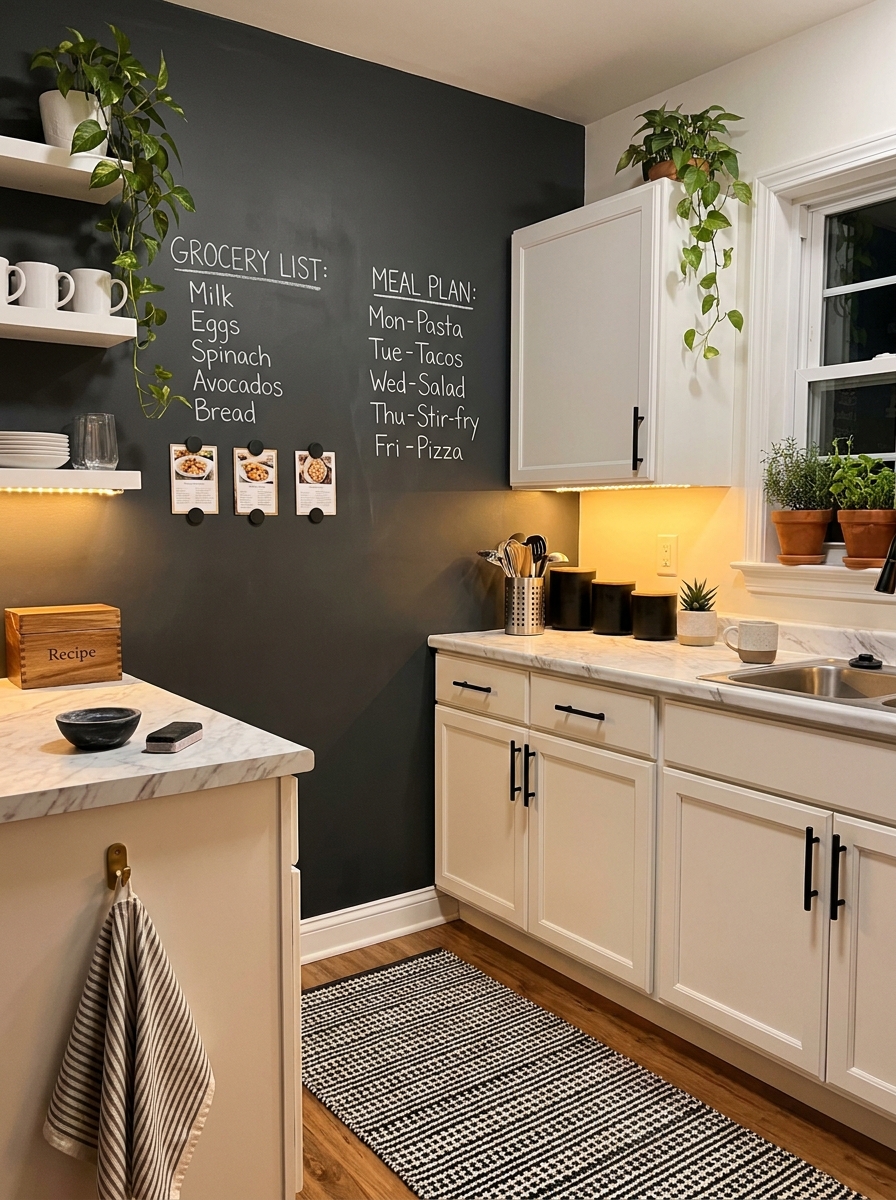
Okay, if your landlord is cool with paint (get it in writing!), this is such a fun move. One small wall—maybe the side of a cabinet run or that weird narrow wall by the fridge—painted with chalkboard or magnetic paint becomes an instant personality spot.
I did a chalkboard section in my rental and used it for meal planning, grocery lists, and honestly just doodling when I was on the phone. It made the kitchen feel so much more like MINE. Magnetic paint is cool too because you can hang lightweight art, recipes, or photos without any hardware.
The trick is keeping it small and intentional. You’re not painting the whole kitchen—just one strategic section that adds character without overwhelming the space. Frame it with painter’s tape for crisp edges. When you move, you just paint over it with the original color. Most landlords don’t even consider this a big deal since you’re returning it to the original state. It’s temporary personality that makes cooking and hanging out in your kitchen way more enjoyable.
13. Adhesive Glass Tile Mirror Backsplash
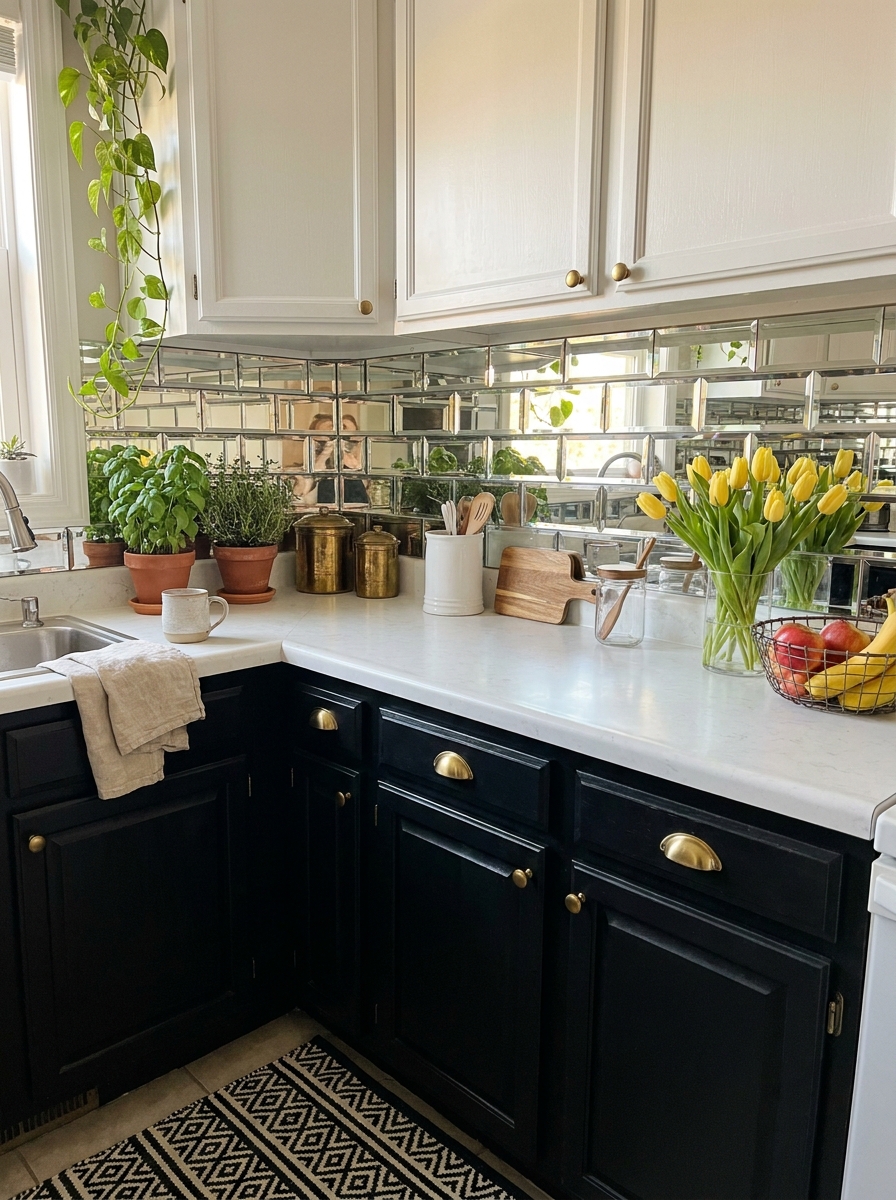
Okay, hear me out. Mirror tile backsplash sounds fancy, but the peel-and-stick versions are totally doable and completely reversible. I’m talking about those small beveled mirror tiles that catch light and make your tiny rental kitchen feel twice as big.
The adhesive backing means zero grout, zero mess, and zero angry landlords. You just peel, stick, and watch your kitchen transform into something that looks way more expensive than it actually is. The reflective surface bounces light around, which is a total game-changer if you’re dealing with a dark galley situation.
I love using mirror tiles behind open shelving or between the counter and upper cabinets. It creates this gorgeous depth that tricks your eye into thinking there’s more space. Plus, when you move out? They peel right off without damaging the wall. Just warm them slightly with a hairdryer first and they come off clean. It’s like magic, but make it renter-friendly.
14. Floating Pot Rack from Ceiling Hooks
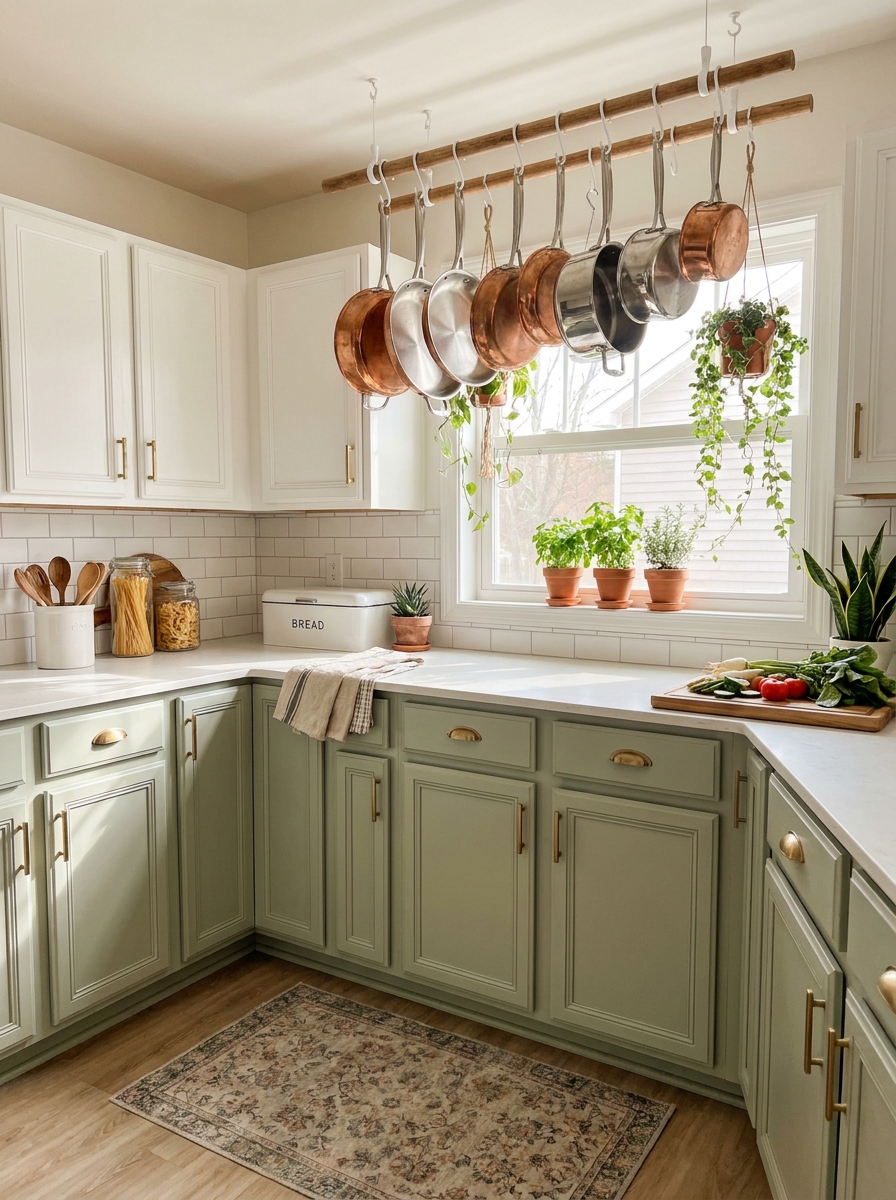
If your rental kitchen is short on cabinet space, a hanging pot rack is your new best friend. And no, you don’t need to install some massive permanent fixture. A simple wooden dowel or copper pipe suspended from removable ceiling hooks does the job beautifully.
I use the kind of ceiling hooks that are designed for plants or light fixtures. They leave tiny holes that are super easy to patch when you move. Hang your prettiest pots and pans, and suddenly that dead air space above your counter becomes functional and gorgeous. It’s like found storage that also happens to look really cool.
The key is choosing pots that actually look good together. This isn’t the place for your scratched-up college cookware. Think matching copper, sleek stainless, or even colorful enamel if that’s your vibe. It becomes both storage and decoration, which is exactly what renters need. Every inch counts, and this one pulls double duty without touching your security deposit.
15. Tension Rod Dish Rack and Drying Station
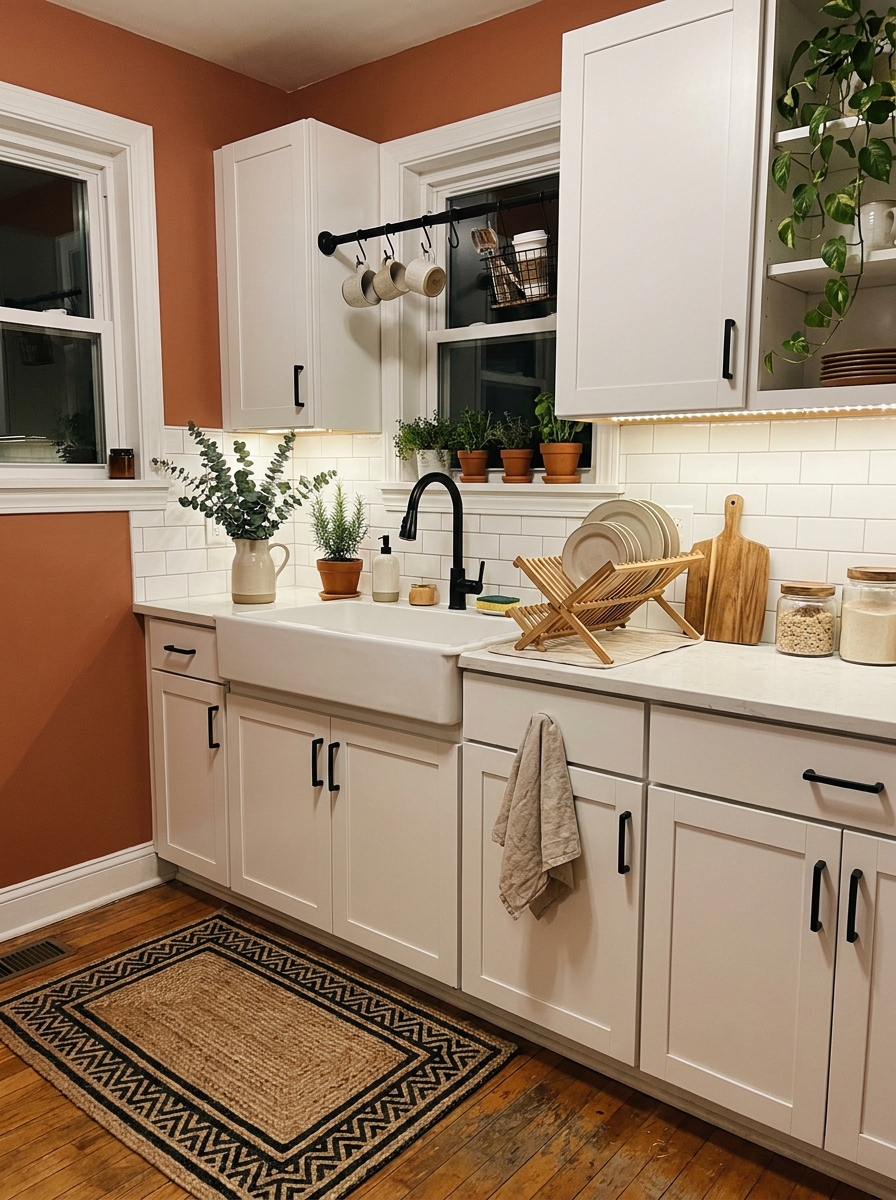
No dishwasher? Join the club. But that doesn’t mean your dish situation has to be a hot mess. A tension rod installed above your sink creates an instant drying station that looks intentional instead of chaotic.
Mount it between your upper cabinets or from cabinet to wall, then hang S-hooks for mugs, small baskets for utensils, or even a tension-rod dish rack that drains directly into the sink. Zero holes, zero damage, and you’ve just created functional storage in a spot that was doing absolutely nothing before.
I love this trick because it gets dishes off your limited counter space while they dry. Everything drips right where it should, and it actually looks kind of charming in a farmhouse-meets-smart-renter way. You can also use the rod to hang frequently-used items like measuring cups or cooking utensils. When it’s time to move, you just twist and remove. Your landlord will never know it was there.
16. Vinyl Decal Backsplash Pattern
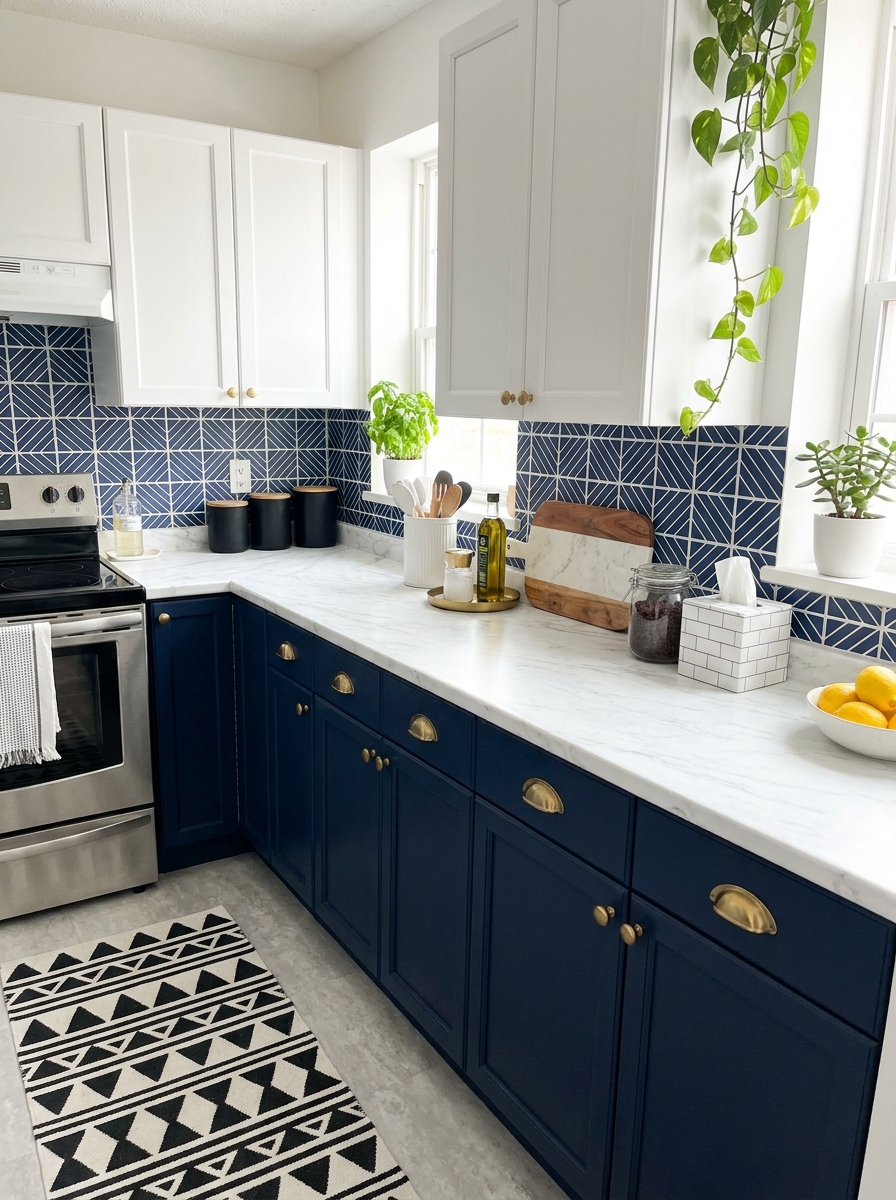
If peel-and-stick tiles feel like too much commitment or your wall texture is giving you trouble, vinyl decals are the sneaky alternative nobody talks about. I’m obsessed with the geometric or Moroccan tile-pattern decals that create the illusion of real tile without any bulk or seams.
These are literally stickers. Fancy, well-designed stickers that transform your boring builder-grade wall into something with serious personality. They’re thinner than contact paper, easier to apply than tile stickers, and they peel off clean when you’re done. Plus, you can get really creative with placement—full backsplash, just behind the stove, or even a small accent section.
The best part? They’re incredibly affordable. We’re talking under fifty bucks for a full backsplash in most cases. If you mess up, you can reposition them. If you get bored, you can change them. It’s the ultimate low-commitment, high-impact rental solution that makes your kitchen look like you actually tried without the price tag of real tile.
17. Adhesive Cork Board Storage Wall
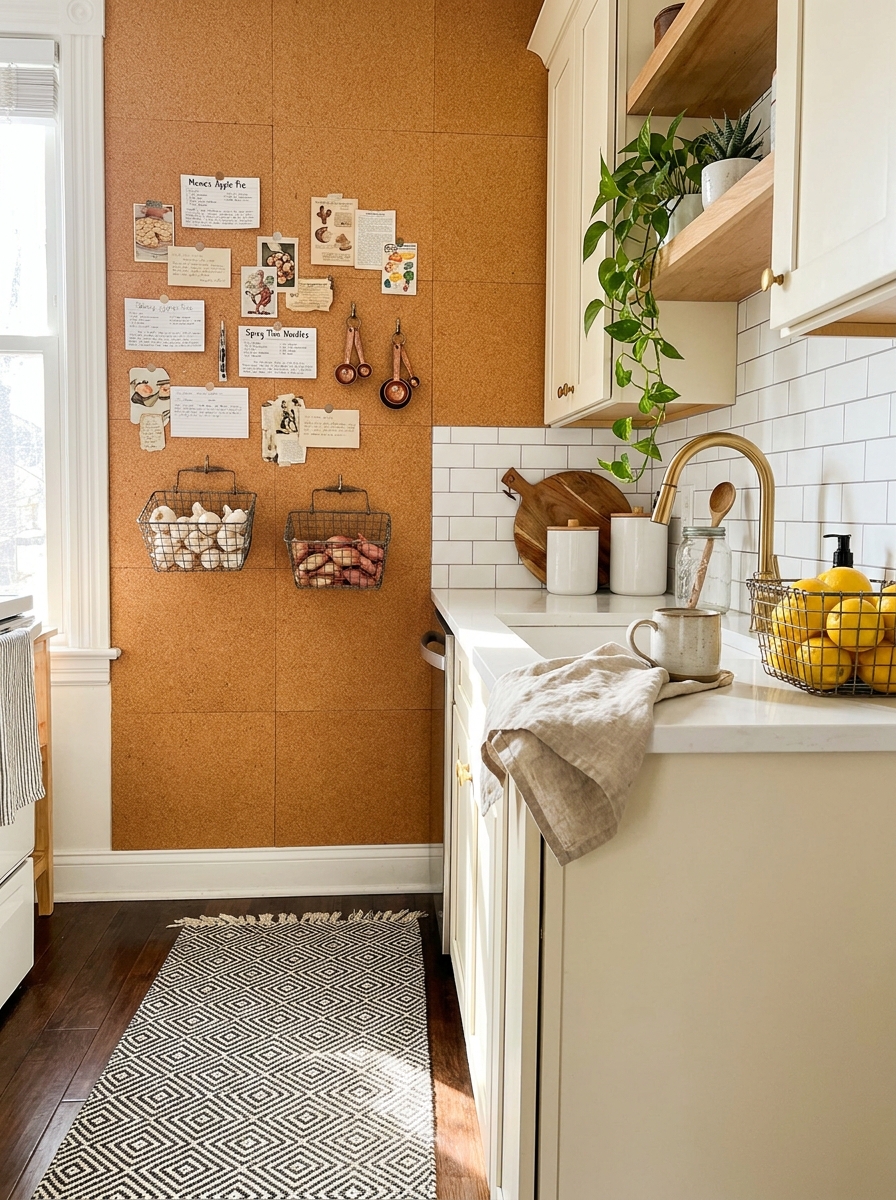
Okay, this one is SO practical and looks way cooler than you’d think. Get those big cork tiles with adhesive backing and create an entire storage wall. I’m talking recipe cards, shopping lists, your favorite takeout menus—whatever you need at arm’s reach.
The genius part? You can pin utensils, hang lightweight pots with hooks, even attach small baskets for garlic and onions. It’s like a giant inspiration board that actually works hard for you. Plus, cork comes in different shades now—from light honey to dark espresso.
I installed mine on the wall next to my fridge, and honestly, it’s become the most-used spot in my kitchen. My landlord didn’t even blink because it’s just stuck on, not screwed in. When I move, it peels right off without damaging the paint. The texture adds so much warmth too, especially if your kitchen feels cold and builder-basic. It’s functional meets actually pretty, which is my favorite combination.
18. Slide-Out Pantry Between Appliances
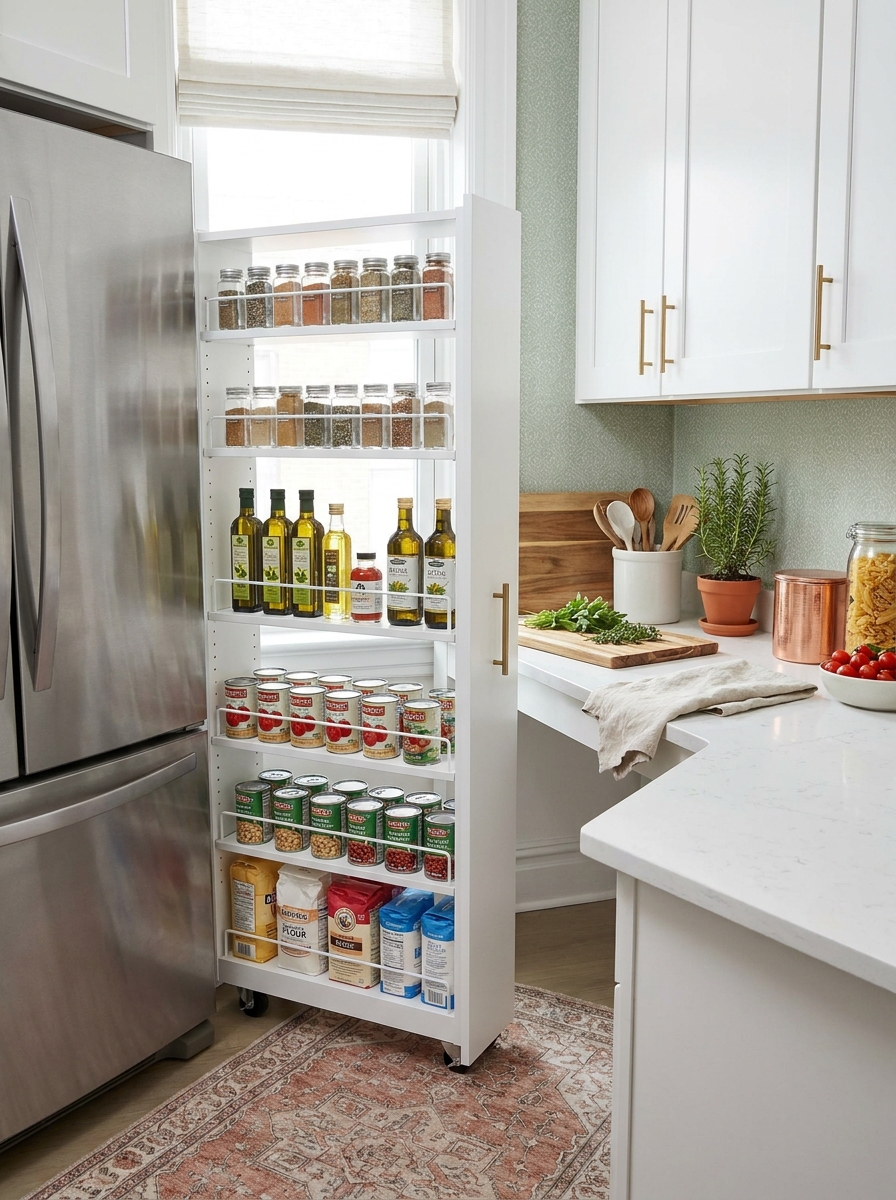
If you’ve got even six inches between your fridge and wall, you can add a rolling slide-out pantry. These slim vertical storage racks on wheels are actual game-changers for tiny rental kitchens. They just slip into that dead space you didn’t even know you could use.
Mine holds all my oils, vinegars, spices, and canned goods—stuff that used to crowd my already-packed cabinets. You just pull it out when you need something, then slide it back to disappear completely. No installation needed beyond maybe adjusting the height of the shelves.
The best ones have a handle on the front and come in white or stainless to match whatever appliances you’ve got. I found mine for under fifty dollars, and it literally doubled my storage. It’s one of those things where guests always ask, “Wait, what IS that?” because it looks so custom and built-in. But nope, just a smart piece that uses wasted space like a boss.
19. Removable Faux Brick Wallpaper Accent
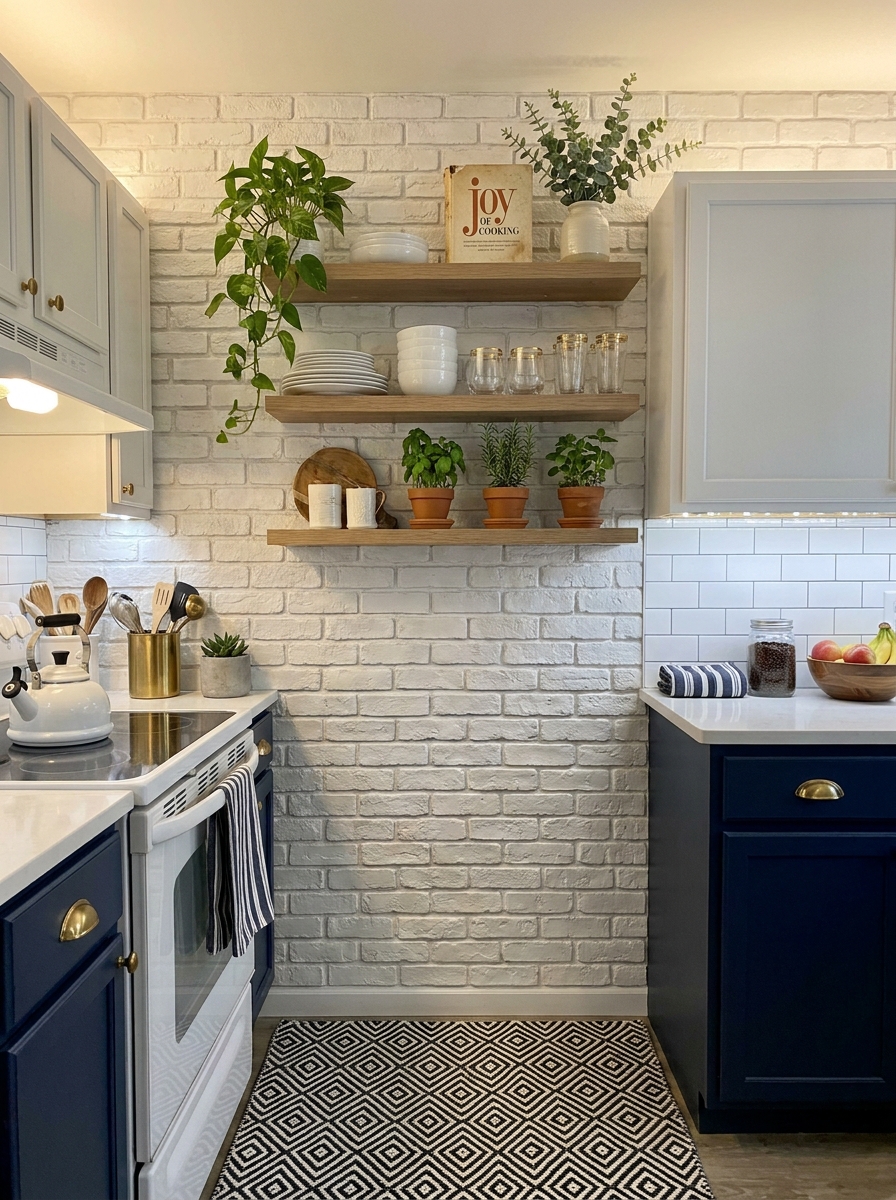
Want that exposed brick loft vibe without the actual loft? Removable brick wallpaper on one wall completely changes the whole energy of your rental kitchen. I went with white-washed brick, and it made my tiny galley kitchen feel like a trendy cafe.
The application is easier than you think—just measure, cut, peel, and stick. I did mine solo in about two hours while watching Netflix. The texture looks surprisingly real, especially the 3D embossed versions that actually have dimension. It catches the light differently throughout the day, which adds so much character.
You can go classic red brick for industrial vibes, or whitewashed for Scandinavian freshness, or even gray for modern edge. I chose the wall behind my open shelving, and now my mismatched dishes look curated and cool against that backdrop. It’s the kind of update that makes people think you hired a designer. When I eventually move, it peels off cleanly—I tested a corner first to make sure.
20. Color-Coded Removable Drawer Liners
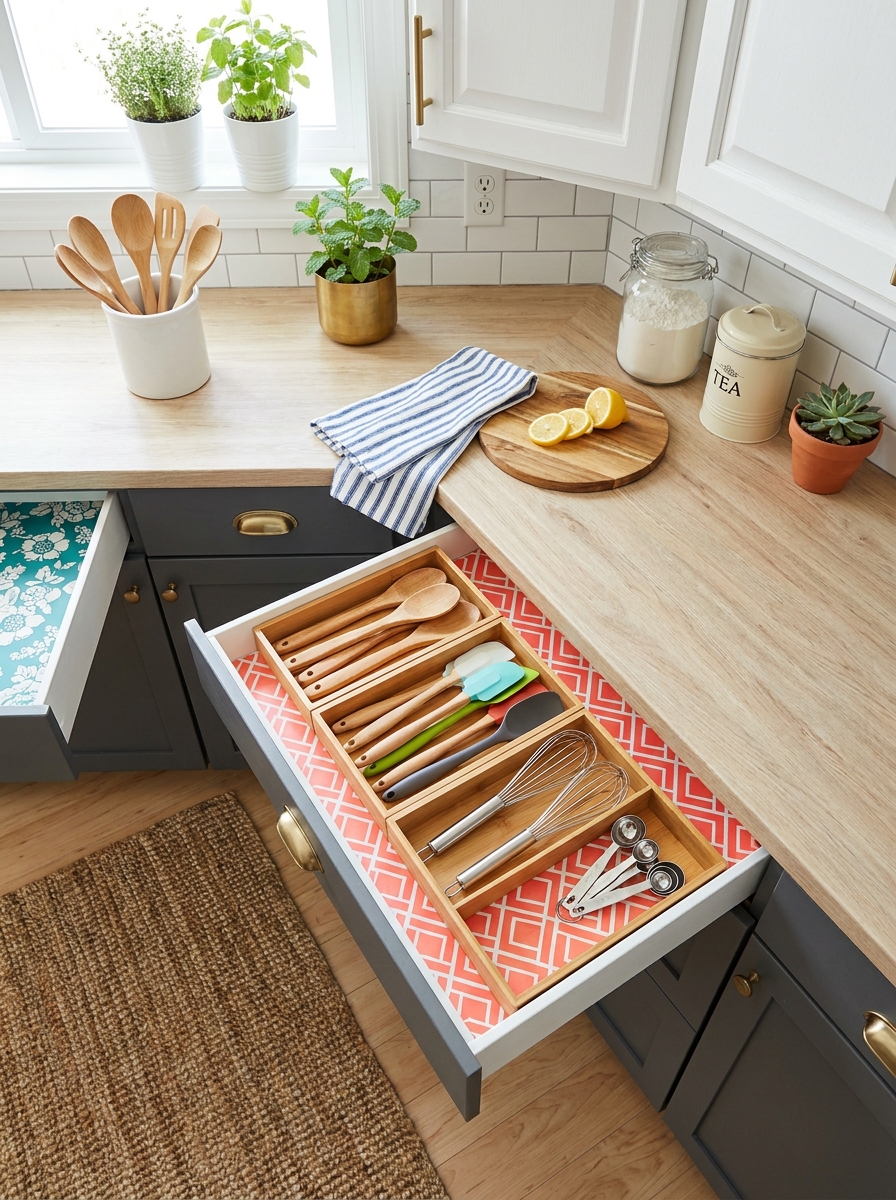
This sounds simple, but hear me out—switching your drawer liners to something bold and patterned makes opening cabinets actually fun. I used bright geometric patterns in mine, and every time I grab a spatula, it’s like a little hit of happy.
Removable drawer liners come in every pattern imaginable now—florals, stripes, abstract shapes, marble effects. You just measure, cut with scissors, and lay them in. No adhesive needed on most, which means they’re truly renter-friendly. When you move, just roll them up and take them with you.
I color-coded mine by function: blue geometric for cooking utensils, coral floral for baking tools, green for junk drawer chaos. It sounds extra, but it genuinely helps me find things faster. Plus, when you leave a drawer open (which, let’s be honest, happens), it looks intentional and styled instead of messy. It’s the smallest change with a surprisingly big mood boost. My friend did hers in marble print and it looks ridiculously fancy.
21. Adhesive Tin Ceiling Tile Backsplash
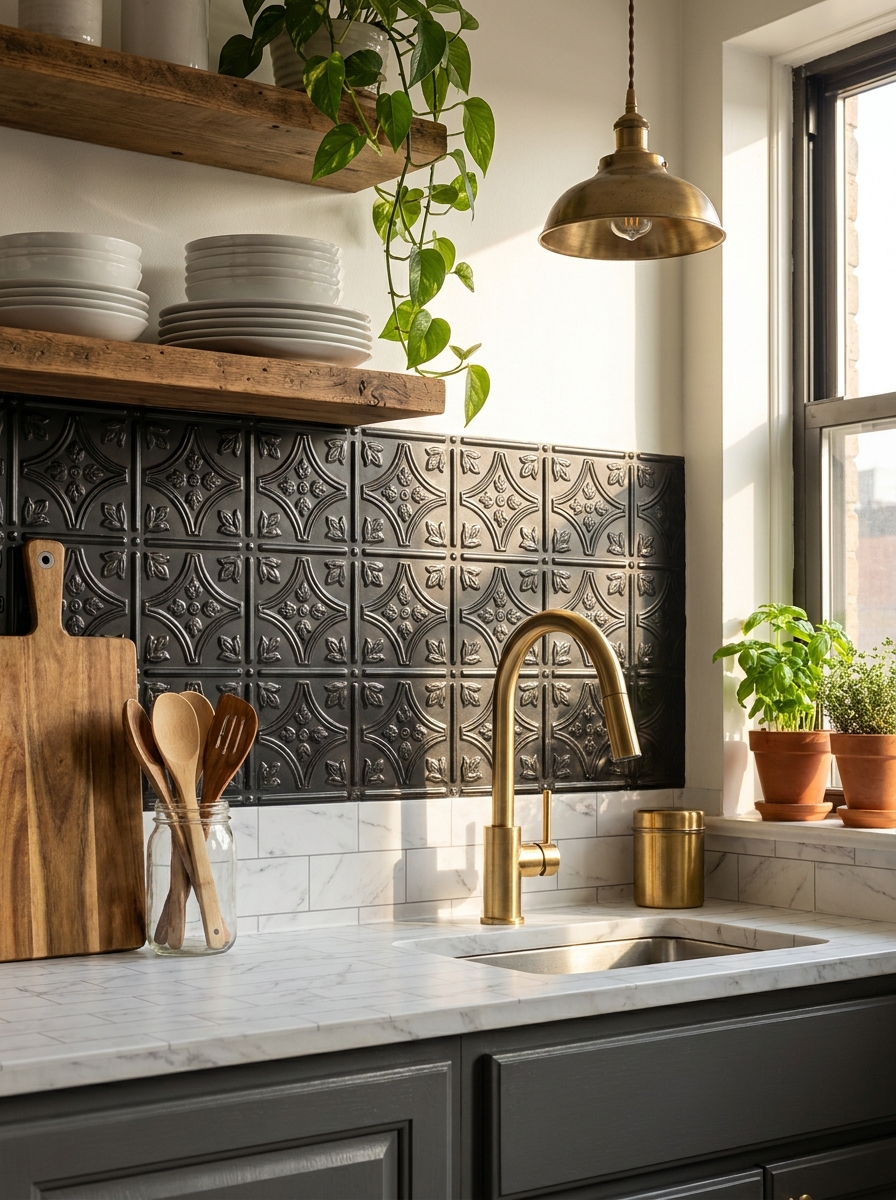
Okay, this one’s a total game-changer if you want that vintage industrial vibe without the commitment. Adhesive tin ceiling tiles (yes, they make them now!) stick right onto your boring backsplash and instantly add texture and personality. They come in so many patterns—from classic pressed tin to Art Deco geometric designs.
I love these because they’re lightweight, easy to cut with tin snips, and they peel off cleanly when you move. The metallic finish catches light beautifully and makes your kitchen feel way more expensive than it actually is. You can leave them silver, or spray paint them in matte black, copper, or even sage green.
Installation takes maybe an hour for a small backsplash area. Just clean your wall, peel, stick, and press firmly. The dimensional texture adds so much visual interest, especially if your kitchen is pretty flat and boring. It’s like jewelry for your walls—totally transforms the whole space without touching a single tile underneath.
22. Removable Toe Kick Drawer Inserts
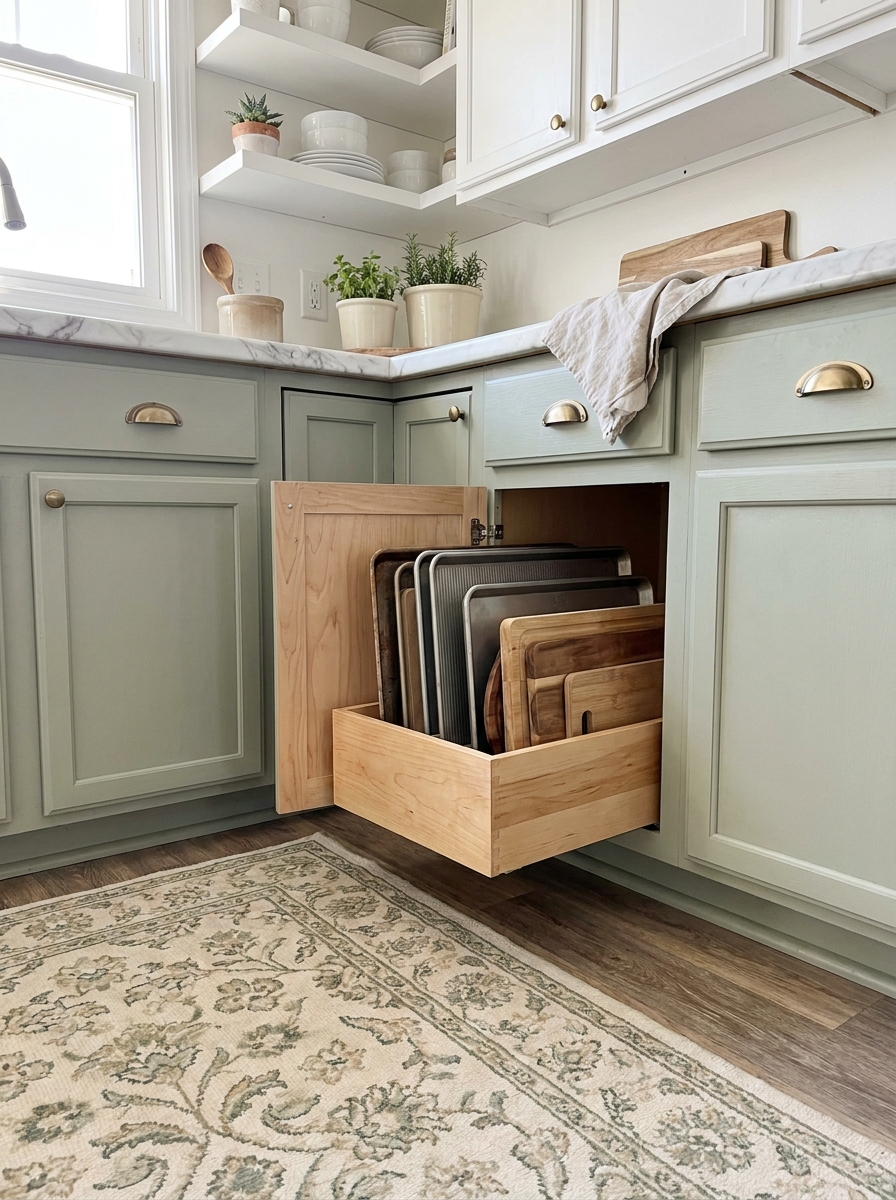
That weird empty space under your cabinets? It’s called the toe kick, and it’s basically wasted storage real estate. But here’s the cool part—you can buy removable toe kick drawer systems that slide right into that space without any permanent installation. They’re perfect for storing flat things like baking sheets, cutting boards, or even wine bottles.
These little drawers are hidden, genius, and totally renter-friendly. Most systems use a spring-loaded mechanism that lets you press to open, and they install with just a few screws into the toe kick板 (which you’ll fill when you leave). Some even come with no-drill adhesive options.
I’m obsessed with this hack because it adds functional storage without changing your kitchen’s footprint at all. Nobody even knows it’s there until you tap it open with your foot while your hands are full. It’s like discovering a secret compartment, and it makes your tiny rental kitchen work so much harder for you.
23. Faux Shiplap Accent Wall with Peel-and-Stick Planks
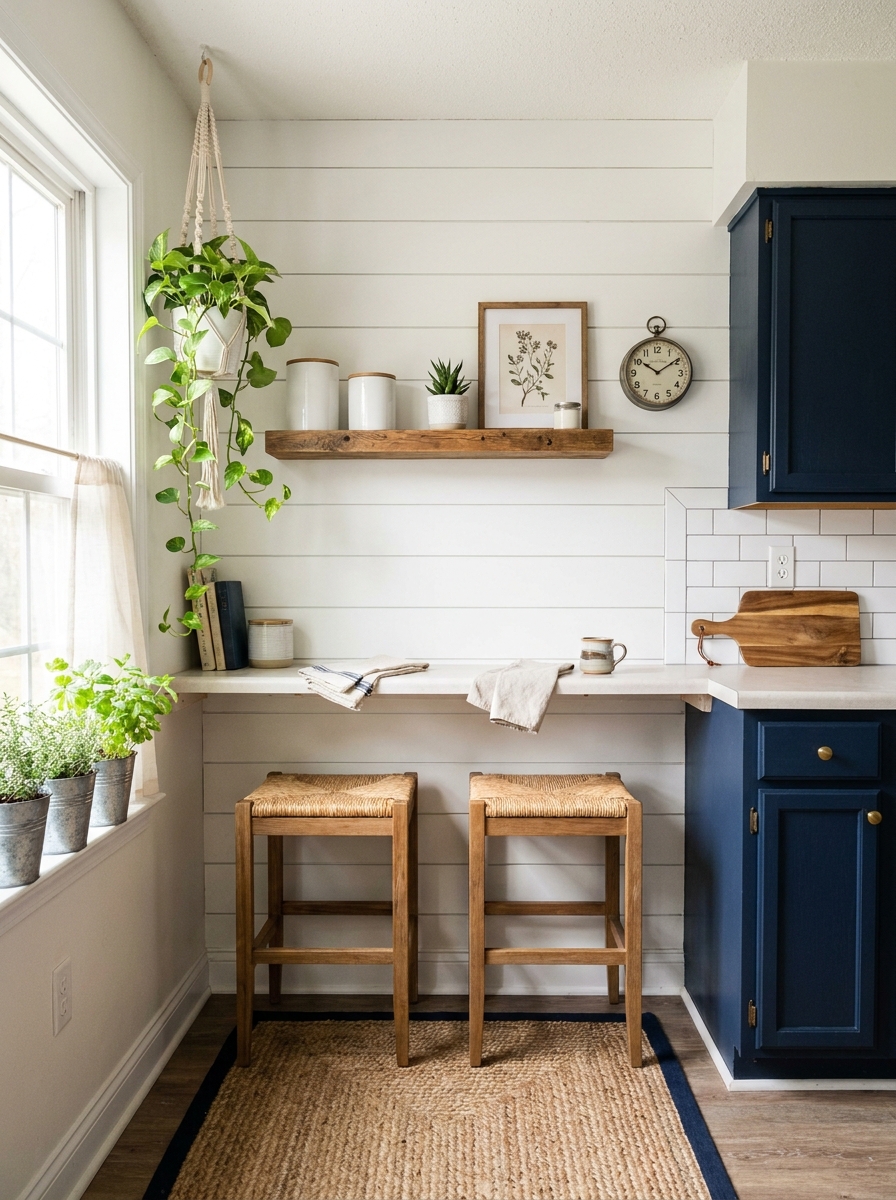
Shiplap is having a moment (thanks, farmhouse everything), but you don’t need to nail boards to your rental walls. Peel-and-stick shiplap planks are a thing, and they’re ridiculously easy to install. You can create that cozy, textured accent wall in your kitchen without your landlord freaking out.
These planks are usually made of foam or vinyl with a realistic wood grain texture. They’re super lightweight, go up in hours, and peel off cleanly when it’s time to move. I love using them on one wall—maybe behind open shelving or as a breakfast nook backdrop—to add warmth and character.
The dimensional grooves create shadows that make your wall look actually three-dimensional, not flat and boring. You can get them in white, natural wood tones, or even weathered gray. It’s the perfect way to add that modern farmhouse or coastal cottage vibe without committing to real wood or paint. Your kitchen instantly feels custom and thoughtfully designed.
24. Removable Pegboard Organization Wall
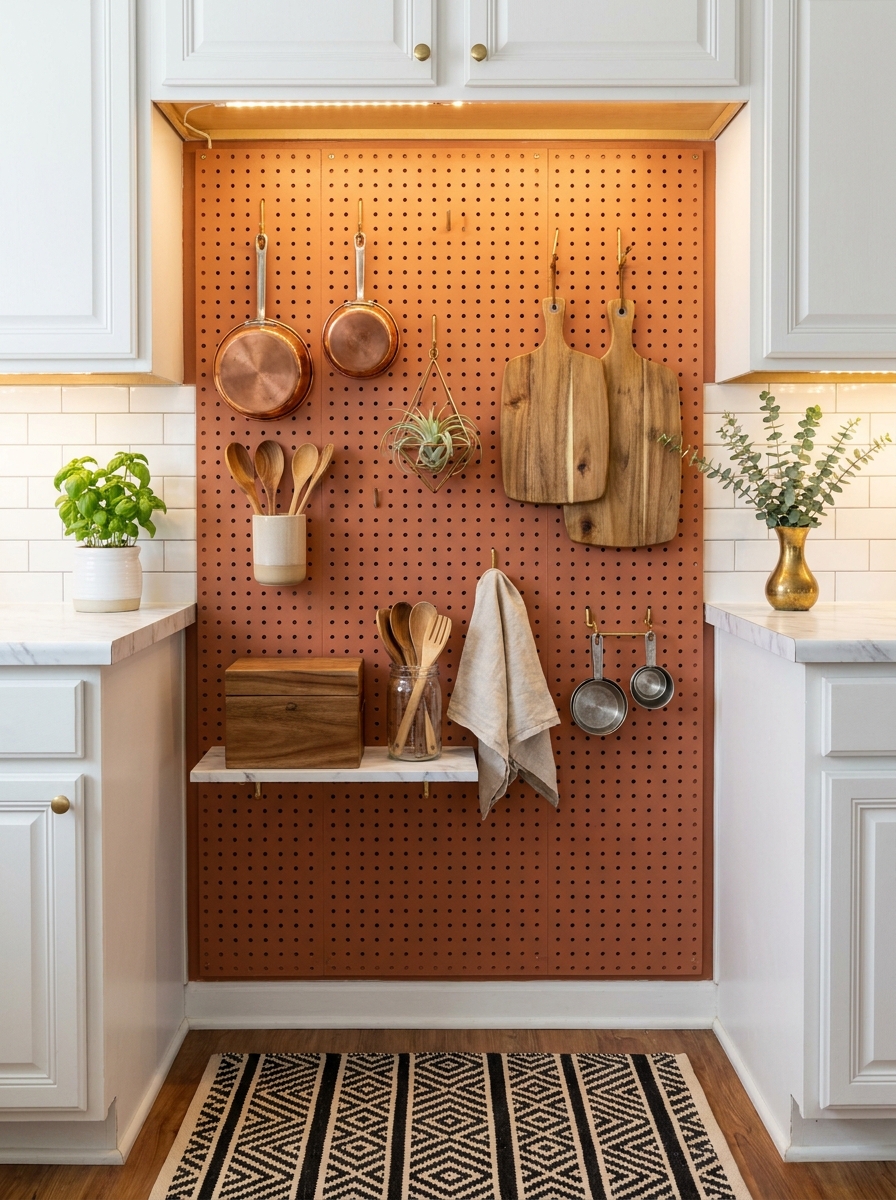
Pegboards aren’t just for garages anymore! A removable pegboard wall in your kitchen adds serious style and function. Mount one using Command strips or a freestanding frame, and suddenly you’ve got customizable storage that shows off your prettiest cooking tools. It’s like open shelving’s cooler, more organized cousin.
You can hang everything—pots, pans, utensils, cutting boards, even small plants in hooks. The best part? You can rearrange the pegs and hooks whenever you want. Feeling like your skillet needs a new home? Just move the peg. No drilling new holes, no commitment.
Paint your pegboard a fun color (removable, obviously) or leave it natural wood. Add brass hooks for a modern look, or colorful ones for something playful. The vertical storage frees up so much counter and cabinet space, and it makes your kitchen feel like a chef’s workspace. Plus, everything’s visible and easy to grab. It’s functional art that actually works hard for you every single day.
25. Adhesive Crown Molding Trim Upgrade
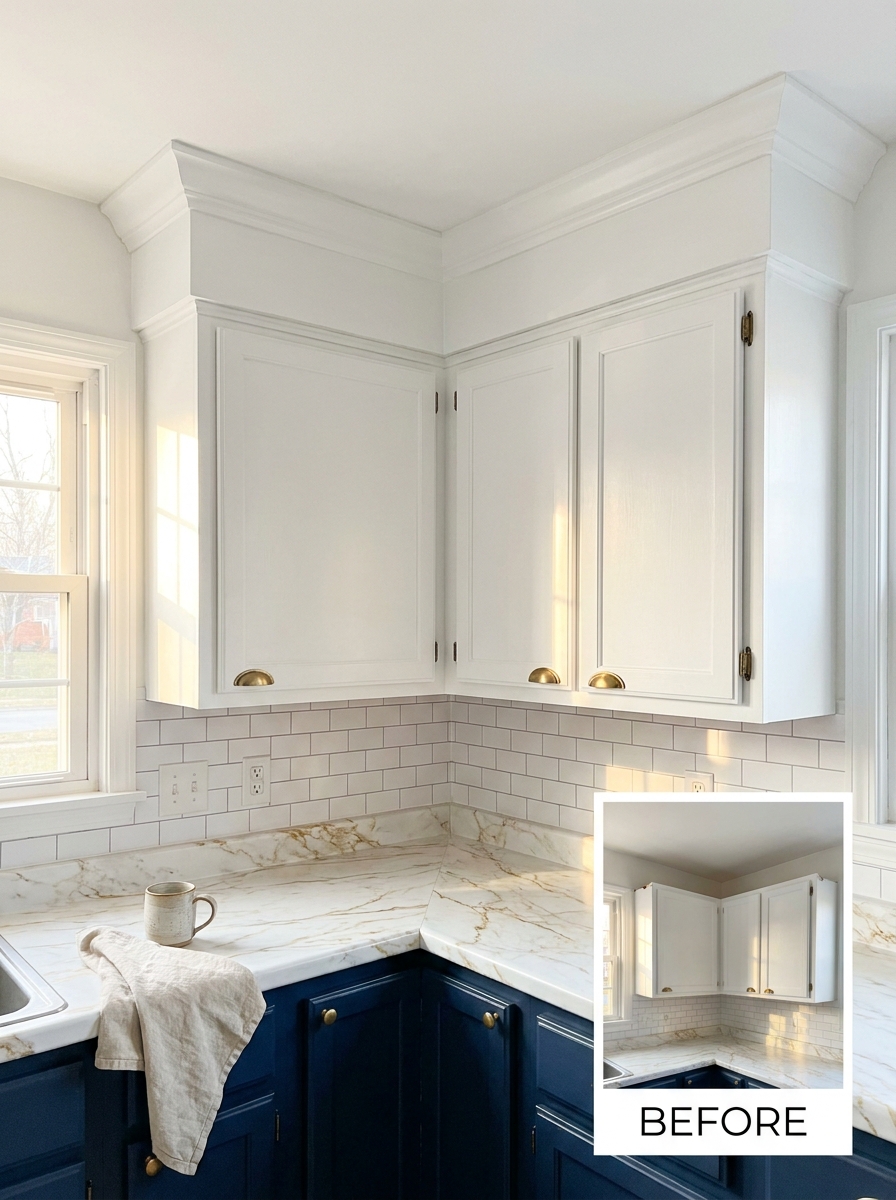
Here’s a secret that’ll make your rental kitchen look custom: stick-on crown molding. I know it sounds too good to be true, but these adhesive foam trim pieces are GAME-CHANGERS for disguising that awkward gap between your cabinets and ceiling.
Most rental kitchens have this dead space at the top that just collects dust and makes everything look unfinished. Add adhesive crown molding along the top edge of your cabinets, and suddenly your basic builder-grade kitchen looks like someone actually designed it. The foam material is super lightweight, cuts with regular scissors, and sticks right up with the adhesive backing.
I painted mine the same color as my cabinets, and it looks like built-in millwork. The whole project took maybe two hours and cost under forty dollars. When you move out, it peels right off without damaging the cabinets or ceiling. This is one of those upgrades where people walk in and can’t quite figure out what’s different, but they know your kitchen looks way more expensive than it did before.
26. Repositionable Pendant Light Conversion Kit
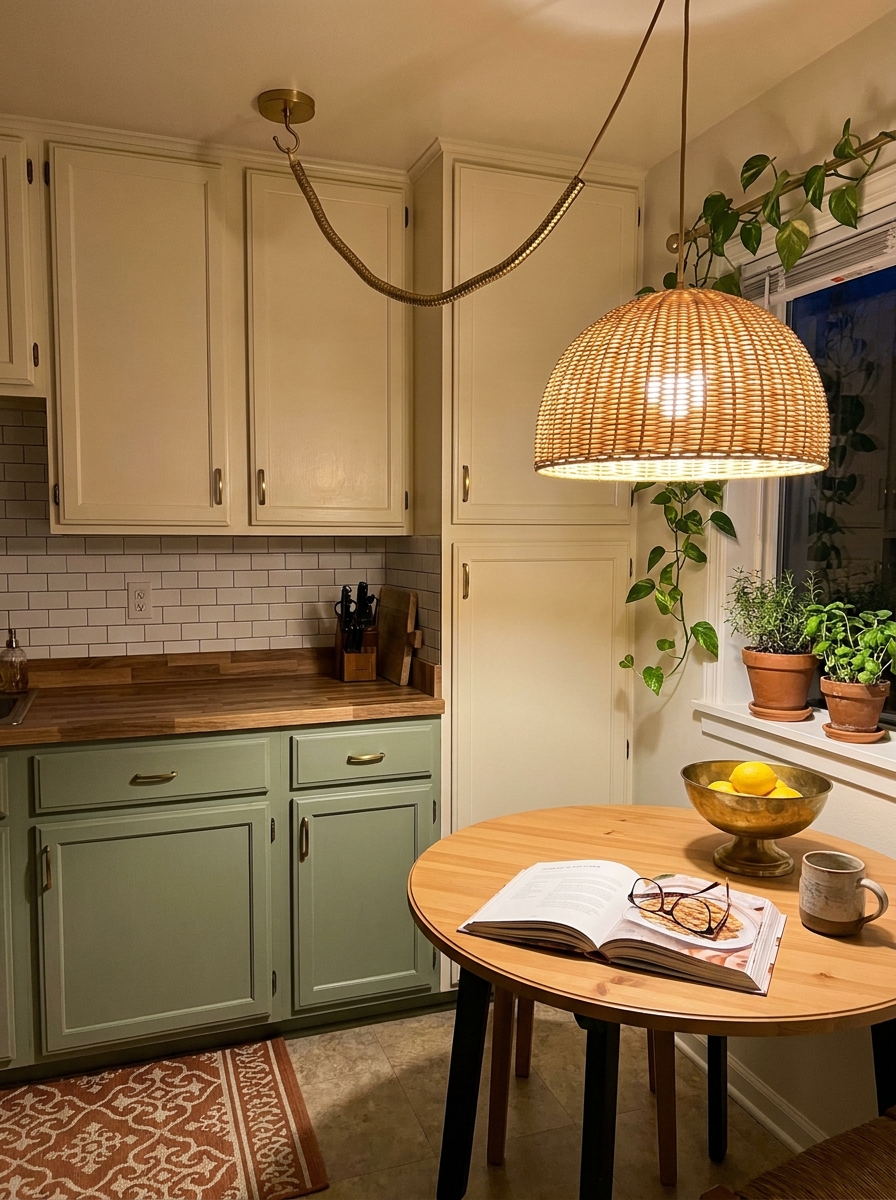
That boring flush-mount ceiling light isn’t doing your rental kitchen any favors. But you can totally change it without hardwiring anything or calling an electrician. Pendant conversion kits let you plug a gorgeous hanging light into your existing ceiling fixture, and they come with adjustable cord covers that look completely intentional.
These kits are ridiculously simple. You screw a special adapter into your current light socket, then hang your pendant light from that. The cord drapes to an outlet, and you cover it with a rope sleeve or chain cover that makes it look designed. Some versions even let you swag the cord to the side for extra style points.
I installed one over my tiny kitchen table area, and it completely changed how the space feels. Suddenly I have task lighting exactly where I need it, plus that restaurant-vibe ambiance that makes cooking feel special. When you move, you just unscrew everything and take your pretty light with you. The landlord’s boring fixture stays intact, and you get to enjoy actual lighting design.
Quick Guide
## Budget Breakdown: What to Tackle First
Under $50: Start with cabinet hardware. It’s the fastest visual transformation and requires zero skill. One pack of pulls or knobs from a home improvement store will change everything.
$50-$150: Add peel-and-stick backsplash to your priority wall — usually the area behind the stove. You don’t need to tile the entire kitchen to see massive impact. One statement wall does the heavy lifting.
$150-$300: Now you’re ready for contact paper countertops. This takes the most time and patience, but combined with new hardware and a backsplash, your kitchen will look like a full renovation.
Wild Card Splurge: Removable wallpaper on one accent wall. It’s not essential, but it’s the move that makes your kitchen feel custom and designed. Totally worth it if you’re planning to stay a while.
Your Kitchen, Your Rules (Your Deposit Back Too)
Here’s what nobody tells you about renting: you’re allowed to love where you live. You don’t have to wait until you buy a place to have a kitchen that makes you smile. These 26 ideas aren’t about making do or settling — they’re about creating a space that feels like yours without asking permission or spending a fortune. The beauty of removable updates is that you can experiment without commitment. Hate the marble contact paper after two months? Peel it off and try something else. Want to take your gorgeous peel-and-stick backsplash to your next place? Pack it up and bring it along. You’re not stuck with builder-grade anything unless you choose to be. And the best part? When you hand over those keys, you’ll get your deposit back and leave your landlord with a perfectly intact, boringly beige kitchen. Start with one small change this weekend. Swap the hardware or add that backsplash you’ve been pinning. You’ll be amazed how much better your morning coffee tastes in a kitchen you actually designed.
Frequently Asked Questions
Will peel-and-stick backsplash damage my rental walls when I remove it?
Not if you prep and remove it correctly. Clean your wall with rubbing alcohol before applying, and when it’s time to move, use a hairdryer to gently warm the adhesive before peeling slowly at a 45-degree angle. It should come off clean without taking paint with it. Avoid applying it over textured walls or freshly painted surfaces (wait at least 30 days after painting).
How long does contact paper really last on countertops?
Quality contact paper can last 1-3 years on countertops with proper care. Avoid placing hot pots directly on it, wipe up spills quickly, and don’t use it as a cutting surface. The edges and seams are the first to show wear, so pay extra attention to those areas during application. Thicker, heat-resistant contact paper holds up significantly better than cheap thin versions.
Can I paint kitchen cabinets in a rental apartment?
Technically you can, but it’s risky without landlord approval since it’s not easily reversible. Instead, try removable options like peel-and-stick cabinet covers, contact paper on cabinet doors, or temporary cabinet curtains to hide lower cabinets. These give you a color change without the permanence and let you get your deposit back without repainting everything white again.
What’s the easiest rental kitchen update for complete beginners?
Cabinet hardware, hands down. You need a screwdriver, ten minutes, and zero design experience. It’s impossible to mess up, completely reversible, and creates immediate visual impact. Keep your old hardware in a baggie, swap in the new pulls or knobs, and you’ve just upgraded your entire kitchen for under $50.
Do I need to tell my landlord before making temporary kitchen updates?
Check your lease first, but most temporary, non-damaging updates don’t require permission. Things like peel-and-stick tile, contact paper, new hardware, removable wallpaper, and added lighting are generally fine since they don’t alter the structure. Avoid anything that requires drilling new holes, removing cabinets, or changing plumbing. When in doubt, document everything with photos and keep all original pieces to reinstall before move-out.