28 DIY Wall Art Ideas That Transform Blank Walls Fast
You know that feeling when you stare at a blank wall for the hundredth time and think, ‘I really need to do something about this’? But then you check art prices online and suddenly that empty wall doesn’t look so bad. I’ve been there too many times to count. Here’s the thing though—you don’t need hundreds of dollars or a fine arts degree to create gorgeous wall art. You just need a free afternoon and some seriously simple ideas. I’m talking dollar store supplies, thrift store finds, and stuff you probably already have shoved in a drawer somewhere. These 28 DIY wall art ideas are the ones that actually work in real homes, not just Pinterest fantasies. They’re cheap, they’re doable, and honestly? Some of them take less than an hour. Let’s get into it.
1. Abstract Acrylic Canvas in Bold Strokes
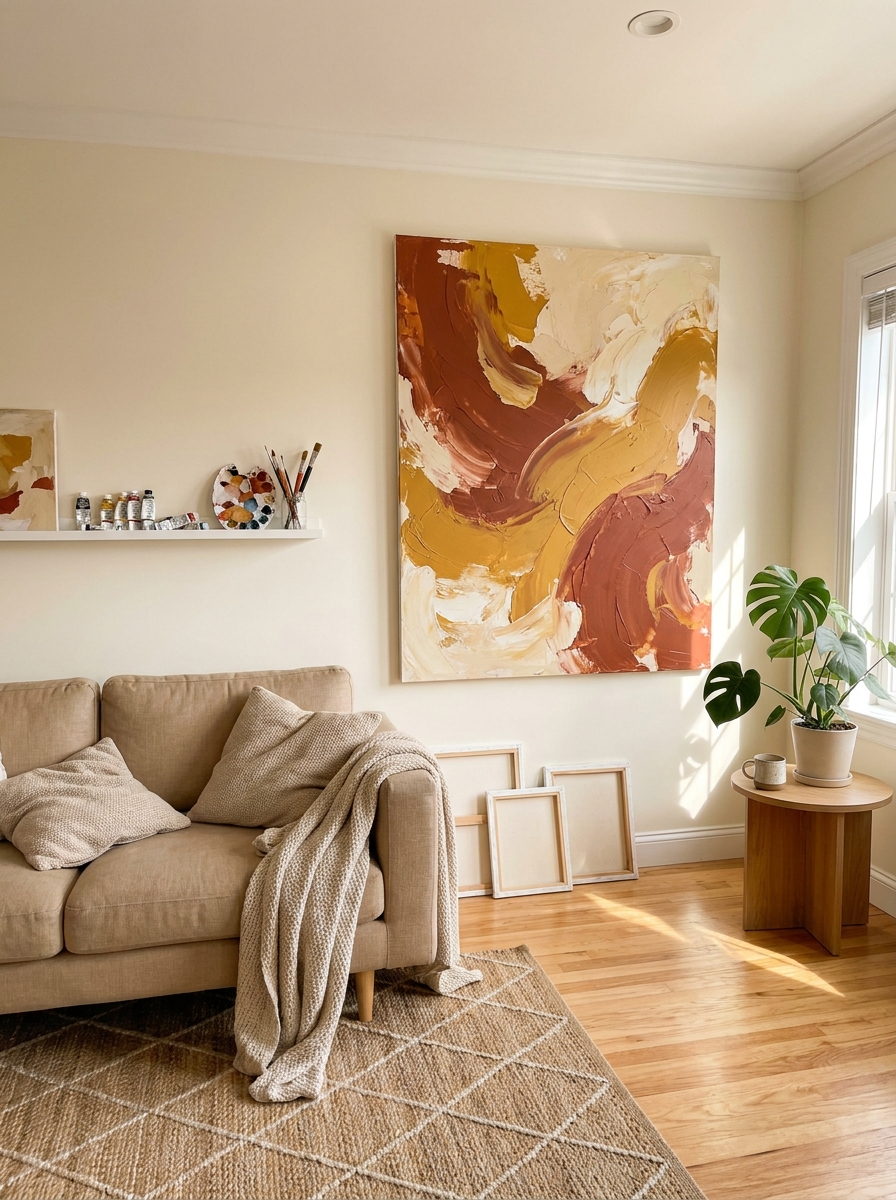
This is where you get to pretend you’re a fancy abstract artist, except way more fun and with zero pressure. Grab a blank canvas from the craft store and a few tubes of acrylic paint in colors you already love. The secret? Big, confident brush strokes that overlap and blend into each other. You literally can’t mess this up because abstract art is whatever you want it to be.
Start with your lightest color as a base, then layer darker shades on top with sweeping motions. Don’t overthink the composition. Some of my favorite pieces happened when I stopped trying to make them look like something specific and just let the brush do its thing. The texture of acrylic paint adds so much depth when it dries, especially if you go heavy in some areas.
This works beautifully above a sofa or bed, and the best part? It matches your existing decor because you chose the colors yourself. If you’re nervous about diving in, practice on cardboard first. But honestly, just go for it. The confident, slightly messy look is exactly what makes it feel expensive and gallery-worthy.
2. Pressed Botanical Frames from Your Backyard
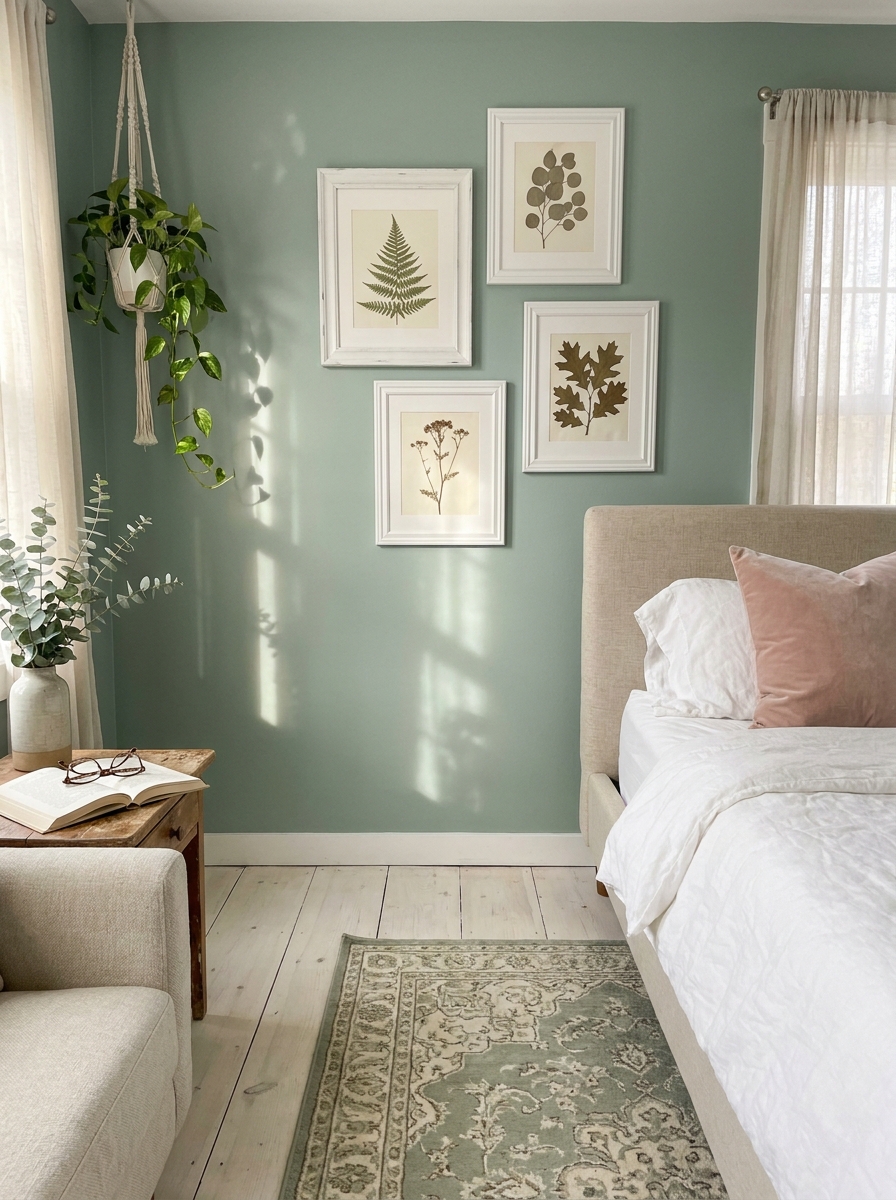
There’s something incredibly satisfying about turning leaves and flowers into actual art. And it costs basically nothing if you have access to a yard, park, or even a neighborhood with trees. Collect leaves, ferns, small flowers, or interesting branches, then press them between heavy books for about two weeks. The waiting is the hardest part, but it’s so worth it.
Once they’re flat and dry, arrange them in simple frames with white or cream matting. The contrast between the organic shapes and clean frame creates this beautiful museum-quality look. I love mixing different botanical specimens in a gallery wall—three or four frames of varying sizes all following the same color scheme.
You can go full scientific illustration vibes by labeling each specimen with its name in elegant handwriting, or keep it minimal and let the natural beauty speak for itself. Either way, it brings the outdoors in without looking like you’re trying too hard. This project works especially well in bedrooms and home offices where you want a calming, nature-inspired feel.
3. Fabric Wall Hanging with Wooden Dowel
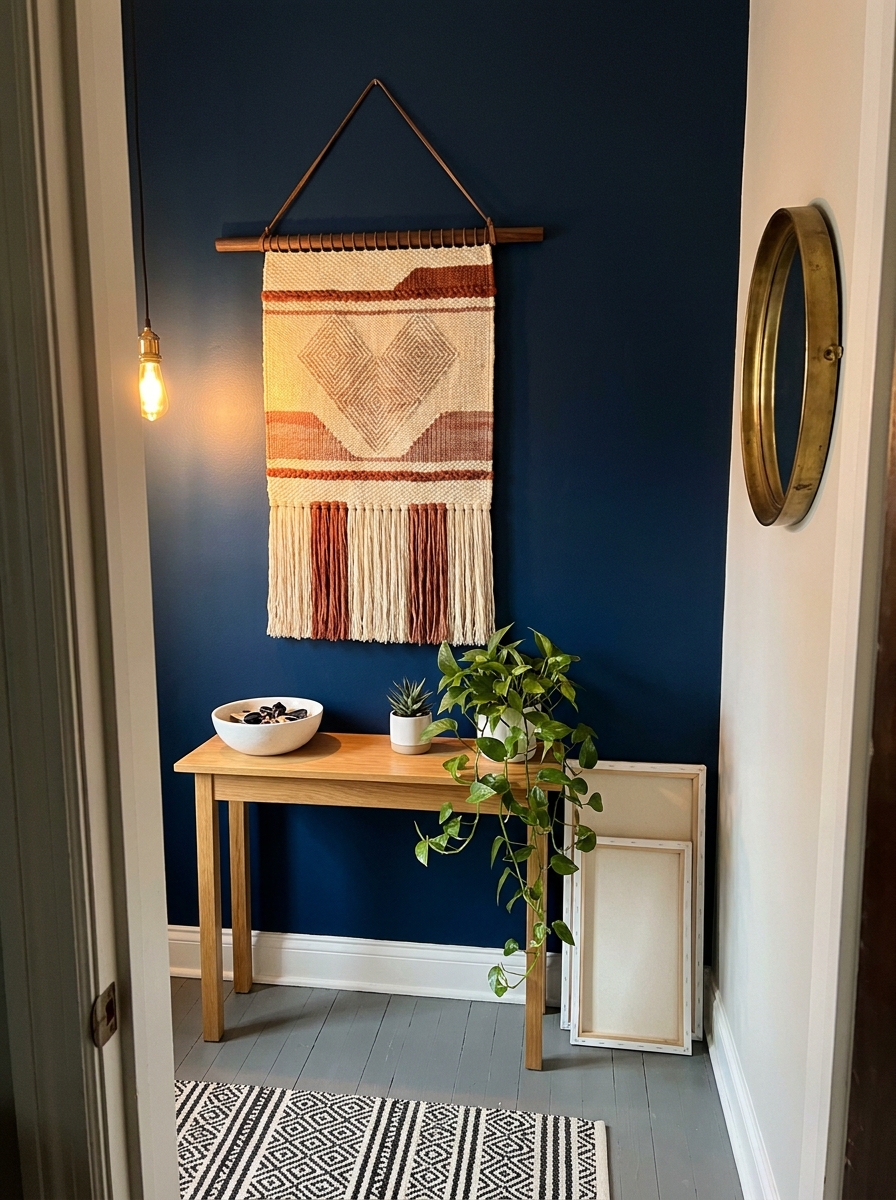
If you’ve ever walked past a fancy home store and gasped at the price of a simple fabric wall hanging, this one’s for you. Buy a half-yard of gorgeous fabric—something with texture or an interesting pattern—and attach it to a wooden dowel with fabric glue or a simple fold-over and stitch. Add leather cord or thick twine at the ends for hanging, and boom. Instant textile art.
The beauty of this project is how quickly it comes together and how much visual impact it creates. Woven fabrics, linen blends, or even vintage scarves work beautifully. I once used a piece of fabric from a thrift store curtain panel and got more compliments on that than anything else in my living room.
Scale matters here. A longer, narrower piece creates drama, while a wider square feels more substantial. You can leave the bottom edge raw and frayed for a boho vibe, or hem it neatly for something more polished. Either way, you’re looking at maybe $15 and thirty minutes of your time. It’s the kind of project that makes you feel like you have your decorating life together.
4. Painted Terra Cotta Plate Collection
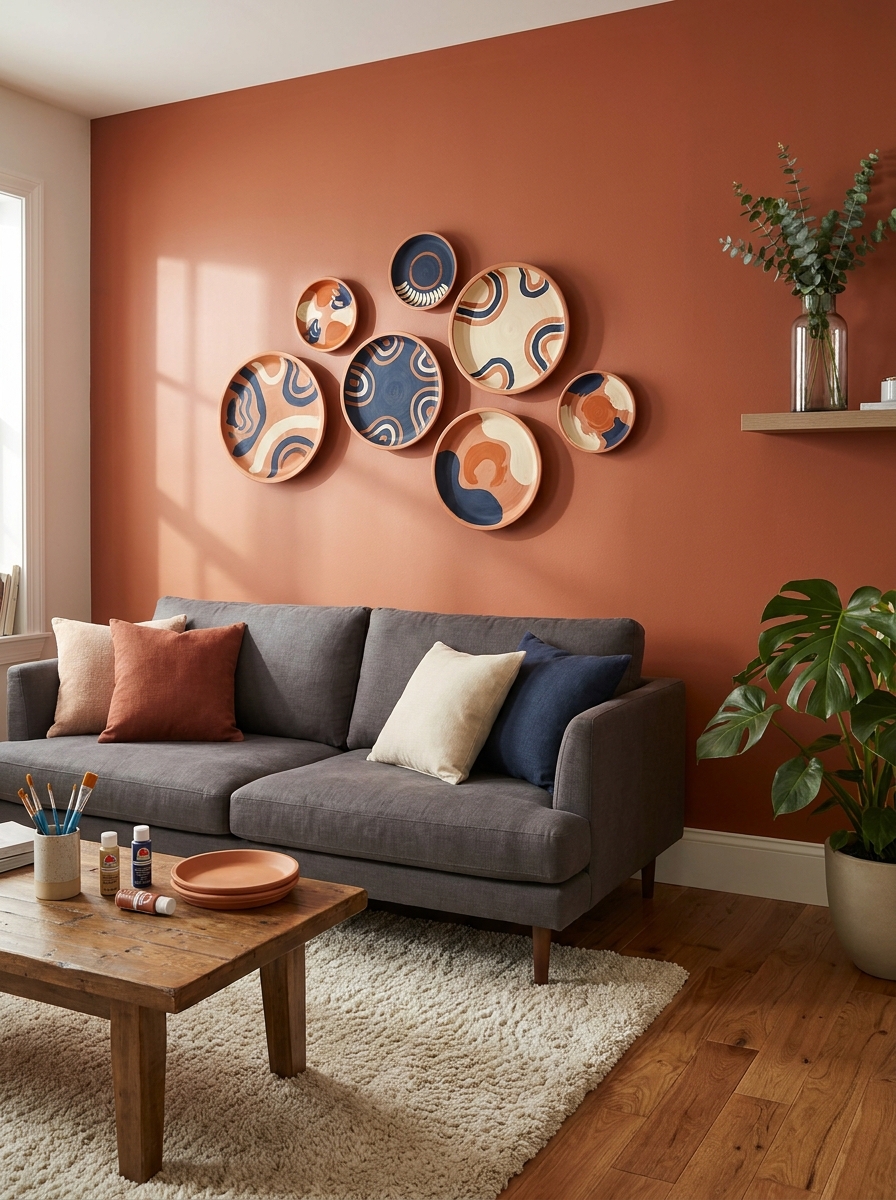
This idea makes me so happy because it’s unexpected and uses something you’d never think to put on a wall. Grab plain terra cotta plant saucers in different sizes from the garden center—they’re like a dollar each—and paint them with acrylic paint in a cohesive color palette. The natural texture of the clay shows through the paint in the most beautiful way, giving you that expensive artisan ceramic look.
You can go geometric with color blocking, create ombré effects, or paint simple abstract shapes. The circular forms create such a pleasing composition when you cluster them together on a wall. I usually do groups of five or seven in varying sizes, overlapping them slightly for dimension.
Hang them with plate hangers or adhesive disc hangers from the hardware store. The terracotta gives you this warm, organic feeling that works in so many different decor styles—from Mediterranean to modern farmhouse to eclectic boho. And if you get tired of the design? Just repaint them. It’s the most forgiving DIY project because there are literally no rules. Your grandmother might be confused about why you hung plates on the wall, but trust me, it looks incredible.
5. Washi Tape Geometric Wall Design
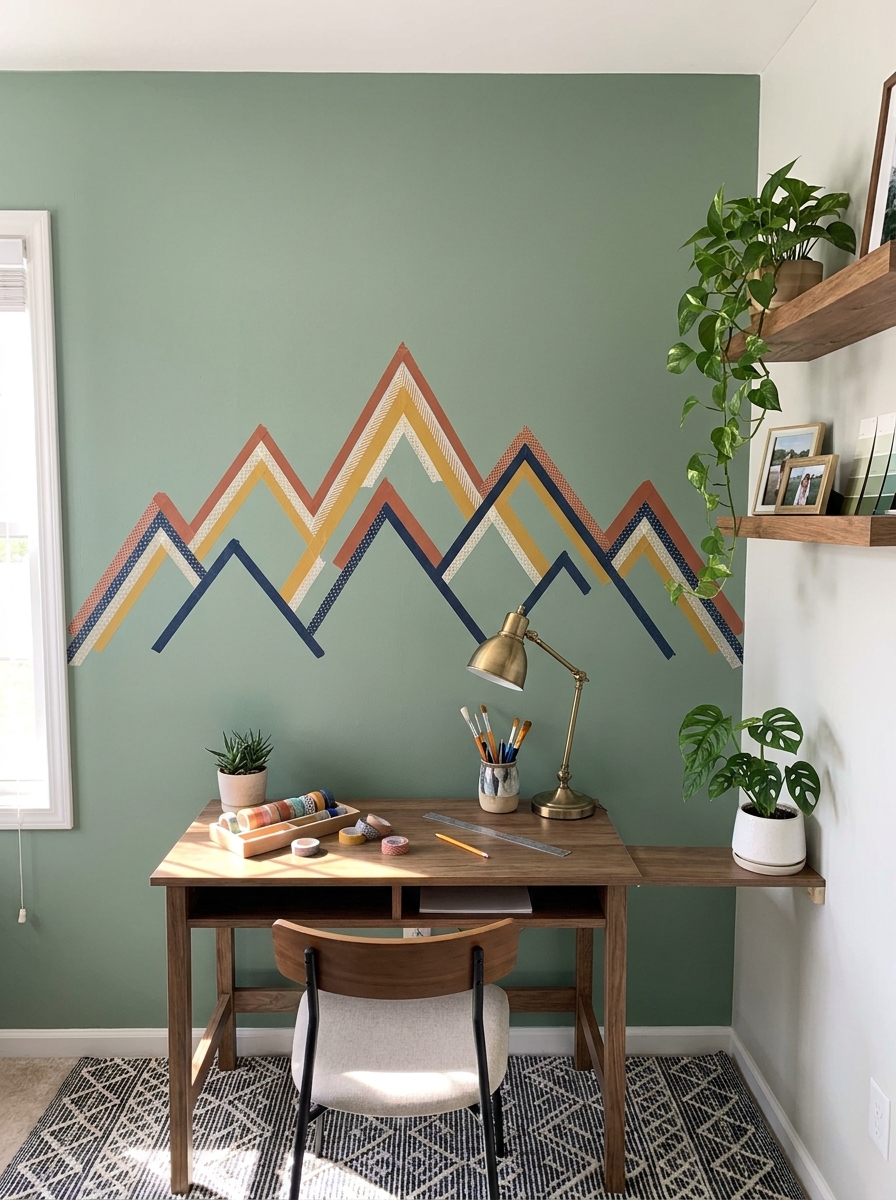
Here’s the thing about washi tape that makes me giddy: it’s basically instant art without commitment. You can create these gorgeous geometric patterns directly on your wall, and if you mess up? Just peel it off and start over. No holes, no paint, no stress.
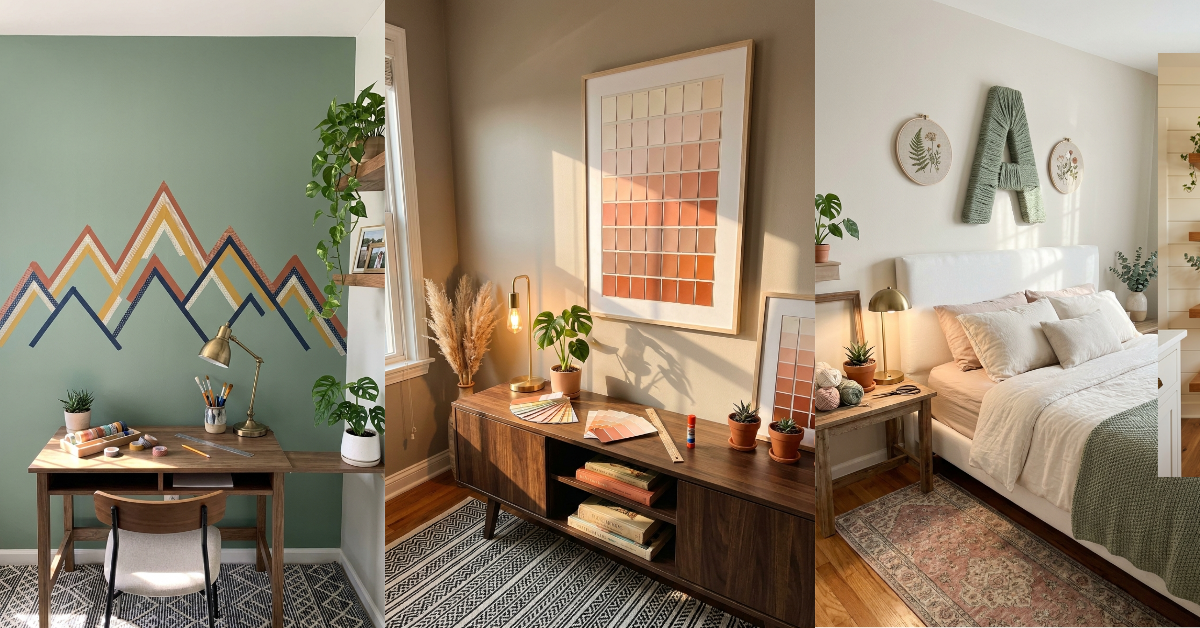
I love doing mountain ranges, abstract triangles, or even a giant hexagon cluster above my desk. The key is using 3-4 coordinating tape colors and mapping out your design lightly with pencil first. You can find washi tape at craft stores for like two bucks a roll, and one roll goes surprisingly far.
The best part? This works on rental walls. When you move, it peels right off without damaging anything. I’ve done this in three different apartments and landlords never knew the difference. It’s also perfect if you’re indecisive like me because you can change your design whenever the mood strikes. Last month I had chevrons, this month I’m rocking a geometric sunset.
6. Magazine Collage in Vintage Frame
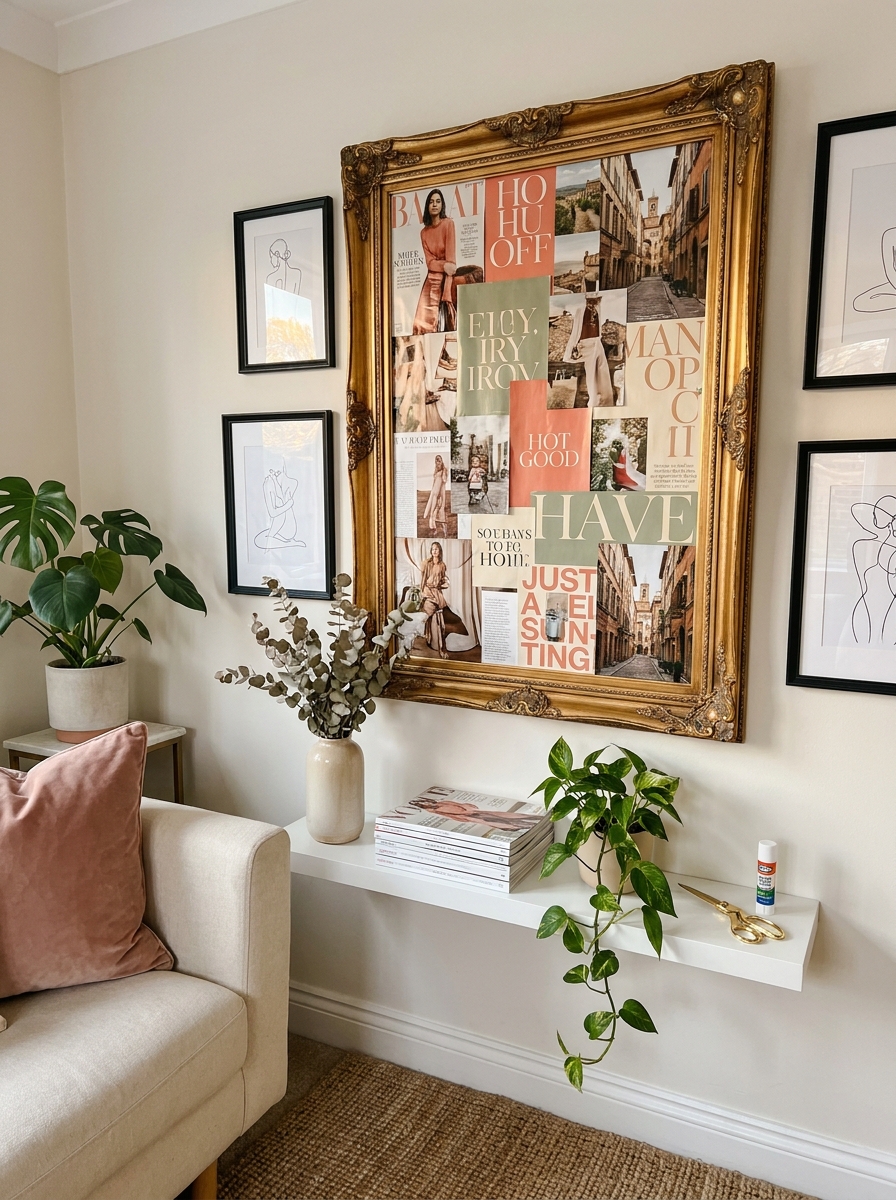
I cannot throw away beautiful magazine pages. Fashion editorials, travel photos, recipe spreads with gorgeous styling… they all end up in my collage pile. And honestly? They make the coolest custom art when you frame them up.
Grab a stack of old magazines and cut out images, words, and colors that speak to you. Arrange them on a large piece of cardstock or poster board, overlapping edges for that layered editorial look. You can go themed (all travel, all fashion, all food) or totally eclectic. Glue everything down with a glue stick and pop it in an oversized thrifted frame.
I made one entirely from cooking magazine pages for my kitchen, and guests always ask where I bought it. The secret? Nobody needs to know it cost you literally nothing but time. My favorite collage technique is leaving some white space showing through so it doesn’t look too busy. That breathing room makes it feel intentional and gallery-worthy instead of chaotic.
7. String Art on Stained Wood
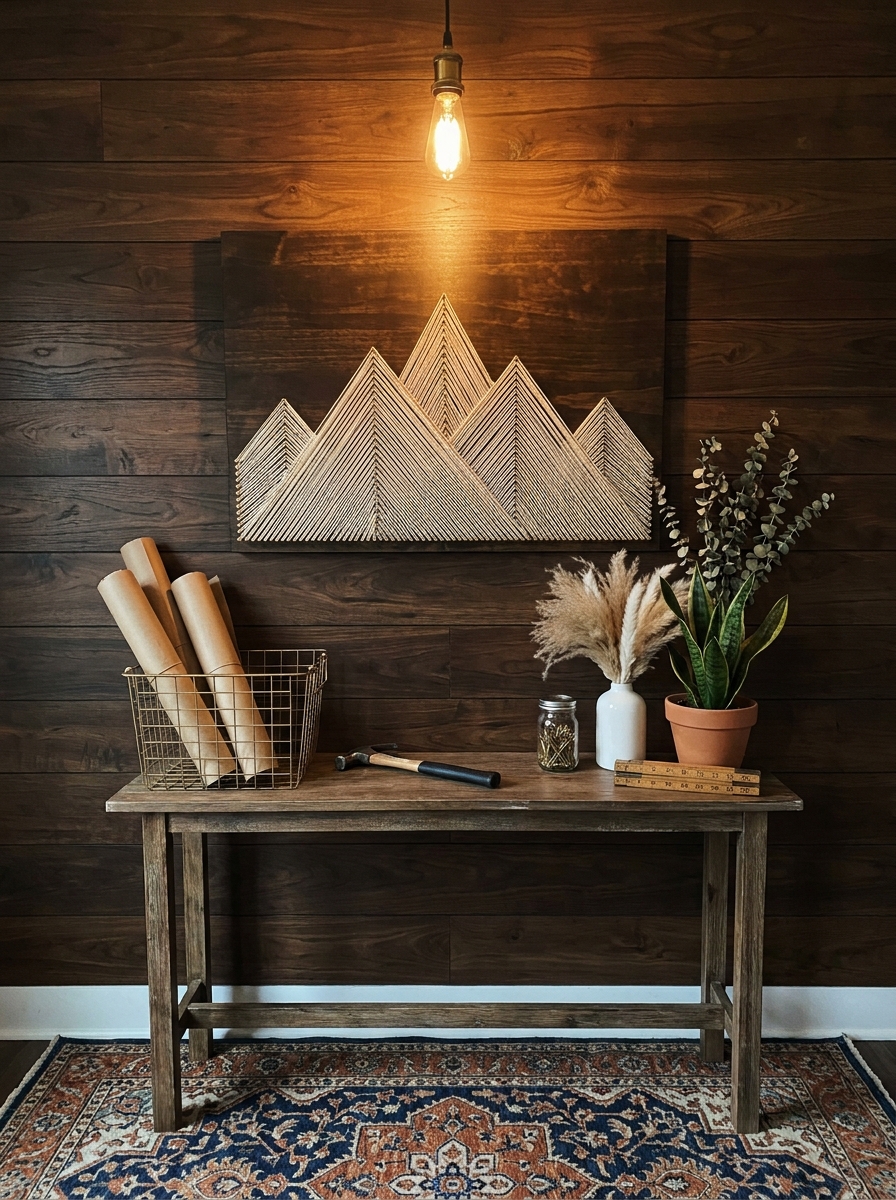
String art had its moment in the 70s, but hear me out: it’s having a comeback and it’s actually really meditative to make. There’s something satisfying about hammering tiny nails and wrapping string around them until a shape emerges.
You’ll need a wood board (I hit up the hardware store scrap bin), small nails, embroidery floss or yarn, and a printed template of whatever shape you want. I’ve done hearts, state outlines, initials, geometric shapes… even a little cactus for my desert-themed bathroom. Tape your template to the wood, hammer nails along the outline, remove the paper, and start wrapping string from nail to nail.
The wood grain showing through is what makes this feel elevated instead of crafty. Stain your board first for extra polish. I like a dark walnut stain with white or cream string for contrast, but metallics look amazing too. It takes maybe two hours total and costs under fifteen bucks.
8. Painted Wood Slice Gallery Wall
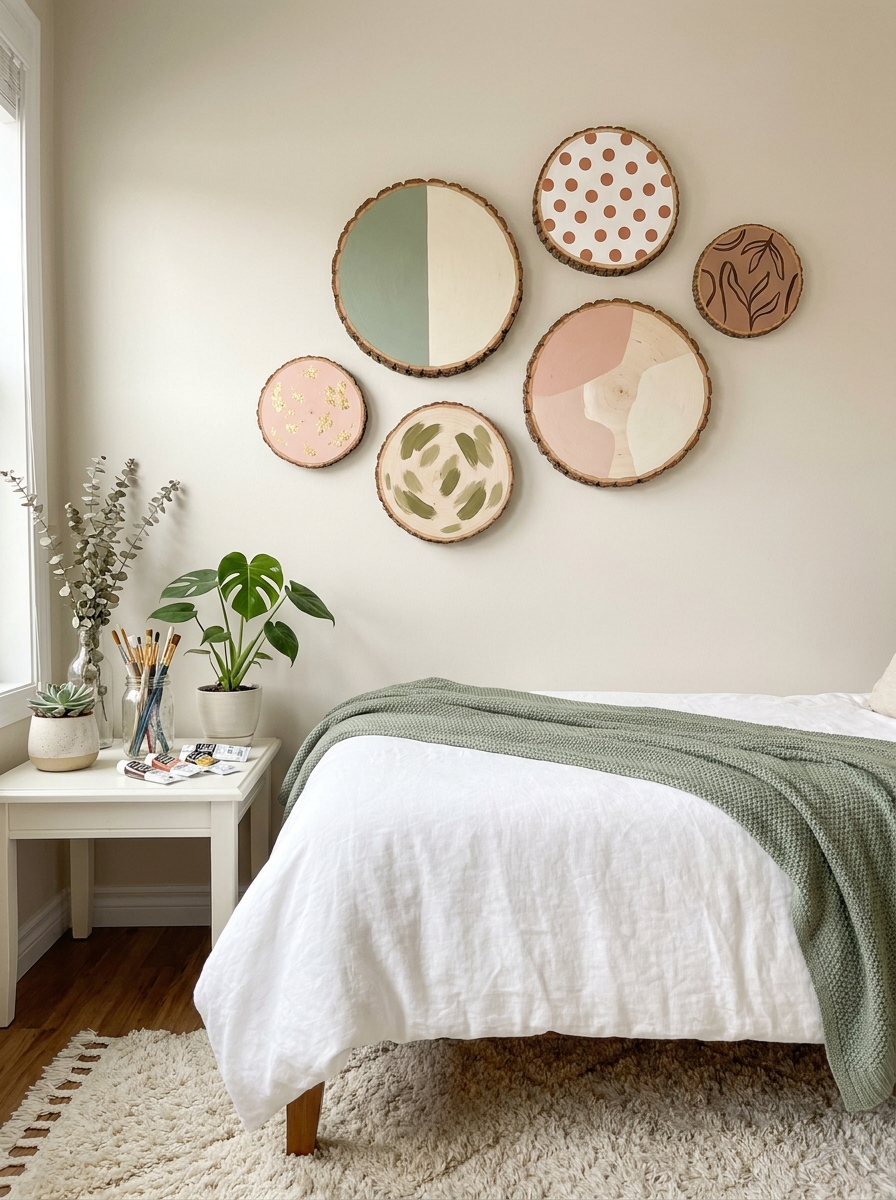
Those wood slices you see at craft stores? Total wall art potential. I’m talking about painting them with simple designs, abstract shapes, or even just color blocking them and clustering them together for organic gallery wall magic.
Grab 5-7 wood slices in varying sizes. Sand them lightly so paint sticks better, then go wild with acrylics. I like doing each slice in a different design but keeping the color palette cohesive: some geometric patterns, some solid colors, maybe one with dots or stripes. Once they’re dry, arrange them on your wall in a cluster, mixing the sizes for visual interest.
The natural bark edges against painted designs create this cool contrast between rustic and modern. It’s cottagecore meets contemporary. I hung mine with small command strips since the slices are lightweight, and I love that I can rearrange them whenever I want. Each slice becomes its own little art moment, but together they feel collected and intentional.
9. Embroidery Hoop Wall Art with Scrap Fabric
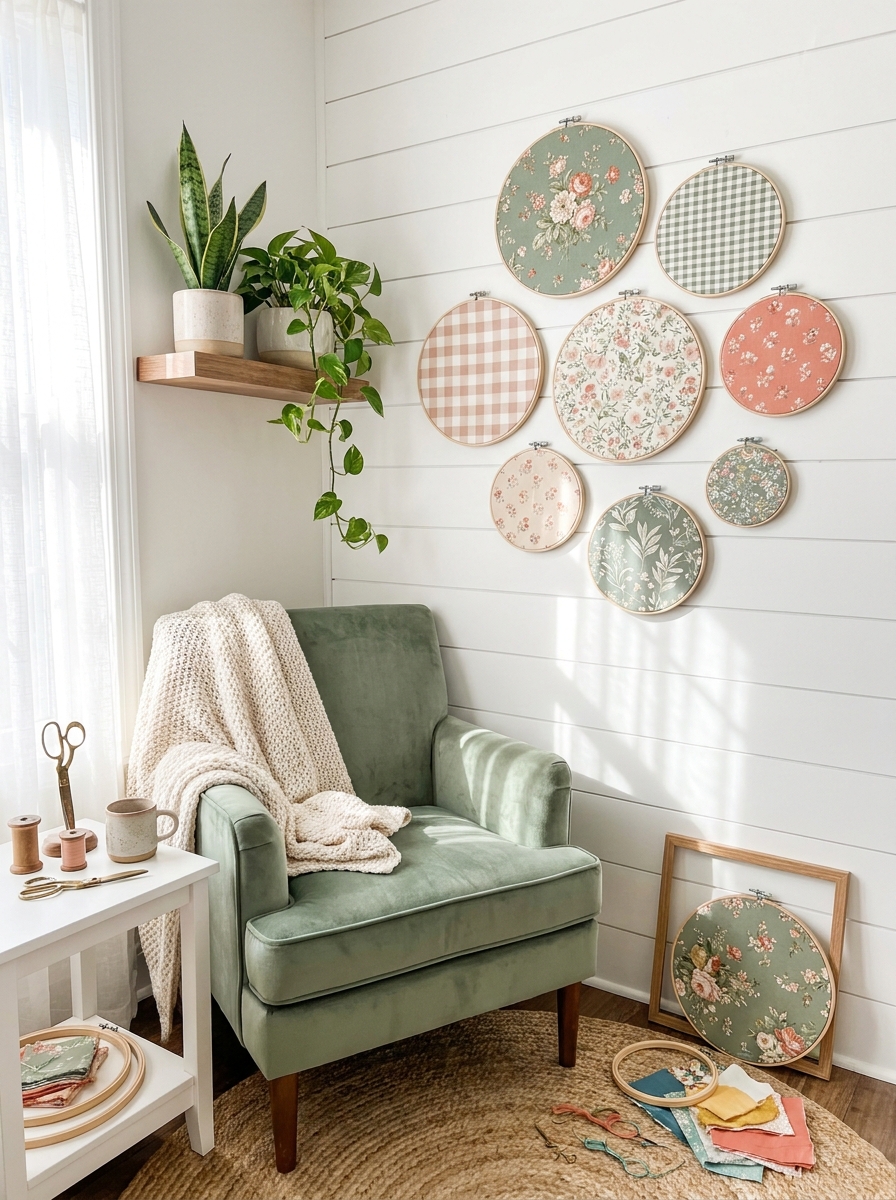
Embroidery hoops are ridiculously cheap at craft stores, and they make the most charming frames for leftover fabric. I’m talking those pretty pieces you’ve been hoarding from old pillowcases, vintage sheets, or that failed sewing project.
Just stretch the fabric tight in the hoop, trim the edges, and hang it up. You can leave the tightening screw visible at the top or hide it at the back. I love mixing different sizes and patterns together for a collected-over-time look that feels intentional but not stuffy.
The best part? This project takes literally five minutes per piece. You don’t need to sew anything or have any special skills. I made seven of these one Sunday afternoon while watching Netflix, and now my bedroom wall looks like a boutique hotel. Use florals, stripes, vintage tea towels, or even pretty napkins. Group them in odd numbers above a dresser or create a flowing arrangement up a stairway wall.
10. Paint Chip Gradient Art in Floating Frame
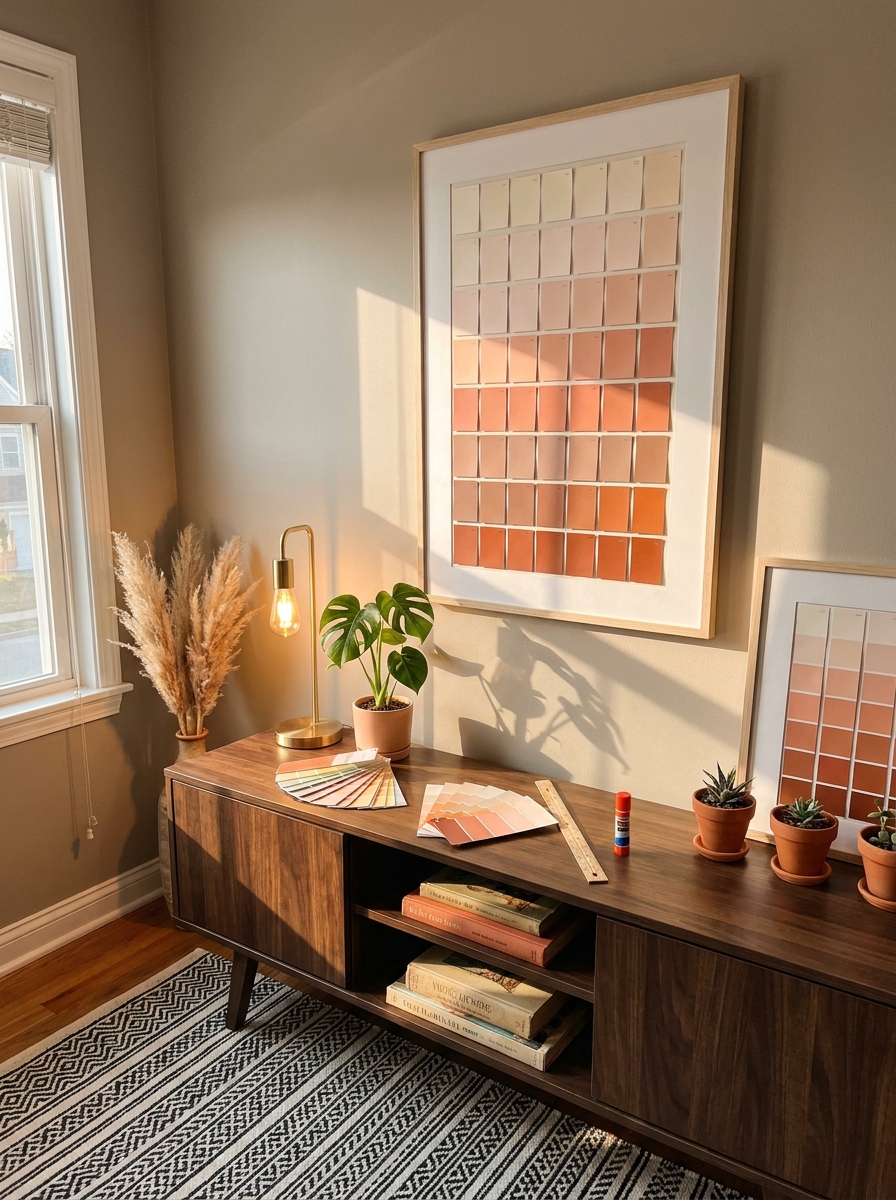
Those free paint chips at hardware stores? They’re about to become your favorite art supply. I grab handfuls every time I’m there, and nobody bats an eye because they’re meant to be free.
Arrange them in an ombre gradient from light to dark, or create a rainbow spectrum, then glue them onto a canvas board or heavy cardstock. The result looks like expensive modern art you’d find at West Elm, but it costs you absolutely nothing except the frame. I’ve done this in every color family—blues fading into greens, warm terracottas into deep burgundies, and a gorgeous pink-to-purple one that lives above my desk.
You can cut them into shapes, layer them, or keep them in their original rectangular strips for a clean geometric look. This is especially perfect for renters because you’re literally working with paint colors, so it’s easy to match your existing palette exactly.
11. Framed Wallpaper Sample Statement Piece
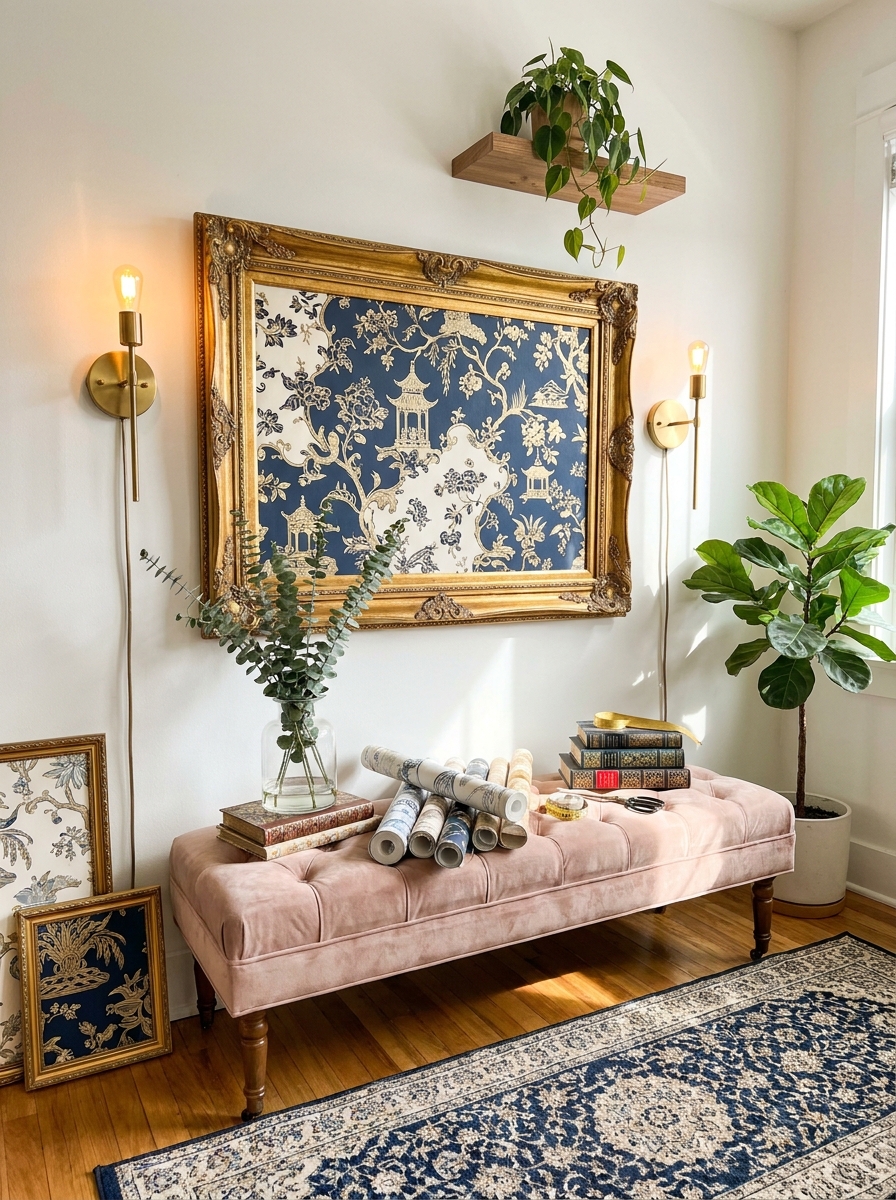
Wallpaper samples are basically free art that designers have already created for you. Most stores will give you large samples, or you can order them online for just a few dollars. The patterns are often way too bold or expensive to actually wallpaper a whole room, but in a frame? They’re absolutely perfect.
I framed a dramatic black and white palm leaf print that would’ve been overwhelming as wallpaper, but as a 16×20 framed piece, it’s the exact amount of drama my entryway needed. You can also cut smaller sections from one sample to create a set of matching pieces—instant cohesive gallery wall.
Look for samples with metallics, bold florals, or geometric patterns that feel too risky to commit to permanently. This is your chance to play with those trendy designs without the installation hassle or the price tag. I’ve even layered two different samples in the same frame for an unexpected mixed-pattern moment.
12. Sharpie Doodle Art on Canvas Board
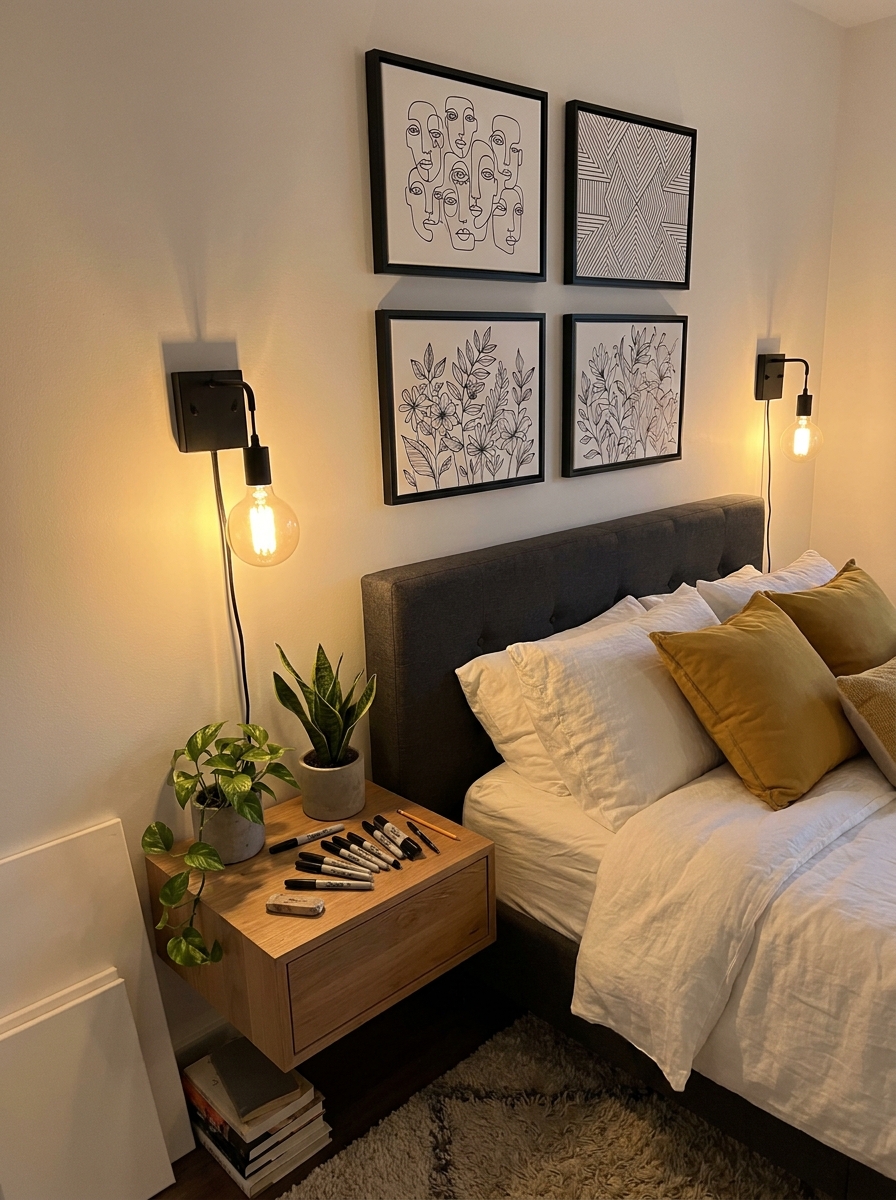
Don’t overthink this one. Grab a white canvas board and a black Sharpie, and just start drawing. Abstract faces, overlapping circles, squiggly lines, random words, geometric shapes—whatever feels good in the moment. There’s something so freeing about working with permanent marker because you can’t fuss and overwork it.
I made three of these while sitting on my couch one evening, and they’ve gotten more compliments than art I actually tried hard on. The imperfect, hand-drawn quality is exactly what makes them charming. They look like expensive line art prints from that one trendy shop, but they’re completely one-of-a-kind and cost maybe three dollars.
You can go minimalist with simple line drawings or fill the entire canvas with detailed patterns and doodles. I love mixing thick and thin Sharpies for varied line weights. These work beautifully in a grid arrangement or scattered among other art pieces for a more casual gallery wall vibe.
13. Torn Paper Landscape in Shadow Box
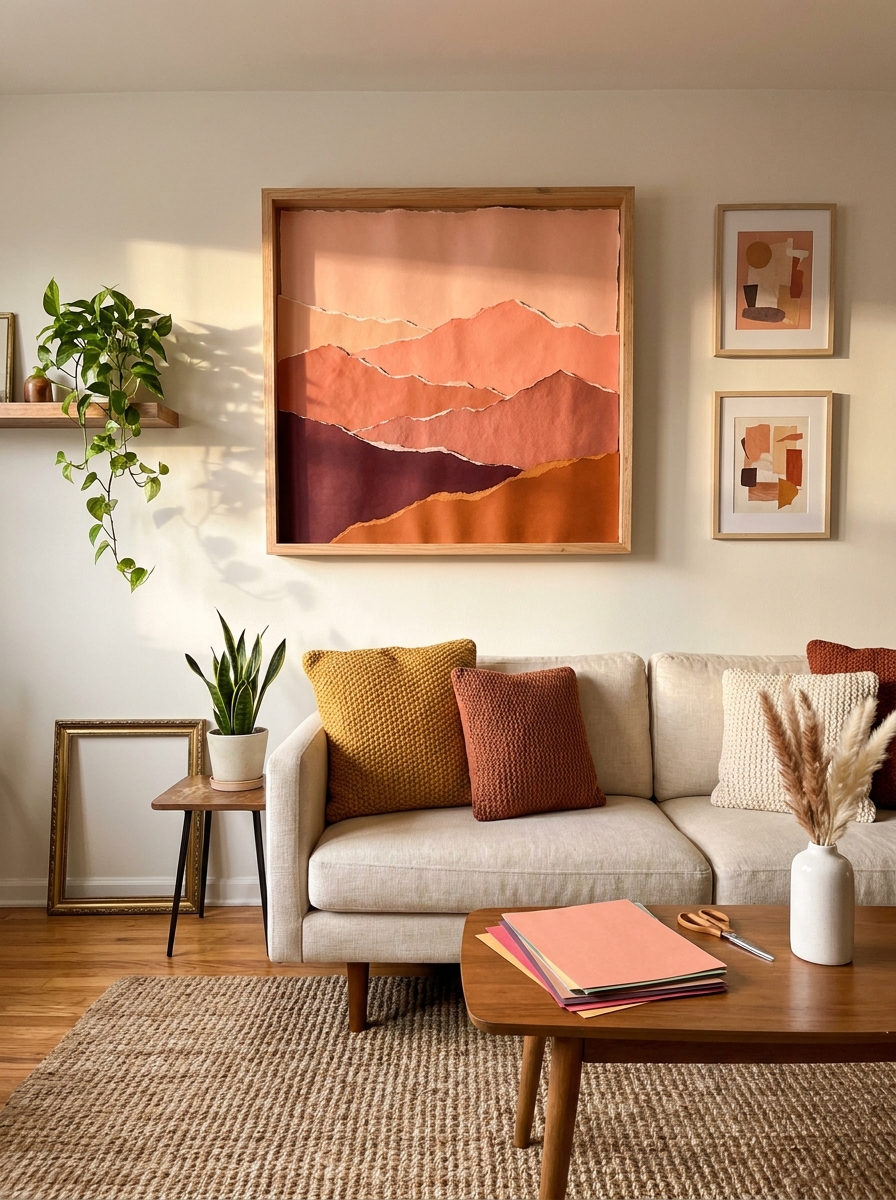
This one’s for everyone who thinks they can’t paint. You don’t need a brush—just your hands and some colored paper! I made a sunset landscape by tearing construction paper into mountain shapes and layering them in a shadow box frame. The torn edges give it this gorgeous organic texture that you’d never get with scissors.
Start with your background color (I used a peachy-pink for sky), then work forward with darker shades for each mountain layer. The torn paper creates natural variation in the edges that looks surprisingly sophisticated. You can do desert scenes, ocean horizons, or abstract color fields—whatever speaks to you.
The shadow box adds depth that makes the whole thing feel dimensional and gallery-worthy. I found mine at the craft store for under $15, but you can also use a regular frame and add layers of cardboard behind for dimension. This is such a good rainy afternoon project, and the result looks way more complicated than it actually is.
14. Yarn-Wrapped Letter Monogram
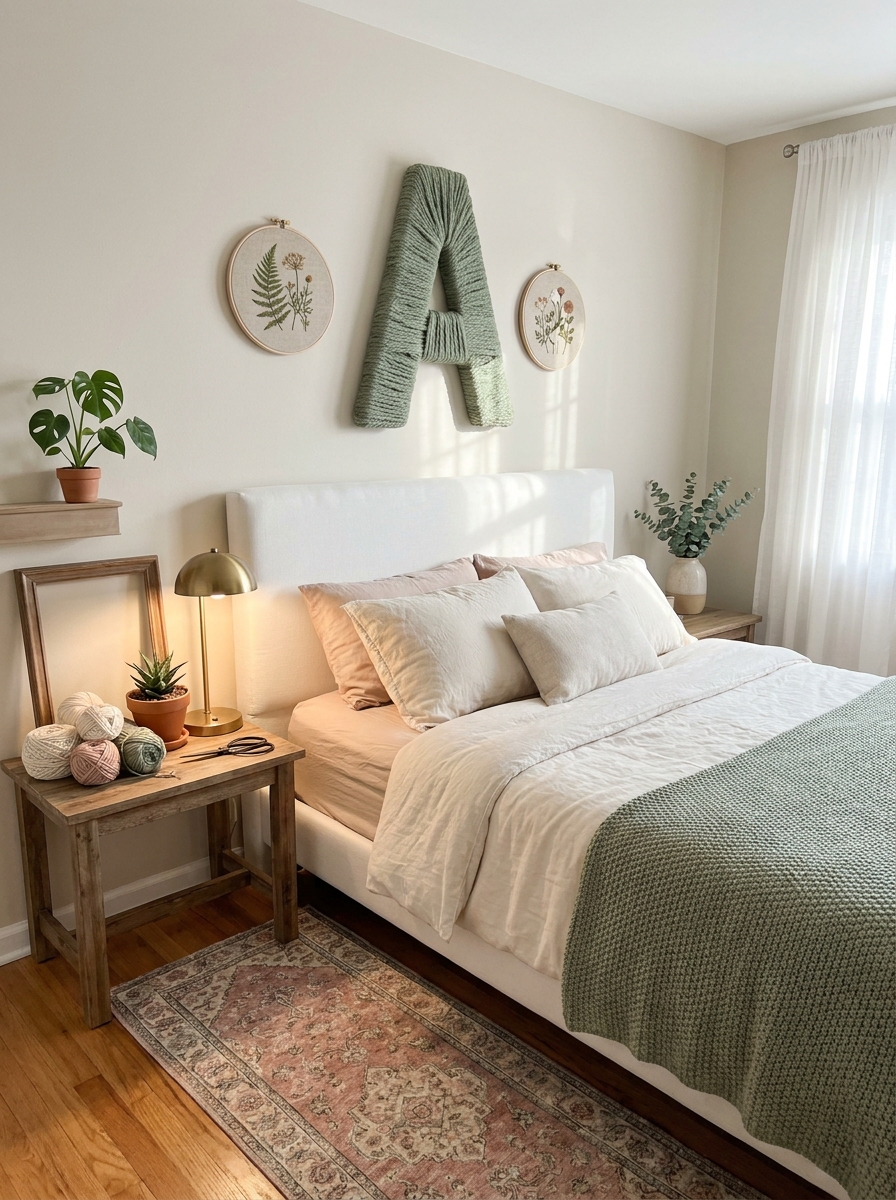
Giant wall letters are having a moment, and making your own wrapped version costs practically nothing. I grabbed a cardboard letter from the craft store (usually $3-5) and wrapped it completely in chunky yarn. The texture is so good, and you can customize the color to match any room.
The wrapping process is super meditative—just start at one end and keep it tight as you go. I like using yarn in unexpected colors like sage green or dusty blue instead of the obvious choices. You can also do ombré by switching yarn colors partway through, or use multiple letters to spell out a whole word.
Hang it alone as a statement piece or group a few letters together. I’ve done initials for kids’ rooms, “HELLO” for an entryway, and even just a giant ampersand because why not? The dimensional quality makes it feel sculptural rather than flat, and the handmade texture adds so much warmth to a wall.
15. Gold Leaf Abstract on Black Canvas
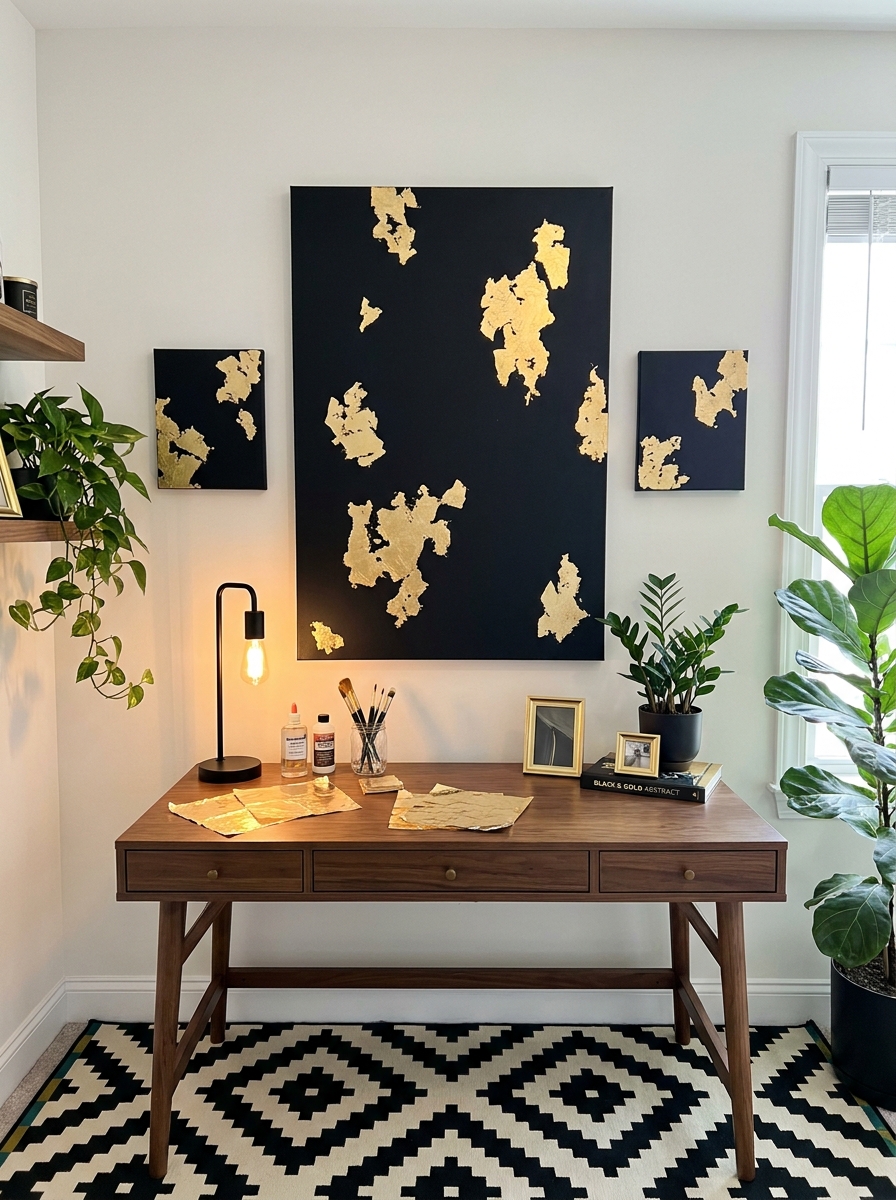
Want something that looks ridiculously expensive but costs under $20? This is it. A black canvas with random patches of gold leaf creates this moody, modern look that people always assume came from a fancy gallery. I’m obsessed with how dramatic it is.
You literally just brush adhesive in abstract shapes on a black painted canvas, wait until it’s tacky, then press on gold leaf sheets. The imperfect application is part of the charm—you want some black showing through, some rough edges, some unexpected shapes. It looks intentionally artistic even when you have no plan whatsoever.
I’ve made these in all sizes, and they work everywhere. A big one makes a serious statement in a dining room, while smaller versions grouped together create an elegant gallery moment. The contrast between matte black and shiny gold is chef’s kiss, and the whole project takes maybe an hour including drying time.
16. Crayon Melt Rainbow on White Canvas
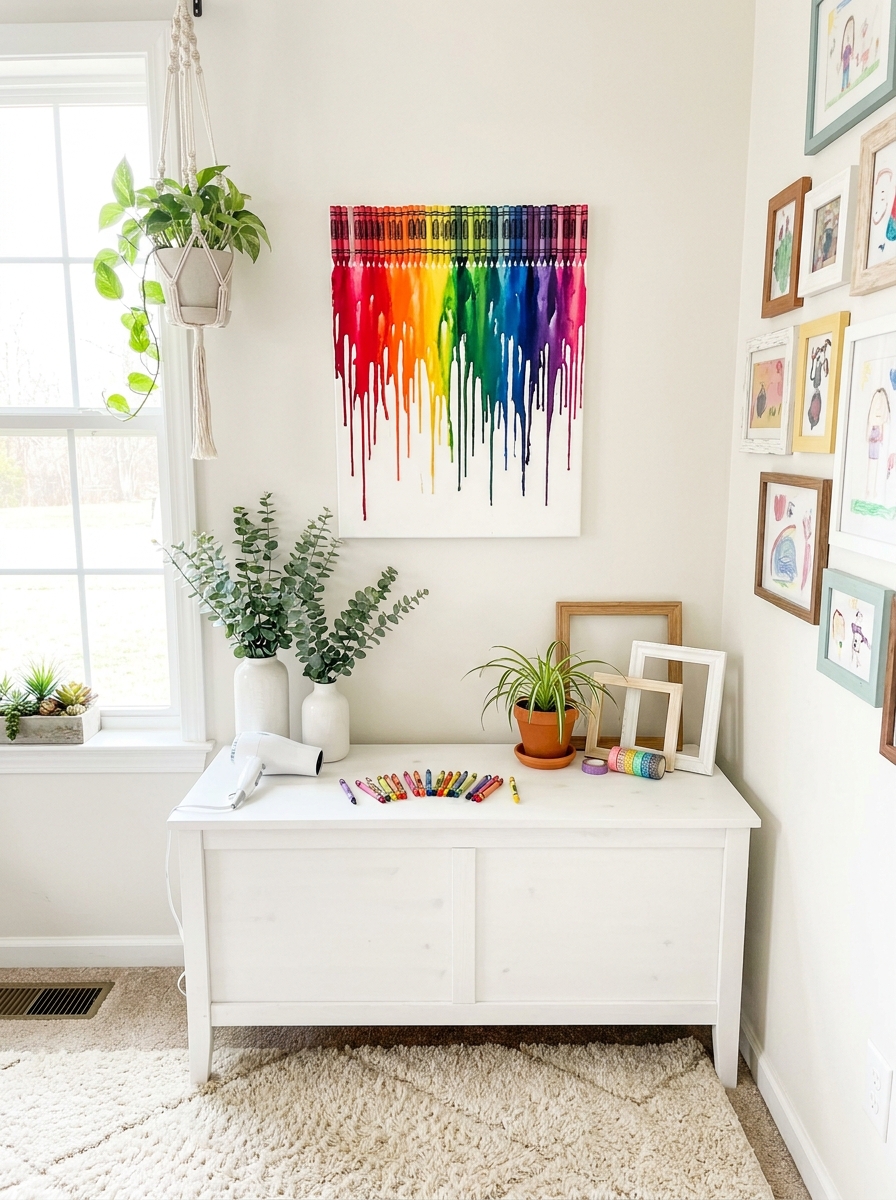
Okay, this one’s pure fun. Remember melting crayons in art class? Turns out it makes genuinely cool wall art when you do it intentionally. Line up crayons across the top of a canvas, hit them with a hair dryer, and watch the colors drip down in these beautiful organic streams. It’s weirdly satisfying to make.
I like arranging crayons in a rainbow gradient, but you could also do ombré in one color family or even just random colors for an abstract vibe. The key is using a good hair dryer on high heat and tilting your canvas so the wax drips the way you want. Some people get really controlled with it, others let it go wild—both look amazing.
This is such a good project to do with kids, but honestly, adults love it too. The finished piece has this glossy, dimensional quality that photographs beautifully, and every single one turns out completely unique. Plus, you probably already have most of the supplies at home.
17. Vintage Book Page Typography Art
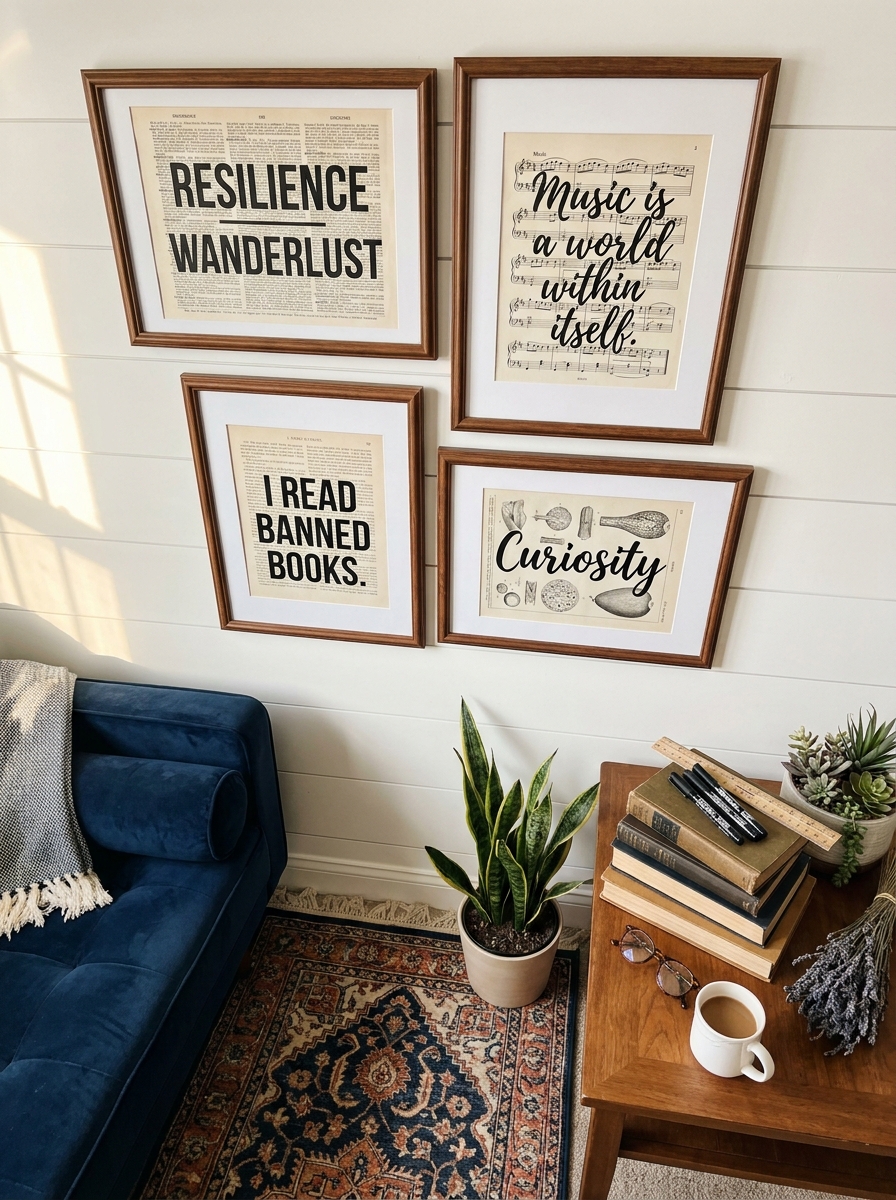
I’m obsessed with this one because you can literally use books that are falling apart at thrift stores! Grab pages from old novels, dictionaries, or sheet music and frame them with bold typography overlaid on top.
You can use a paint pen, brush marker, or even print out words and glue them on. Think of meaningful quotes, single impactful words like “home” or “breathe,” or even coordinates of special places. The aged paper gives it that vintage charm that feels way more expensive than it actually is.
The best part? You can create a whole gallery wall for under ten bucks if you use simple frames from the dollar store. Mix different book page backgrounds with varying typography styles for a collected-over-time look. I love pairing old dictionary pages with modern sans-serif fonts for that perfect high-low mix. It’s the kind of art that makes guests lean in closer to read what it says.
18. Layered Cardboard Texture Wall Sculpture
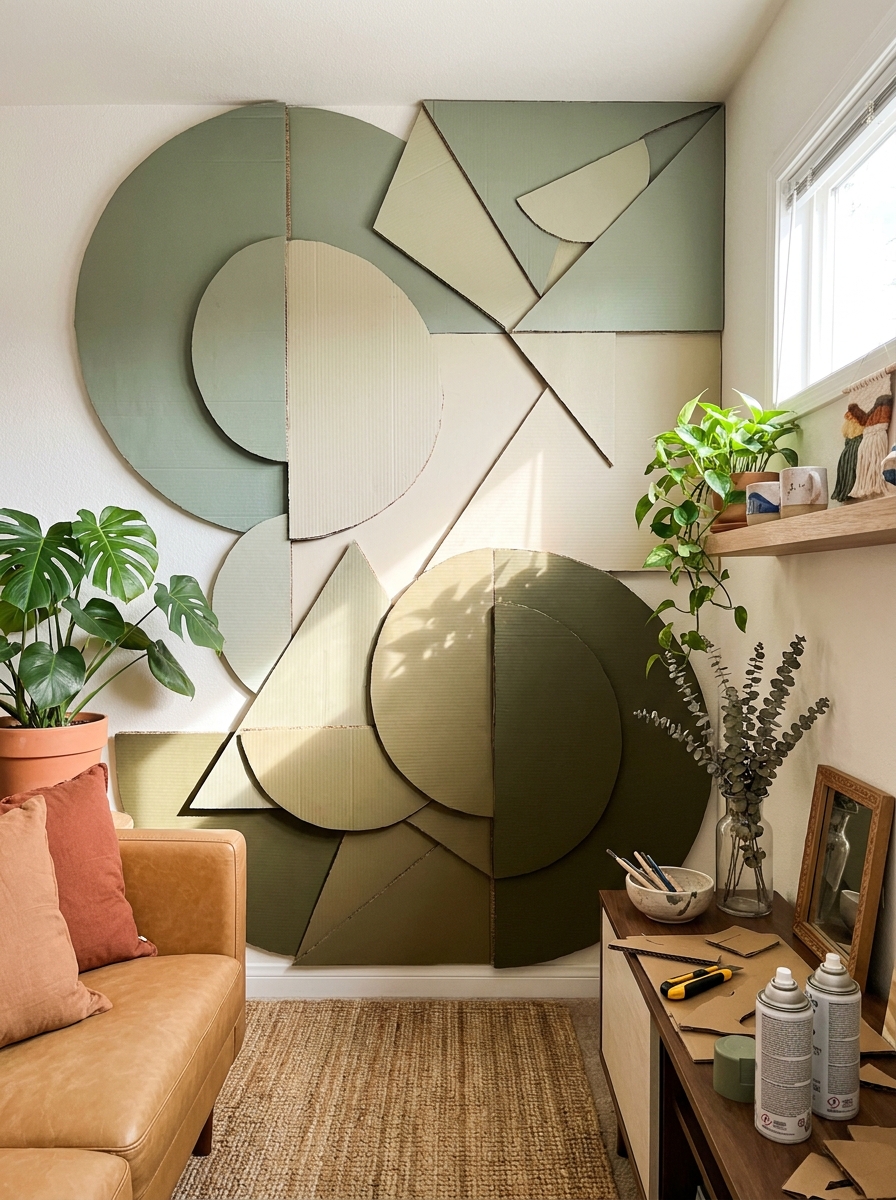
Okay, hear me out on this one because it sounds weird but looks incredibly cool! You’re going to cut shapes from cardboard boxes and layer them to create dimensional wall art. I’m talking abstract geometric designs, mountain ranges, or organic flowing shapes.
The texture is everything here. Paint each layer in different shades of the same color family, or go bold with contrasting colors. The shadows between layers give it serious depth, and nobody will ever guess it’s made from Amazon boxes! I mounted mine on a canvas board, but you can also create a floating effect by mounting directly to the wall.
This project is perfect if you love modern sculptural art but can’t drop hundreds of dollars on it. The dimensional aspect catches light differently throughout the day, so it’s constantly changing. Use a box cutter for clean edges and play with different heights for maximum drama. It’s recycling that actually looks like designer wall art!
19. Ombre Dip-Dyed Fabric Banner
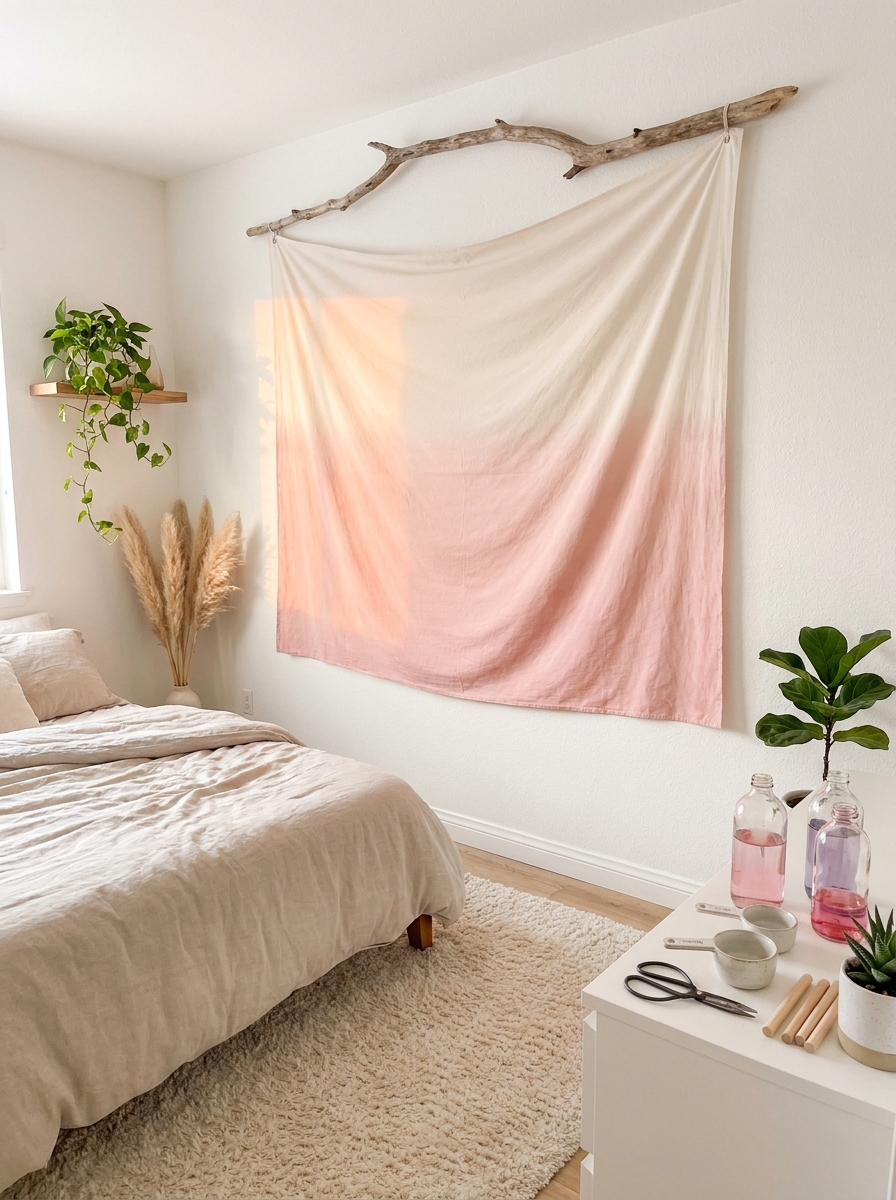
This might be the easiest project on the whole list, and it looks so dreamy and soft hanging on any wall! You’re literally just dip-dyeing canvas or cotton fabric in gradients, then hanging it from a wooden dowel or branch.
Grab some RIT dye from the craft store and a piece of canvas drop cloth fabric. Mix different concentrations of the same color, then dip your fabric incrementally, letting it dry between dips. You end up with this gorgeous ombre effect that’s so calming and organic. I love dusty pink to cream, or sage green fading to white.
The movement of the fabric adds softness to hard wall surfaces, and the ombre feels very gallery-worthy without any artistic skill required. You can leave the edges raw and frayed for a boho vibe, or hem them for something more polished. Hang it above your bed, in a reading nook, or even in a bathroom for unexpected softness.
20. Stamped Tile Pattern on Canvas Grid
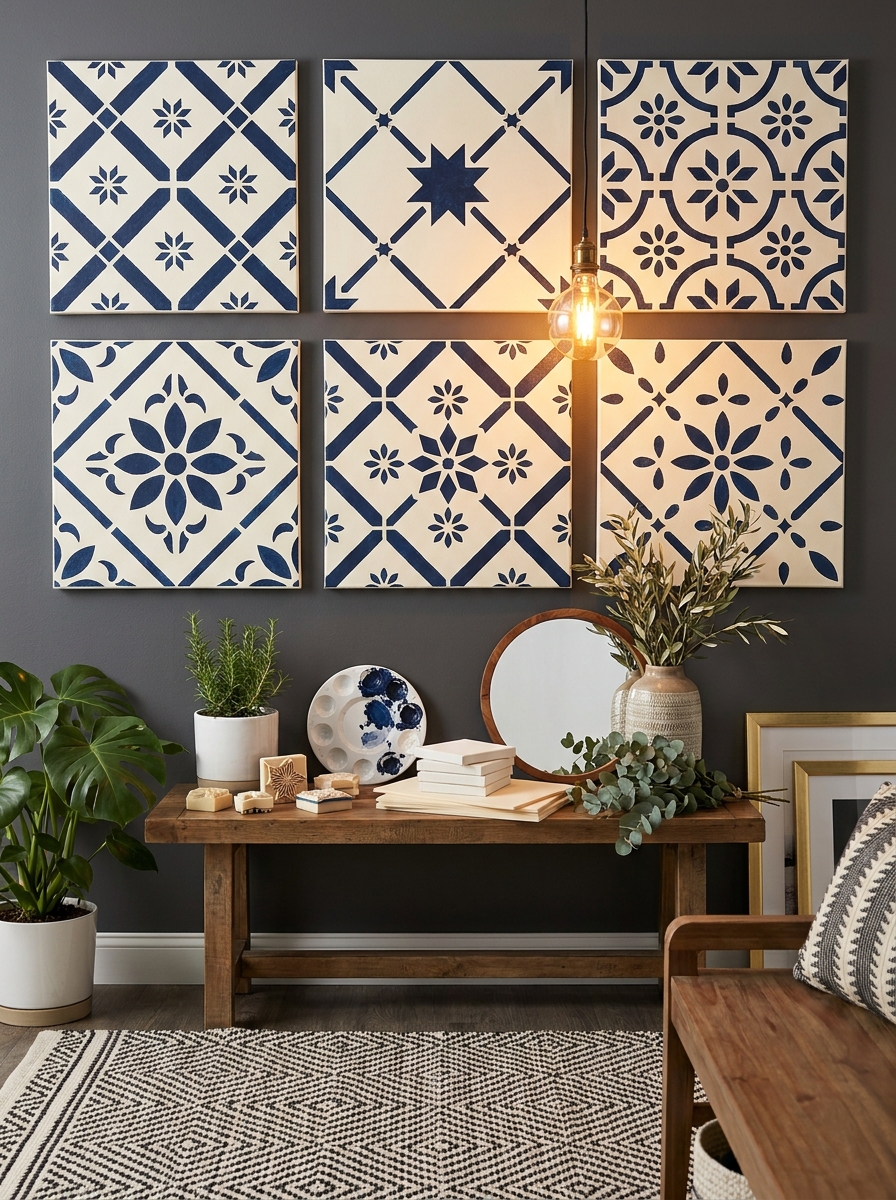
This is for anyone who loves the look of patterned cement tiles but doesn’t want to commit to actual tile! You’re creating a grid of repeating stamped patterns on multiple small canvases arranged together. It reads as one cohesive piece but gives you so much flexibility.
Grab small square canvas boards and create stamps from craft foam, cut potatoes, or even rubber erasers. Paint your base color, let it dry, then stamp your pattern in contrasting colors. The slightly imperfect hand-stamped look is actually what makes it charming! Arrange 4, 6, or 9 canvases together for maximum impact.
I love using Mediterranean-inspired patterns in navy and white, or go bold with terracotta and mustard geometrics. The repetition is visually satisfying, and you can rearrange the canvases anytime you want a refresh. It’s basically removable decorative tile art that costs about five dollars to make. Perfect for renters or commitment-phobes!
21. Framed Scarf Statement Wall Art
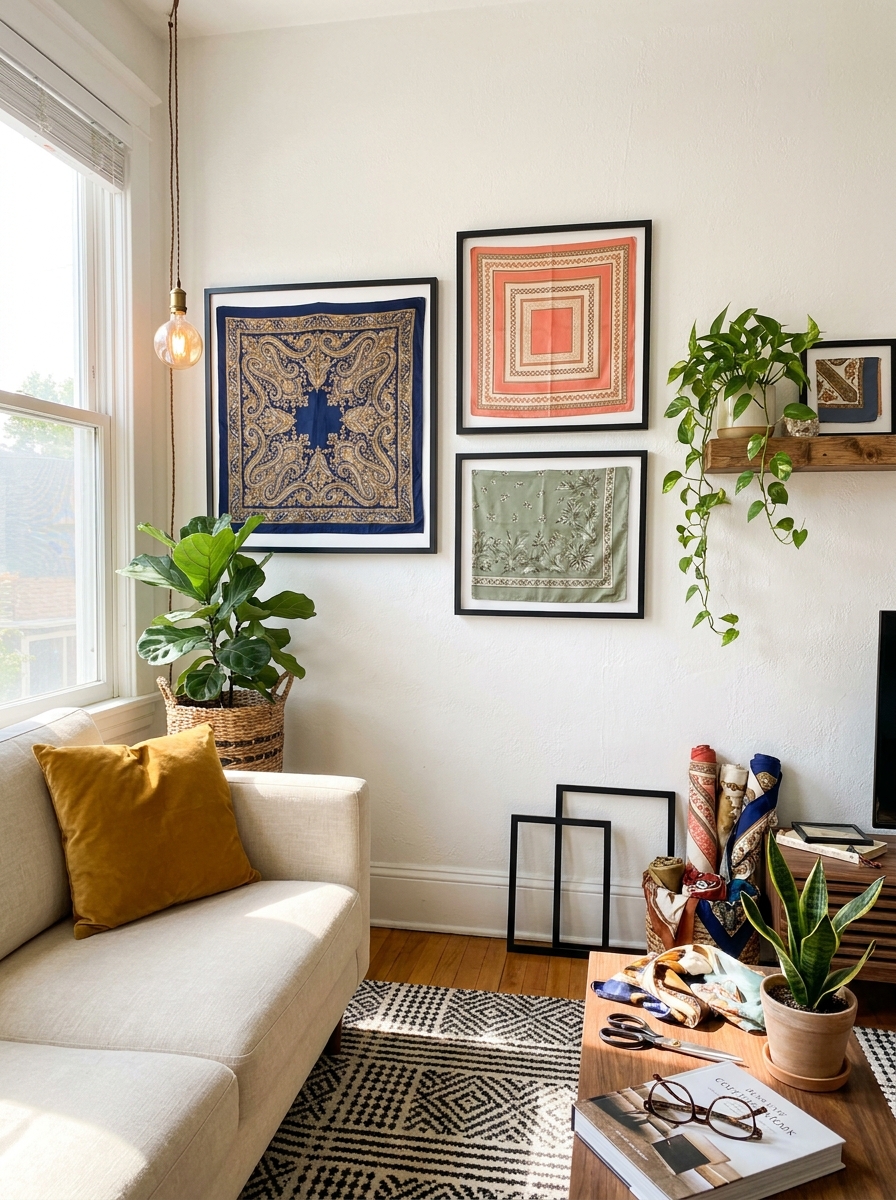
Got a vintage scarf you never wear? Or found a gorgeous one at the thrift store for three bucks? Frame it! Seriously, this is one of those ideas that looks ridiculously expensive but costs practically nothing.
I love using scarves because they already have beautiful patterns and colors designed by actual artists. You’re basically getting artwork for the price of a thrift store find. Stretch the scarf tight over foam board or cardboard, tape it on the back, then pop it in a frame. You can use a standard frame or even make a simple wood frame yourself.
The trick is choosing scarves with patterns that speak to you. I’ve framed silk scarves with bold geometric prints, vintage florals, and even souvenir scarves from places I’ve visited. Group three different scarf frames together for a collected, worldly look. The texture of silk or cotton adds this subtle richness that flat prints just can’t match.
22. Painted Foam Board Typography Wall Quote
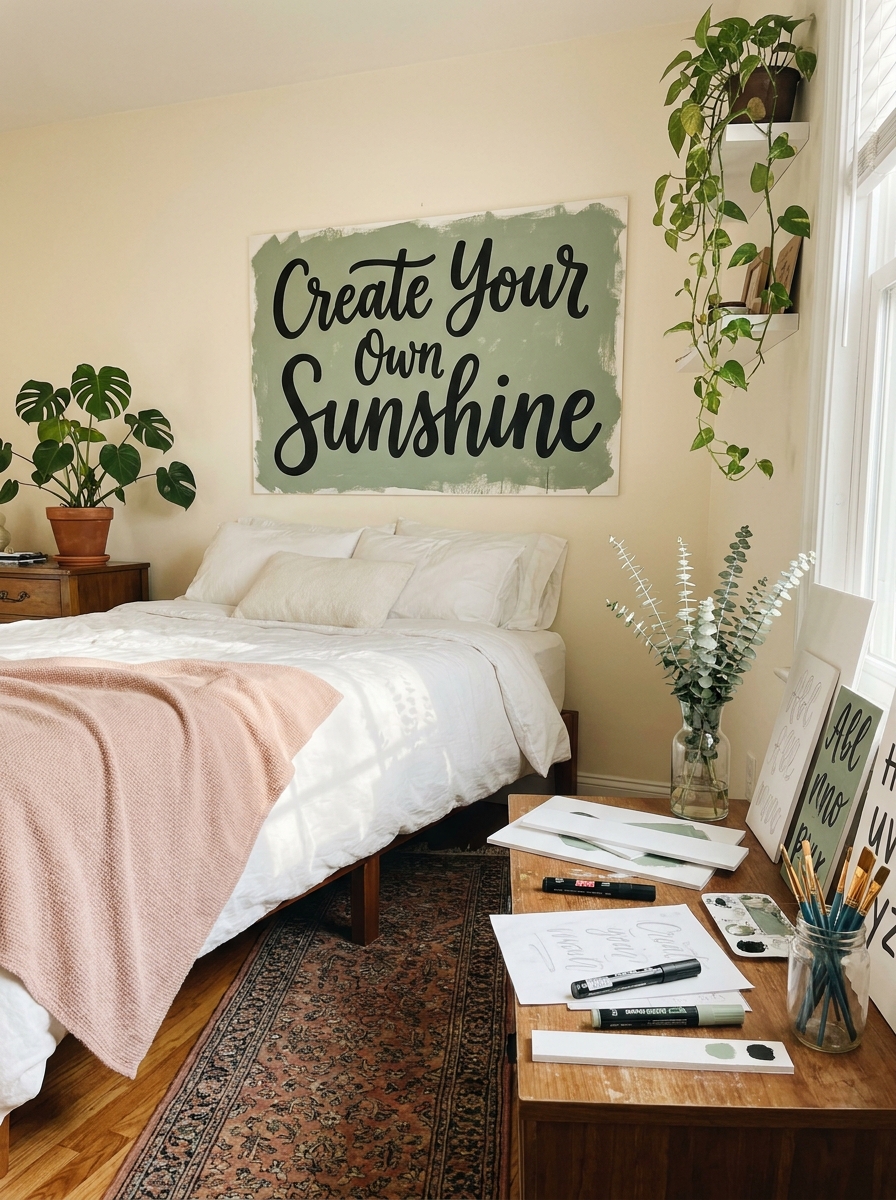
Words matter. And putting your favorite quote or phrase on the wall is like giving yourself a daily pep talk. Foam board from the dollar store makes this ridiculously easy and crazy lightweight to hang.
I painted mine with leftover acrylic paint in a simple color palette, then hand-lettered my favorite quote right on top. You don’t need fancy calligraphy skills. Honestly, imperfect lettering has more character anyway. Use a pencil first to sketch your layout, then go over it with paint markers or a small brush. Simple block letters work beautifully.
The beauty of foam board is you can make huge statement pieces without spending a fortune or needing power tools. Cut it to whatever size you want with a basic craft knife. I’ve made vertical quotes for narrow wall spaces and wide horizontal pieces above beds. Paint the background any color that makes your heart happy, then add your words in contrasting paint.
23. Tin Ceiling Tile Painted Wall Panel
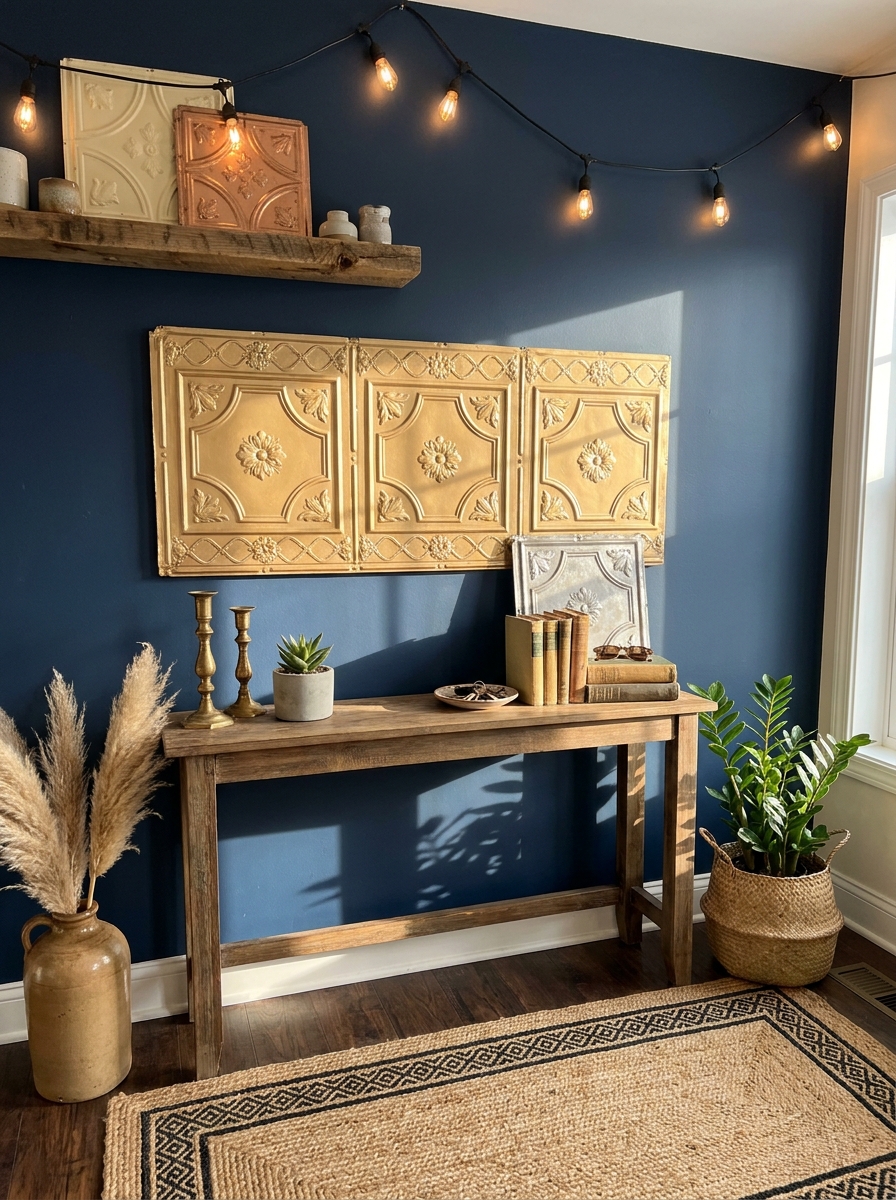
Architectural salvage yards are treasure troves for wall art materials. Old tin ceiling tiles have the most gorgeous embossed patterns, and you can usually snag them for cheap or even free if they’re damaged.
I spray-painted mine in matte black and hung it as a dramatic focal point. But you could go metallic gold, soft white, or even leave the vintage patina as-is. The dimensional texture catches light throughout the day and creates these beautiful shadows. It’s instant architectural interest without any actual renovation.
If you can’t find real vintage tiles, hardware stores sell reproduction tin tiles that work just as well. Mount them directly to the wall with construction adhesive or frame them for a cleaner look. I love using a single large tile as a statement piece or grouping several smaller ones in a grid. The industrial vibe works in modern spaces, farmhouse kitchens, or eclectic living rooms.
24. Bleach Pen Design on Dark Fabric Canvas
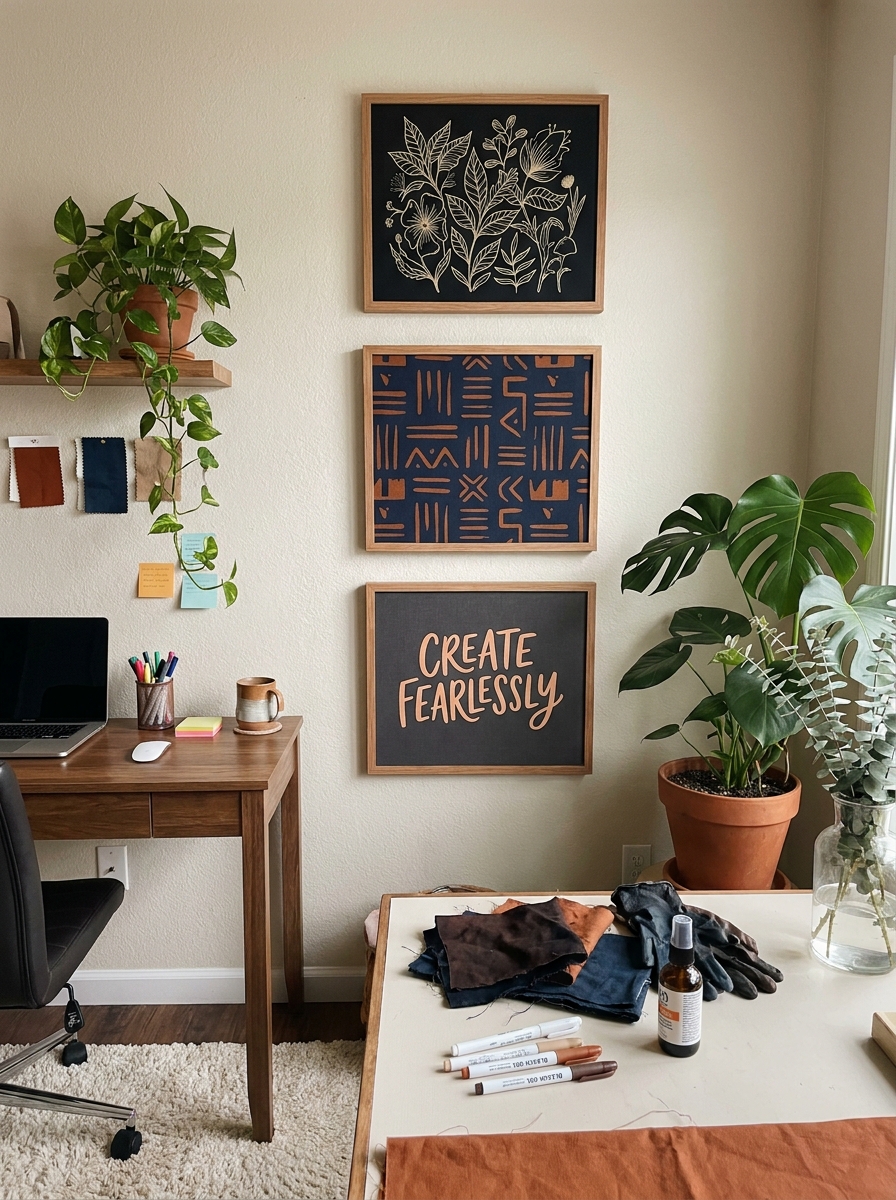
This one feels like magic. You literally draw on dark fabric with a bleach pen and watch your design appear as it lightens. It’s chemistry meets art, and it’s so fun to watch it happen.
Grab black or navy canvas fabric from the craft store, stretch it over a canvas frame or embroidery hoop, then draw your design with a bleach gel pen. I’ve done simple line drawings, geometric patterns, and even hand-lettered words. The bleach gradually lightens the fabric from dark to rust-orange to cream, depending on how long you leave it. Rinse it in cold water when you like the color, then let it dry.
The organic, unpredictable quality makes each piece totally unique. You can’t replicate the exact same color shifts twice. I love the modern, graphic look of light designs on dark backgrounds. It’s bold without being loud, and nobody would guess you made it with a three-dollar bleach pen.
25. Coffee-Stained Paper Map Art in Thrifted Frame
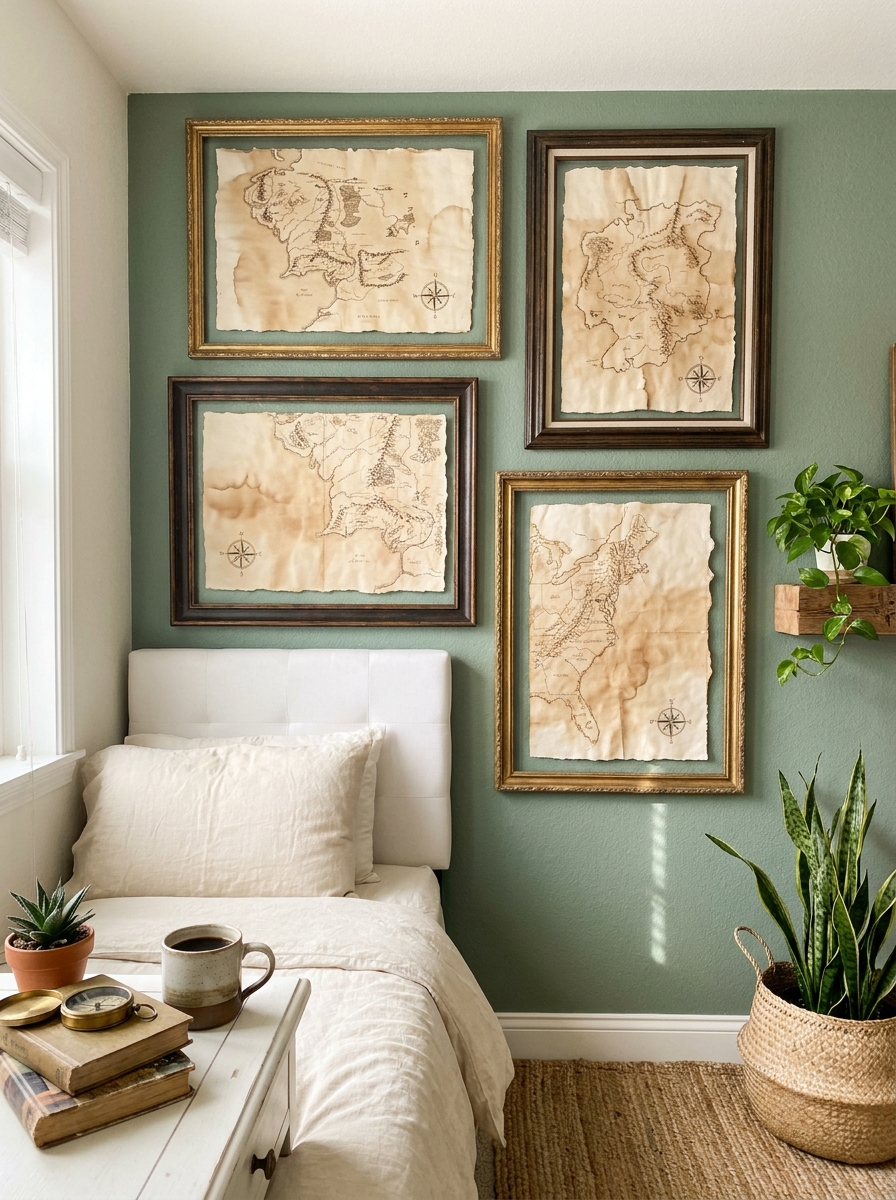
You know that dusty old atlas sitting in the thrift store? Grab it! Coffee-stained paper gives maps this gorgeous vintage vibe that looks like you found it in a Parisian antique shop. I tear out continents I’ve visited or dream destinations, then literally dunk them in strong brewed coffee. The edges curl up beautifully as they dry, creating this dimensional texture that’s way more interesting than flat paper.
The staining process is ridiculously satisfying. Some areas soak up more coffee than others, creating these natural gradients that look totally intentional. I usually crumple the paper first before staining to get those cool creases that age it even more. Pop your dried map into any thrift store frame, and suddenly you’ve got art that looks like a travel heirloom.
This works with sheet music too, or pages from vintage books. The coffee smell fades completely once dry, but that aged appearance stays forever. It’s the perfect project when you’re already drinking your morning coffee anyway!
26. Ribbon Weaving on Canvas Board
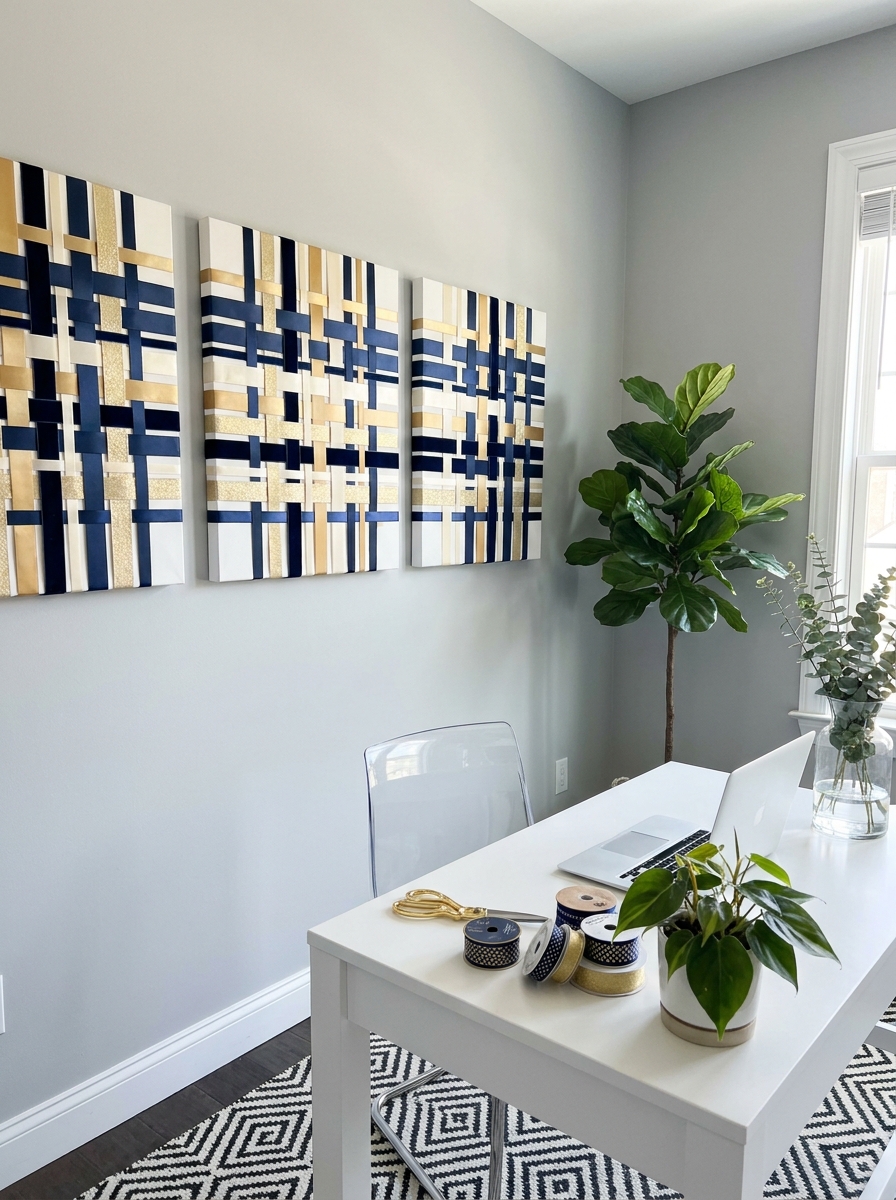
This craft takes me right back to making potholders as a kid, except way prettier! You’re basically weaving ribbons through slits cut into a canvas board to create this gorgeous textile pattern. I hit the ribbon aisle when stores have sales and grab every color and texture that makes me happy. Grosgrain, satin, velvet, burlap—they all create different vibes when woven together.
The actual weaving is so meditative. You cut vertical slits in your canvas, then thread ribbons through in an over-under pattern. I usually do diagonal weaves or color-block sections rather than traditional checkerboards because it feels more modern. The dimensional quality is what makes this special—those ribbons catch light differently than flat paint ever could.
You can secure the ribbon ends on the back with hot glue or staples, then frame it or leave it as-is. I love mixing patterns and textures in one piece. Stripes with florals, shiny with matte, wide with narrow. It’s like textile art without needing a loom!
27. Painted Paper Bag Wall Sculpture
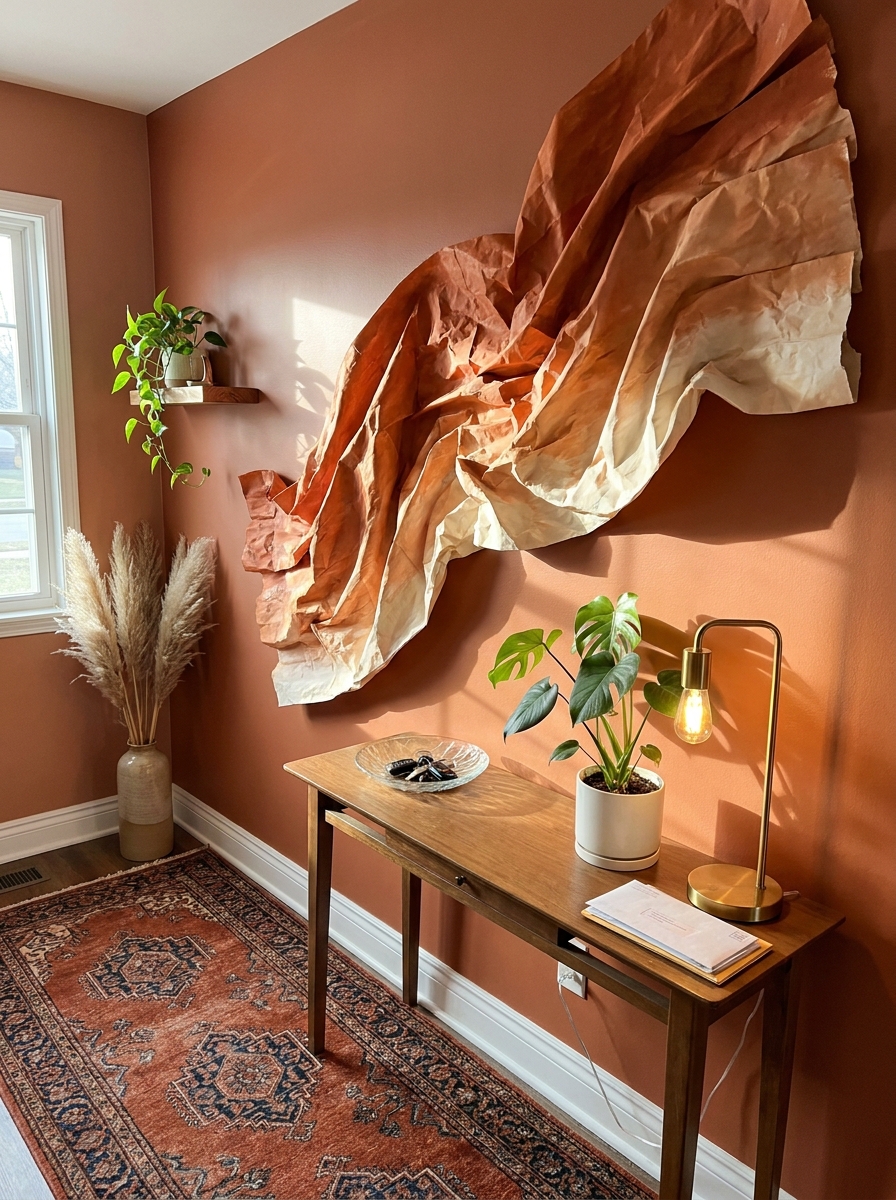
Wait, hear me out—brown paper bags become legit sculptural art! I crumple lunch bags repeatedly until they’re soft like leather, then paint them with acrylics and shape them into dimensional wall pieces. The texture is insane. All those wrinkles and folds create shadows that make the whole thing look way more expensive than grocery bag art has any right to look.
I usually paint mine in metallic or ombre techniques, then arrange them in organic flowing shapes mounted on canvas or directly on the wall. Some I fold into flower shapes, others I leave abstract and crinkled. The paper holds its shape surprisingly well once it’s been worked enough. You can go monochromatic for a sophisticated vibe or use bold colors for something playful.
This is truly a free-materials project if you save your shopping bags. Even buying craft paper bags costs like three dollars. The magic is in the manipulation—the more you crumple and shape, the more interesting the texture becomes. It’s basically paper mache without the mess!
28. Nail Polish Marble Pour on Small Canvas
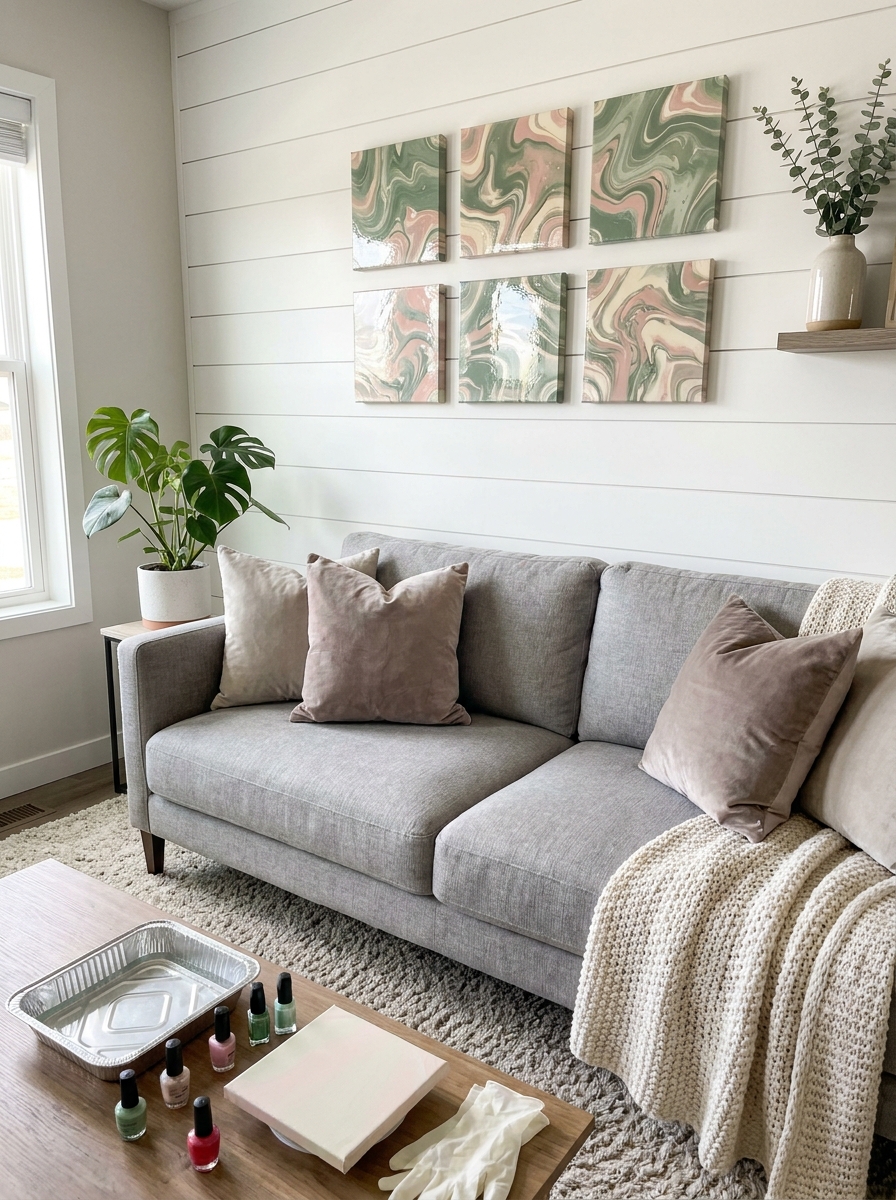
This is the most fun you’ll have with nail polish that doesn’t involve your actual nails! You drop different polish colors into a tray of water, swirl them into marbled patterns, then dip a small canvas through the floating design. What transfers onto the canvas is this unpredictable, gorgeous marble effect that looks professionally made. Every single one turns out completely unique.
The technique is dead simple but feels like magic. Fill a disposable aluminum pan with room-temperature water, drop in your polish colors one at a time near the center, use a toothpick to swirl, then dip your canvas straight down through the design. When you pull it out, you’ve captured that marbled pattern. The polish dries shiny and permanent.
I make these in sets of four or six using the same color palette so they work together as a gallery wall. Stick with three colors max per canvas or it gets muddy. This is perfect for using up old nail polish bottles you’re not wearing anymore. Way better than throwing them away!
Quick Guide
Quick Cost Breakdown: What You’ll Actually Spend
Let’s talk real numbers because ‘cheap’ means different things to everyone. Most of these projects fall into three budget categories.
Under $10: Pressed botanicals (free materials + $5 frames from thrift stores), painted terra cotta plates, paper cut-outs, washi tape designs, magazine collages.
$10-25: Abstract acrylic canvases ($8 canvas + $12 paint set), fabric wall hangings ($15 fabric + $3 dowel), embroidery hoop art, painted wooden pieces, macramé with rope.
$25-40: Large-scale projects, framed collections, multiple canvases for gallery walls, or projects using specialty materials.
The sweet spot? Most projects cost between $10-15 when you shop smart. Hit up dollar stores for frames and canvases, use craft store coupons (they’re always having 40-50% off sales), and raid your local thrift stores for frames you can spray paint. Your walls don’t need to wait for your budget to catch up.
Your Walls Are Waiting (And So Is Your Creative Side)
Here’s what I love most about DIY wall art—it tells your story in a way that mass-produced prints never can. That abstract canvas you painted on a rainy Sunday? It holds that memory. Those pressed leaves from your favorite hiking trail? They bring that feeling home with you. Even the slightly imperfect frame arrangement becomes part of your home’s personality.
You don’t need to tackle all 28 ideas at once. Pick one that makes you genuinely excited, gather your supplies, and spend an afternoon creating something. The beauty of DIY is that if you don’t love how it turns out, you can just try again. Paint over it. Rearrange it. Start fresh. There’s zero pressure here.
Your blank walls have been patient long enough, and honestly? They’re the perfect canvas for trying something new. So grab that idea that’s been sitting in your mental ‘someday’ folder and make it happen this weekend. Your home will feel more like you, and that’s worth way more than anything you could order online. Now go make something beautiful.
Frequently Asked Questions
What’s the easiest DIY wall art for complete beginners?
Abstract acrylic paintings are incredibly beginner-friendly because there’s no right or wrong way to do them. You just need a canvas, a few paint colors you love, and some brushes. Big, bold strokes look intentional and artistic, even if you’ve never painted before. Pressed botanicals are another foolproof option—nature does most of the work for you, and you just arrange and frame them.
How can I make DIY wall art look expensive instead of crafty?
The secret is in the framing and presentation. Use matching frames for gallery walls, stick to a cohesive color palette, and give each piece enough breathing room on the wall. Quality frames make a huge difference—even simple black or white frames from thrift stores look polished when spray-painted to match. Also, scale matters. One large statement piece often looks more expensive than several small ones.
Where should I buy cheap supplies for DIY wall art projects?
Dollar stores are goldmine for basic canvases, frames, and paint supplies. Craft stores like Michaels or Hobby Lobby always have 40-50% off coupons on their apps. Thrift stores offer amazing frames you can paint or update. For fabric and textiles, check discount fabric stores or even clearance sections at home goods stores. Amazon also has bulk craft supplies that work out cheaper per item.
How do I hang DIY wall art without damaging walls?
Command strips are lifesavers for renters and anyone avoiding nail holes. They hold surprisingly well for lightweight art and canvases. For heavier pieces, use proper picture hangers rated for the weight. If you’re creating a gallery wall, use painter’s tape to map out your arrangement on the wall first before committing to holes. Small nail holes are also easy to patch with spackle when you move.
Can I make DIY wall art that works with modern minimalist decor?
Absolutely. Stick to monochromatic color schemes—black, white, gray, and one accent color. Choose simple geometric designs, line art, or abstract pieces with lots of negative space. Pressed botanicals in sleek frames work beautifully, as do minimalist fabric hangings in neutral tones. The key is restraint—fewer pieces with more impact rather than cluttered gallery walls.