35 Gorgeous Candle & Vase Decor Projects You’ll Want to Try
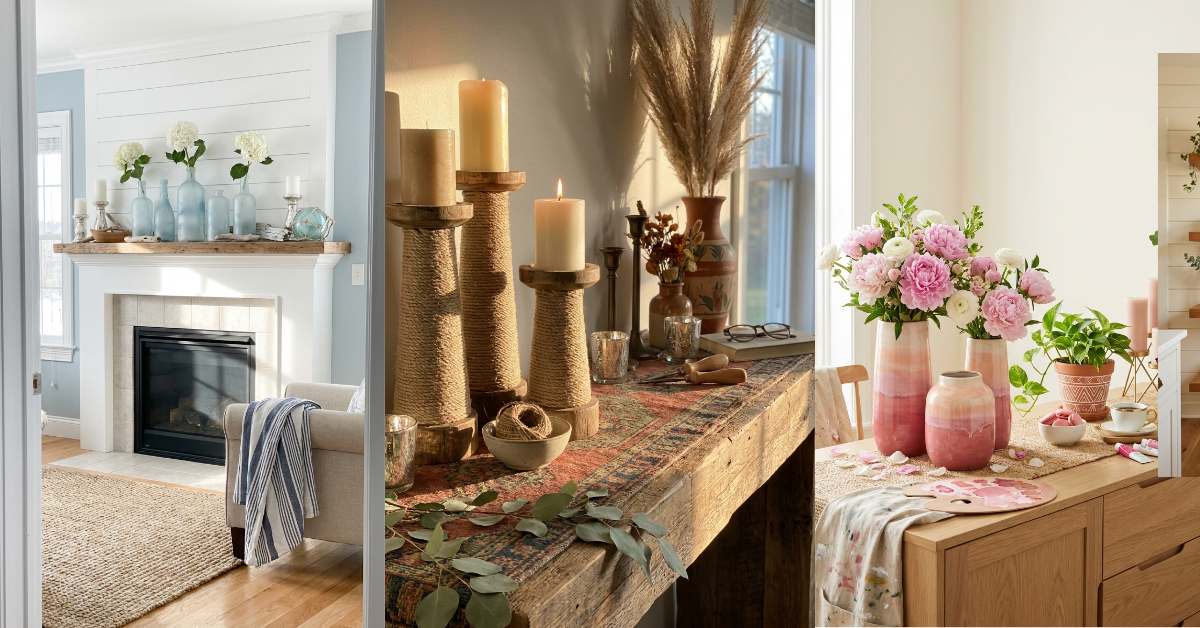
You know that feeling when you walk into a beautifully styled home and everything just feels intentional? Like someone actually thought about what goes on that console table instead of just plopping down whatever was handy? That’s the magic of thoughtfully decorated candles and vases. They’re not just containers or light sources—they’re the personality pieces that make a space feel like yours. And here’s the best part: you don’t need to drop serious cash at fancy boutiques to get that curated look. With a little creativity and some simple supplies, you can create stunning candle and vase displays that look like they came straight from a designer’s Instagram feed. I’m talking painted glass, textured concrete, vintage-inspired finishes, and so much more. Whether you’re into moody neutrals, coastal vibes, or colorful bohemian energy, there’s a project here that’ll make your heart skip a beat. Let’s get into it.
1. Terracotta-Painted Glass Vase Collection
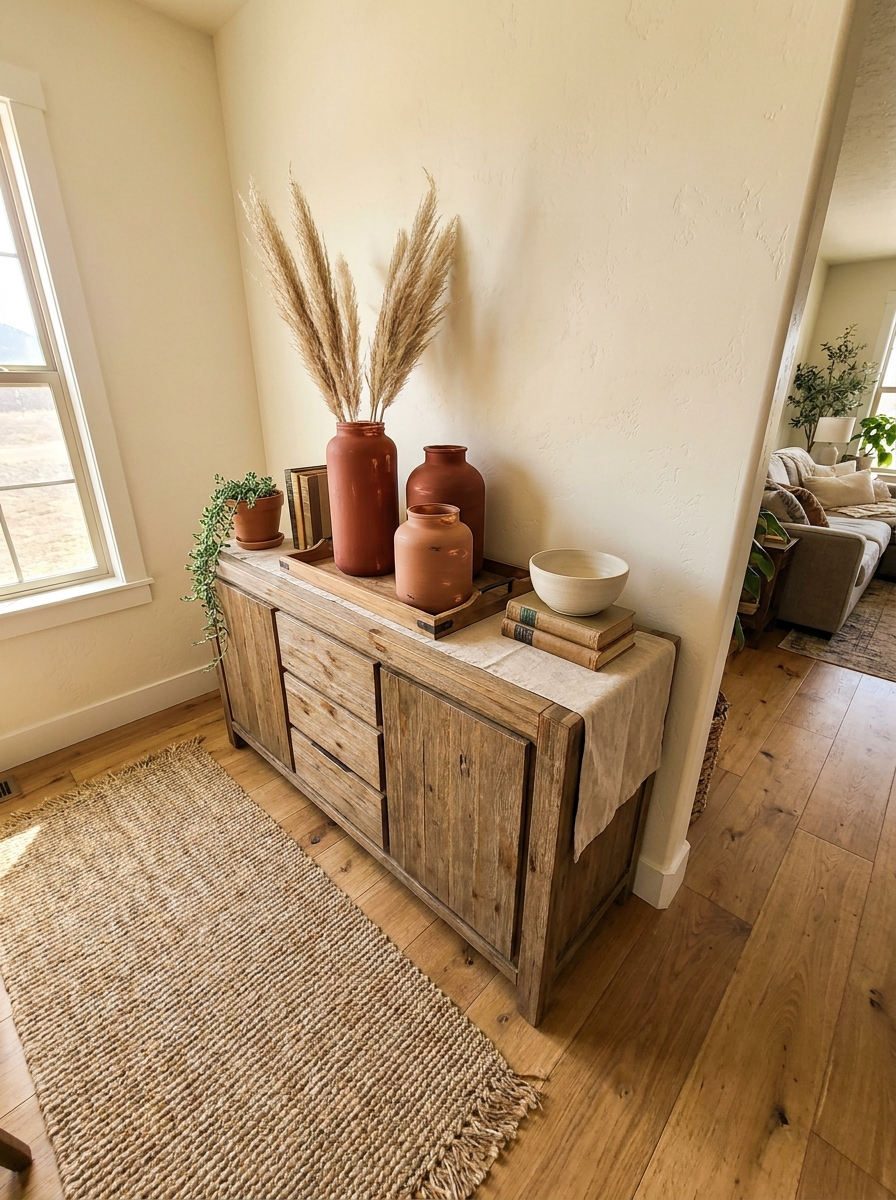
There’s something about terracotta that instantly warms up a space. It’s earthy without being heavy, and when you paint plain glass vases in those gorgeous clay tones, they transform into something you’d swear came from an expensive home store. The beauty here is in the slight imperfection—brush strokes that show, color variations that happen naturally when you layer paint.
Start with thrifted glass vases in different heights. Clean them thoroughly, then apply chalk paint in terracotta, rust, or burnt sienna shades. You can do solid coverage or leave some glass peeking through for a more organic look. Once dry, lightly sand the edges for a worn, vintage feel.
Style them together on a wooden tray or separately throughout your space. Fill them with dried pampas grass or leave them empty to let their shapes shine. They work beautifully on dining tables, entryway consoles, or bedroom nightstands. The warm tones play incredibly well with natural wood furniture and cream-colored textiles.
2. Concrete Pillar Candle Holders with Brass Accents
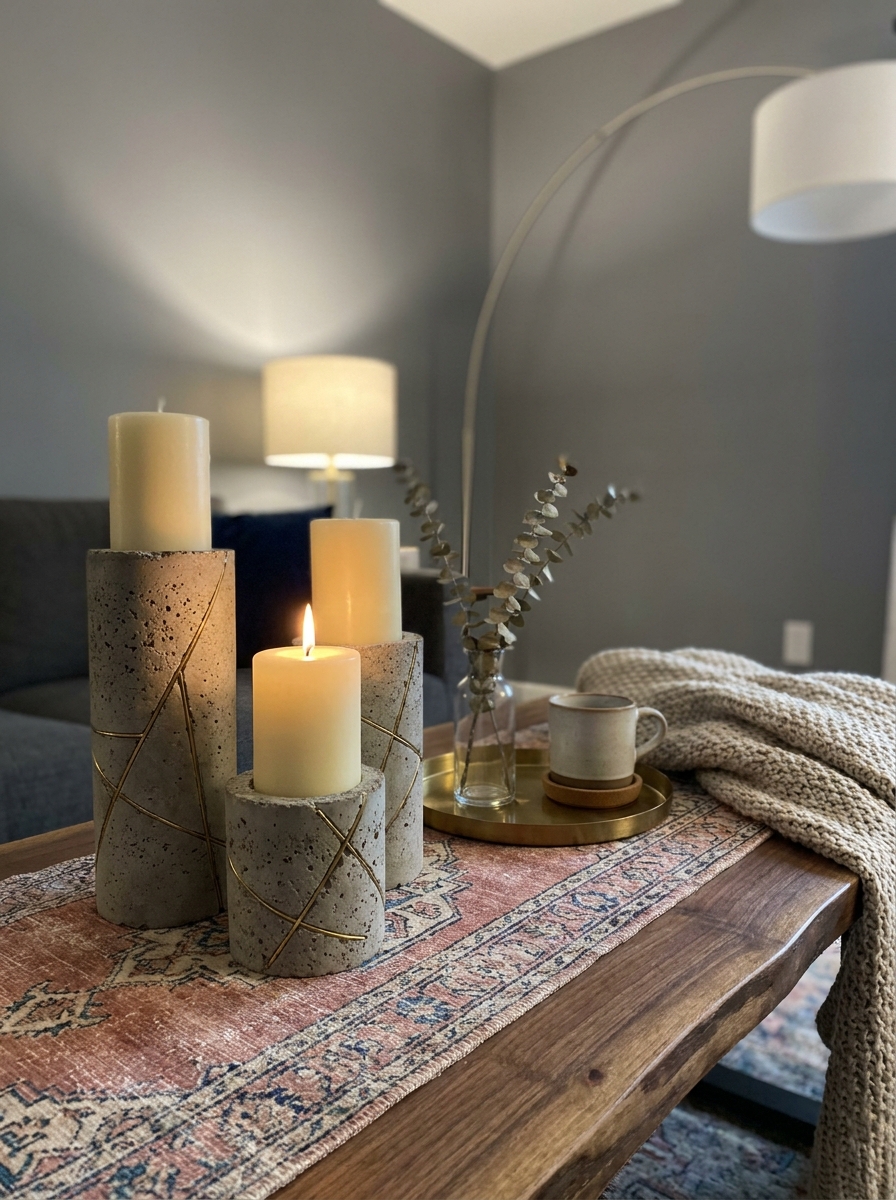
Concrete brings that perfect industrial-chic vibe without feeling cold. When you pair it with warm brass details, you get this gorgeous contrast that feels both modern and inviting. Making your own concrete candle holders is surprisingly simple, and the end result looks like something from a high-end design shop.
You’ll need quick-setting concrete mix, silicone molds in different sizes, and brass wire or thin brass sheets for accents. Mix your concrete according to package directions, pour into molds, and while it’s still slightly wet, press brass wire in geometric patterns or embed small brass pieces. Let it cure completely—usually 24 hours.
The raw concrete texture is beautiful on its own, but you can also seal it for a subtle sheen. These holders work with pillar candles in cream, black, or even colorful options. Group three together on a coffee table or use a single large one as a dining table centerpiece. They’re heavy enough to feel substantial and grounding in a space.
3. Frosted Sea Glass Vase Transformation
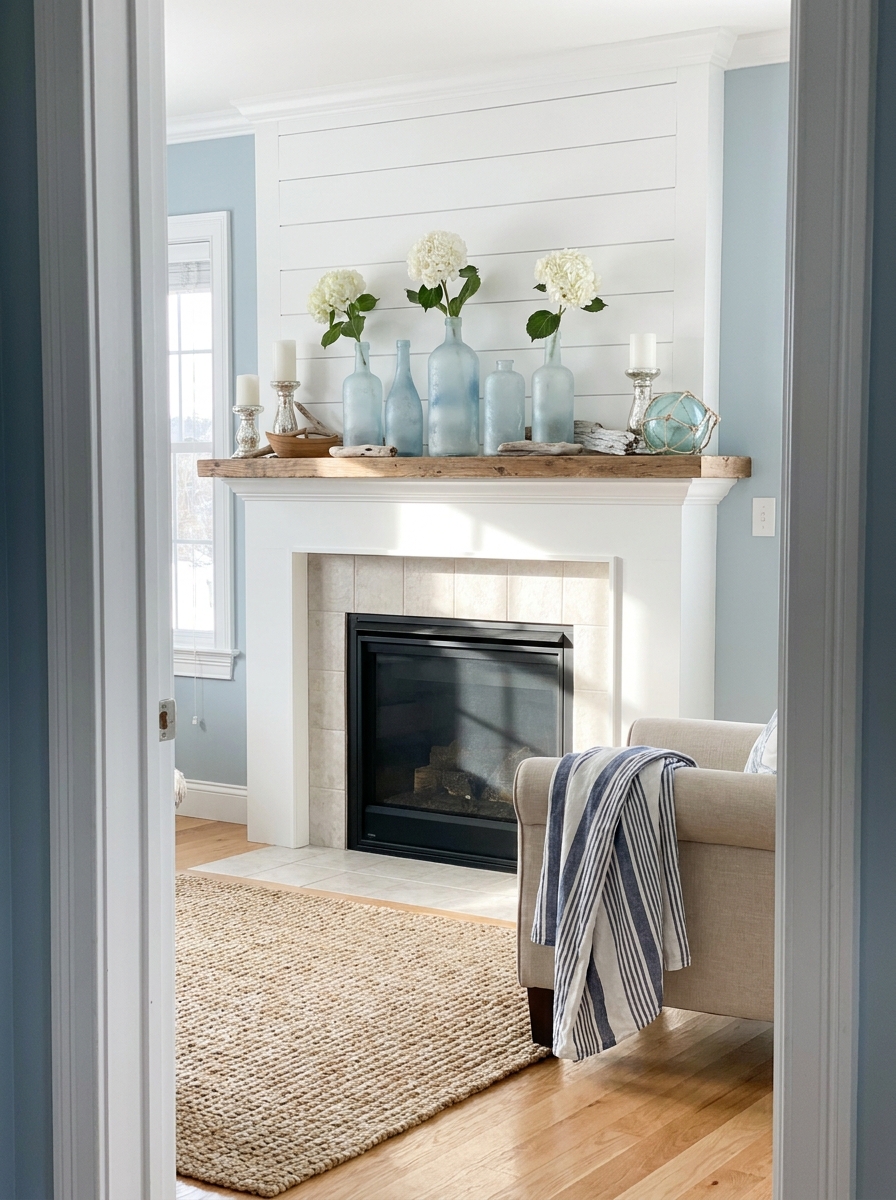
If coastal vibes are your thing, this project is about to become your favorite. Frosted glass instantly evokes that beachy, weathered-by-the-ocean feeling, and it’s ridiculously easy to achieve at home. Clear glass vases get completely reinvented with a simple frosting technique that makes them look like actual sea glass.
Grab some clear glass vases—wine bottles work great too—and a can of frosted glass spray paint. Work in a well-ventilated area and apply light, even coats, rotating the vase as you spray. The key is building up the frost gradually rather than one heavy coat. You want that translucent, not opaque, finish.
Once they’re dry, these beauties are perfect for single-stem flowers or small coastal arrangements. Think white hydrangeas, blue delphiniums, or simple greenery. They look stunning grouped together on a mantel or used individually throughout your home. The frosted finish diffuses light in the prettiest way, especially near windows. And honestly? They’re so convincing that people will ask where you bought them.
4. Wax-Dipped Taper Candles in Custom Colors
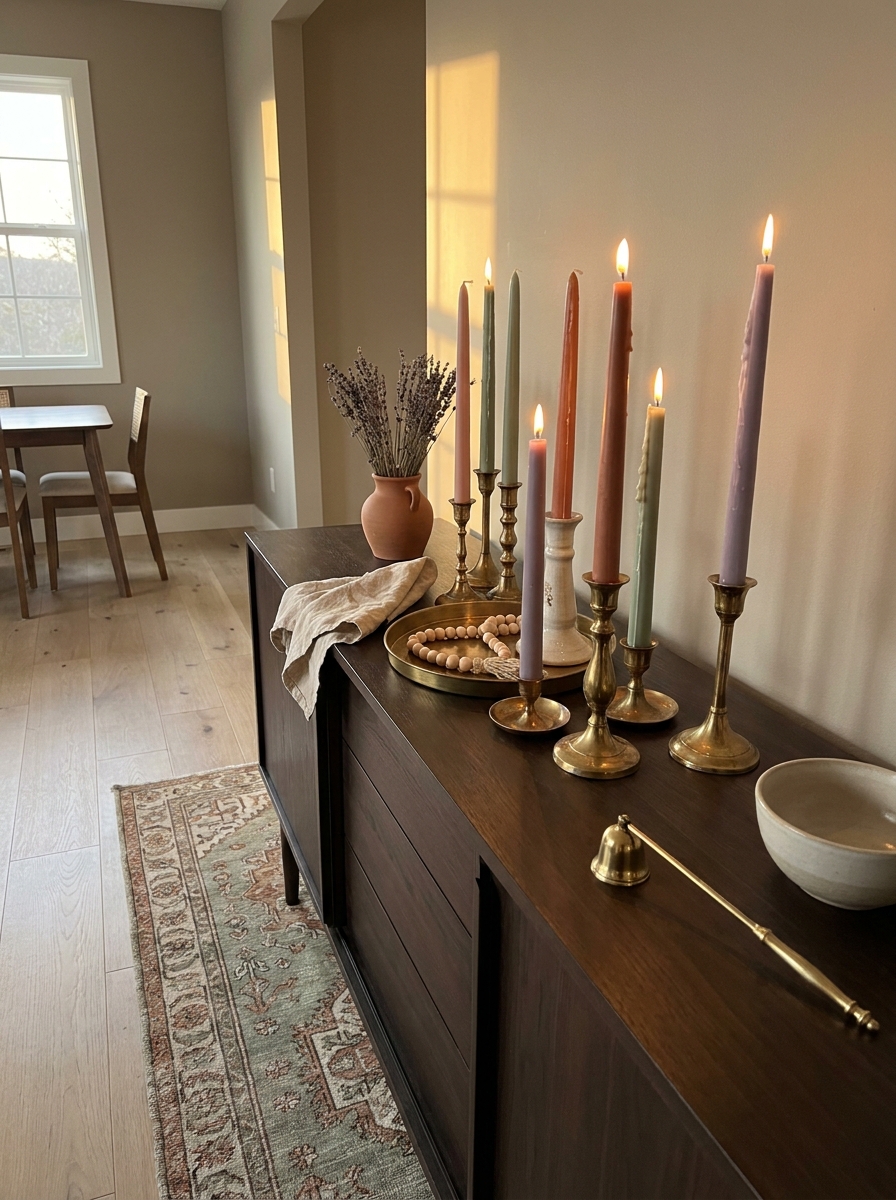
Taper candles are having a major moment, and when you make your own custom-colored ones, you’re basically creating functional art. The wax-dipping technique gives you complete control over color, and you can create ombre effects, two-tone looks, or solid saturated hues that match your exact decor.
Start with plain white taper candles and paraffin wax or soy wax flakes in your chosen colors. Melt the colored wax in a tall container—a repurposed tomato can works perfectly. Dip your tapers repeatedly, letting each layer cool slightly between dips. You’ll watch the color build gradually, and the base gets thicker with each dip, creating that handmade, slightly irregular look that’s so appealing.
The color possibilities are endless. Dusty rose, sage green, terracotta, deep burgundy—whatever speaks to your current mood. Display them in brass candlesticks, vintage glass holders, or simple ceramic bases. They’re absolutely gorgeous on dinner tables but also stunning on mantels or sideboards. And when you light them? The glow through that colored wax is pure magic.
5. Layered Sand and Wax Hurricane Candles
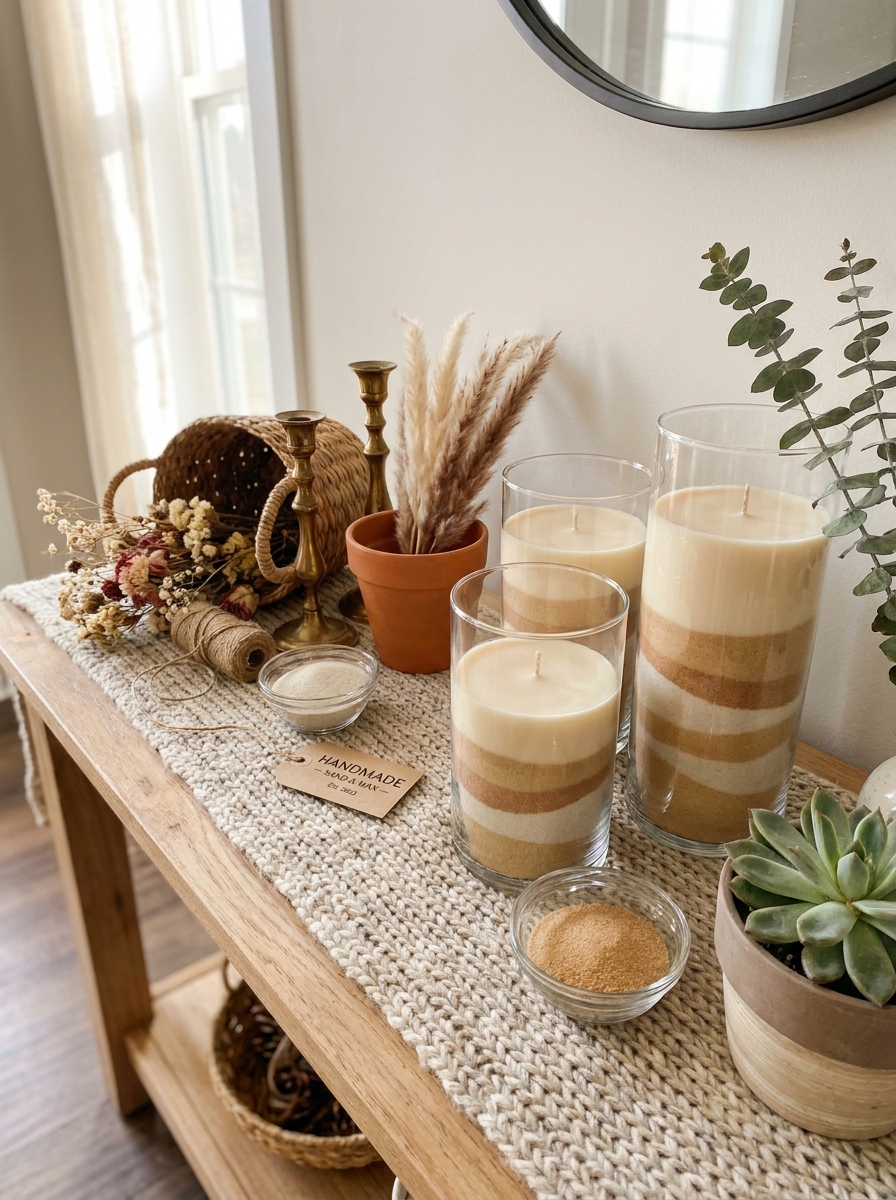
This project is like making art you can light on fire—in the best way! You’ll layer colored sand inside clear glass hurricanes, then pour wax on top to create these gorgeous striped candles that look way more expensive than they are.
I love using different shades of one color family—maybe creams, tans, and soft browns for a desert vibe, or blues and whites for something coastal. The sand creates natural texture and weight, and when the candle burns down, you get this amazing view of all those layers.
The trick is using a funnel or rolled paper to pour your sand precisely. Tap the glass gently on your counter between layers so the sand settles flat. Then pour your melted wax slowly so it doesn’t disturb your perfect stripes. I like adding a subtle scent that matches the color story—vanilla for warm tones, ocean breeze for blues. These make incredible gifts because each one looks totally unique!
6. Painted Botanical Vase Collection
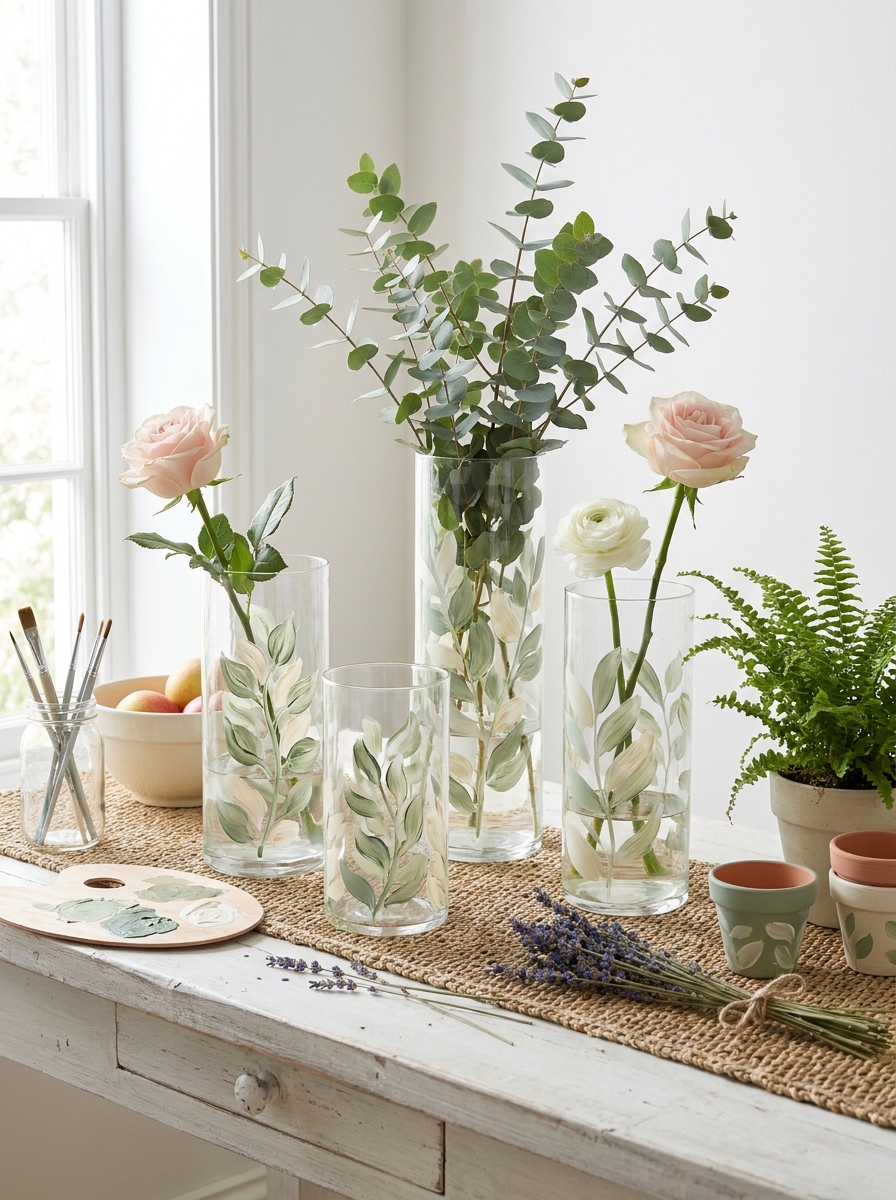
I’m obsessed with hand-painting simple leaf and flower designs on plain glass vases! You don’t need to be an artist—honestly, the more imperfect and loose your brushstrokes, the better these look.
Grab some ceramic or glass paint in 2-3 coordinating colors and practice your leaves on paper first. Think simple shapes—eucalyptus sprigs, monstera leaves, or tiny wildflowers. I like painting on thrifted vases of different heights so the whole collection feels curated but not matchy-matchy. The beauty is in the handmade quality.
What I love most is that these vases tell a story. Every brushstroke is yours. I did a whole set in sage green and cream last spring, and people still ask where I bought them! Display them in a cluster on a dining sideboard, some with fresh stems and some empty to show off your painted details. The imperfections make them feel special and completely personal to your home.
7. Rope-Wrapped Pillar Candle Pedestals
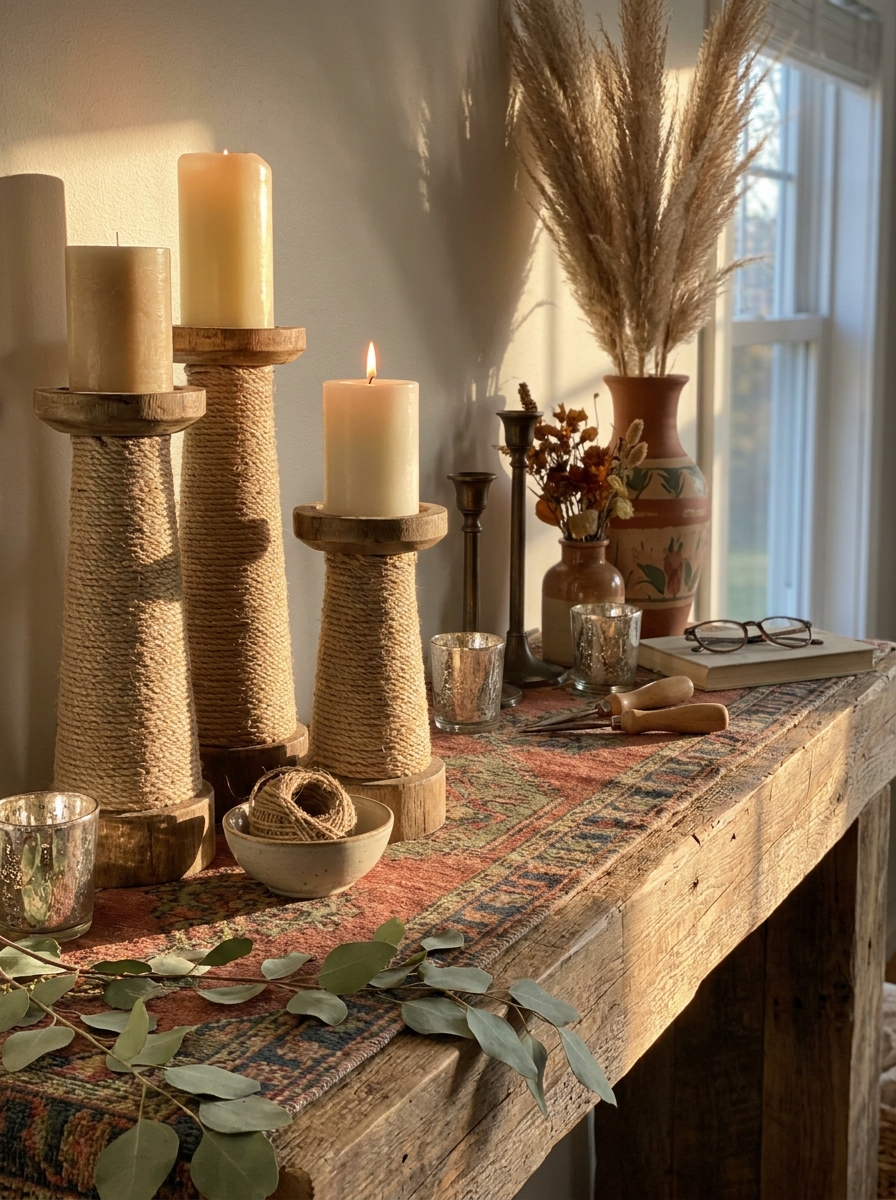
This DIY gives you that elevated, expensive look without the price tag! You’re basically taking simple wooden blocks or candle stands and wrapping them in natural jute rope or cotton cord to create textured pedestals for your pillar candles.
Start with wood blocks in different heights—craft stores sell these, or cut your own if you’re handy. Secure one end of your rope with hot glue, then wrap tightly, adding dabs of glue every few inches as you spiral up. The rope texture adds instant warmth and that organic, artisan vibe I can’t get enough of.
I made three in varying heights and topped them with chunky ivory pillar candles. The neutral rope works with literally everything, but you could also try dyed rope in terracotta or charcoal for something moodier. Group them on a mantel or entryway table with some greenery, and suddenly your whole space feels more considered and styled. The texture combo of rough rope and smooth wax is chef’s kiss!
8. Marbled Clay Bud Vase Set
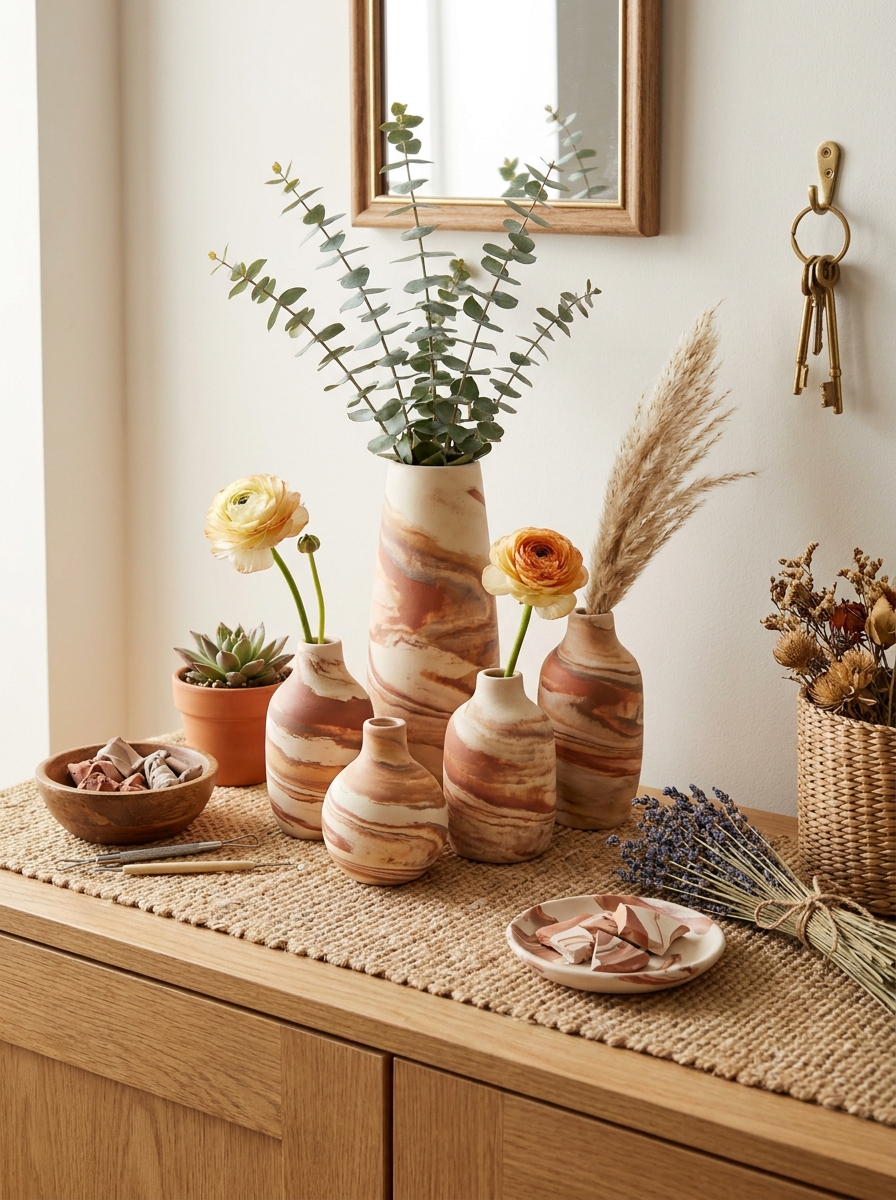
Air-dry clay is my current obsession, and these marbled bud vases are ridiculously fun to make! You blend two or three colors of clay together—but not completely—so you get these gorgeous swirled patterns that look like natural stone.
The process is almost meditative. Knead different colored clays partially together, then shape small vases by hand or using simple molds. Each one comes out totally unique because the marbling is random. I love making a whole family of them in different sizes—some tall and skinny, some short and round.
Once they’re dry and sealed, they have this beautiful matte, organic texture that feels so earthy and modern at the same time. Use them for single stem flowers or leave them empty as sculptural objects. I made mine in cream and terracotta swirls, and they’re honestly my favorite thing on my entryway credenza right now. People always stop and ask about them, and I love saying “I made those!”
9. Vintage Book Page Decoupage Vases
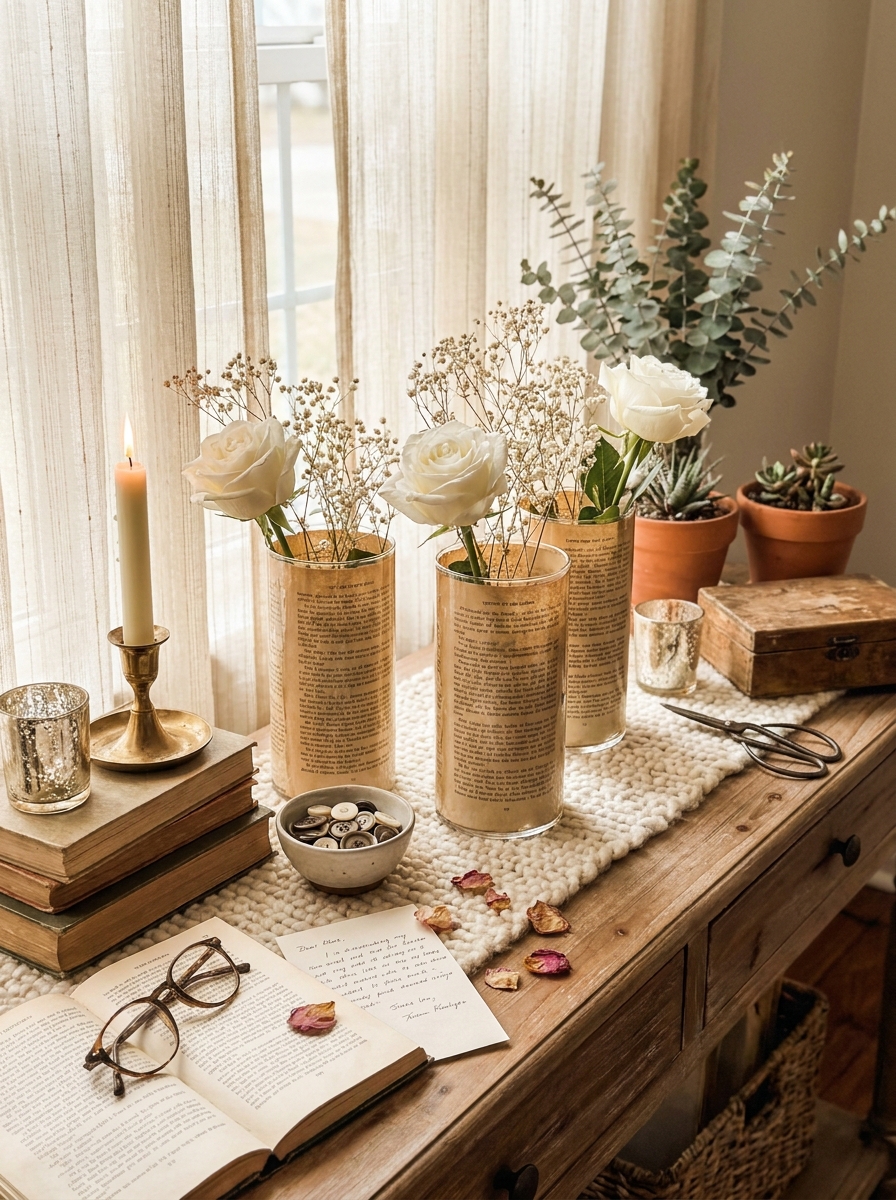
This is where old books get a second life in the prettiest way possible! I’ve been collecting thrifted glass vases and giving them this romantic vintage treatment using pages from damaged books. The text peeking through creates this gorgeous depth that you just can’t buy in stores.
The technique is easier than you think. You tear pages into pieces, brush on Mod Podge, and layer them onto clean glass. The edges get a little wrinkled and imperfect, which honestly makes them more charming. I love using poetry books or old novels with yellowed pages for that aged look.
What I adore most is how the light plays through the translucent paper when you add water and flowers. It creates this soft, dreamy glow that feels so cozy. Group three different heights together and you’ve got an instant centerpiece that looks like a vintage shop find.
10. Ombre-Dipped Ceramic Vase Trio
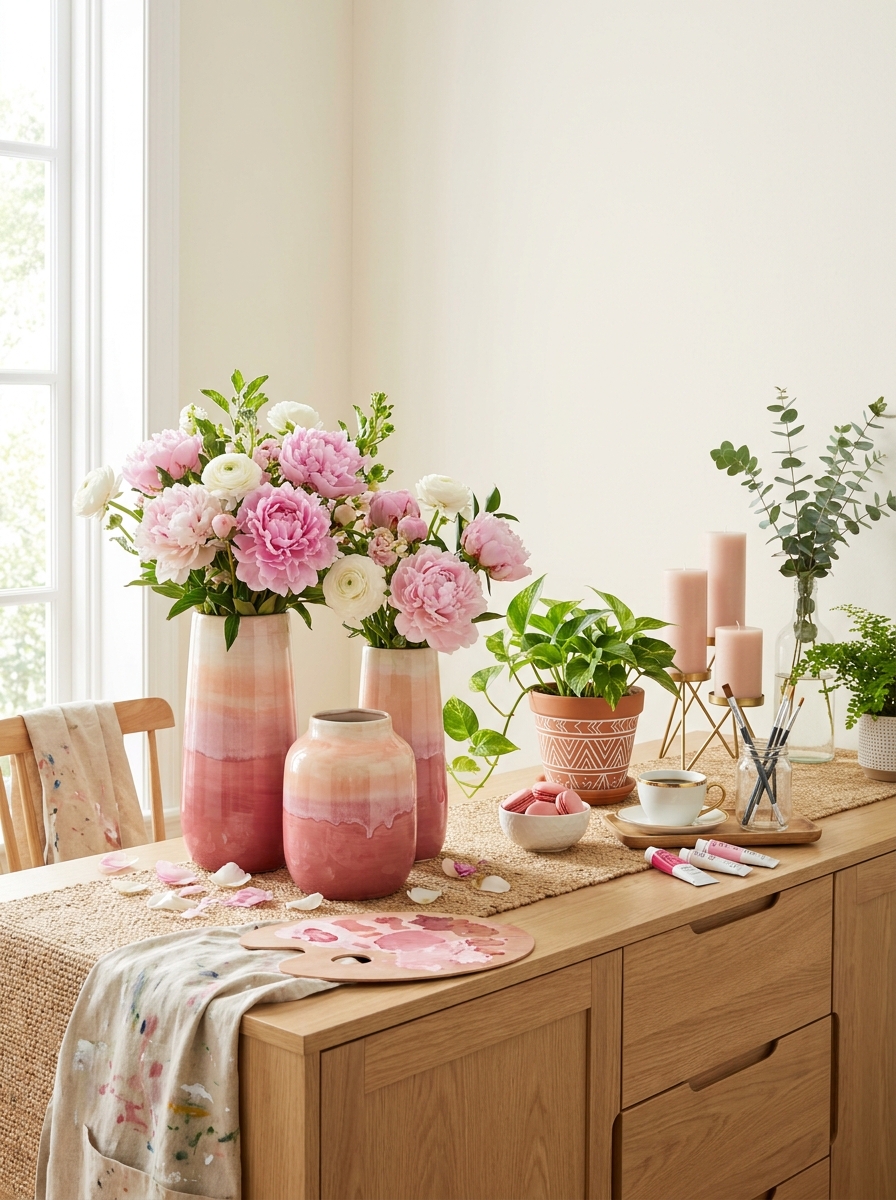
Color gradients are having such a moment right now, and this DIY is pure magic! I grabbed plain white ceramic vases from the dollar store and transformed them with this gorgeous ombre dipping technique. The color slowly fades from deep to light, and it looks professionally done.
Here’s the fun part: you mix acrylic paint with water to get different shades of the same color. Start with your darkest mixture and dip the vase bottom first. Let it dry, then dip again with a lighter shade, stopping higher up. Repeat with progressively lighter shades until you get that dreamy fade.
I made mine in a blush pink palette, but imagine this in sage green, lavender, or even a moody charcoal gray! The best part is you can customize the colors to match your exact room vibe. They look incredible grouped together or scattered throughout your space.
11. Geometric Gold Leaf Candle Vessels
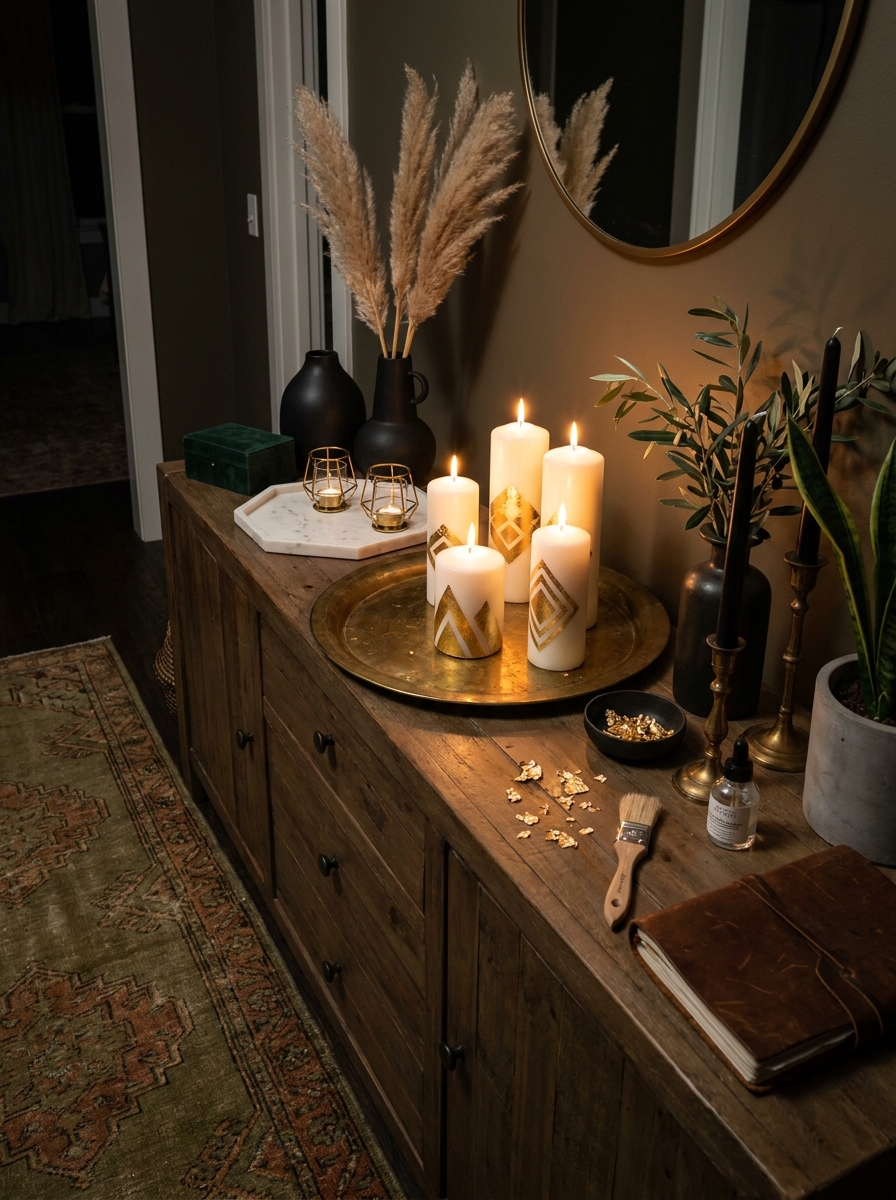
Gold leaf makes everything feel fancy, but this project is surprisingly budget-friendly! I’ve been making these geometric pattern candles using basic white pillar candles and gold leaf sheets. The contrast between matte white wax and shiny gold is absolutely stunning.
You don’t need perfect lines here, which is what I love. Cut your gold leaf into triangles, squares, or abstract shapes. Brush a thin layer of adhesive onto your candle where you want the gold, press the leaf on, and gently brush away the excess. The imperfect edges actually add to the handmade charm.
These candles catch the light in the most beautiful way and look expensive displayed on a mantel or dining table. I group mine with other metallic accents for a cohesive look that feels modern and luxe. They also make incredible handmade gifts!
12. Color-Blocked Wooden Vase Collection
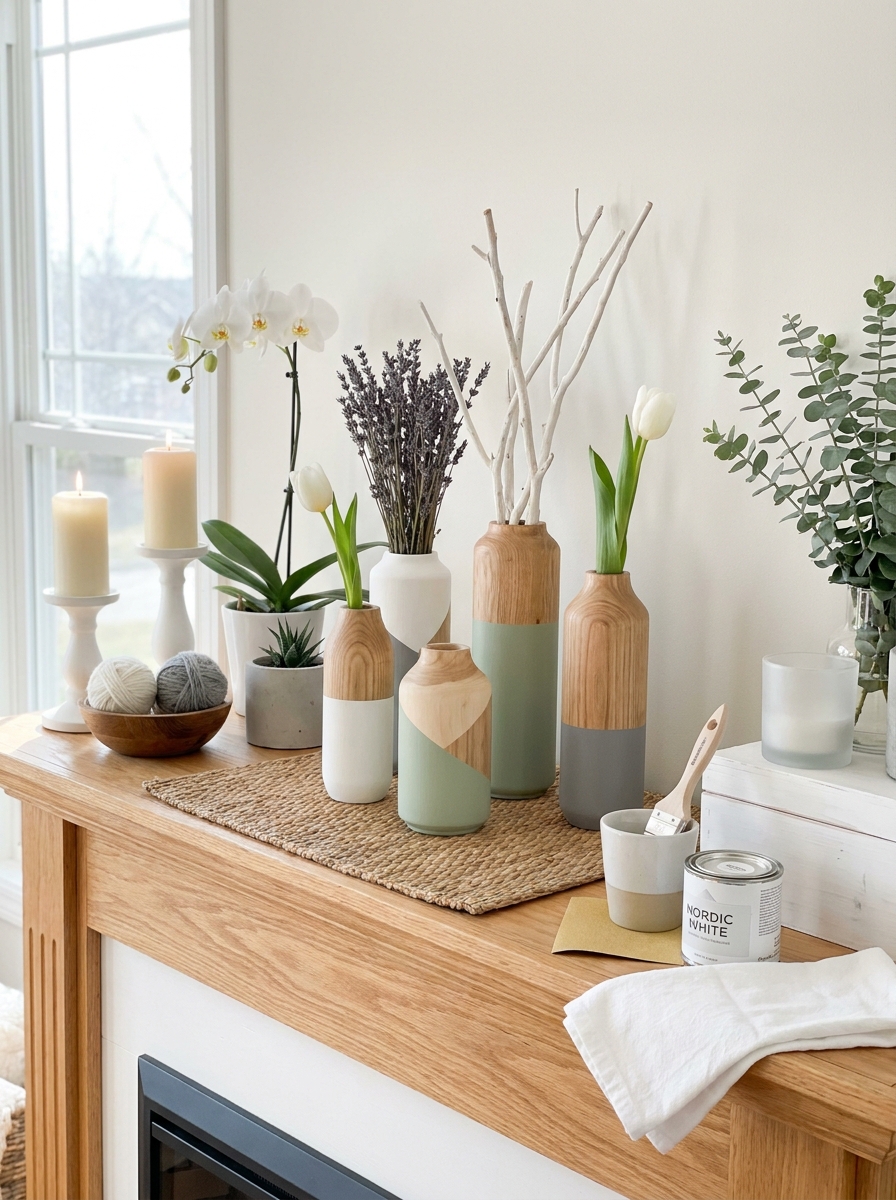
Wood vases have this amazing organic warmth that glass just can’t match! I found unfinished wooden vases at the craft store and gave them this modern color-blocked treatment. Half natural wood, half painted in bold color—it’s such a fun contrast that works with any decor style.
The key is finding that perfect line where the color meets the wood. I use painter’s tape to get a crisp edge, then apply two coats of acrylic or chalk paint. When you peel off the tape, that clean division looks so intentional and designed. You can go horizontal, diagonal, or even create multiple blocks.
I love mixing different colors in the same collection—one terracotta, one sage, one navy. The natural wood ties them all together while each piece gets its own personality. They’re perfect for dried flowers since you don’t need to worry about water with wooden vases!
13. Pressed Flower Resin Candle Holders
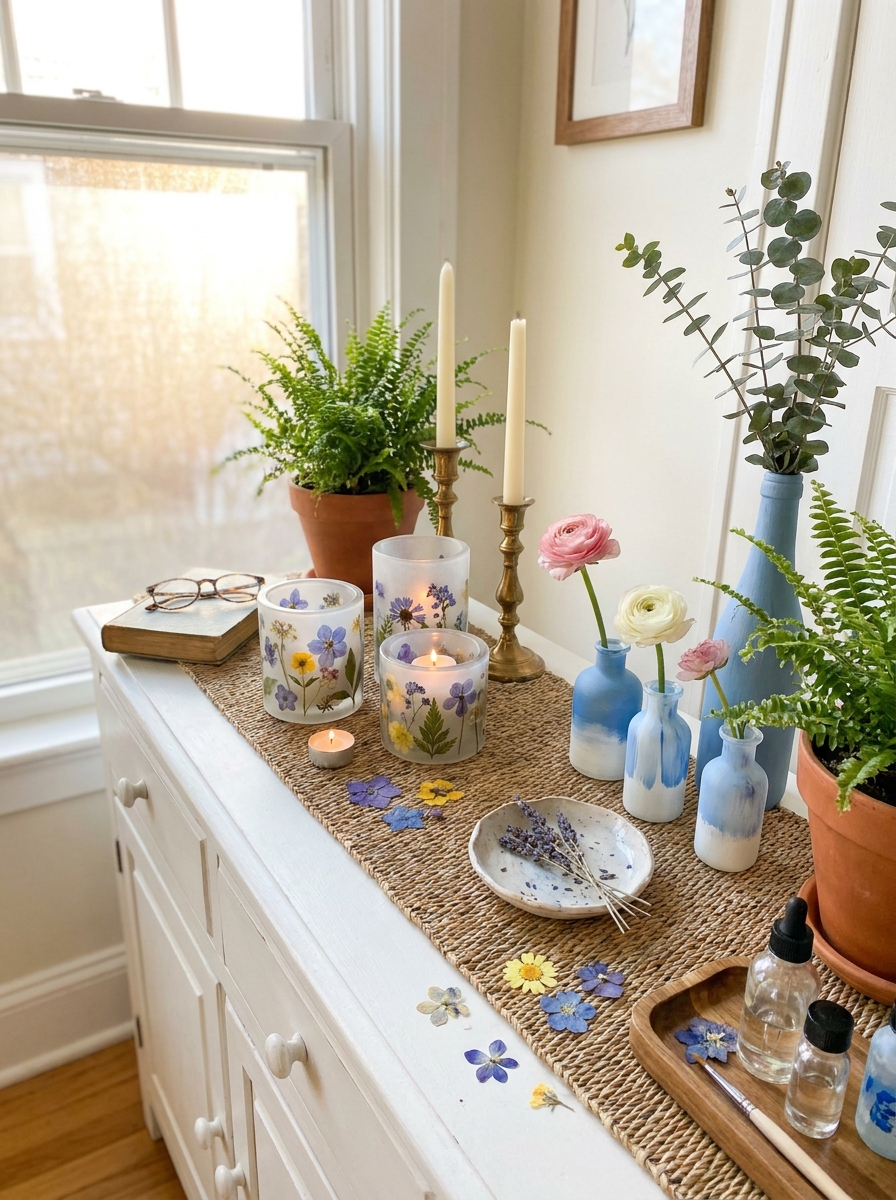
I stumbled onto this technique completely by accident, and now I can’t stop making them. You basically pour clear resin into small molds with pressed flowers suspended inside, creating these gorgeous translucent candle holders that catch the light like little jewels.
The flowers I press between heavy books for about two weeks—think delicate pansies, tiny ferns, or those sweet white Queen Anne’s lace blooms. When you embed them in resin, they keep their color way longer than you’d expect. I use silicone molds shaped like cylinders or cubes, and the resin captures every petal detail perfectly.
What I love most? When you light a tealight inside, the glow shines through the flowers and creates these dreamy shadows on your table. It’s like having a little botanical museum piece that’s also functional. They make incredible gifts too—I made a set for my sister’s birthday and she literally cried. The best part is each one turns out completely unique depending on which flowers you choose.
14. Distressed Chalk Paint Mason Jar Vases
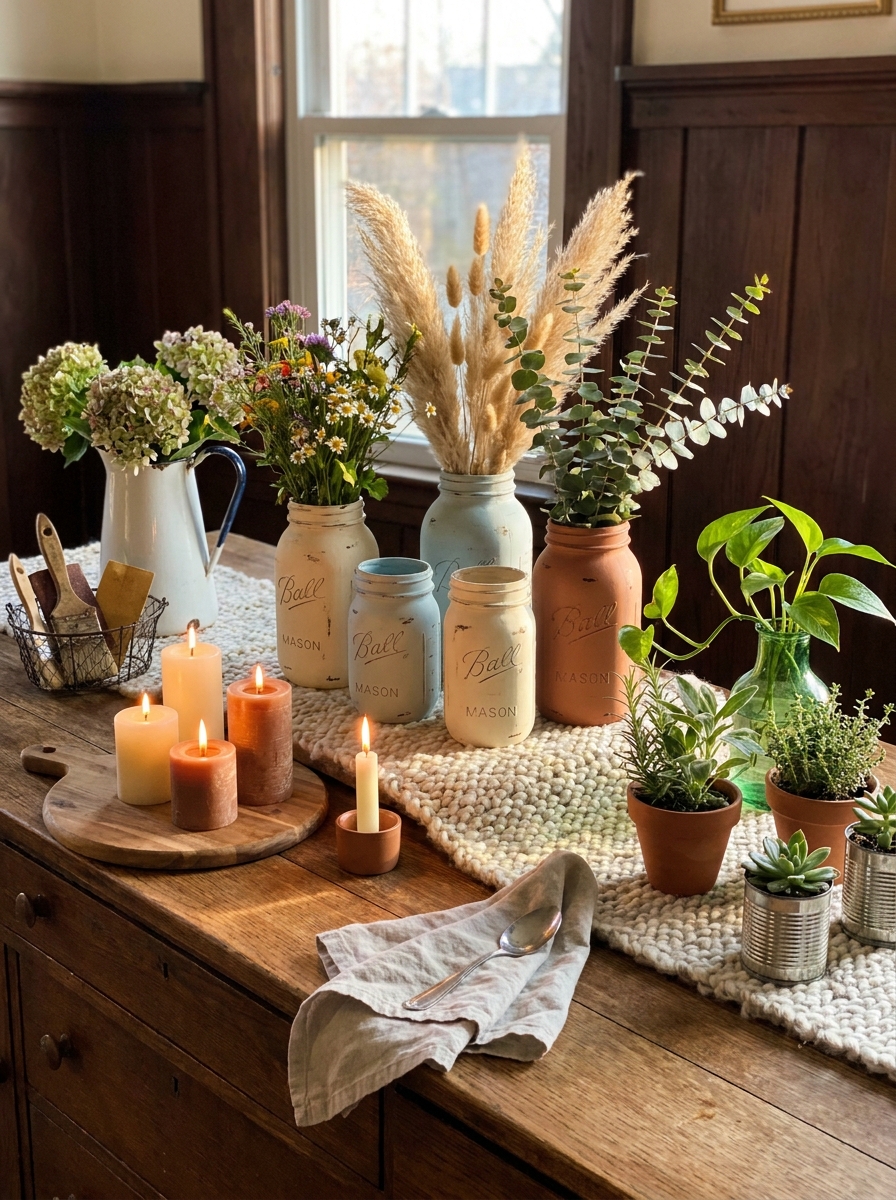
Mason jars get a bad rap for being overdone, but hear me out. When you layer chalk paint and then distress it just right, these humble jars transform into something that looks like you found them at a French flea market.
I start with clean jars in different sizes and paint them in soft, muted colors—dusty blue, sage green, warm cream, or that perfect greige shade. Here’s where the magic happens: after the paint dries completely, I use fine-grit sandpaper to gently rub away paint around the edges and raised lettering. This reveals glimpses of the glass underneath and creates that aged, vintage patina.
The distressing makes each jar look like it has a story. Some I sand more aggressively for a really weathered farmhouse look, others I barely touch for just a hint of age. Group them together on a tray with fresh flowers, and suddenly your kitchen counter looks like a page from a design magazine. My neighbor saw mine and immediately asked me to make her a set.
15. Twisted Beeswax Taper Candles
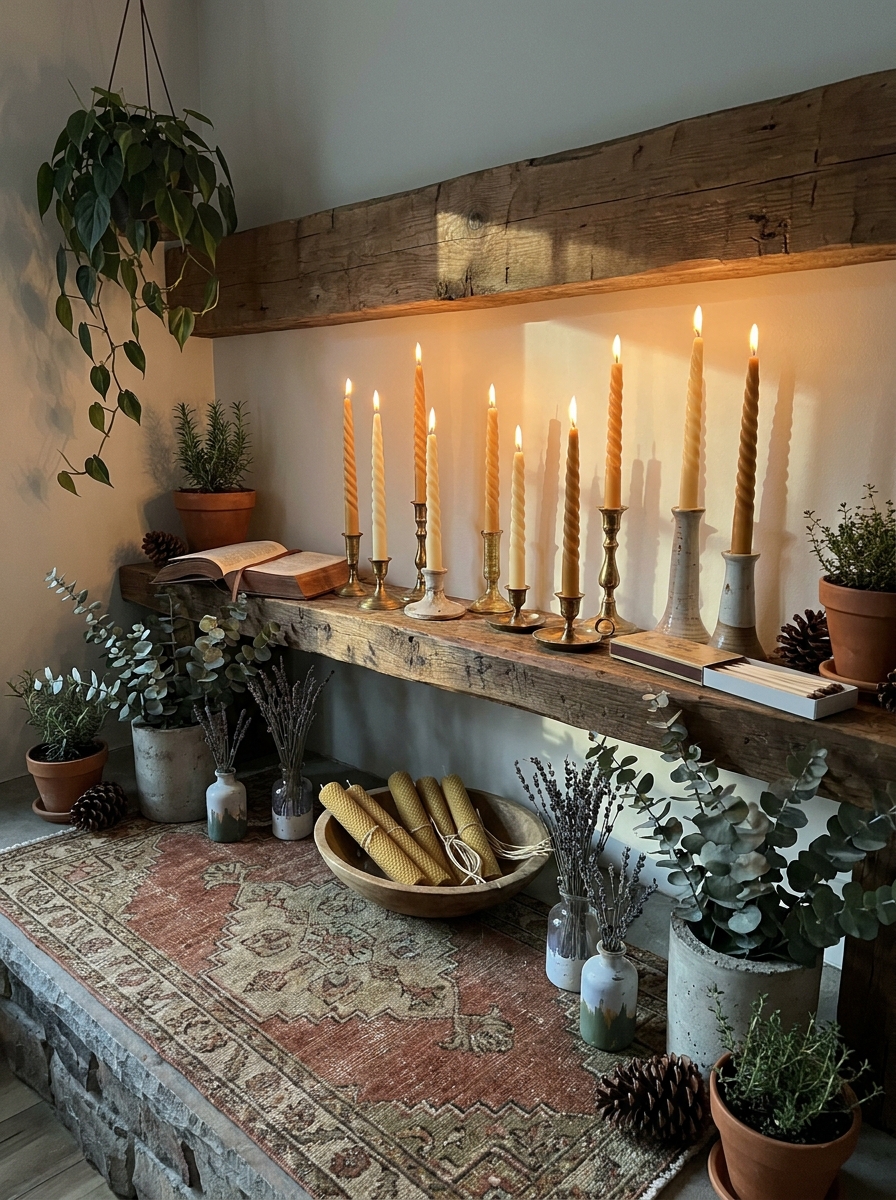
Have you ever worked with beeswax sheets? They smell like honey and sunshine, and they’re ridiculously easy to shape. You can roll them into regular tapers, sure, but twisting them creates this incredible spiral texture that catches candlelight in the most beautiful way.
I warm the beeswax sheets slightly with a hairdryer—just enough to make them pliable—then roll them around a wick like you normally would. Before they cool completely, here’s the fun part: I gently twist the whole candle, creating these gorgeous spiral ridges that run from top to bottom. The natural golden color of beeswax is already stunning, but you can find sheets in beautiful muted colors too.
They burn slower than regular candles and fill your room with the subtle scent of honey. I make them in different heights and group them together in mismatched vintage candleholders. The twisted texture creates these amazing shadow patterns when they’re lit. Honestly, they’re so pretty I almost don’t want to burn them. Almost.
16. Watercolor-Washed Ceramic Vase Set
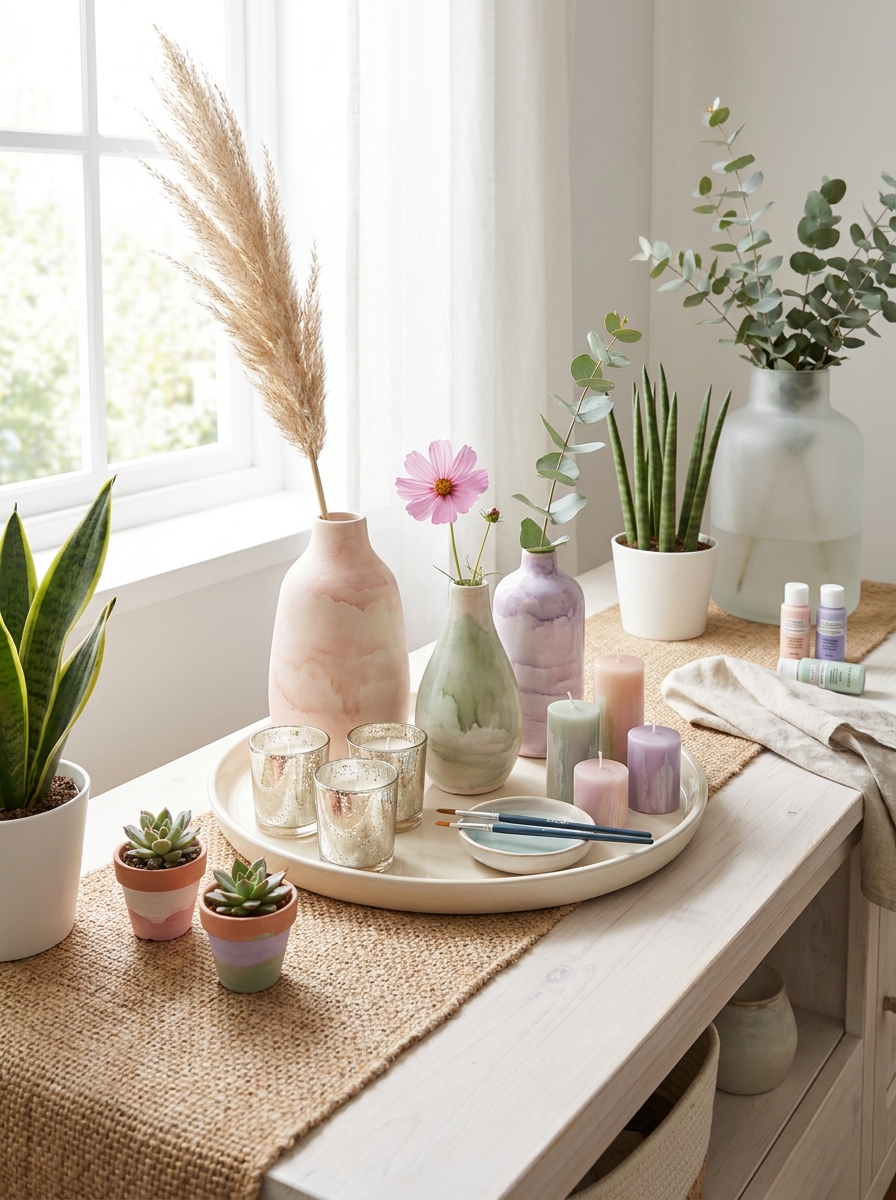
This project feels like painting but without any of the pressure. You’re literally just washing diluted ceramic paint over plain white vases and letting it pool and blend however it wants. The results are these soft, dreamy pieces that look professionally made.
I grab affordable white ceramic vases from the craft store—different shapes and heights work best. Then I mix ceramic paints with lots of water until they’re super watery, almost like dye. I choose two or three colors that blend well together, like blush pink and sage green, or dusty blue and lavender. You brush the diluted paint onto the vase and tilt it around, letting the colors run into each other and create organic patterns.
No two vases ever turn out the same, which is exactly the point. Some get more color saturation at the bottom, others have streaky watercolor effects all over. After they dry, you bake them in the oven to set the paint. Grouped together, they create this cohesive but wonderfully imperfect collection that adds such a gentle, artistic vibe to any room.
17. Wine Bottle Vases with Leather Wrapped Necks
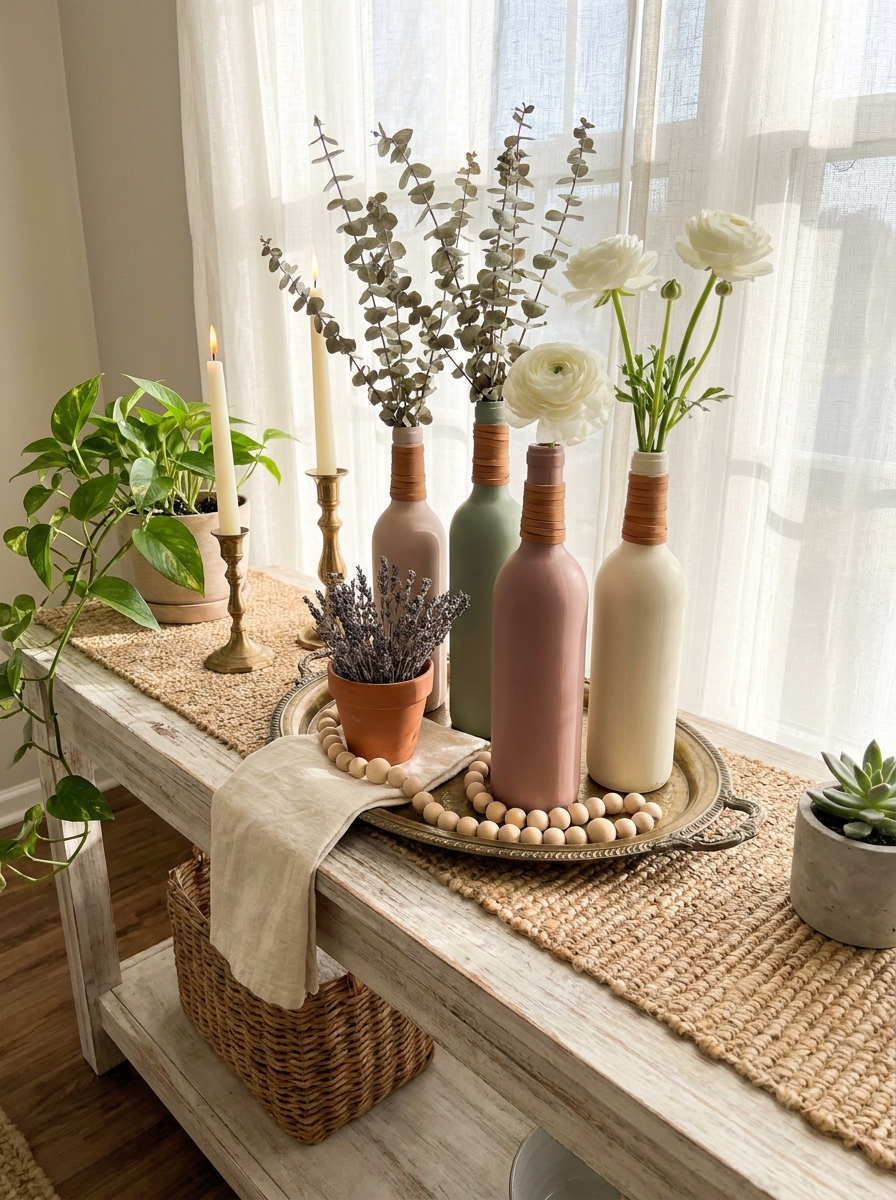
You know those beautiful wine bottles you can’t bring yourself to toss? Yeah, let’s turn them into something gorgeous. I’ve been wrapping the necks with leather strips and painting the glass in soft matte colors. The contrast between rustic leather and painted glass is just *chef’s kiss*.
The trick is getting your hands on different bottle shapes. I haunt the recycling bin after dinner parties and ask friends to save theirs. Once you remove the labels with hot soapy water, you’re halfway there. A coat or two of chalk paint transforms them completely. The leather wrapping adds that handmade boutique touch that makes people think you spent a fortune.
I love clustering three or five bottles together in varying heights. Each one gets a single stem flower or a sprig of eucalyptus. Nothing fancy, just simple and pretty. They look expensive but cost practically nothing to make.
18. Citrus-Infused Soy Candles in Vintage Teacups
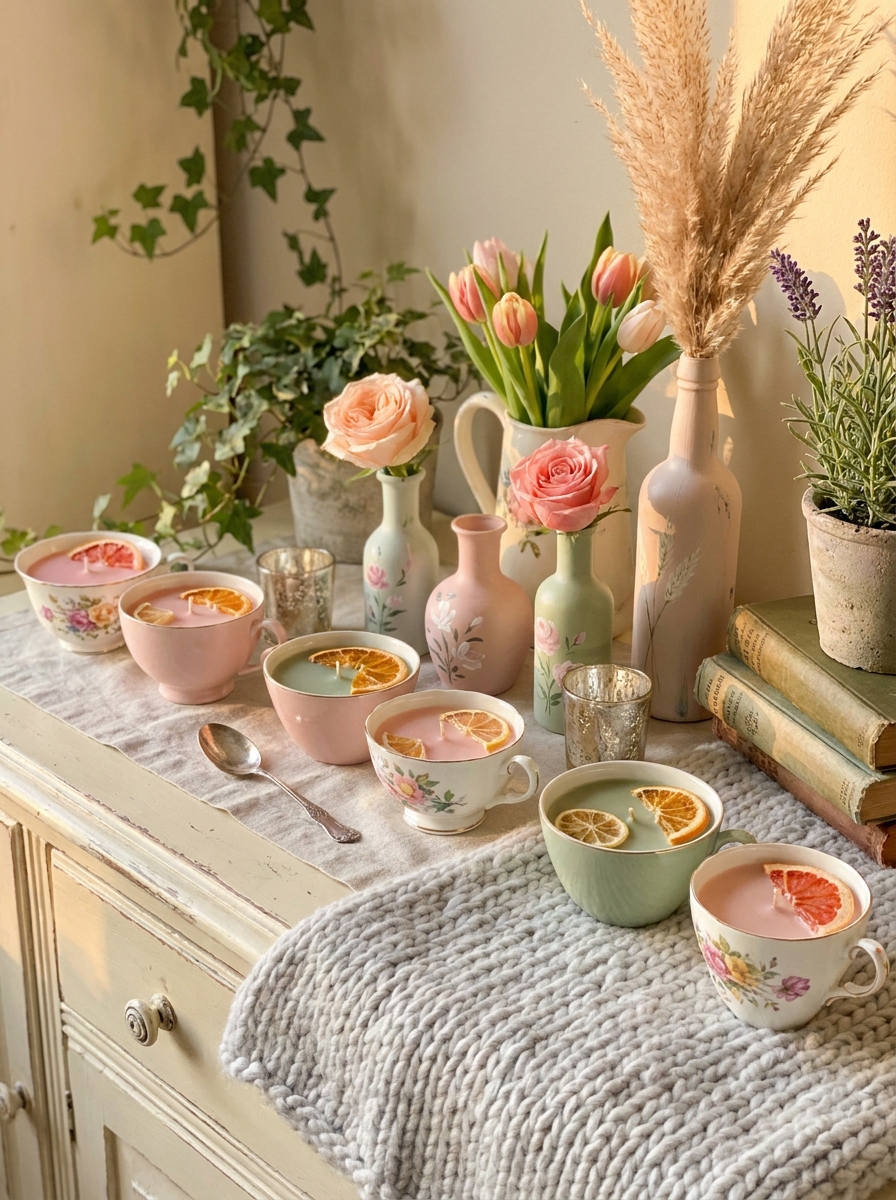
I’m obsessed with making candles in thrifted teacups. There’s something so charming about a delicate floral cup filled with homemade wax. Plus, soy wax is ridiculously easy to work with, and adding dried citrus slices makes them look professionally crafted.
Thrift stores are goldmines for mismatched teacups. I grab any pattern that speaks to me, knowing they’ll look intentional grouped together. The process is simple: melt soy wax, add your favorite essential oils, secure a wick, and pour. Before the wax fully sets, press thin dried orange or lemon slices against the sides. They create the prettiest effect when the candle burns.
These make incredible gifts, but honestly? I keep most for myself. They’re perfect for cozy corners where you want just a hint of candlelight without committing to a full pillar. The vintage cup adds instant character to any space.
19. Embossed Metal Vase Sleeves with Patina Finish
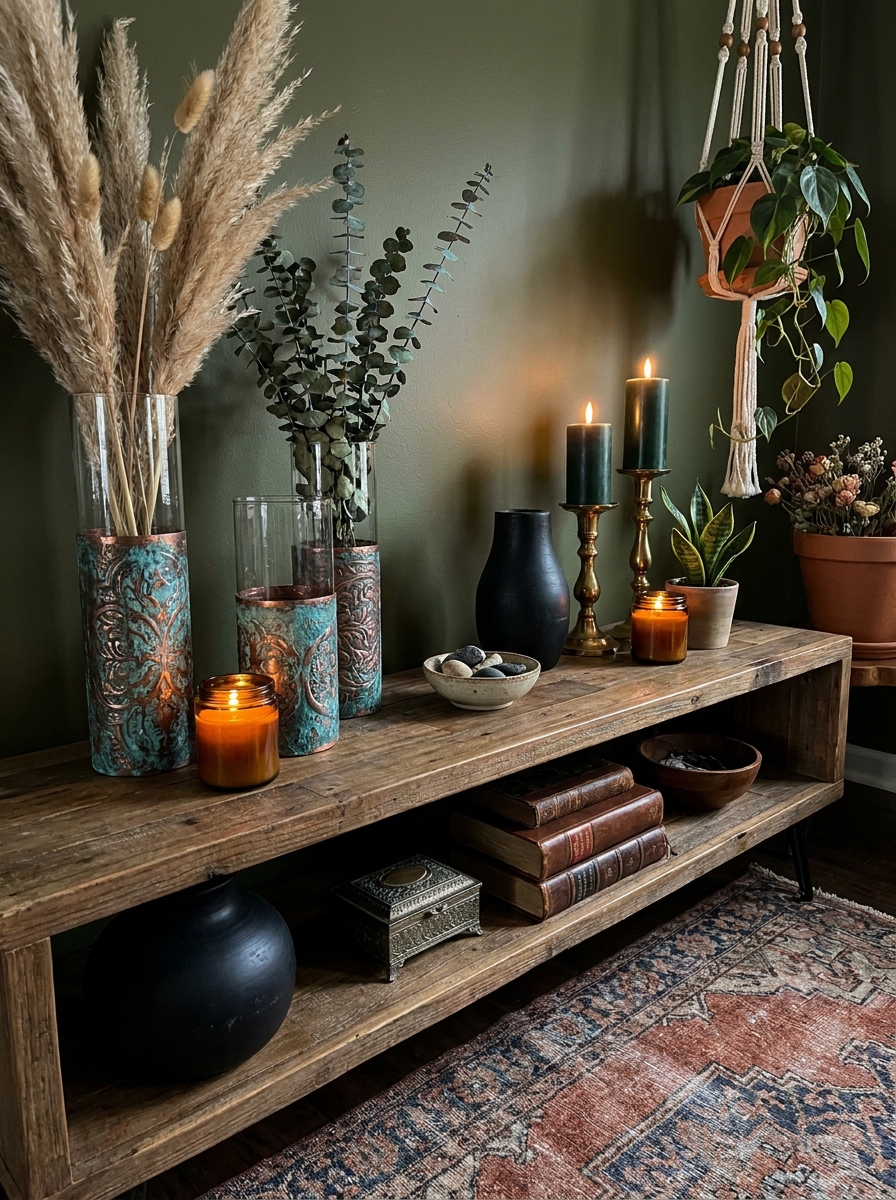
Want to make cheap glass vases look like expensive antiques? Metal sleeves are your answer. I buy thin copper or aluminum sheets from the hardware store and emboss them with simple designs using wooden skewers. Then comes the magic: aging them with vinegar and salt to create that gorgeous patina.
The embossing is weirdly therapeutic. You just place the metal over a foam pad and press designs from the back with anything pointy. Geometric patterns, swirls, your initials—whatever feels right. Once you wrap them around plain glass cylinder vases, they become statement pieces. The patina develops over a few hours and looks authentically aged.
I use these sleeves on everything from dollar store vases to recycled jars. They slide on and off, so you can switch them between vessels. The weathered metal brings instant vintage character to modern spaces.
20. Sculptural Plaster Candle Vessels with Natural Divots
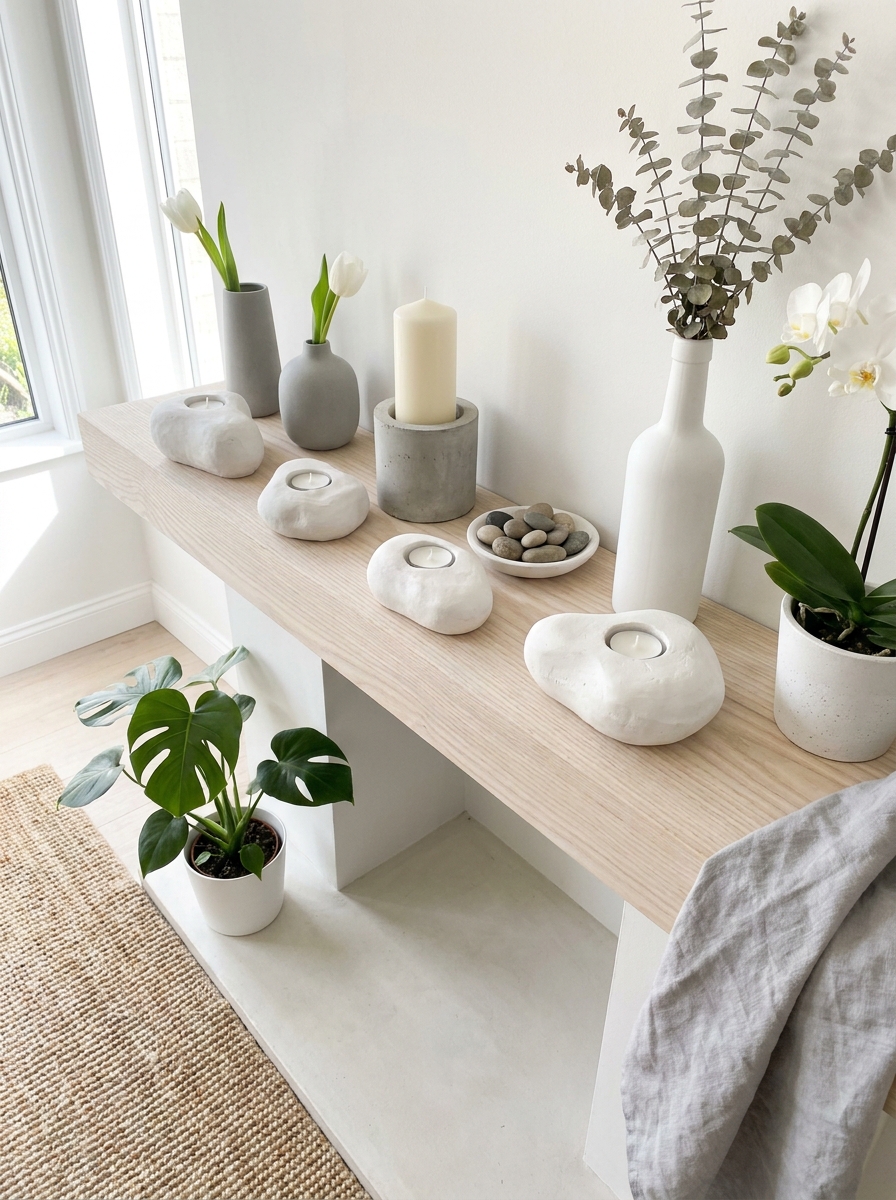
Plaster is having a moment, and I’m here for it. These sculptural vessels look like gallery pieces but are actually super beginner-friendly. The organic, imperfect shapes with natural divots make each one completely unique. No two ever turn out exactly the same, which is the whole point.
I use plaster of Paris and mold it in everything from balloons to cardboard boxes lined with plastic. The trick is working fast—plaster sets quickly. Once demolded, I carve out spaces for tea lights or votives using a spoon while it’s still slightly soft. The chalky white texture is gorgeous on its own, but sometimes I add a hint of pigment for barely-there color.
These vessels work beautifully in minimalist spaces where you want texture without busy patterns. They’re substantial enough to anchor a coffee table display but light enough not to overwhelm. Pure modern simplicity.
21. Hand-Poured Gradient Candles in Recycled Glassware
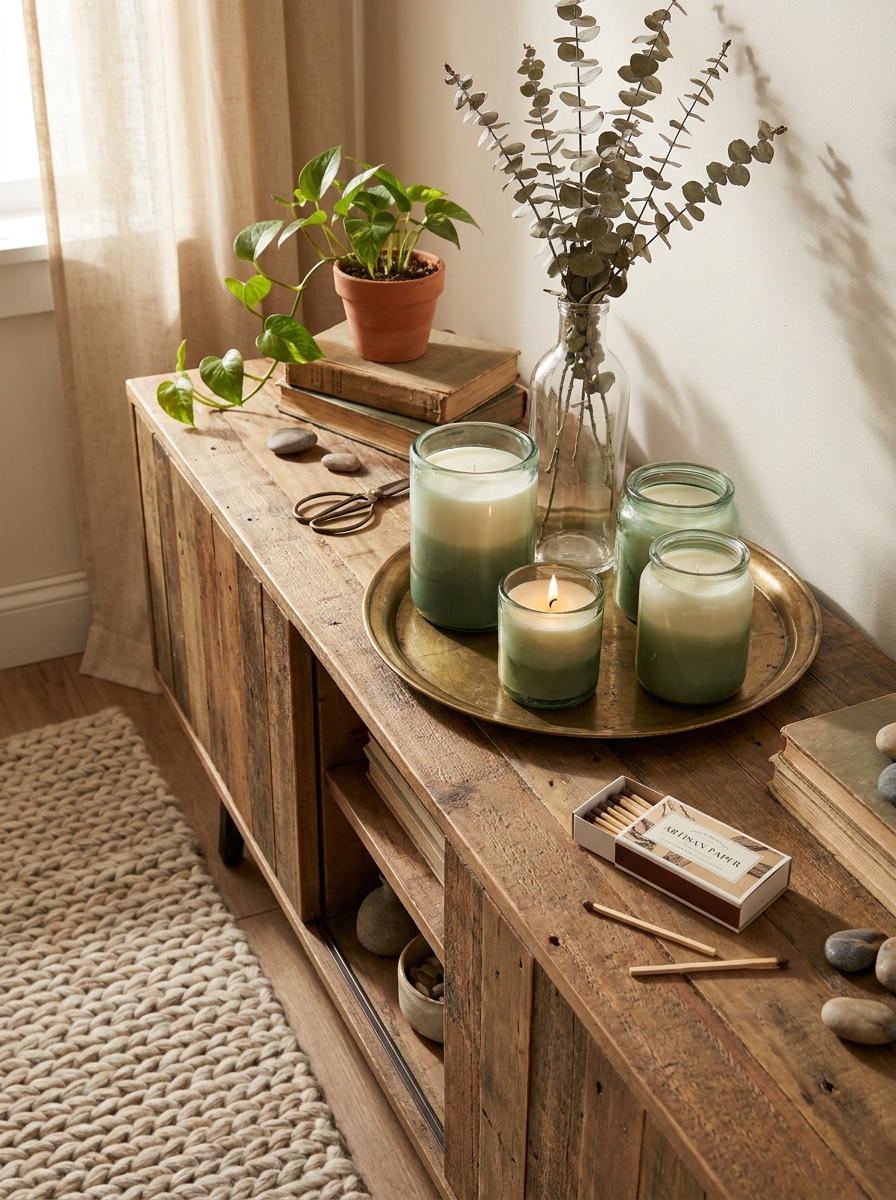
This project is seriously addictive once you get the hang of it. You’re basically creating ombre magic in whatever glass containers you already have. Old jam jars, thrift store glassware, even cleaned-out pasta sauce jars become these gorgeous gradient candles that look way more expensive than they are.
The trick is pouring your wax in layers, letting each one cool slightly before adding the next shade. I like starting with a deep color at the bottom and working my way to almost-white at the top. The transitions create this dreamy effect when the candle burns down. You can do moody grays to white, terracotta to cream, or sage green to pale mint.
What I love most is how forgiving this project is. If your layers blend a bit, it actually looks better—more organic and handmade. Plus you’re using containers that might otherwise end up in recycling, which feels good. Group a few different heights together on a tray, and suddenly your coffee table looks like you hired a stylist.
22. Linen-Wrapped Cylinder Vases with Natural Twine
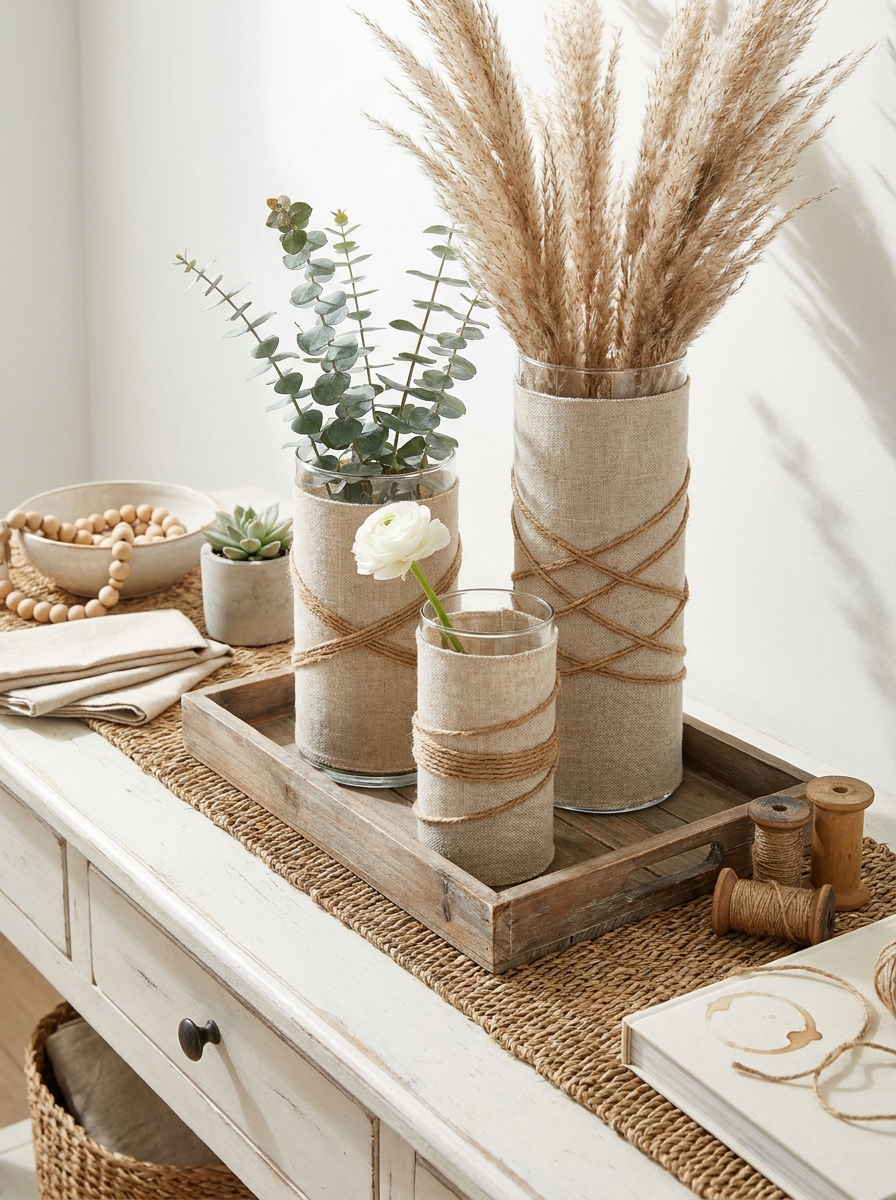
There’s something so calming about natural linen fabric wrapped around a simple glass cylinder. It’s like giving your basic vases a cozy sweater. I started doing this when I wanted to soften the look of clear glass vases but didn’t want to paint them permanently. The linen adds this beautiful texture while still letting you swap out the look whenever you want.
You literally just cut strips of natural linen, wrap them around your vases overlapping slightly, and secure with jute twine wound around a few times. I like leaving the raw edges visible because that frayed look adds to the handmade charm. The neutral linen works with literally any flower or branch you put in it.
The best part is how different they look depending on your twine placement. Wrap it at the top like a collar, create a crosshatch pattern, or wind it around the middle like a belt. I made six of these one afternoon and now I use them constantly. They’re perfect for that relaxed Scandinavian look that never feels too fussy.
23. Jewel-Toned Resin Votive Holders with Gold Flakes
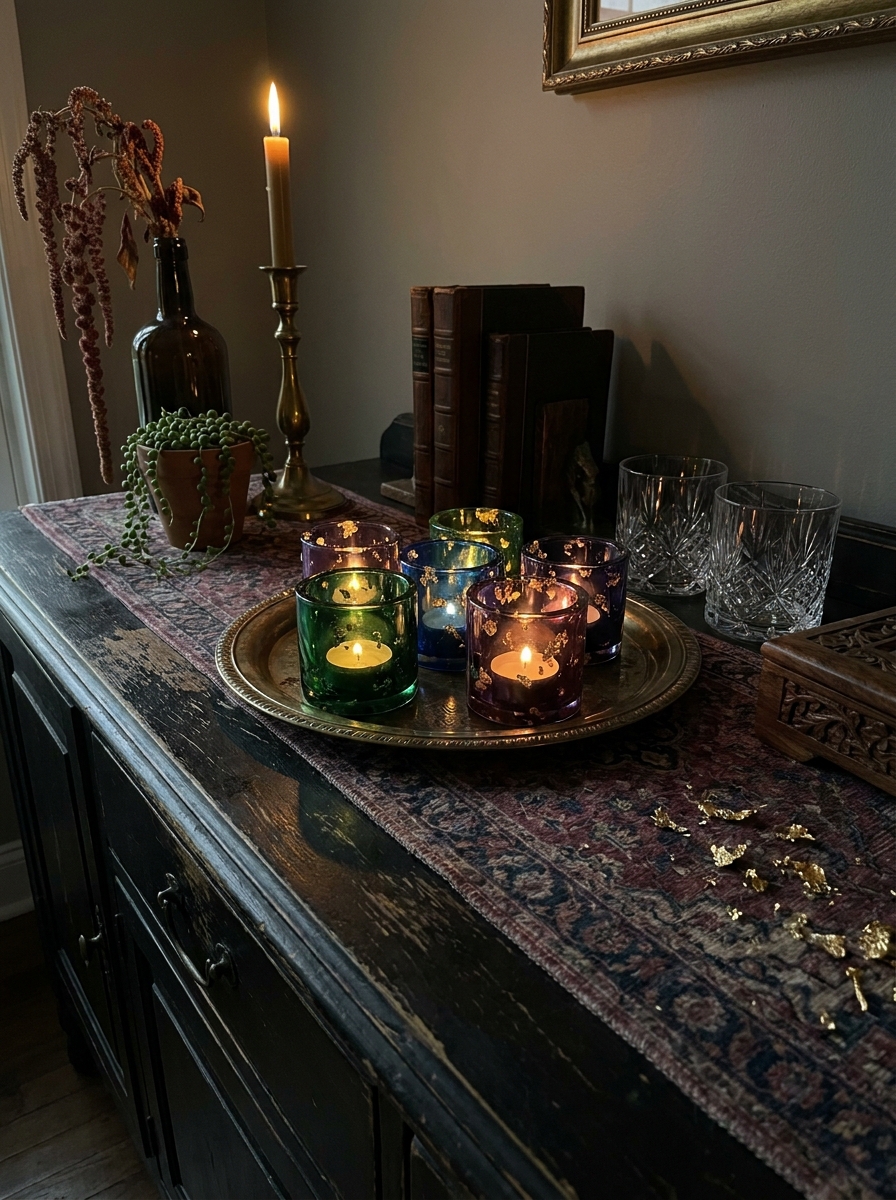
Okay, working with resin was intimidating until I actually tried it. Now I’m kind of obsessed. These little votive holders are like making your own jewelry for your home. The resin captures these rich jewel colors—deep emerald, sapphire blue, amethyst purple—and when you add gold leaf flakes, they look like tiny precious gems.
You’ll need silicone molds shaped for votives, resin, pigment dyes, and actual gold leaf flakes from a craft store. Mix your colors, pour them into the molds with flakes suspended throughout, and wait for the magic to happen. The hardest part is being patient while they cure for 24 hours. But when you pop them out and add tea lights, oh my goodness.
The gold catches the candlelight in the most gorgeous way. I made a whole set in different jewel tones and cluster them together on my dining table for dinner parties. They cast these colorful glows that make everything feel special. Even on a random Tuesday, lighting one while I’m answering emails makes me feel fancy.
24. Speckled Ceramic Vases with Toothbrush Paint Technique
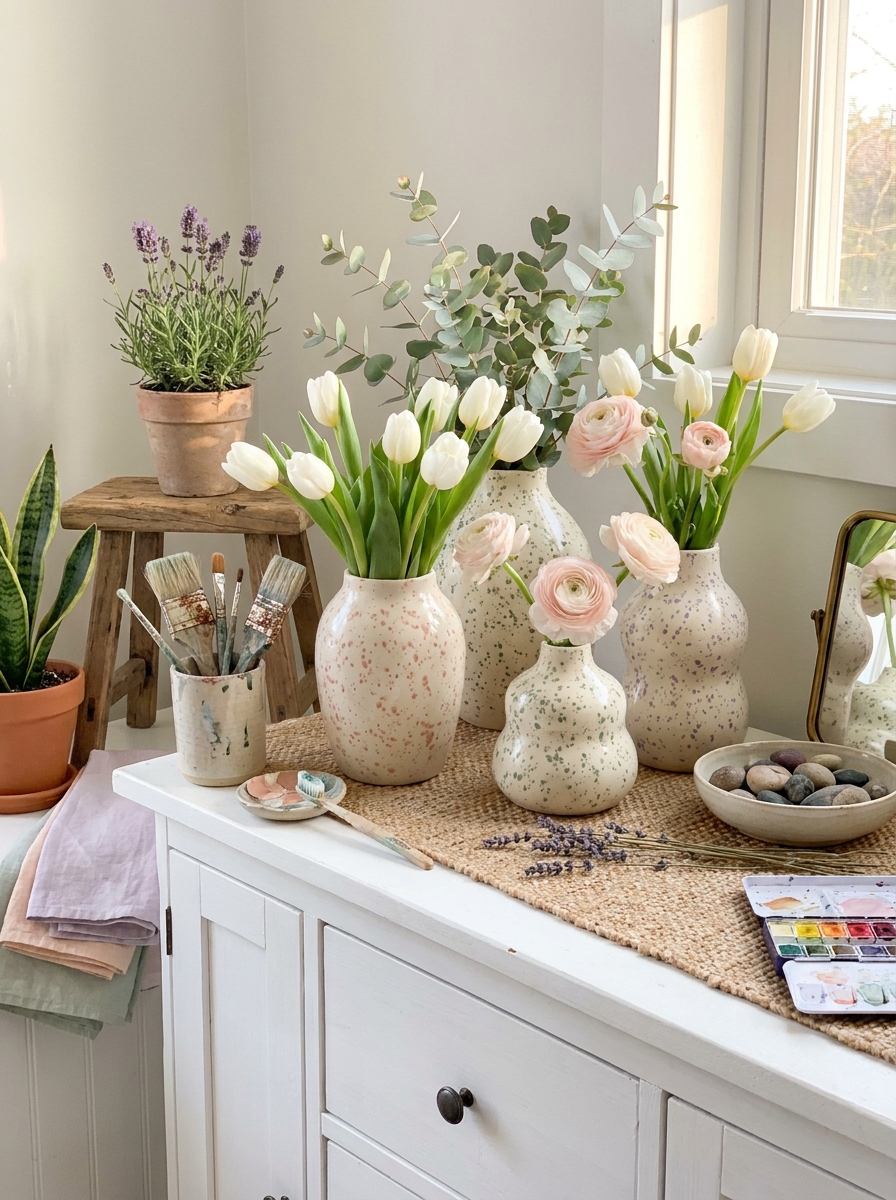
This is hands-down the most fun painting technique I’ve taught friends. You’re literally flicking paint off a toothbrush onto plain ceramic vases, and somehow it looks like expensive designer pottery. The speckled effect is so trendy right now, but you’re creating it yourself for almost nothing.
Grab some plain white or cream ceramic vases from anywhere—dollar store, thrift shop, wherever. Tape off sections if you want to leave some areas clean, then load an old toothbrush with acrylic paint thinned slightly with water. Run your thumb across the bristles and watch the paint splatter. Do multiple colors, different densities, whatever feels right. There’s no wrong way.
I did a whole set in black speckles on white, another in sage and terracotta on cream, and another in navy on light blue. They look like a curated collection but took maybe an hour total. The randomness of the speckles is what makes them look authentic and handmade. Plus it’s weirdly therapeutic—very satisfying in a messy art project kind of way.
25. Dried Lavender Bundles Tied to Pillar Candles
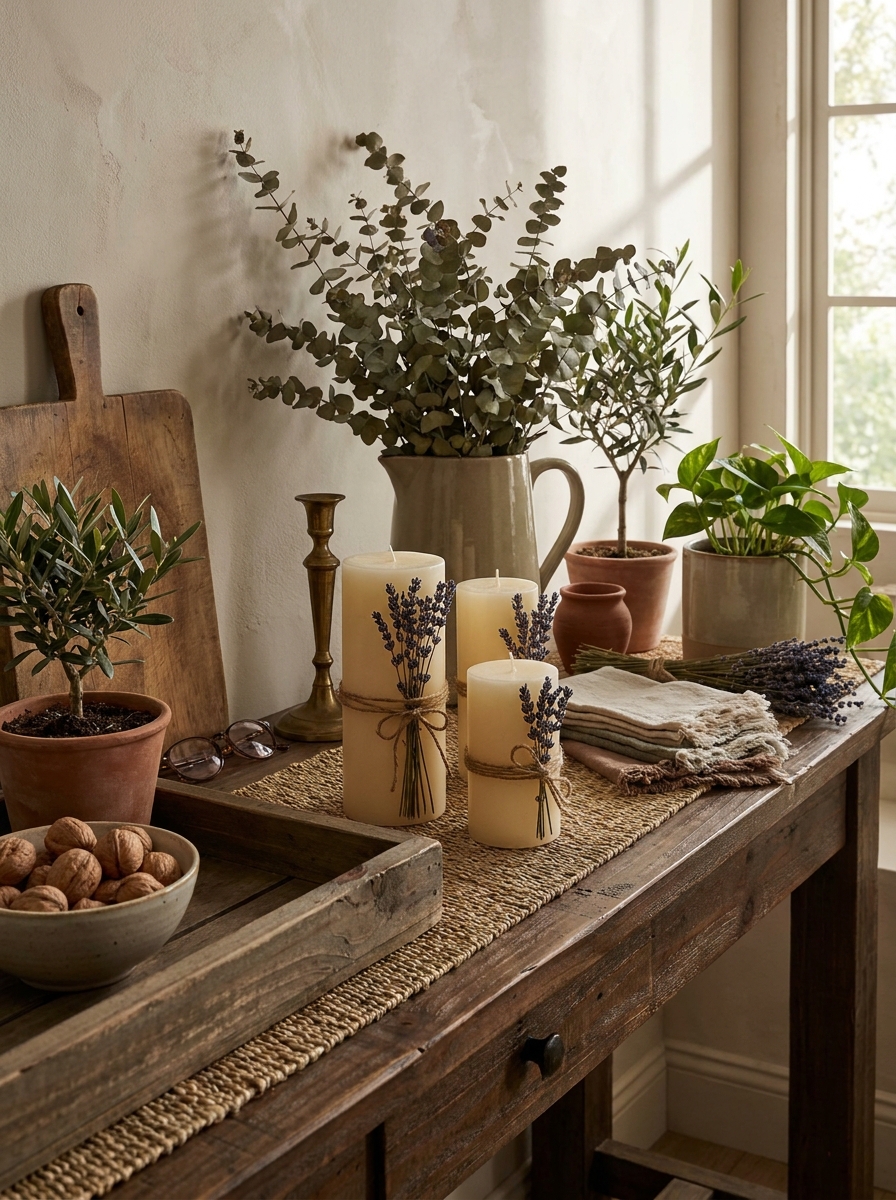
This one’s so simple but seriously pretty. You’re basically tying little bundles of dried lavender around chunky pillar candles with twine or ribbon. That’s it. But the look? Gorgeous. The lavender adds this beautiful texture and the most amazing scent when the candle warms up.
I love making these in batches because they’re perfect for gifts. Grab some thick pillar candles in cream or white, bundle about 10-15 stems of dried lavender together, and wrap them around the middle with natural jute twine. You can leave them natural or add a little sprig of rosemary too.
The best part is how they make your whole room smell. Even unlit, that lavender fragrance just floats around. And when you do light them? Heaven. These work beautifully on a dining table or bathroom counter. They bring that French countryside vibe without trying too hard.
26. Striped Tape Resist Painted Glass Cylinders
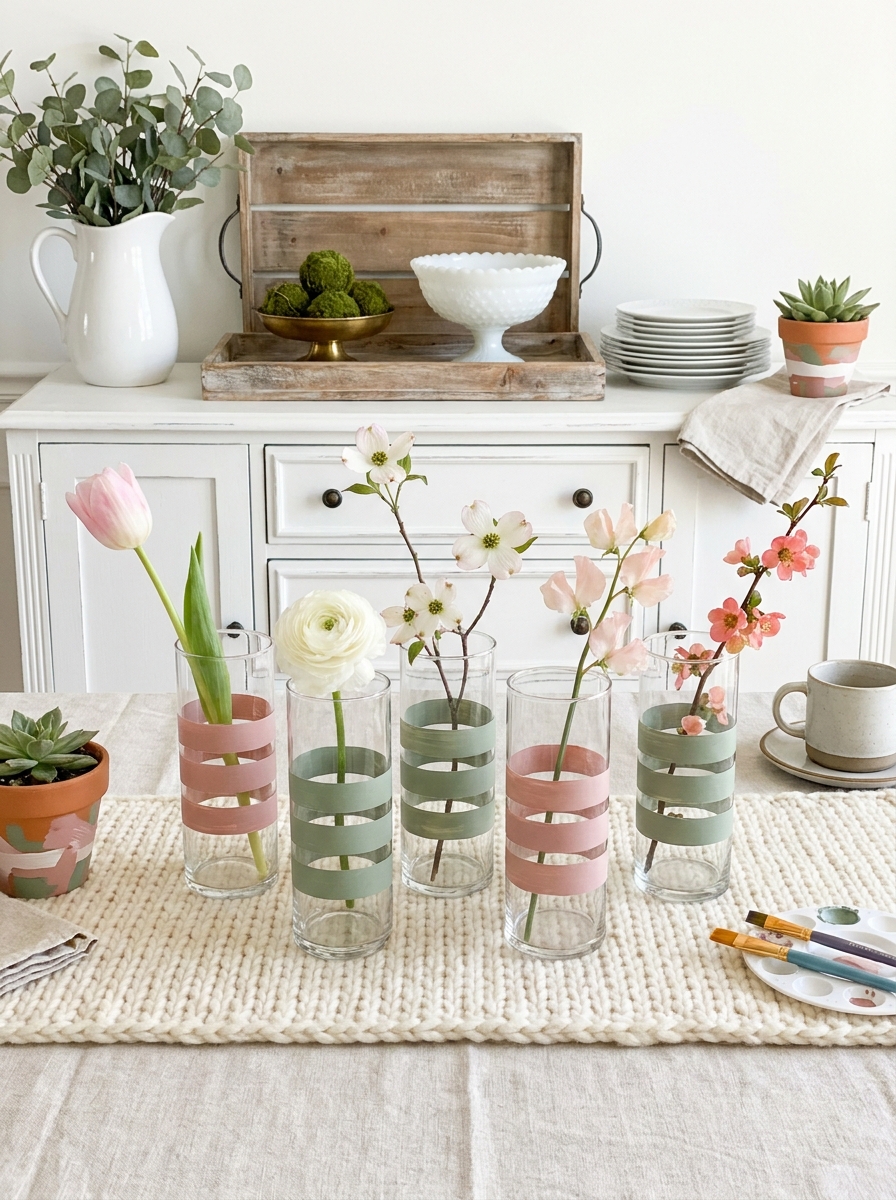
Remember doing tape resist art in school? Same idea, but now you’re making chic vases. You wrap painter’s tape in stripes around plain glass cylinders, paint over everything, then peel the tape off. The clean glass lines underneath? Chef’s kiss.
I did a whole set of these in different widths—some with thick stripes, some with skinny ones. Used matte acrylic paint in dusty pink and sage green. The trick is really pressing that tape down tight so paint doesn’t seep under. Let it dry completely before you peel.
These look amazing grouped together with single stems in each one. I’m talking one tulip here, one ranunculus there. The stripes add this graphic modern element that feels really fresh. And honestly? They’re so easy even kids could help. Mine did, and we had the best afternoon making them together.
27. Cork-Wrapped Votive Holders with Copper Wire
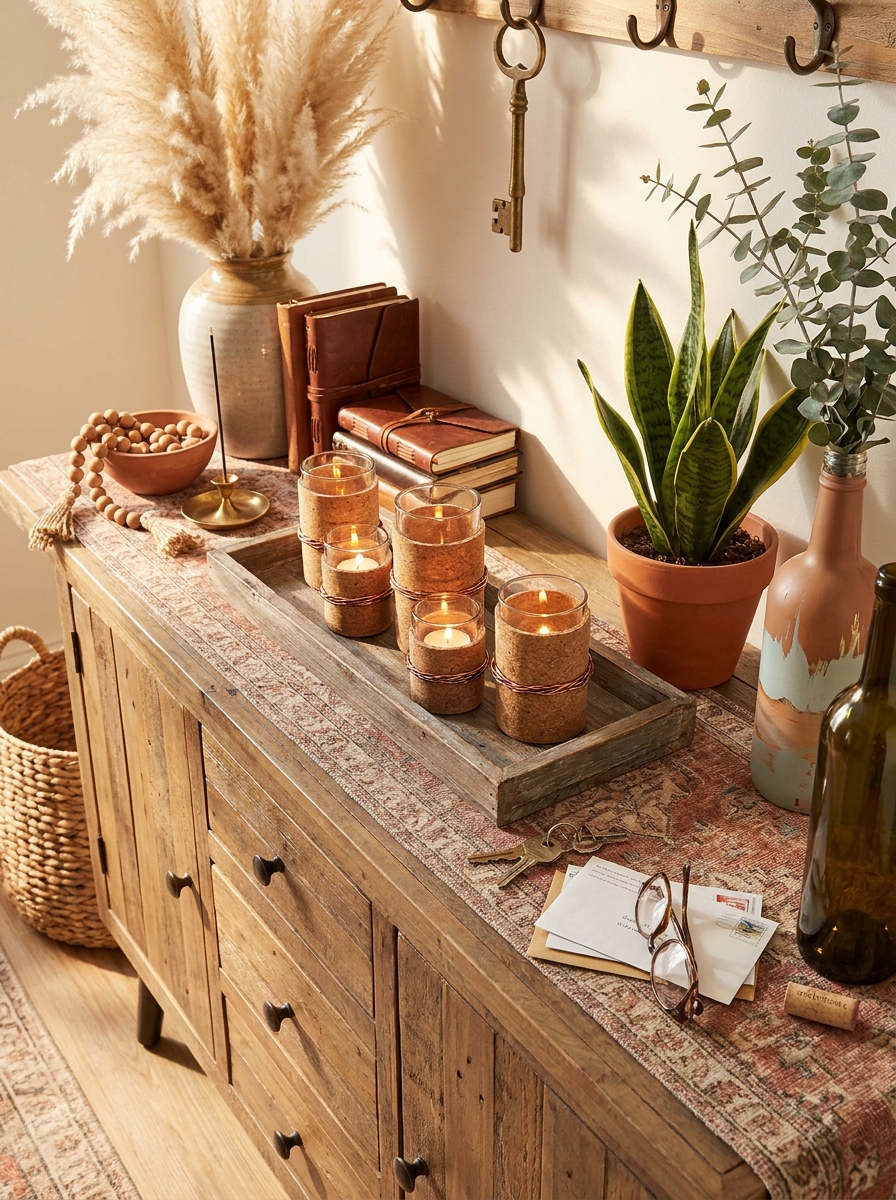
Wine corks, meet your second life. I’ve been wrapping them around glass votives and securing them with thin copper wire, and they’re giving major cozy cabin vibes. The cork adds this warm, natural texture that catches candlelight beautifully.
You’ll need a bunch of corks—start saving now or grab a bag online. Glue them vertically around a small glass votive holder, fitting them as tightly as you can. Then wrap copper wire around the whole thing a few times and twist it to secure. The wire adds a little shine against all that cork texture.
These work perfectly in groups of three or five. I put them on a wooden tray with some greenery and called it done. They’re rustic without being too country, you know? And there’s something really satisfying about upcycling all those wine corks into something this pretty.
28. Tissue Paper Stained Glass Lantern Vases
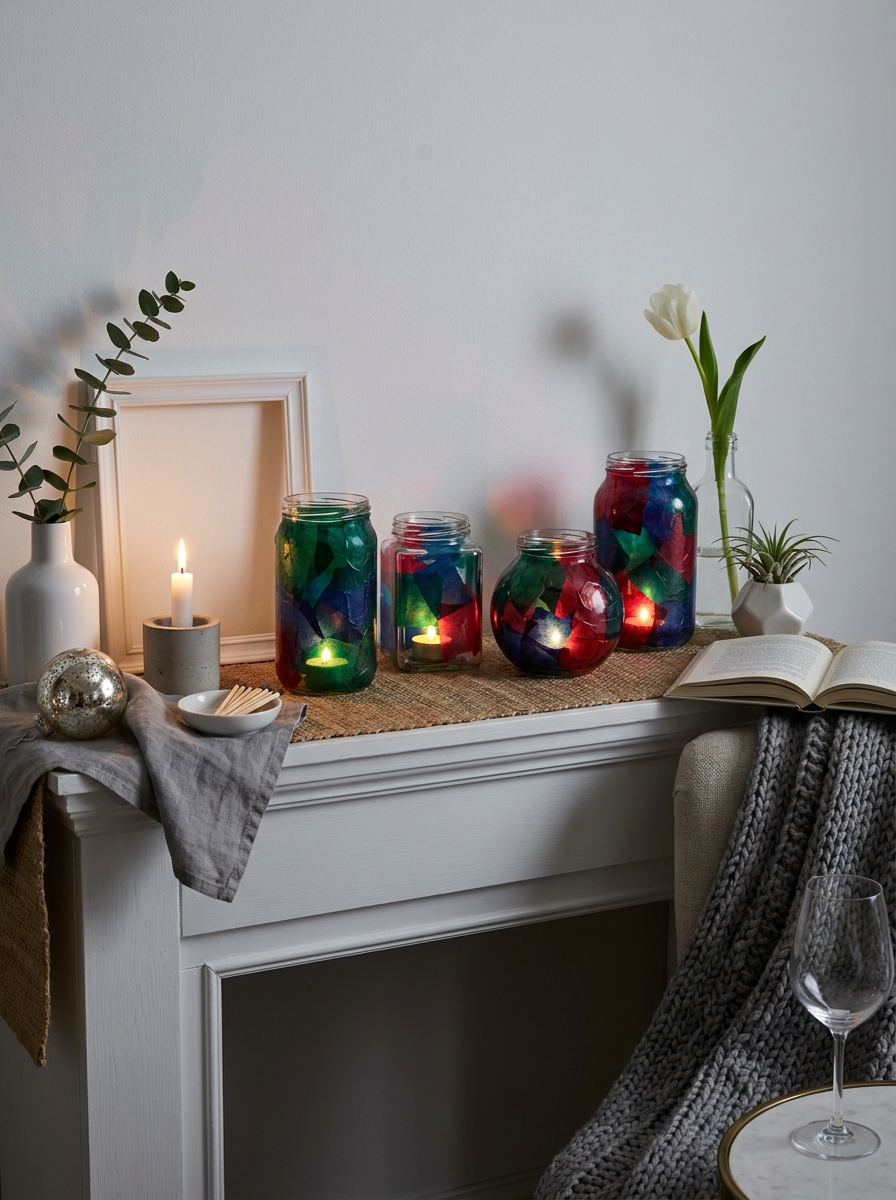
This is pure childhood nostalgia turned grown-up decor. You’re basically decoupaging torn pieces of colored tissue paper onto glass jars or vases to create a stained glass effect. When light shines through? Magic.
I like using jewel tones—emerald green, sapphire blue, ruby red. Tear the tissue paper into irregular pieces and use Mod Podge to layer them on the outside of clean glass containers. Overlap the colors and let some pieces wrinkle—that’s what gives it dimension. Seal everything with another coat of Mod Podge.
Use them as candle holders or bud vases. The tissue paper diffuses light so beautifully, creating this warm, colorful glow. I made a whole set for my kitchen windowsill, and every morning the sun hits them just right. It’s like having tiny jewels on display. Plus, it’s such a fun rainy day project.
29. Macramé-Wrapped Glass Cylinder Vases
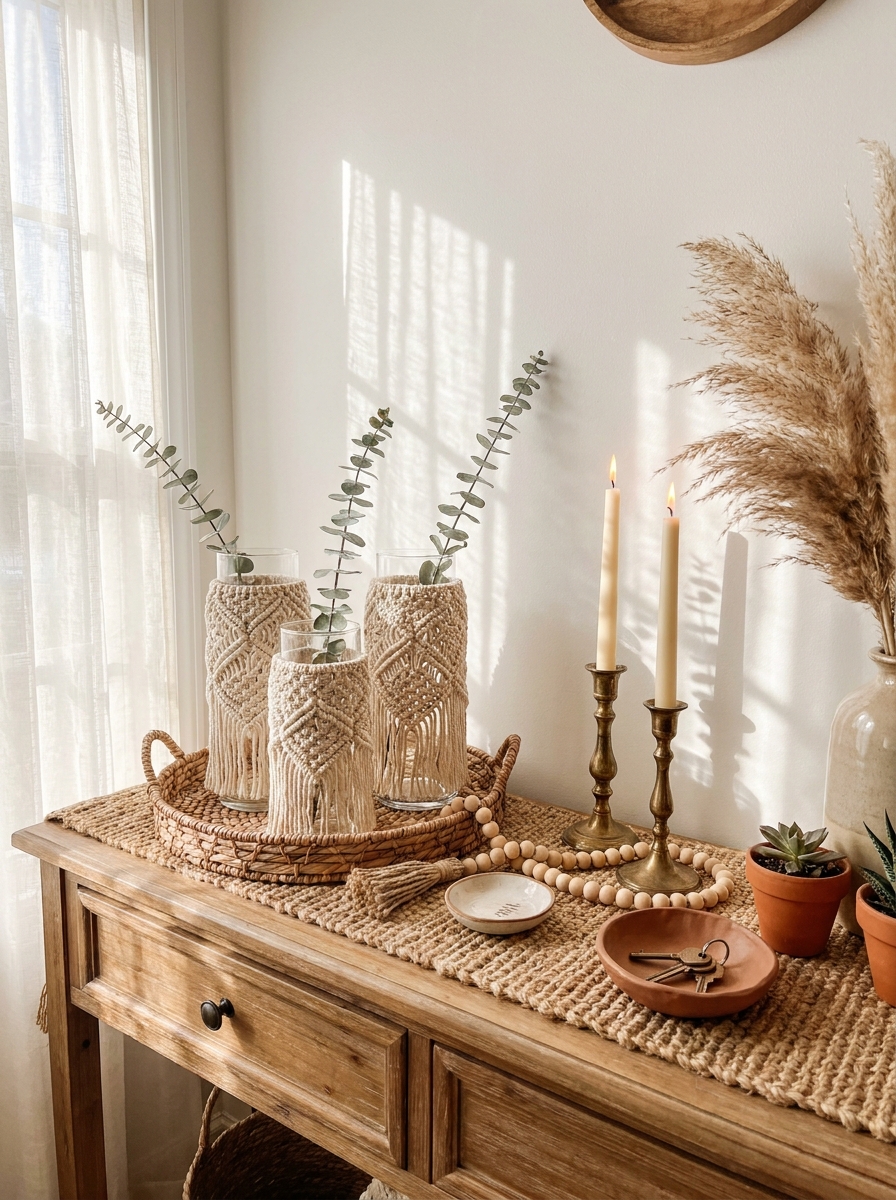
Remember those macramé plant hangers your mom had in the ’70s? Well, they’re back but way more sophisticated. And now we’re wrapping glass cylinders with knotted cord to create vases that feel both bohemian and modern. I love this project because you can customize the pattern complexity based on your skill level.
Start with clear glass cylinders in varying heights—dollar store finds work perfectly. Use cotton cord in natural cream or dyed colors, and learn a few basic macramé knots like square knots and half hitches. The cord wraps around the glass creating dimensional texture that catches light beautifully. You can leave the glass base exposed or wrap it entirely, depending on your look.
What I love is how the negative space between knots lets you see stems and water inside. Group three wrapped vases together with single stems in each—it’s that effortless look that actually takes some planning. The handmade knots give each piece character that store-bought versions just can’t match.
30. Watercolor-Dripped Pillar Candles with Embedded Petals
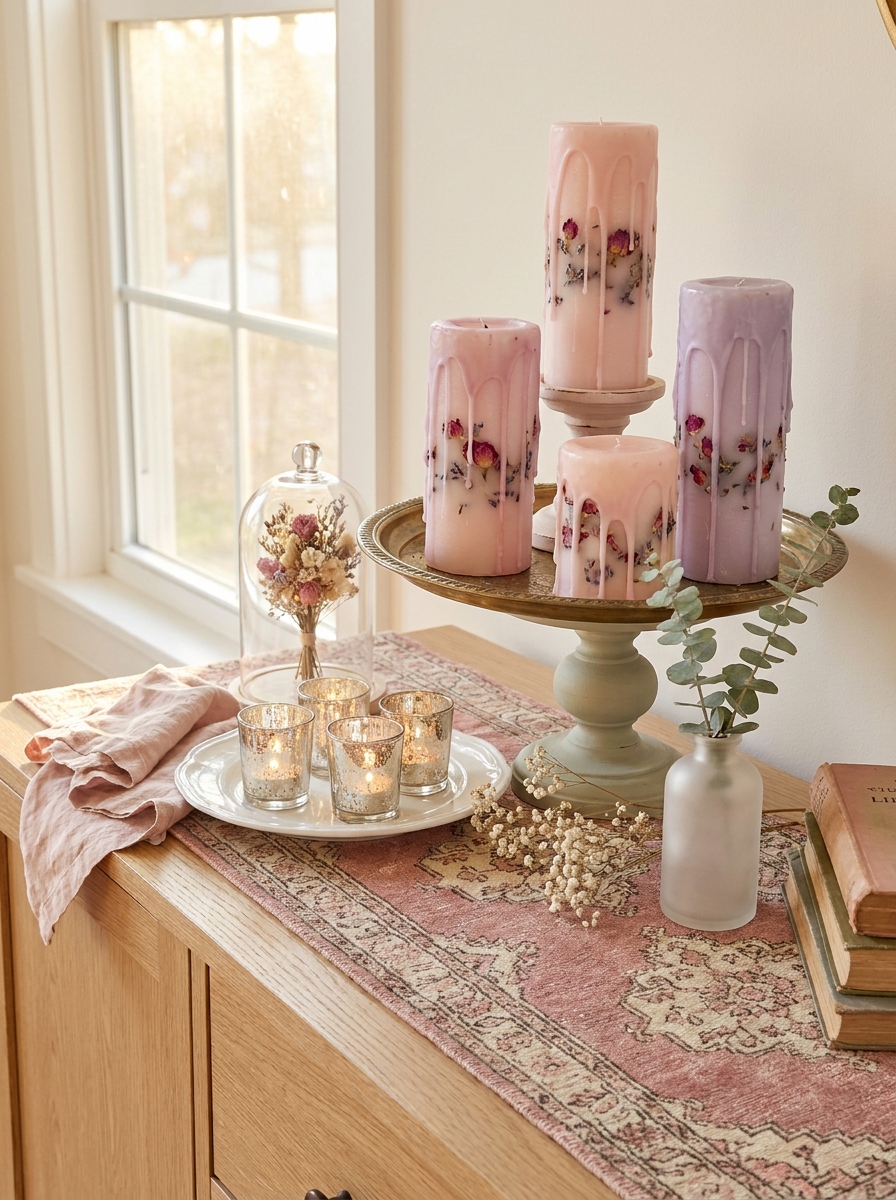
This technique looks like art gallery material but it’s surprisingly simple. You’re basically painting with colored wax on plain pillar candles, then pressing dried petals into the surface while the wax is still slightly warm. The result? Candles that look like they belong in a fancy boutique.
Grab white or ivory pillar candles as your canvas. Melt crayon shavings or candle dye chips in separate small containers—I love using soft watercolor-ish shades like blush pink, lilac, and sage green. Use a spoon to drizzle the colored wax down the sides of the candle, letting it drip naturally for that organic effect. Before the dripped wax fully hardens, gently press dried flower petals—rose, lavender, or baby’s breath work beautifully—into the warm wax.
The petals become part of the candle surface, preserved under a thin layer of wax. When you light these candles, the glow illuminates the embedded flowers and creates the most magical effect. They’re almost too pretty to burn, but please do—that’s when they truly shine.
31. Carved Wood Block Vase Inserts with Glass Tubes
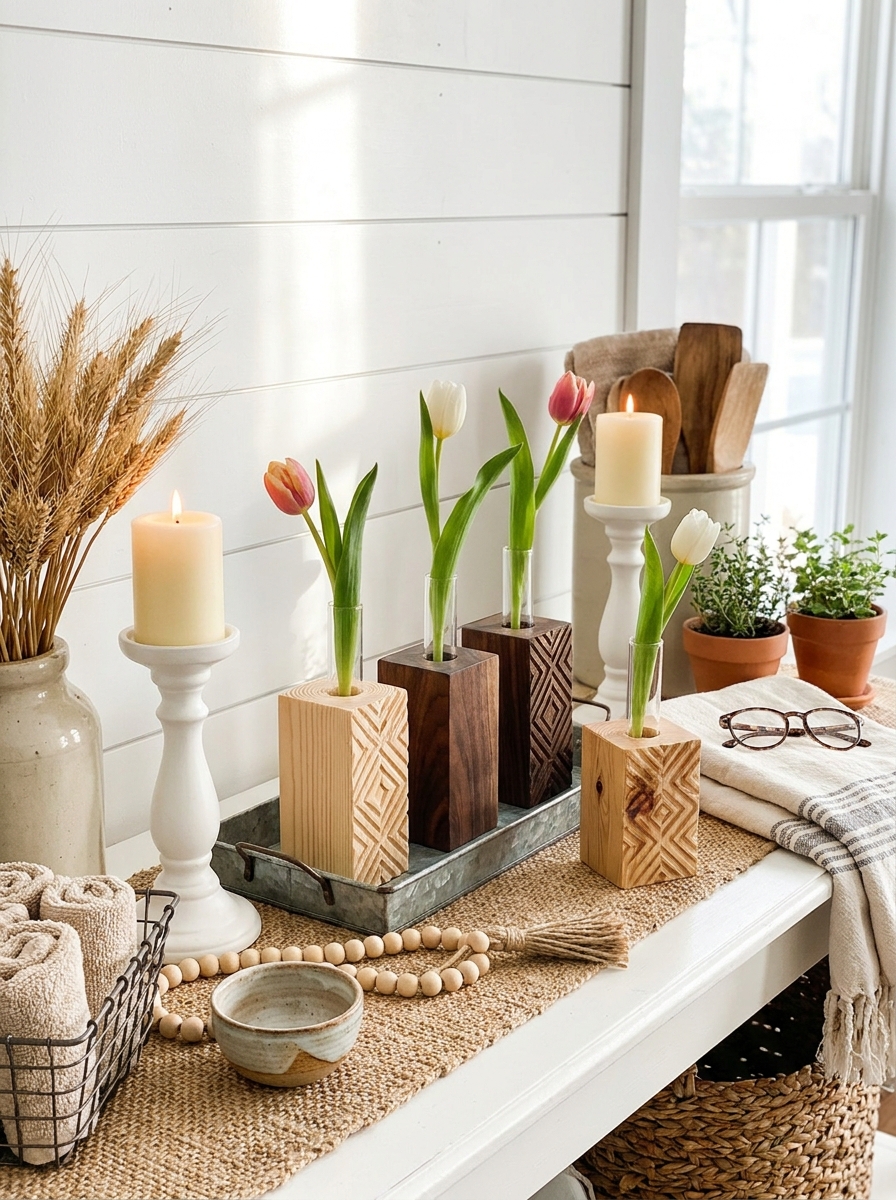
Here’s a genius way to make rustic wood vases without any woodworking skills beyond using a drill. You’re taking small wooden blocks—think chunky leftover lumber pieces or craft store wood cubes—and drilling holes to hold glass test tubes as water vessels. It’s industrial meets organic in the best way.
Find wood blocks in various sizes and finishes. Leave some natural, stain others dark walnut, or whitewash a few for contrast. Drill straight down into the top center, sizing your drill bit to fit standard glass test tubes or small bud vases. The glass insert holds water while the wood block provides all the visual weight and texture. Sand the edges smooth or leave them rough for more character.
I love grouping these in odd numbers—three or five blocks of different heights creates the most interesting display. Each one holds a single stem, making a dramatic statement with minimal flowers. The wood grain becomes part of the design, and every piece looks slightly different because of natural variations in the wood.
32. Two-Tone Dipped Terra Cotta Pot Vases with Sealant
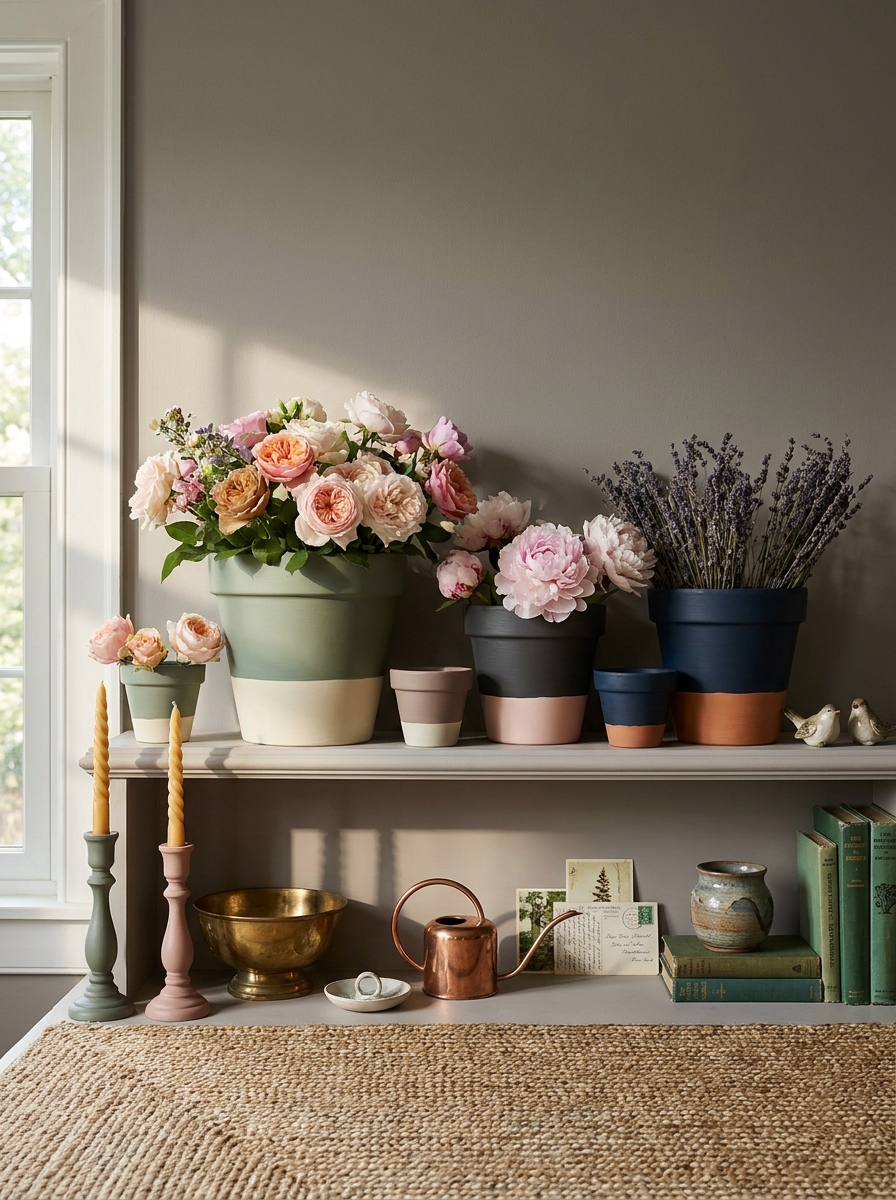
Sometimes the simplest projects create the biggest impact. Terra cotta pots get a major upgrade when you paint them in two-tone color blocks—and yes, with proper sealing, they absolutely work as vases for fresh flowers.
Start with basic terra cotta pots in various sizes. The trick is choosing your paint line carefully—I love a crisp horizontal line about two-thirds up the pot, or a diagonal line for something more dynamic. Use exterior acrylic paint in colors that complement each other: think sage green with cream, charcoal with blush pink, or navy with gold. Tape off your line with painter’s tape, paint one section, let it dry completely, then paint the other. The natural terra cotta can be one of your two tones if you want to keep that earthy element visible.
Here’s the critical step everyone misses: seal the inside completely with a waterproof sealer made for terra cotta. This transforms your decorative pot into a functional vase. The contrast between painted surface and raw clay creates visual interest that plain ceramic can’t match.
33. Textured Wax Pillar Candles with Dried Herb Embeds
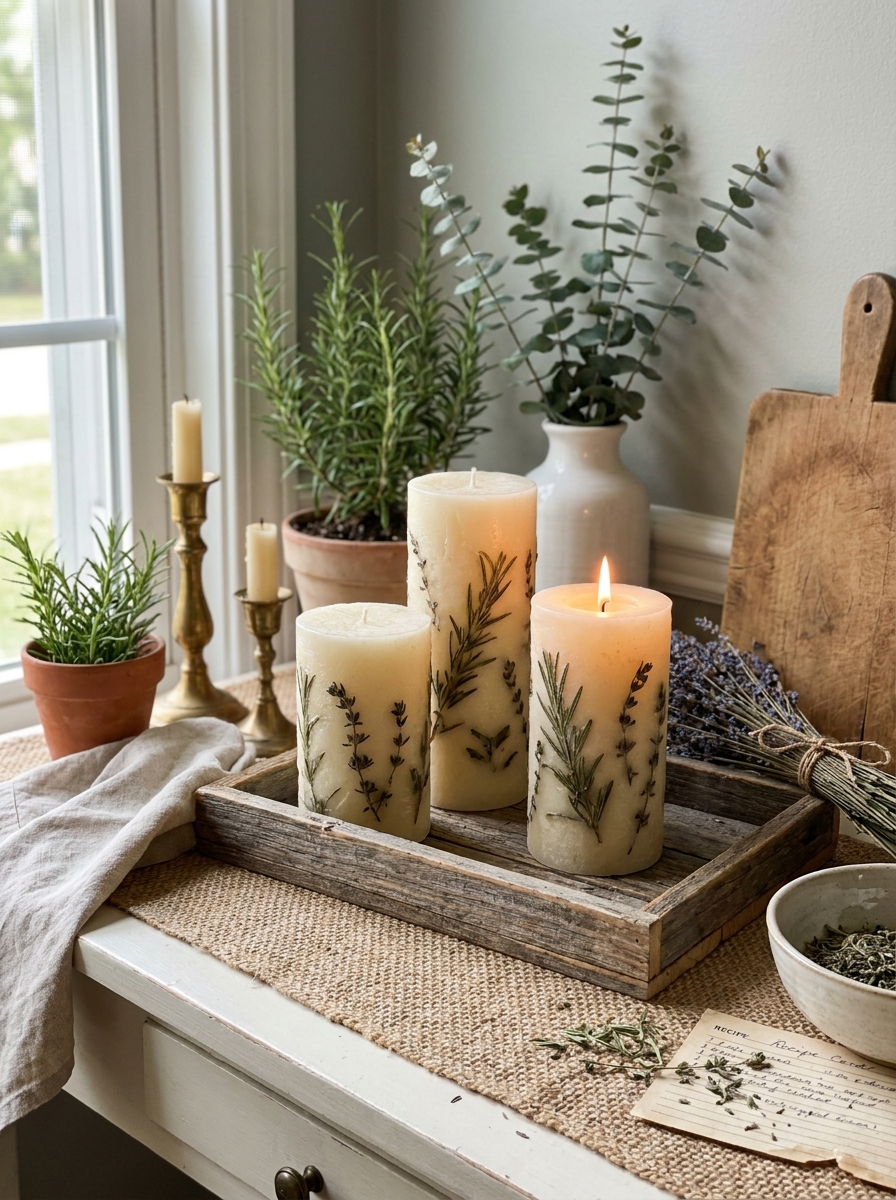
Oh, this one smells as good as it looks! Press dried herbs like rosemary, thyme, or sage into the outside of your pillar candles while the wax is still slightly warm. You get these gorgeous botanical impressions that make every candle feel like a little piece of nature.
I love using white or cream wax because it really shows off those green herb details. The trick is timing—wait until your poured candle has set just enough to hold its shape but is still tacky to the touch. Then gently press your dried herbs into the surface, working your way around the candle in whatever pattern makes you happy.
The herbs don’t just look pretty—they release the most amazing subtle scent as the candle burns down. It’s like having a mini herb garden right there on your coffee table. Group a few together in different heights and you’ve got an instant conversation starter that smells incredible.
34. Glass Bottle Vases with Painted Ombre Interiors
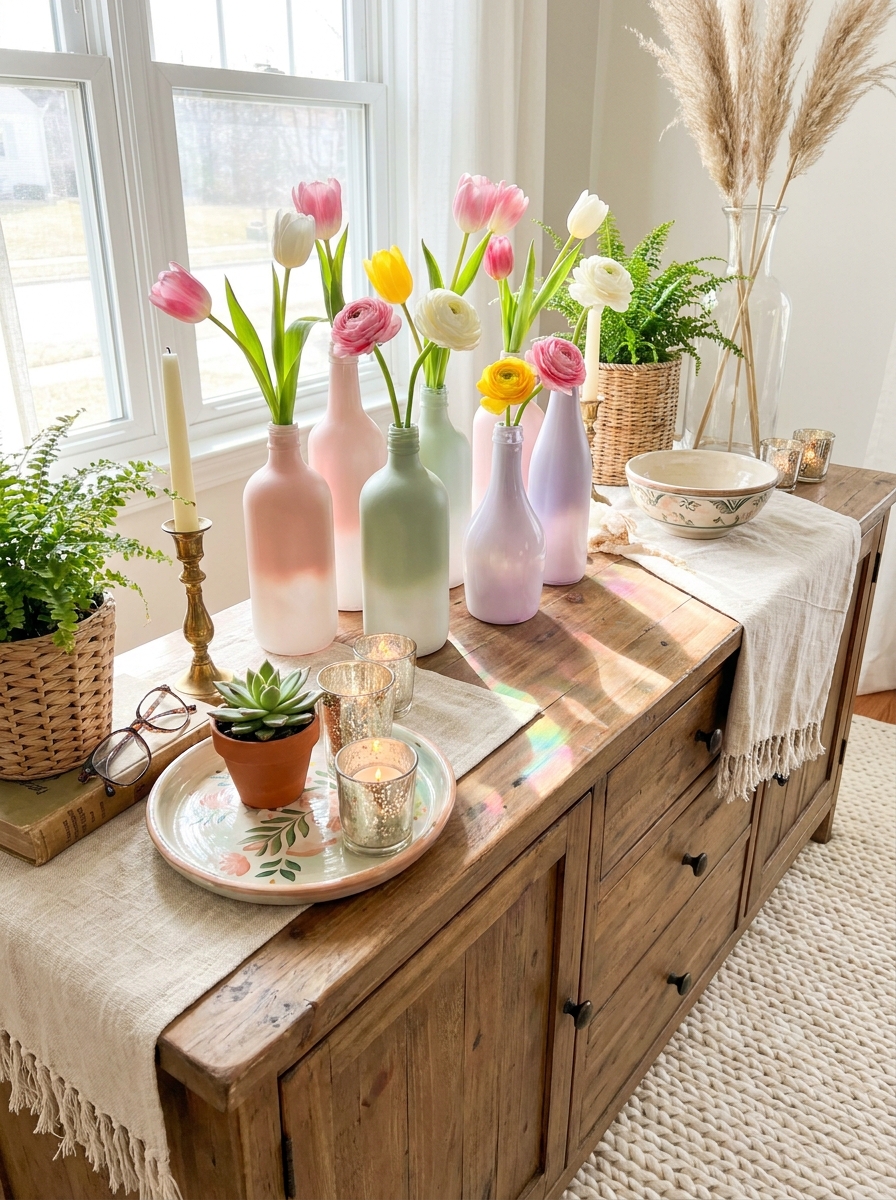
Here’s a fun twist—paint the INSIDE of clear glass bottles instead of the outside! You get this dreamy, translucent ombre effect that looks way fancier than it actually is. I’m obsessed with how the light plays through the painted glass.
Pour your acrylic paint inside the bottle, then slowly rotate it while the paint runs down the sides. Add a second color while the first is still wet and watch them blend together like magic. The key is using bottles with interesting shapes—old wine bottles, vintage soda bottles, or those tall olive oil containers work perfectly.
Let them dry upside down so excess paint drips out, and you’re left with this gorgeous gradient coating on the interior. When you add water and flowers, the whole thing just glows. The painted interior creates this soft, filtered color that feels so much more interesting than solid painted vases. Plus, you can still see your flower stems through the glass, which I love.
35. Weathered Wood Candle Platforms with Metal Insert Holders
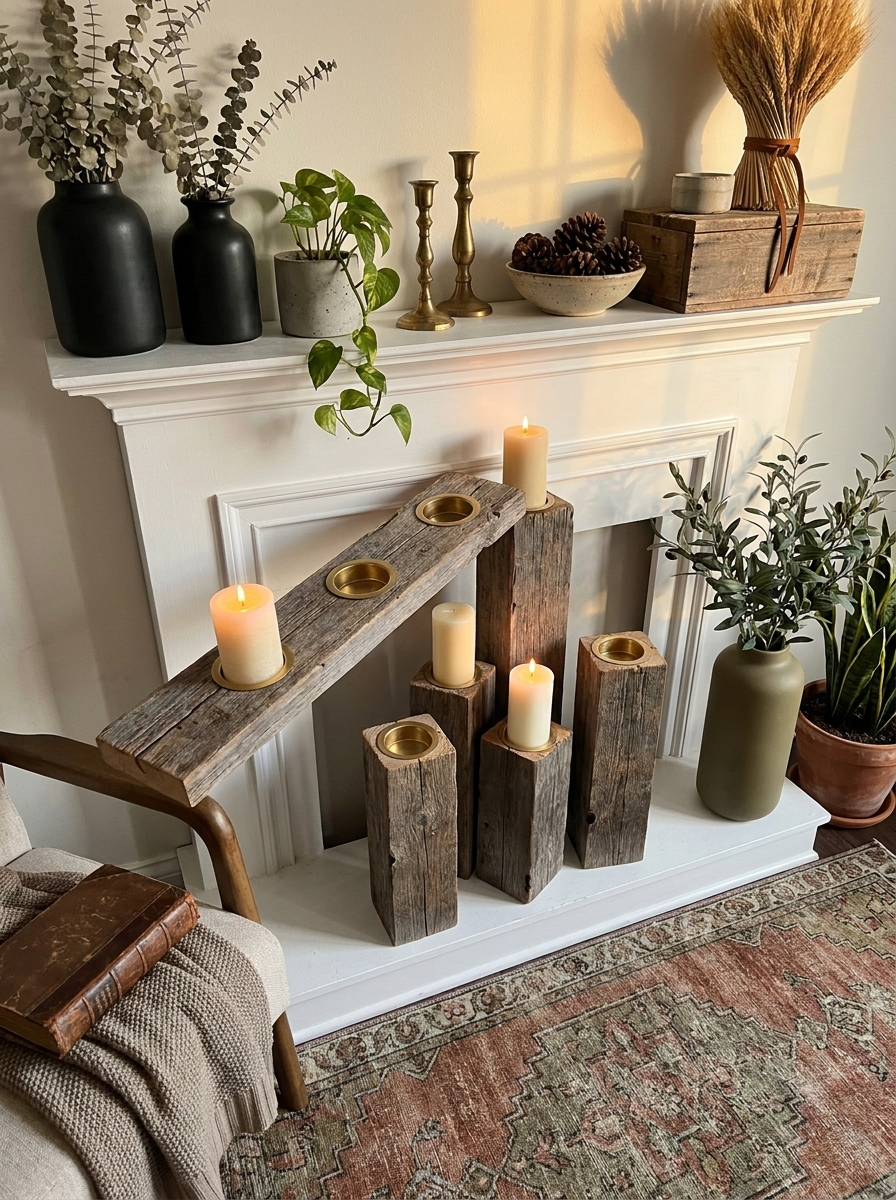
This project combines rustic charm with super practical design! Cut thick wood planks into various lengths, then drill holes to fit metal candle inserts. You end up with these gorgeous wooden platforms that hold tapers or pillars securely while showing off that beautiful natural wood grain.
I love finding weathered barn wood or driftwood for this—the more character, the better. Those natural cracks, knots, and worn edges make each piece totally unique. Sand them just enough to remove splinters but keep that aged patina. The metal inserts (you can grab them cheap at craft stores) give you the stability you need without looking fussy.
What I really love is how versatile these are. Make them in different lengths for a layered mantel display, or create matching pairs for a dining table centerpiece. The rough wood texture against elegant candles creates this perfect high-low mix that feels collected and intentional. Plus, they’re hefty enough that you never worry about candles tipping over.
Quick Guide
Quick Cost Breakdown: DIY vs. Store-Bought
| Project Type | DIY Cost | Store-Bought | You Save |
|————–|———-|————–|———-|
| Painted Glass Vases (set of 3) | $8–12 | $45–75 | $37+ |
| Concrete Candle Holders | $15–20 | $60–90 | $45+ |
| Frosted Vases (set of 5) | $10–15 | $55–85 | $45+ |
| Custom Dipped Tapers (dozen) | $18–25 | $48–72 | $30+ |
Time Investment: Most projects take 1–2 hours of active work, plus drying time. You can easily knock out several projects in one crafty afternoon. The best part? You can customize everything to match your exact color scheme and style, something you’d never get with store-bought pieces. Plus, there’s something genuinely satisfying about guests asking where you bought something and getting to say, ‘I made it.’
Your Space, Your Creative Touch
Here’s what I love most about candle and vase projects—they’re these small creative acts that make such a big visual impact. You’re not committing to a major renovation or expensive furniture piece. You’re simply adding layers of personality and warmth through objects you’ve put your own hands on. And honestly? That personal touch is what makes a house feel like an actual home.
These 35 projects give you so many directions to explore. Maybe you’ll fall in love with the earthy simplicity of terracotta-painted vases. Or perhaps those moody concrete holders speak to your industrial-loving heart. You might even surprise yourself and try something completely outside your usual style. That’s the beauty of DIY—there’s zero commitment beyond a few dollars and an afternoon.
So grab some thrifted glass, raid the craft store, or repurpose what’s already hiding in your cabinets. Put on your favorite playlist, pour yourself something delicious, and just start creating. Your perfectly imperfect, completely personal candle and vase collection is waiting to happen. And trust me, your space will thank you for it.
Frequently Asked Questions
What’s the easiest DIY candle or vase project for complete beginners?
The frosted sea glass vase transformation is absolutely the easiest starting point. You literally just spray paint clear glass with frosted spray paint—no special skills required. It takes about 15 minutes of active time, and the results look professionally made. It’s nearly impossible to mess up, which makes it perfect for building your DIY confidence.
Can I use regular paint on glass vases or do I need special paint?
You’ll want to use paint specifically designed for glass—either glass paint or chalk paint works beautifully. Regular acrylic paint will peel and chip over time, especially if the vases get wet. Chalk paint gives that gorgeous matte finish and adheres really well, while glass paint offers more durability. For best results, clean your glass thoroughly with rubbing alcohol before painting.
How do I make concrete candle holders without them cracking?
The key is using the right concrete mix and not rushing the curing process. Quick-setting concrete designed for crafts works best—avoid regular construction concrete. Mix it to a thick pancake batter consistency, tap your molds gently to release air bubbles, and let it cure slowly at room temperature for at least 24 hours. Don’t try to speed up drying with heat, as that’s what causes cracking.
Where can I find affordable supplies for DIY candle and vase projects?
Thrift stores are absolute goldmines for glass vases and candleholders that you can transform. Dollar stores carry basic glass vases and candles perfect for customizing. For craft supplies like paints and wax, check sales at craft stores like Michael’s or Joann—they always have 40-50% off coupons. You can also repurpose glass bottles and jars from your recycling bin for truly budget-friendly projects.
How do I safely work with wax when making custom candles at home?
Always melt wax using a double boiler method—never directly on the stove, as wax is flammable. Keep your workspace clear of anything that could catch fire, and never leave melting wax unattended. Use a thermometer to monitor temperature and work in a well-ventilated area. Keep a lid nearby to smother flames if needed, though if you’re following proper techniques, you shouldn’t have any issues. It’s actually quite safe when you respect the material.