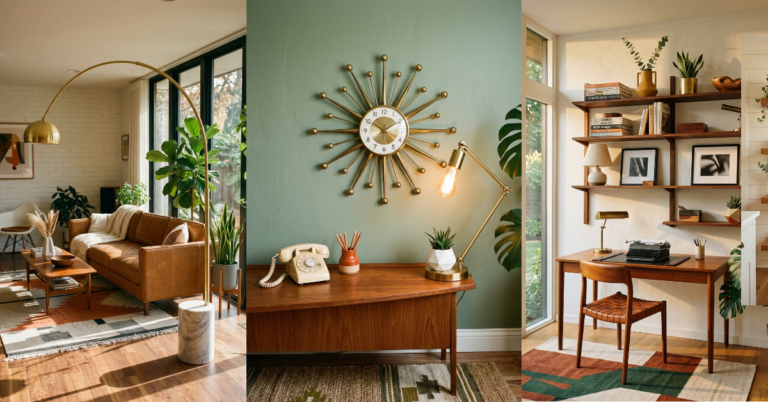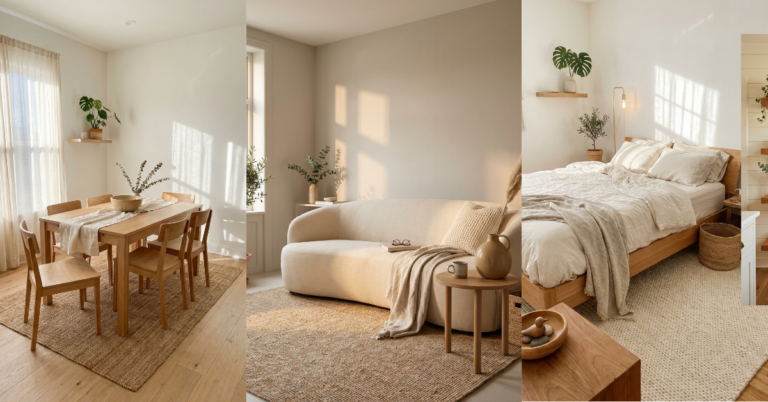
26 Thrift Flip Home Decor Ideas That Transform Junk to Joy
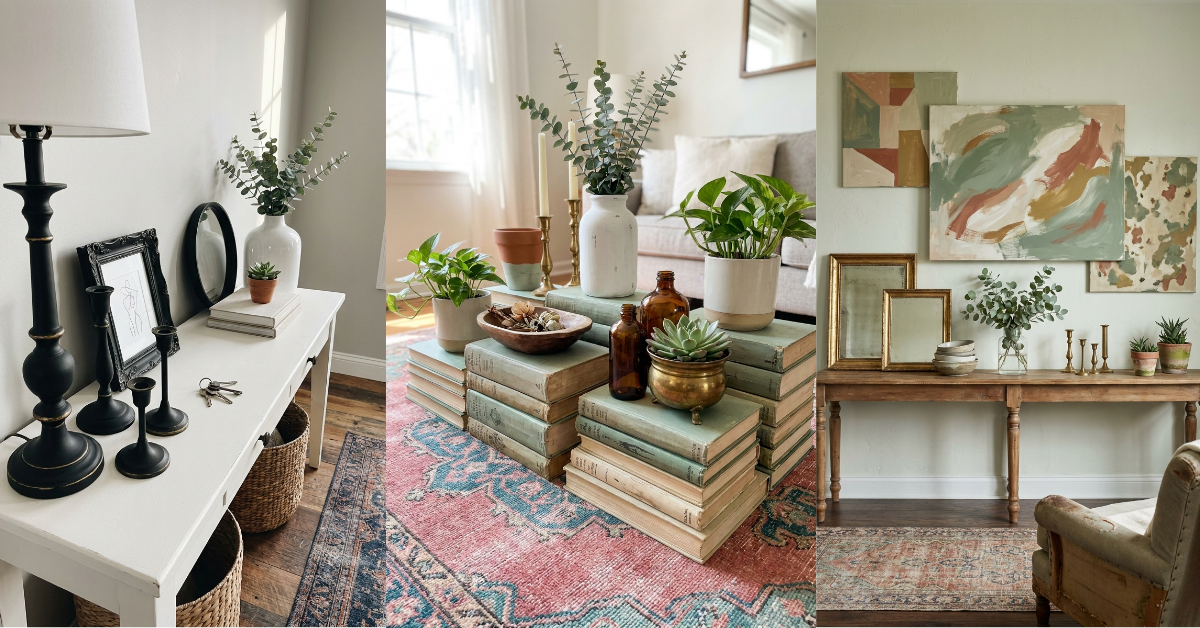
You know that feeling when you walk past a sad-looking side table at Goodwill and something whispers, ‘I could make that amazing’? That’s the thrift flip magic calling. I’ve hauled home more questionable furniture than I’d like to admit, but here’s the thing—some of my favorite pieces started as total rejects. A little paint, new hardware, or creative repurposing can turn a $12 disaster into something you’d see on a fancy design blog. And the best part? You get a one-of-a-kind piece that actually fits your style and budget. These 26 thrift flip ideas aren’t complicated or intimidating. They’re the kind of projects you can tackle on a Saturday afternoon with supplies from the hardware store. Some take an hour, others might need a weekend, but all of them prove that secondhand doesn’t mean second-rate. Let’s get into it.
1. Chalk Paint Magic on Old Dressers
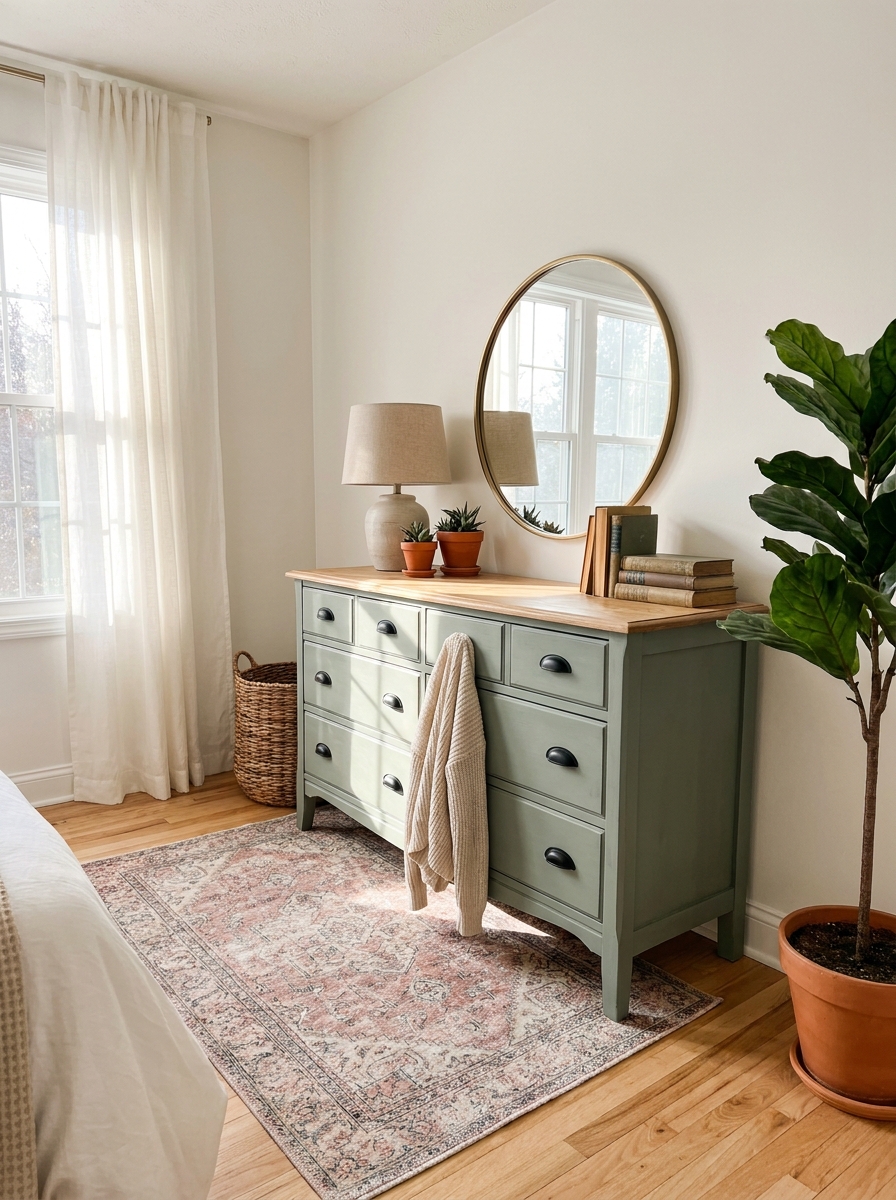
That clunky wooden dresser with the weird brass pulls? It’s about to become your bedroom’s star piece. Chalk paint is ridiculously forgiving—it sticks to almost anything without primer, and the matte finish hides a world of scratches and imperfections. I love going with soft sage green or dusty blue for a calm, modern look, but you could also try a dramatic charcoal or even a two-tone situation with the drawers in a contrasting color.
The key is prepping less than you think. A quick wipe-down with soapy water is usually enough. Then just apply two coats, let it dry completely, and swap those dated handles for sleek brass or matte black ones. The hardware change alone makes a huge difference—it’s like jewelry for furniture.
Seal it with clear wax if you want a subtle sheen, or leave it as-is for that perfectly imperfect cottage vibe. I’ve done this to at least five dressers now, and each one feels like a totally different piece depending on the color and hardware combo.
2. Turn Thrifted Frames Into a Gallery Wall
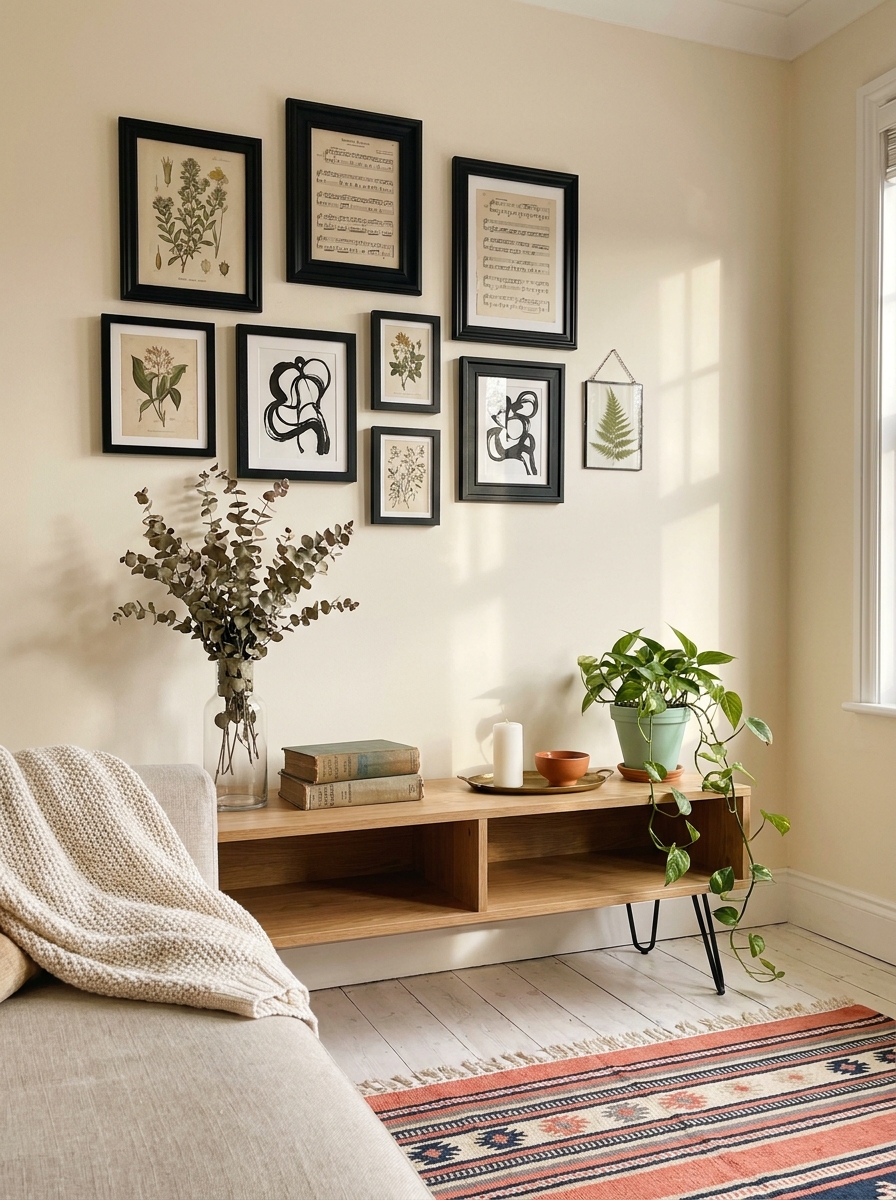
Mismatched frames from the thrift store are absolute gold. Seriously, don’t pass them up just because they’re all different styles and finishes. The secret to making them look intentional is painting them all the same color—classic white, matte black, or even a warm gold spray paint pulls the whole collection together instantly.
Once they’re painted and dry, fill them with a mix of art prints, fabric scraps, pressed botanicals, or even pages from old books. I’ve used vintage sheet music, black and white family photos, and abstract watercolor prints I found on Etsy for just a few bucks. The variety in what’s inside the frames is what makes it interesting.
Hang them salon-style with different sizes clustered together, or go for a more structured grid if that’s your thing. Either way, you’ve got a custom gallery wall that cost maybe $30 total. And it tells a story that’s completely yours.
3. Reupholster Dining Chairs with Bold Fabric
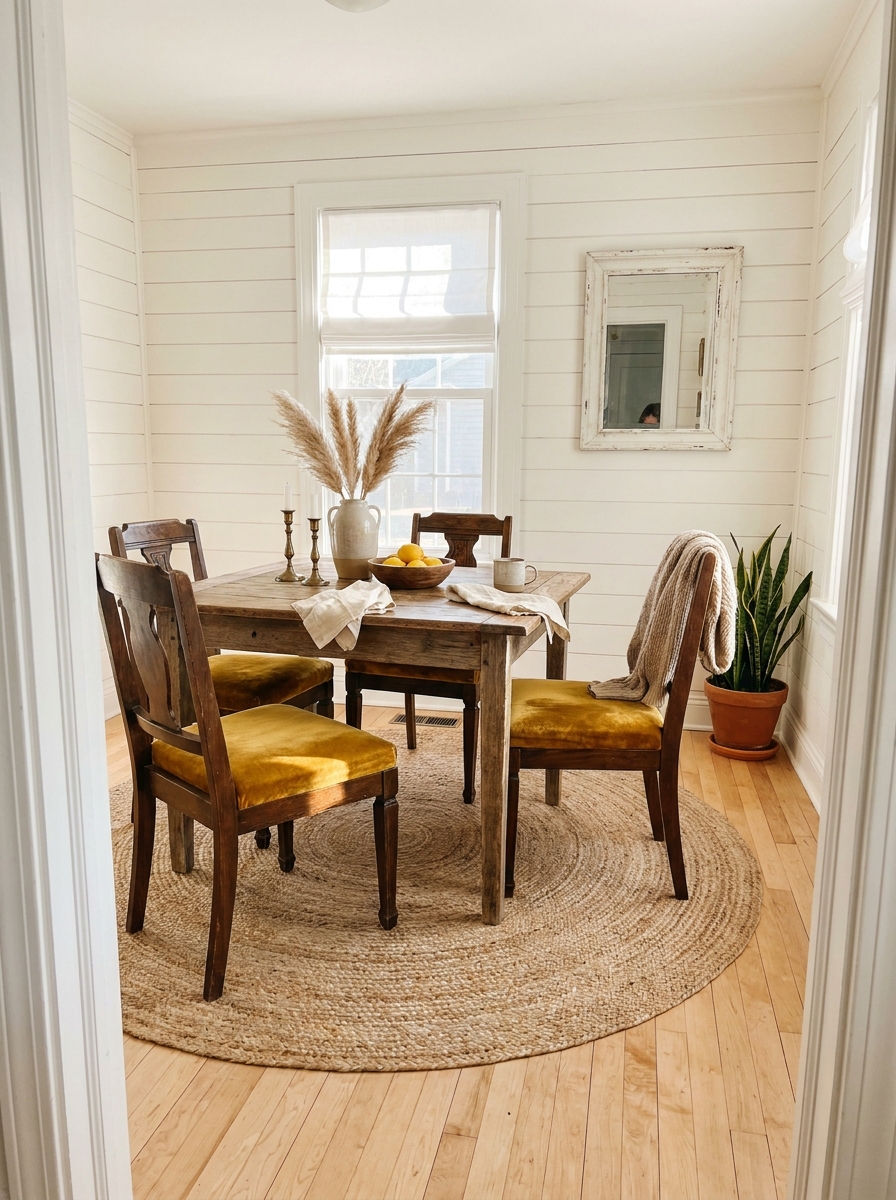
Old dining chairs with good bones but tragic upholstery are everywhere at estate sales and thrift shops. And reupholstering them is way easier than it sounds—you basically just need a staple gun, fabric, and about an hour per chair. I’m not talking about anything fancy with piping or tufting. Just remove the seat, pull off the old fabric, cut your new fabric to size with a few inches of overhang, and staple it tight on the underside.
This is your chance to go bold. A vibrant velvet in emerald or burnt orange adds so much personality, or try a fun patterned linen if you want something more playful. Mixing and matching fabrics across a set of chairs gives you that eclectic, collected look without spending a fortune on brand-new furniture.
Pair your freshly upholstered chairs with a simple wooden table, and suddenly your dining area feels like it came straight out of a design magazine. It’s one of those projects where people always ask, ‘Where did you get those?’ and you get to casually say, ‘Oh, I made them.’
4. Spray Paint Brass Fixtures for a Modern Update
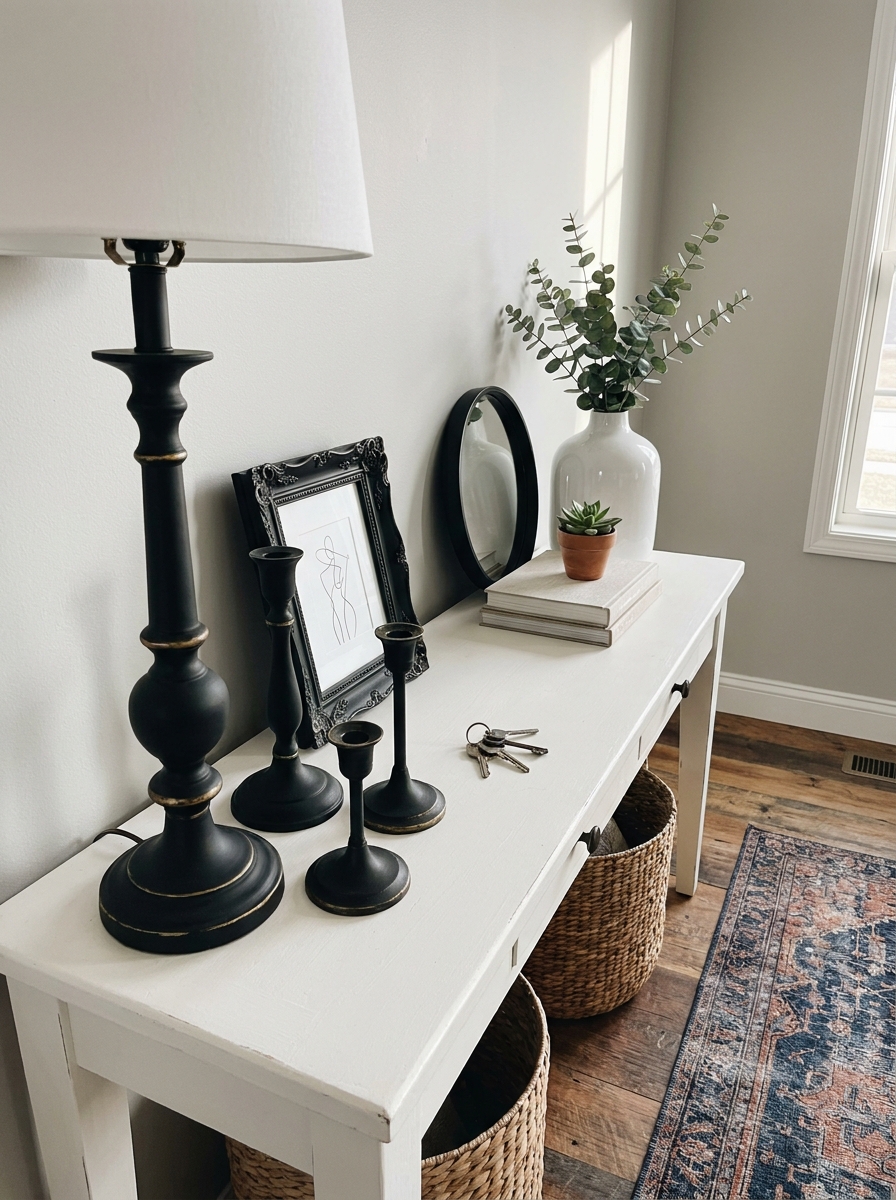
Those outdated brass lamps, candlesticks, and picture frames you find at every thrift store? They’re actually amazing once you give them a modern makeover with spray paint. Matte black is my go-to because it instantly makes anything look expensive and current, but brushed gold or even a soft blush pink can be stunning depending on your space.
The trick is proper prep—clean everything with rubbing alcohol first, then apply a coat of primer made for metal. After that, two light coats of spray paint in a well-ventilated area, and you’re done. I’ve transformed ugly table lamps, vintage mirror frames, and even those weird tiered candle holders into pieces I actually want to display.
Group a few together on a console table or bookshelf, and suddenly you’ve got a cohesive collection that looks intentional. The best part? Each piece cost maybe $3 at the thrift store and $8 in spray paint. That’s the kind of math I can get behind.
5. Transform Old Books Into Stylish Risers
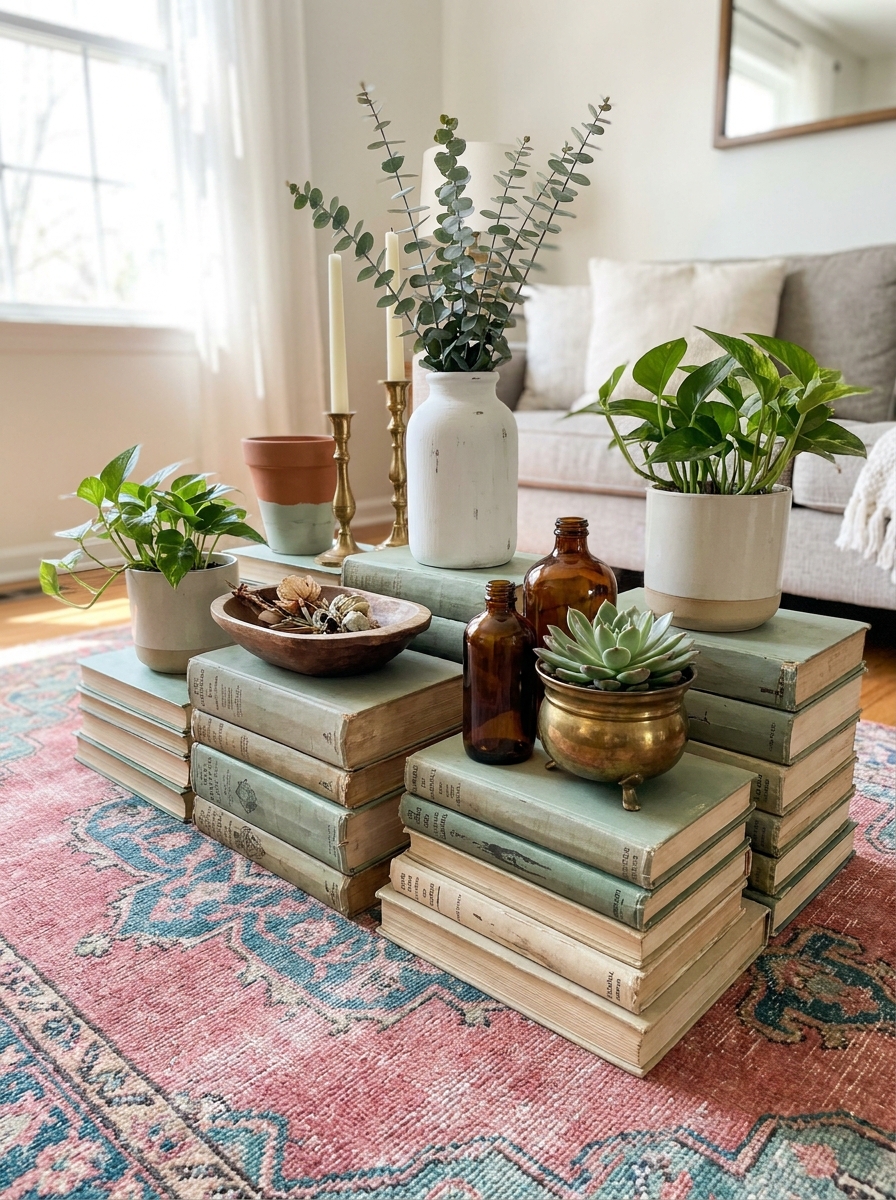
I started stacking vintage books under plants and suddenly my whole coffee table looked intentional instead of cluttered. Thrift stores always have those gorgeous old hardcovers nobody wants anymore. The ones with worn spines and faded colors? Perfect.
You can paint the spines all one color for a modern look, or leave them as-is for that collected-over-time vibe. I love mixing heights to create little vignettes. Stack three books, add a small plant on top. Stack five more, nestle a candle there. It’s like instant styling magic.
The best part? You can rearrange them whenever you get bored. Use them as risers on shelves, under picture frames, or to prop up a pretty tray. I’ve even hot-glued stacks together to make permanent side tables for tight spaces. One friend covers hers in pretty fabric scraps. Another wraps hers in leftover wallpaper. The possibilities are honestly endless, and you’ll spend maybe ten bucks total.
6. Give Thrifted Mirrors a New Frame
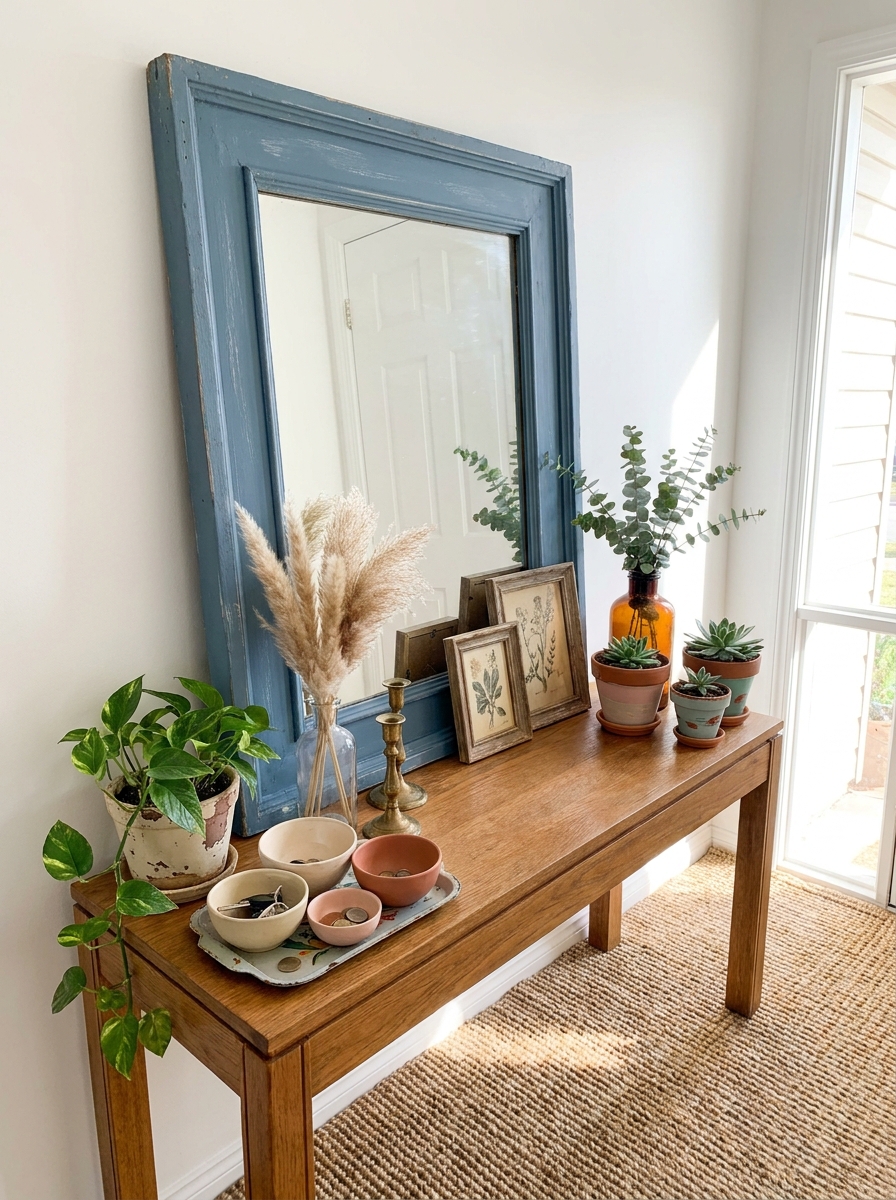
Old mirrors with ugly frames are everywhere at thrift stores, and the glass is usually perfect. I grab them every single time because a good mirror instantly makes a room feel bigger and brighter. The frame situation? We can fix that.
You can strip the old finish and stain it dark for drama. Paint it glossy black for modern elegance. Wrap it in rope for coastal vibes. I once covered a baroque frame in metallic gold leaf and it looks like a thousand-dollar antique. Another time I glued wooden shims around a plain square mirror in a sunburst pattern. Took an hour, cost twelve dollars, looks custom.
The trick is finding mirrors with good bones. Look for interesting shapes or solid wood frames you can work with. Even damaged frames can be sanded down and rebuilt. I’ve seen people add decorative molding, mosaic tiles, even seashells. Your thrifted mirror becomes whatever style you need it to be.
7. Refresh Lampshades with Fabric or Paint
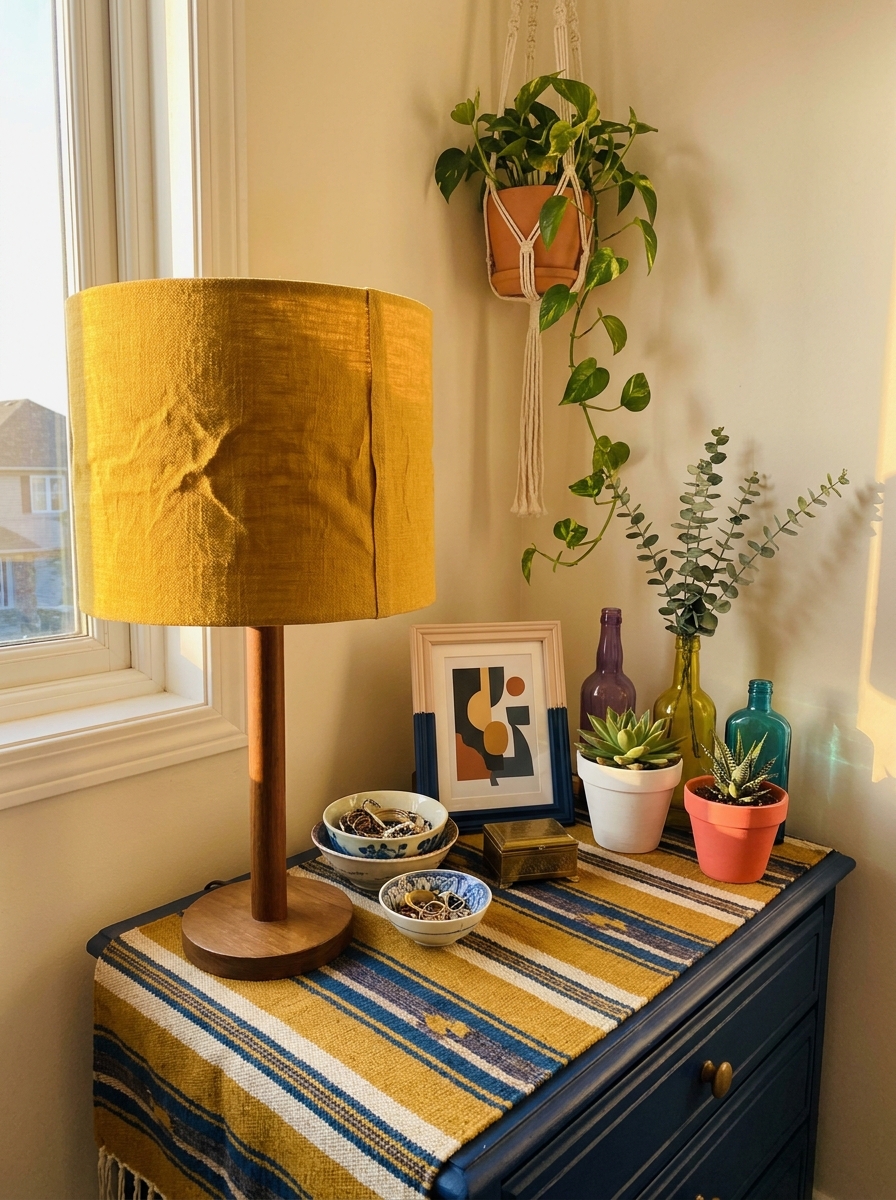
Dated lampshades make me sad because the lamps themselves are usually great. That yellowed shade or weird pattern? Easy fix. You can completely change the whole vibe of a room by swapping or updating lampshades.
Fabric is my go-to. Buy half a yard of something gorgeous and wrap it right over the old shade with fabric glue. I’ve done velvet, linen, even fun printed cotton. Or paint them! Chalk paint works beautifully on fabric shades. I painted one lampshade navy blue with a dry brush technique and it looks so moody and expensive.
You can also add trim, fringe, or ribbon around the edges. I hot-glued pom-pom trim to a plain white shade for my daughter’s room and she absolutely lost it. The lamp cost three dollars at Goodwill. The trim was five. Total transformation for under ten bucks and maybe thirty minutes of work.
8. Create Custom Wall Art from Thrifted Canvases
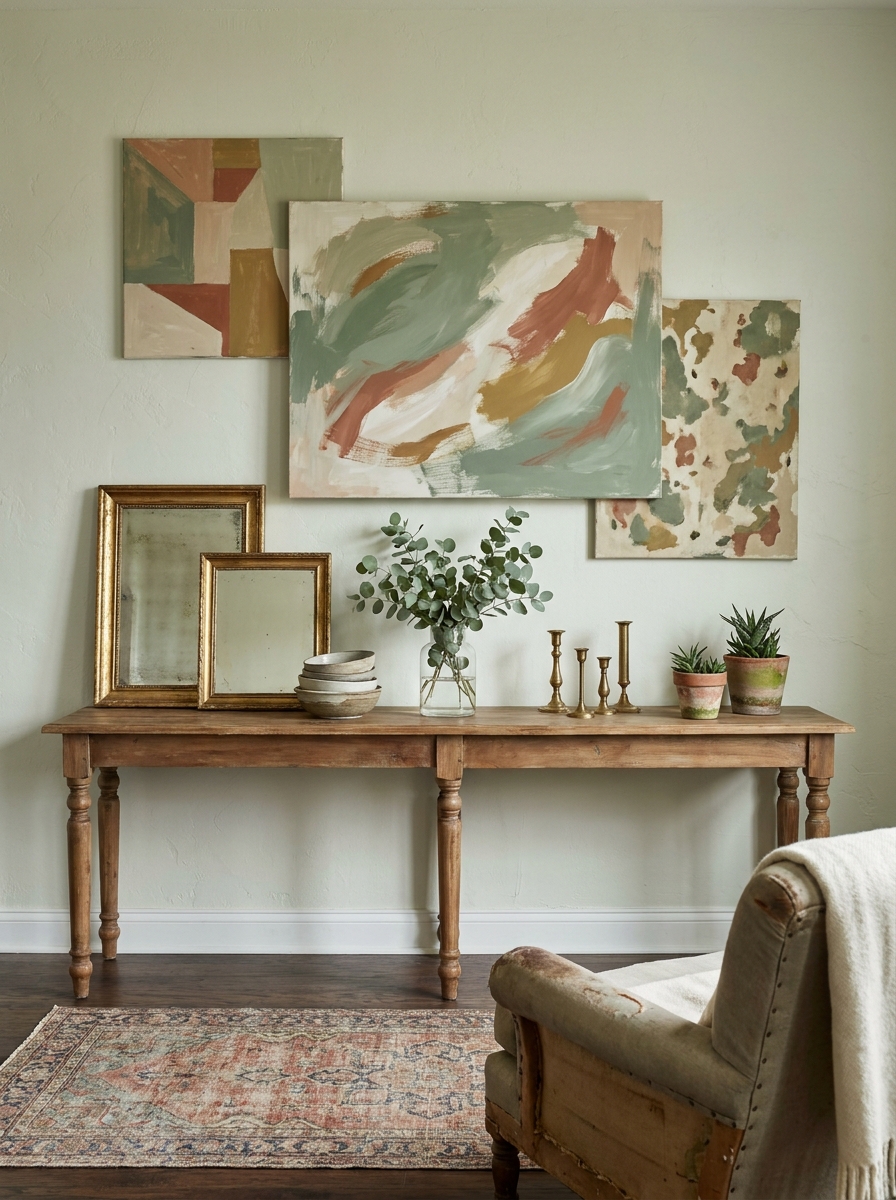
Those weird landscapes and outdated prints at thrift stores? Prime real estate for your own artwork. The canvases are already stretched and ready to go. Just paint right over them.
I’m not even artistic and I’ve made some of my favorite wall art this way. Abstract shapes, color blocking, simple line drawings. You literally cannot mess this up because it already looked bad. Paint it all white first as a base, then add whatever colors make you happy. I did three canvases in different sizes with just terracotta and cream stripes. Hung them together and everyone asks where I bought them.
You can also cover them with fabric, wallpaper samples, or even sheet music for a vintage look. Mod Podge is your friend here. I’ve seen people create typography art, botanical prints, even family photo collages. The frame is already there, the canvas is already primed. You’re just making it yours.
9. Turn Vintage Suitcases Into Stylish Storage
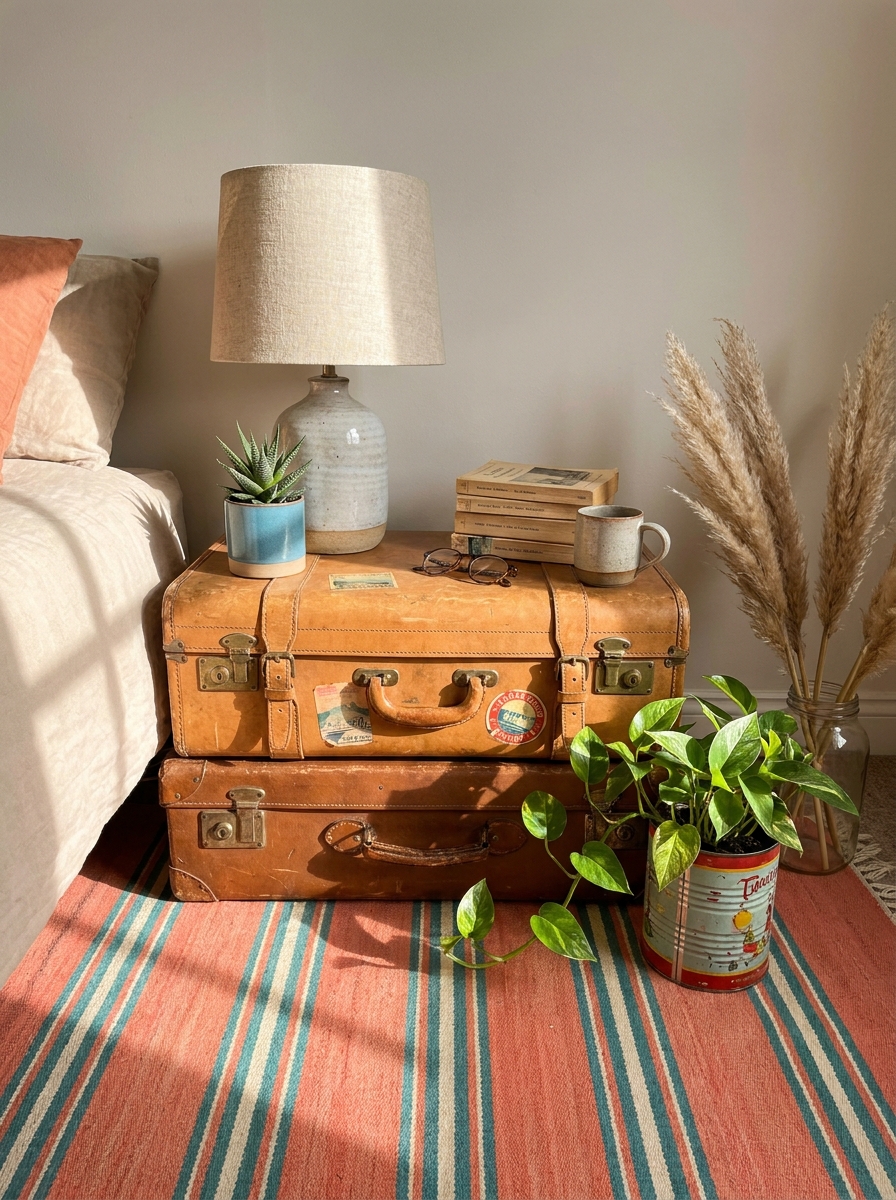
Old suitcases are treasure troves waiting to happen! I find them all the time at thrift stores for like five bucks, and they’re seriously so versatile. Stack two or three to create a quirky side table, or mount one on the wall as a unique shelving unit. The worn leather and vintage travel stickers give instant character that you just can’t buy new.
My favorite trick? Clean them up really well, add new fabric lining inside if the old stuff is gross, and use them to stash blankets, magazines, or craft supplies. They look amazing in living rooms, bedrooms, or even entryways. If the exterior is damaged, you can paint them or leave the patina for that authentic vintage vibe.
The best part is how much personality these bring to a space. Every suitcase tells a story, and when you repurpose it, you’re giving it a whole new chapter. Plus, guests always ask about them!
10. Refinish Wooden Crates Into Open Shelving
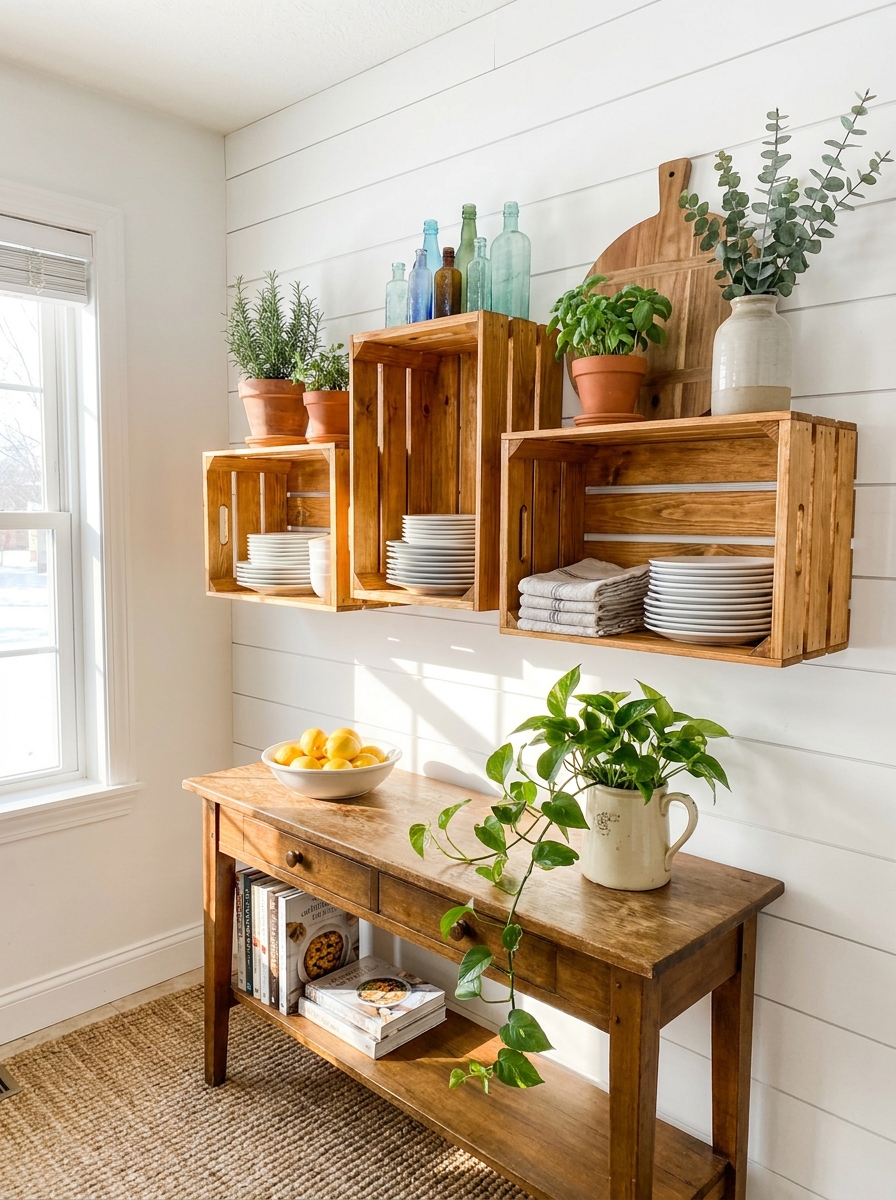
Wooden crates from thrift stores or flea markets are absolute gold for DIY lovers. They usually cost a few dollars, and with a little sanding and stain, they transform into the cutest open shelving. I’ve used them in kitchens, bathrooms, living rooms—literally everywhere.
Start by giving them a good clean and sanding down any rough spots. Then you can stain them dark for a rustic look, paint them white for farmhouse vibes, or leave them natural and just seal with polyurethane. Mount them horizontally or vertically on the wall, or stack them freestanding for a bookshelf effect. The open design keeps things feeling airy while adding tons of storage.
I love styling these with a mix of practical items and pretty decor. Think folded towels, potted plants, vintage finds, and a few books. The natural wood texture adds so much warmth, and because they’re modular, you can rearrange them whenever you want a new look.
11. Paint Ceramic Vases for a Designer Look
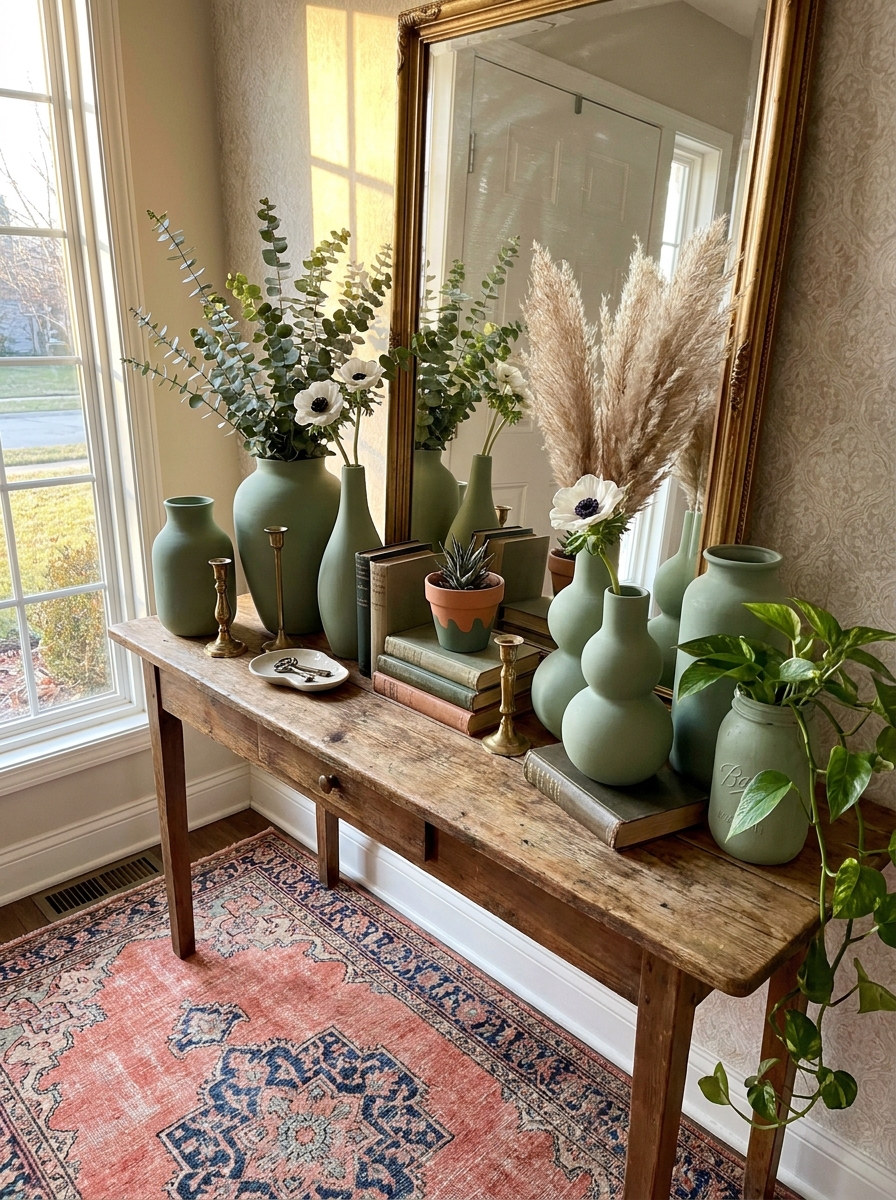
Thrift stores are packed with random ceramic vases that nobody wants, but hear me out—a little paint changes everything. I’m talking about those dated floral vases, weird shapes, or plain boring ones. With spray paint or chalk paint, you can turn them into high-end looking pieces that could pass for Anthropologie.
I like to collect a bunch in different shapes and paint them all the same color for a cohesive look. Matte white is always chic, but sage green, dusty blue, or even black adds major style. You can also do two-tone effects by taping off sections or leaving the bottom unpainted for contrast. The transformation takes like ten minutes, and suddenly you have a whole collection of custom vases.
Group them together on a shelf, use them as centerpieces, or scatter them around the house with fresh or dried stems. Nobody will ever guess they started as thrift store rejects!
12. Upcycle Glass Jars Into Chic Storage Containers
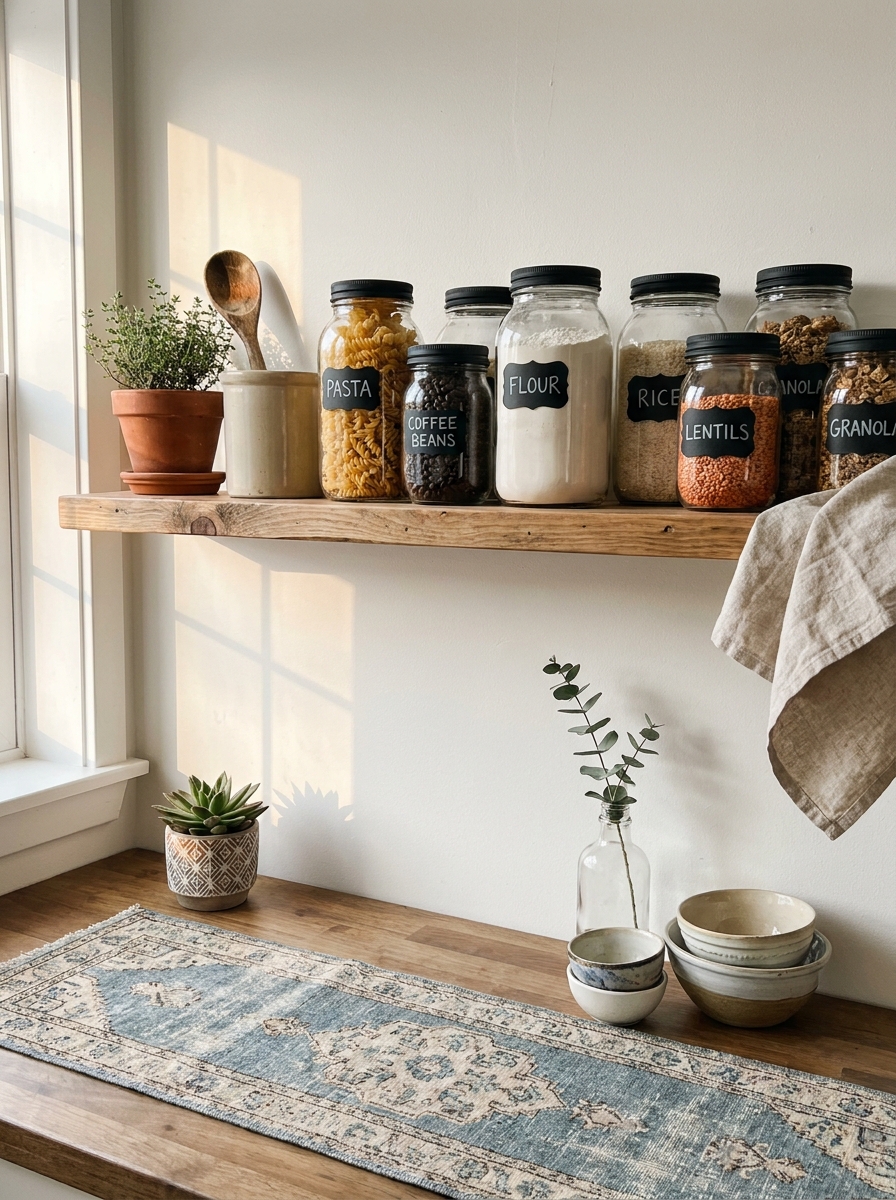
Okay, this one might sound too simple, but trust me—thrifted glass jars are insanely useful and look so much better than plastic. I’m talking about old pasta sauce jars, vintage canning jars, or random glass containers you find for pennies. Remove the labels, give them a good scrub, and you’ve got instant stylish storage.
Paint the lids with metallic spray paint for a glam touch, or wrap them with twine for a farmhouse feel. Use them in the kitchen for dry goods like pasta, rice, or coffee. In the bathroom, they’re perfect for cotton balls, q-tips, or bath salts. You can even cluster them on a tray as a cute organizing station on your desk.
The clear glass lets you see what’s inside, which is both pretty and practical. Add a little chalkboard label if you want to get fancy. These jars cost basically nothing but make your space feel intentional and put-together.
13. Turn Old Shutters Into Rustic Wall Decor
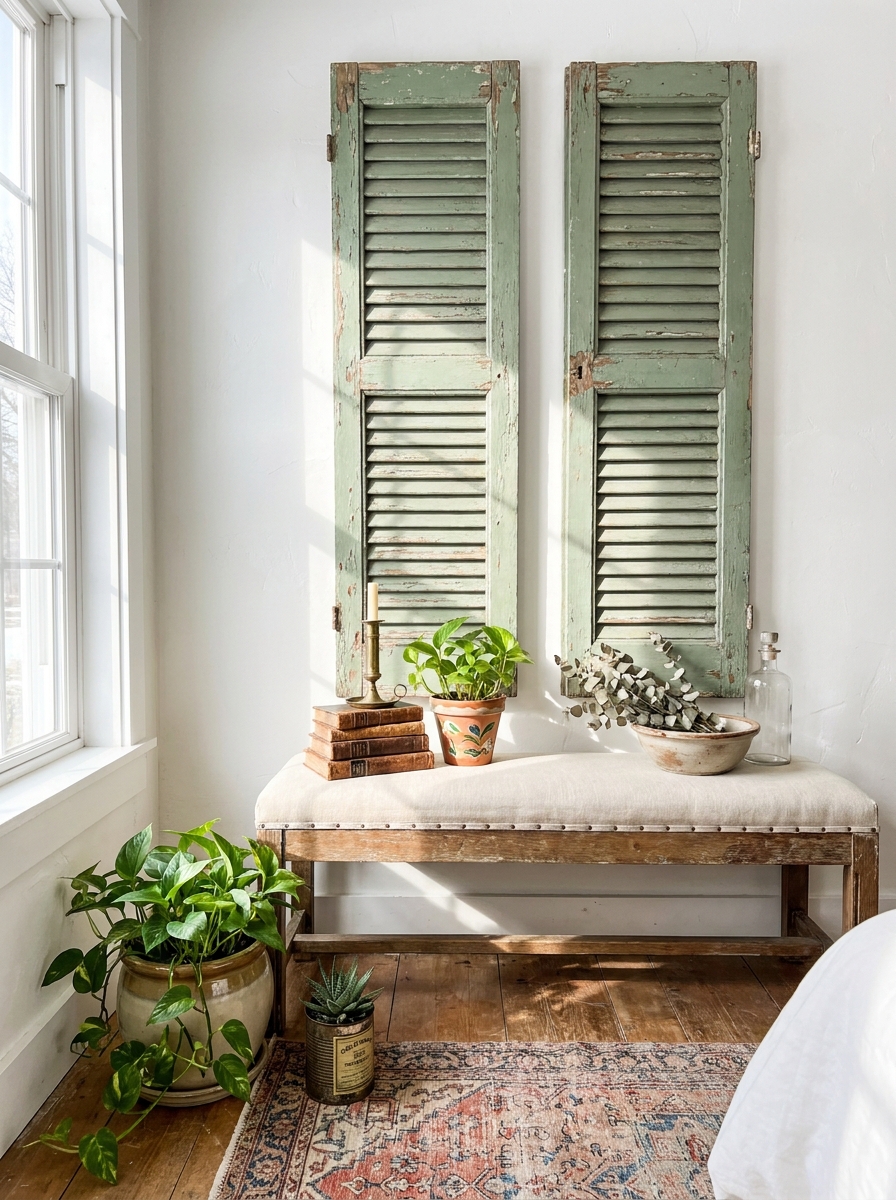
I found these beat-up wooden shutters at a yard sale for three dollars, and honestly? They looked terrible. Chipped paint, wobbly hinges, the works. But I saw potential.
A good cleaning, some light sanding to embrace that chippy texture, and suddenly they became the coolest wall art. You can leave them as-is for that authentic vintage vibe, or paint them in a soft sage or cream. Hang them vertically behind your bed, horizontally above a console table, or even use them as a unique photo display by clipping pictures between the slats.
The beauty of shutters is they add instant architectural interest without the commitment of real built-ins. They work in farmhouse spaces, cottages, even eclectic bohemian rooms. Look for shutters at estate sales, salvage shops, or even curbside. The more weathered, the better. Sometimes the best decor is what other people toss out. These babies bring so much character to blank walls, and guests always ask where you found them. Little do they know you paid less than a latte.
14. Update Thrift Store Baskets with Paint and Rope
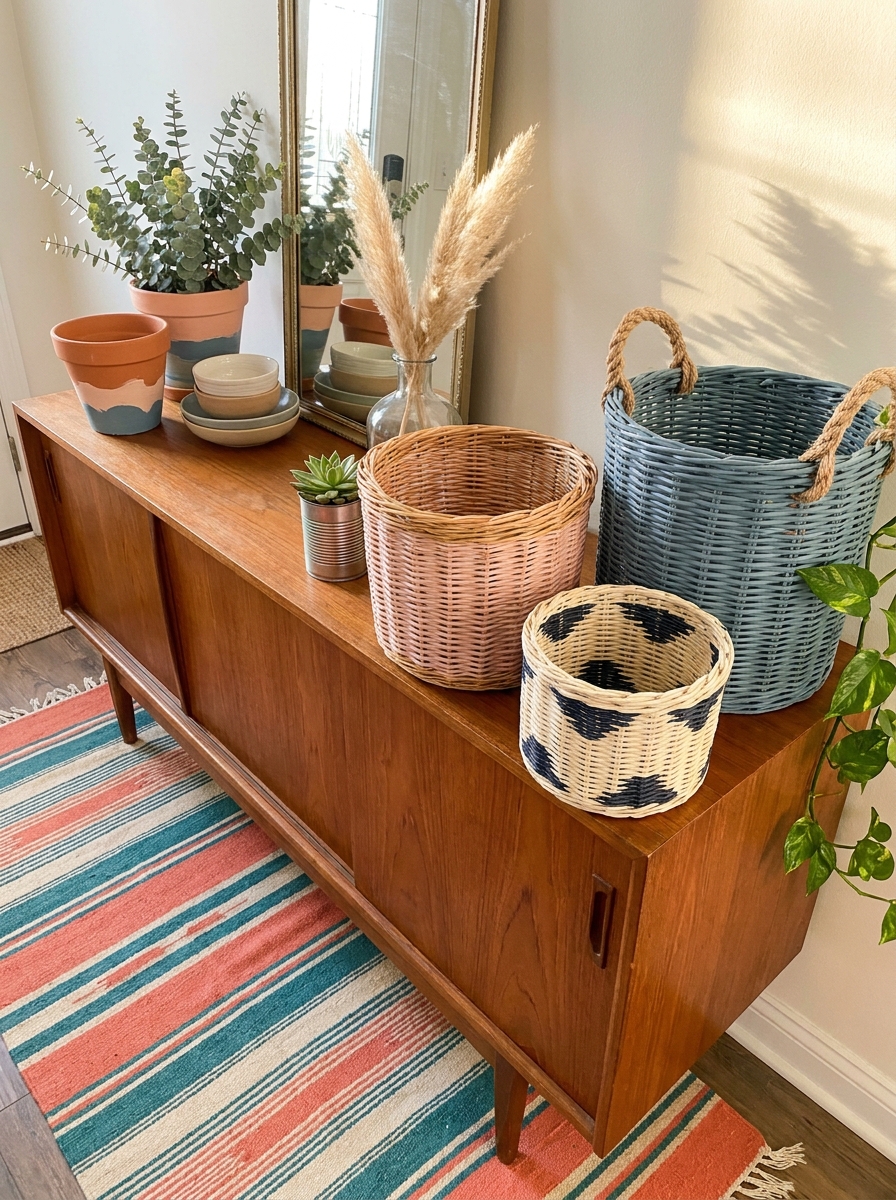
Baskets are thrift store gold, but let’s be honest—most of them look dated or dingy. The good news? A little creativity turns them into custom storage that looks expensive.
Grab some chalk paint or acrylic craft paint and go wild. Paint the entire basket in a bold color like navy or terracotta, or just paint the rim for a subtle two-tone look. You can even add rope handles if the originals are gross or broken. Just hot glue thick jute rope around the rim or thread it through existing holes for an instant upgrade.
I use painted baskets everywhere—under my coffee table for blankets, on open shelving for mail and remotes, in the bathroom for rolled towels. They hide clutter while adding texture and personality. And because you painted them yourself, they actually match your decor instead of looking like random thrift store finds. The best part? Even if you mess up, it’s just a basket. Paint over it and try again. Low stakes, high reward.
15. Refinish Thrifted Wooden Trays for Serving in Style
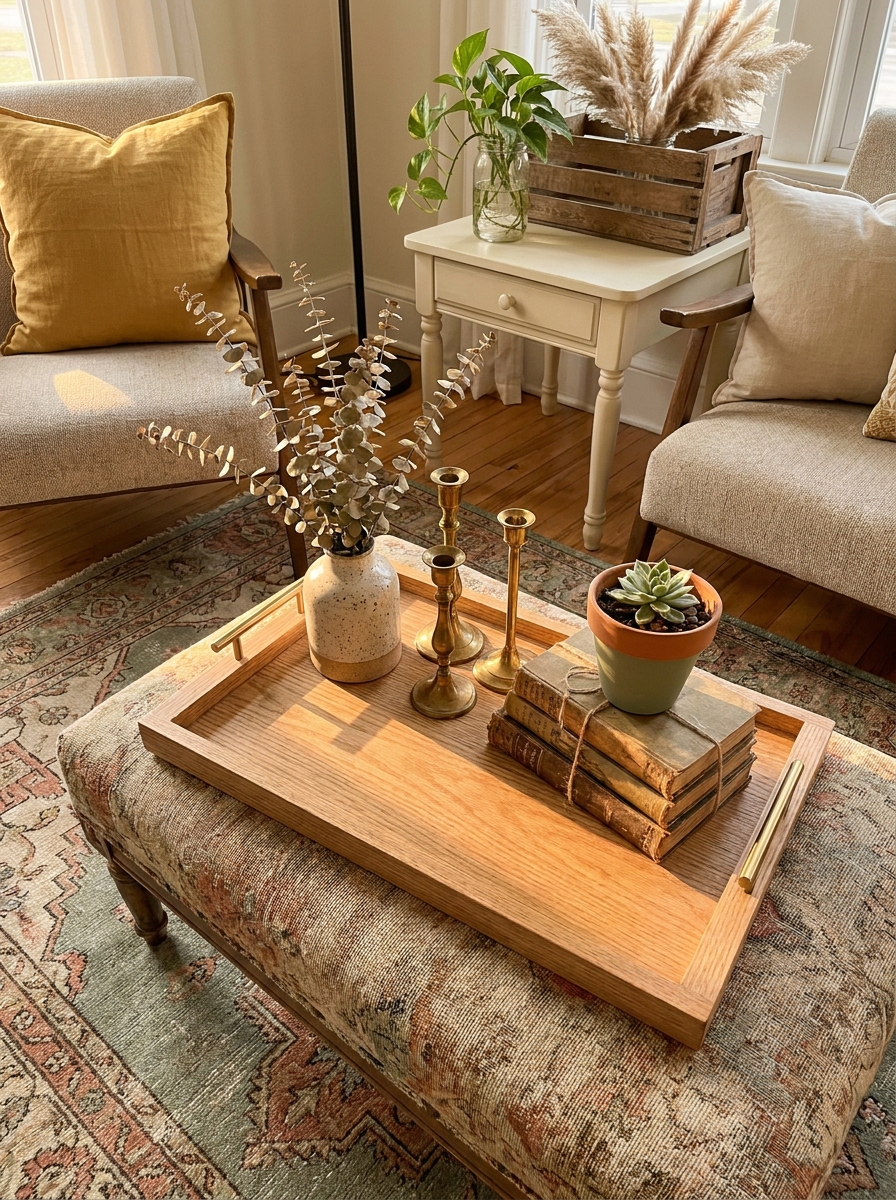
Wooden trays are everywhere at thrift stores, usually scratched up and sad-looking. But underneath that wear is solid wood just waiting for a makeover.
Sand them down to remove the old finish, then decide your vibe. Stain them dark for a moody look, paint them white for farmhouse freshness, or leave them natural and seal with poly for that organic Scandi feel. You can even stencil a design on the bottom or add new handles from the hardware store if the old ones are missing.
I keep a few refinished trays in rotation—one lives on my ottoman for corralling remotes and candles, another sits on my kitchen counter for coffee essentials, and my favorite serves as a breakfast-in-bed tray on weekends. They instantly make any surface look more intentional and pulled-together. Plus, they’re way cheaper than buying new designer trays that honestly aren’t better quality. It’s literally just wood and a little elbow grease. You’ve got this.
16. Transform Outdated Picture Frames Into Serving Trays
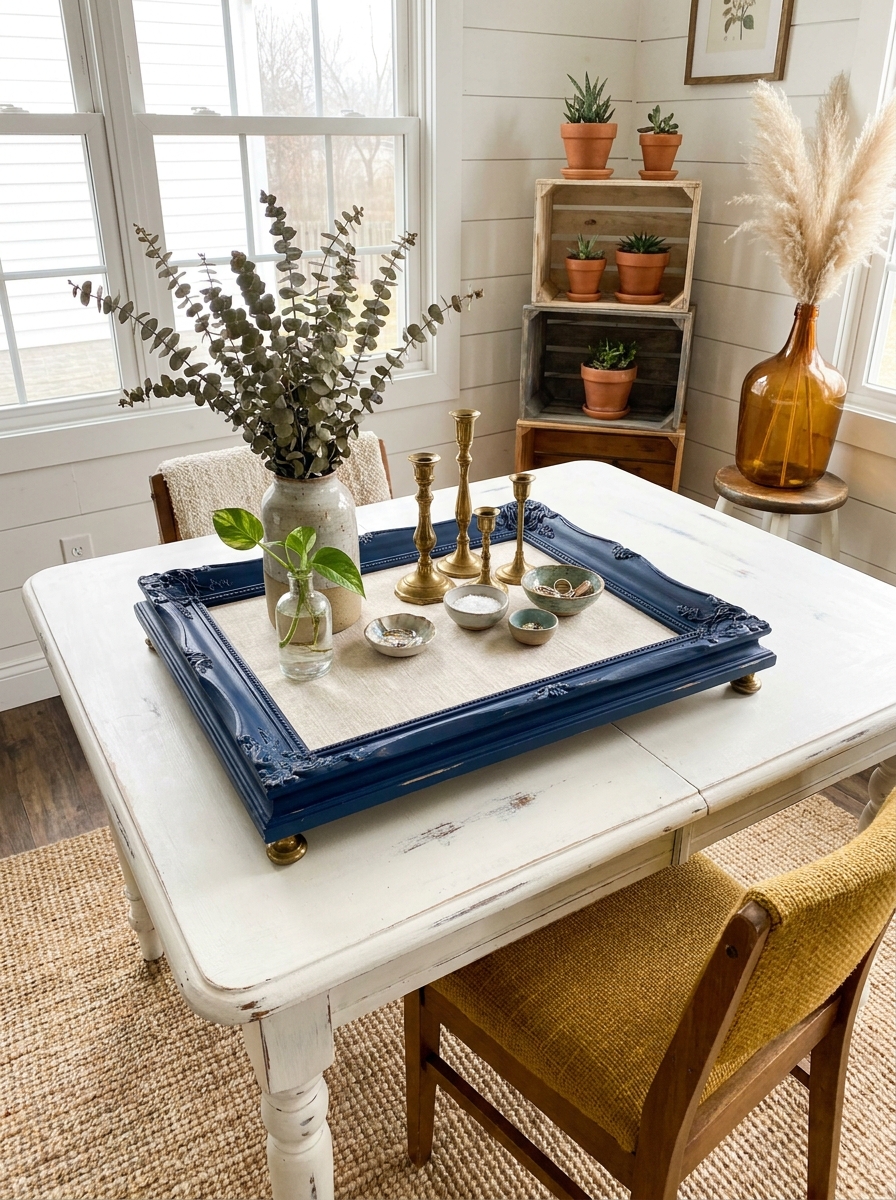
This flip blows people’s minds every time. Take a large thrift store picture frame, remove the glass, and boom—you’ve got a gorgeous decorative tray.
Paint or stain the frame however you want, then replace the cardboard backing with something prettier—fabric, scrapbook paper, or even wallpaper samples work great. Secure it with the frame clips, flip it over, and add some small furniture felt pads or cabinet knobs on the bottom as feet. Suddenly that ugly frame is a chic tray perfect for your coffee table or bar cart.
I love this project because frames are so cheap at thrift stores, especially the big chunky ones from the 90s that nobody wants. But once you transform them, they look like something from Anthropologie. Use them to corral candles and coasters, display perfume bottles in your bathroom, or serve drinks when friends come over. The glass protects whatever surface it’s sitting on, and the frame adds that finished designer touch. It’s such an easy flip with major visual impact.
17. Give Thrift Store Candlesticks a Luxe Makeover
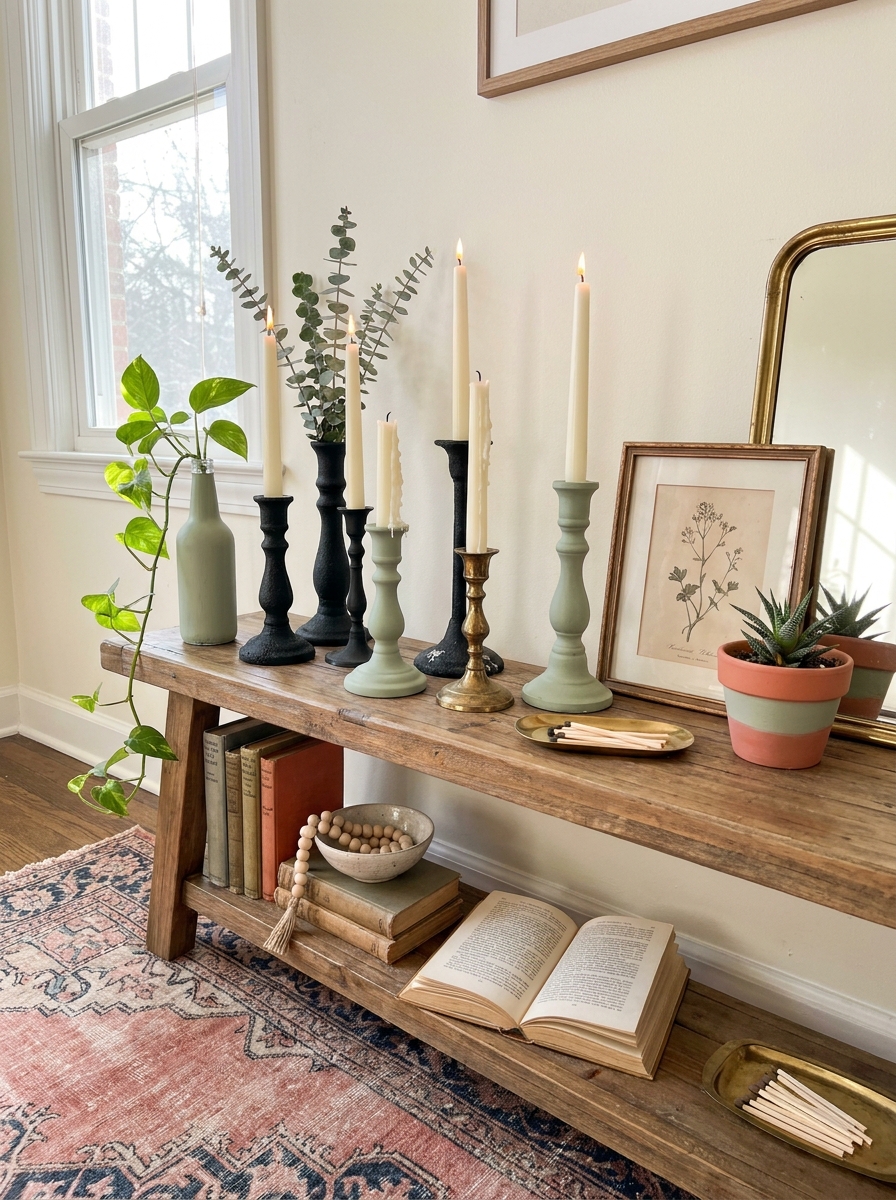
Those mismatched brass candlesticks collecting dust at the thrift store? Total gold mine. I grab them every single time because they’re so easy to transform into something gorgeous.
Start by cleaning them really well with dish soap and a scrub brush. Then decide your vibe. You can spray paint them all one cohesive color for a modern look, or leave some brass showing through for that trendy mixed-metal thing. Matte black looks incredibly chic. White feels fresh and coastal. Gold spray paint makes cheap brass look expensive.
I love clustering different heights together on a console table or mantel. Mix in some painted ones with original brass for dimension. Add taper candles in colors that pop against your paint choice. The best part? This project costs maybe five bucks and takes twenty minutes. You end up with candlesticks that look like they came from a boutique, not a donation bin.
18. Turn Thrifted Cutting Boards Into Decorative Wall Art
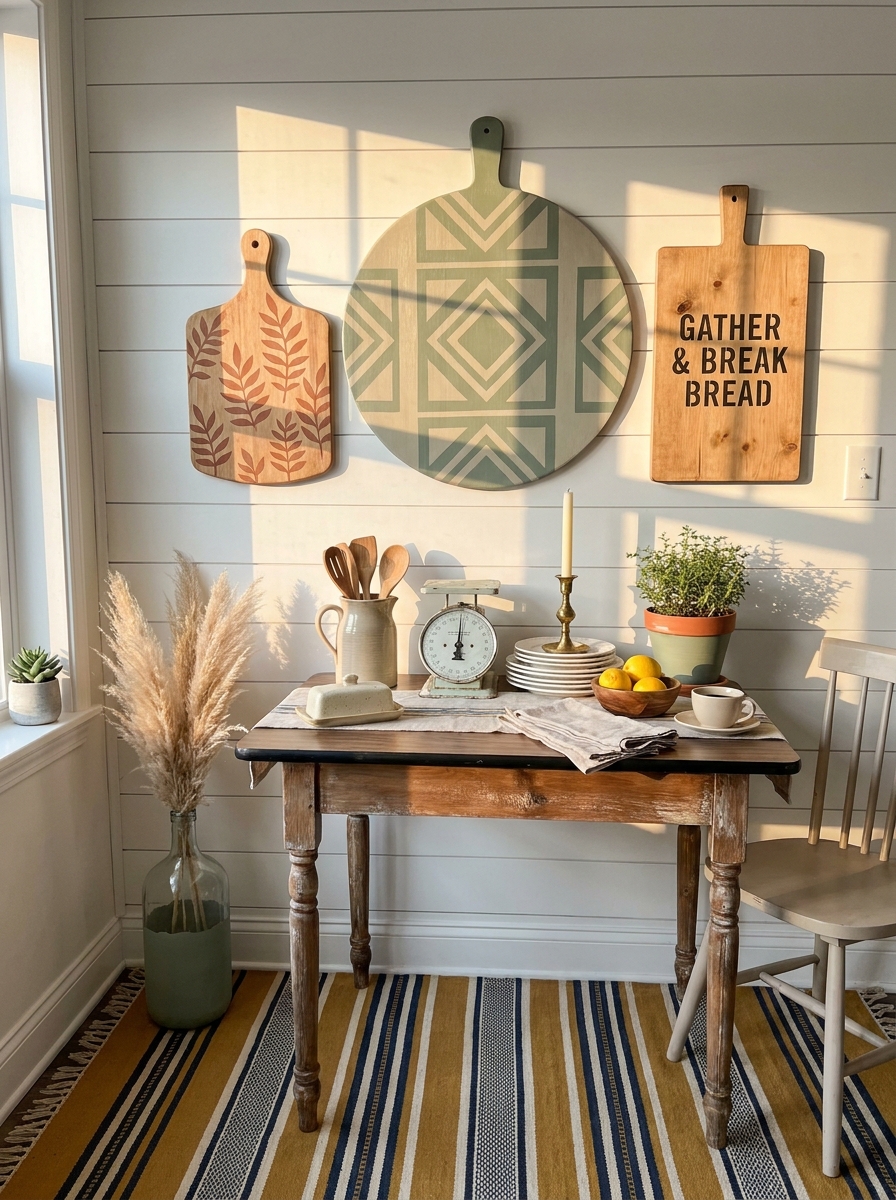
Okay this one surprised me. Who knew old wooden cutting boards could become wall art? But here we are and I’m obsessed.
Hunt for cutting boards with interesting shapes—round ones, paddle-style ones, those long skinny bread boards. Even if they’re stained or scratched, that’s totally fine. Sand them down if they’re rough, then decide your design. You can paint a simple pattern, stencil on a quote, add a botanical design, or even decoupage with pretty paper or fabric.
I’ve seen people paint them solid colors and arrange them in a grid like tiles. Others keep the wood natural and just add a painted monogram or house number. Hang them with small nails or those adhesive picture strips. They work perfectly in kitchens obviously, but I’ve also used them in dining rooms and even bathrooms.
The wood texture gives them this warm, organic feel that painted canvas just doesn’t have. Plus they’re usually like two dollars each.
19. Refinish Thrifted Wooden Stools for Extra Seating
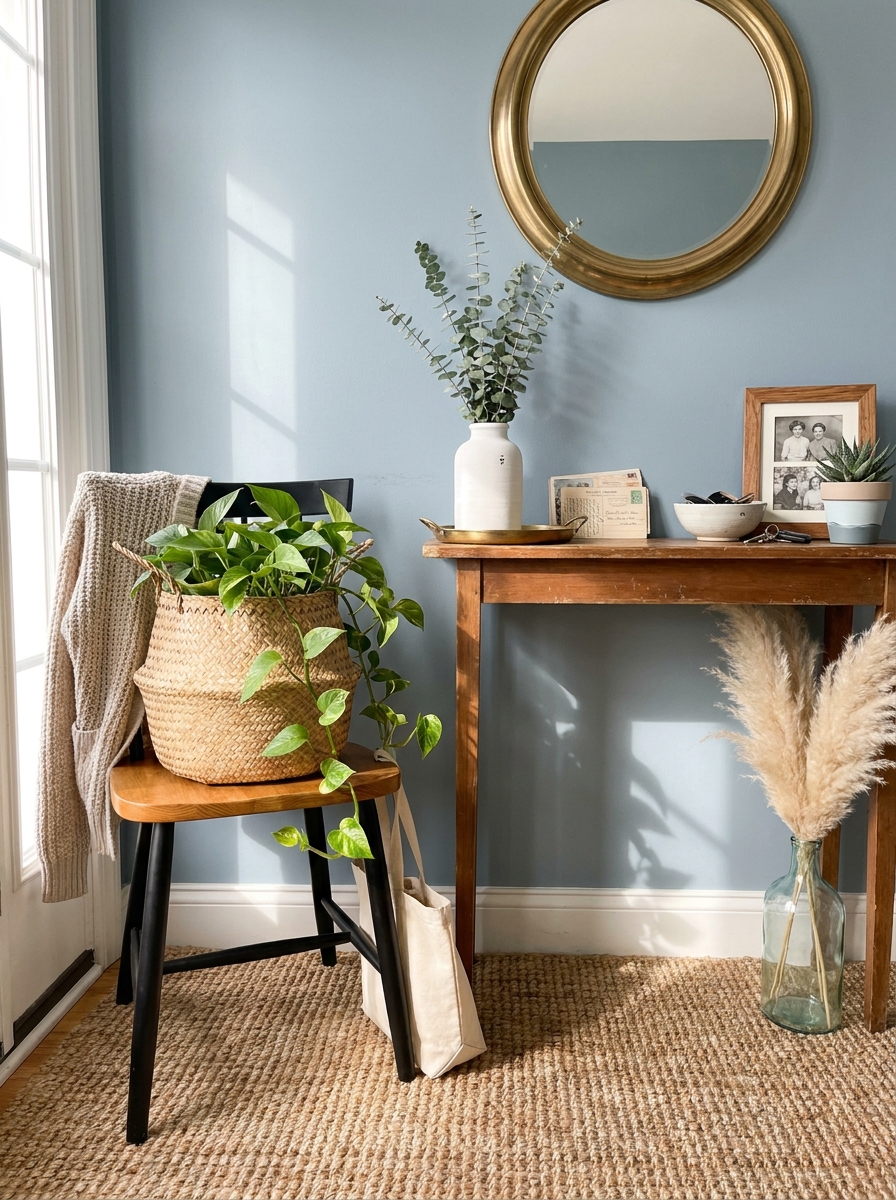
Wooden stools are everywhere at thrift stores, usually looking pretty beat up. But underneath that worn finish? Solid construction that just needs some love.
I look for stools with good bones—sturdy legs, no wobbles, interesting shapes. Bar stools, step stools, piano benches, milking stools. The finish doesn’t matter because you’re changing it anyway. Strip or sand off the old finish if it’s really rough. Then go wild with your refinishing choice.
You can stain them dark for a modern look, paint the legs and leave the top natural, or go full color with a fun bright hue. I’ve done two-tone stools with white legs and a wooden top that look so expensive. Add new cushions if they had old gross ones, or keep them bare for that minimalist vibe. They’re perfect for extra seating when guests come over, or as side tables, or even plant stands. A thirty-dollar thrift stool becomes a hundred-dollar looking piece.
20. Transform Old Window Frames Into Statement Mirrors
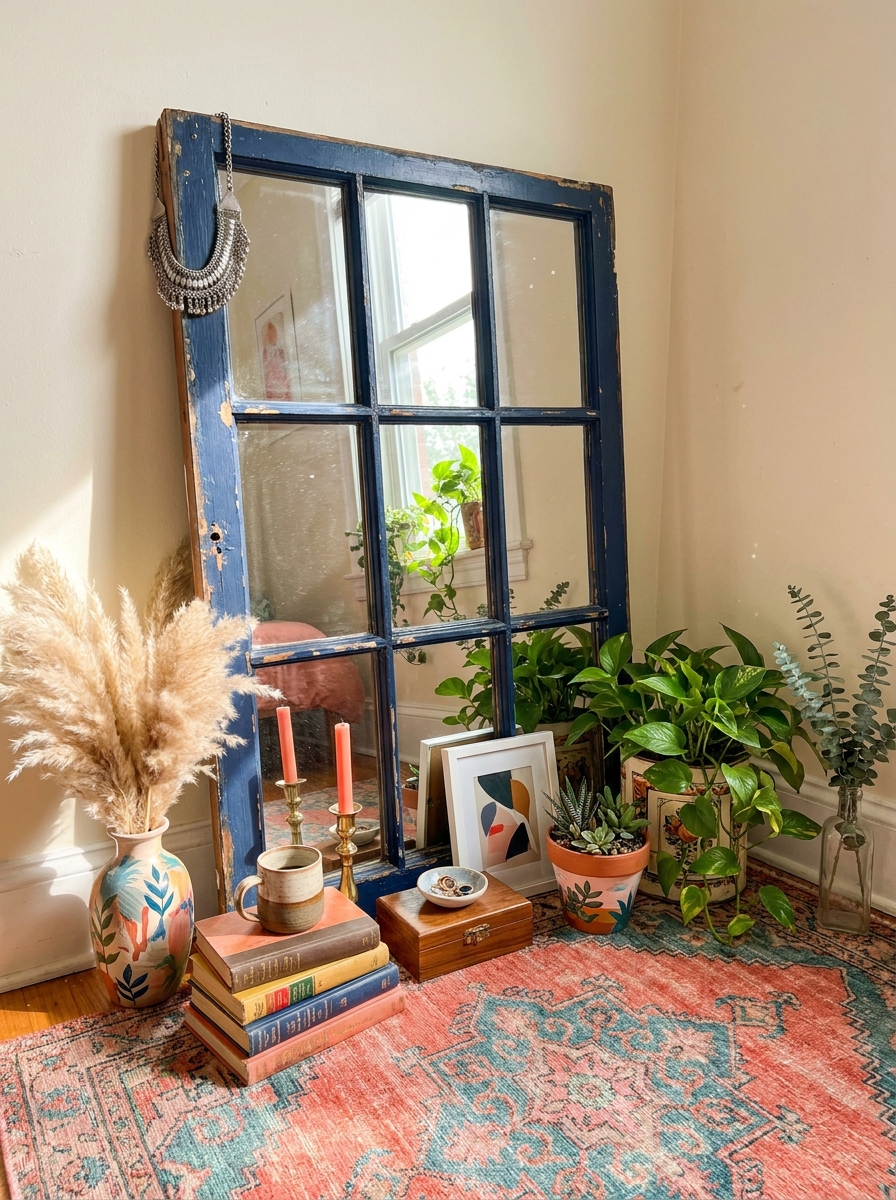
This is probably my favorite thrift flip ever. Old window frames with all that character and chippy paint? They make the most stunning mirrors.
Find a window frame with interesting panes—the more divided sections, the better. Remove any old glass carefully, then measure each opening. You can get mirrors cut to size at a hardware store for super cheap, or use mirror sheets and cut them yourself. Secure the mirrors in each pane opening with mirror adhesive or clips.
Leave the frame as-is if you love the weathered look, or paint it to match your space. White is classic. Black is dramatic. I’ve seen gorgeous ones painted sage green or navy blue. Hang it in an entryway to reflect light and make the space feel bigger. Or lean a huge one against a bedroom wall for serious impact.
That vintage window character combined with reflective mirror creates this perfect blend of rustic and functional. People always ask where I got mine and I love saying I made it from a five-dollar window frame.
21. Turn Thrifted Plates Into Wall Art Clusters
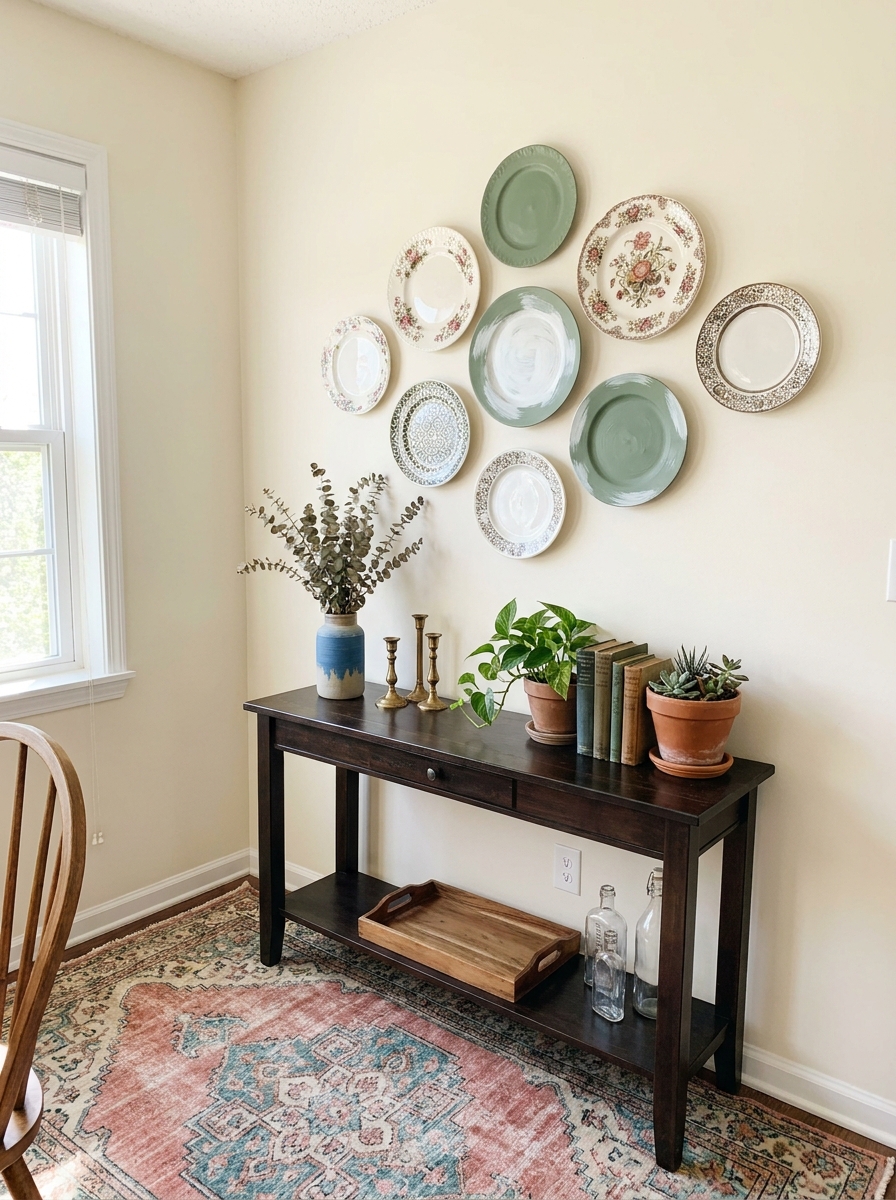
I’ve been collecting mismatched vintage plates forever, and I finally figured out what to do with them all. Hanging them on the wall as art is genius!
You can find beautiful decorative plates at thrift stores for just a couple bucks each. Look for interesting patterns, colors, or vintage designs. Mix different sizes and styles for a collected-over-time look. I love combining floral patterns with solid colors and geometric designs.
Hang them using plate hangers or adhesive disc hangers on the back. Start with your largest plate in the center and build out from there. I like to lay everything out on the floor first to plan my arrangement. The best part? This project costs almost nothing but looks like you commissioned custom wall art. It’s perfect above a console table or in a dining room where you want something unique and personal.
22. Refinish Thrifted Side Tables with Two-Tone Paint
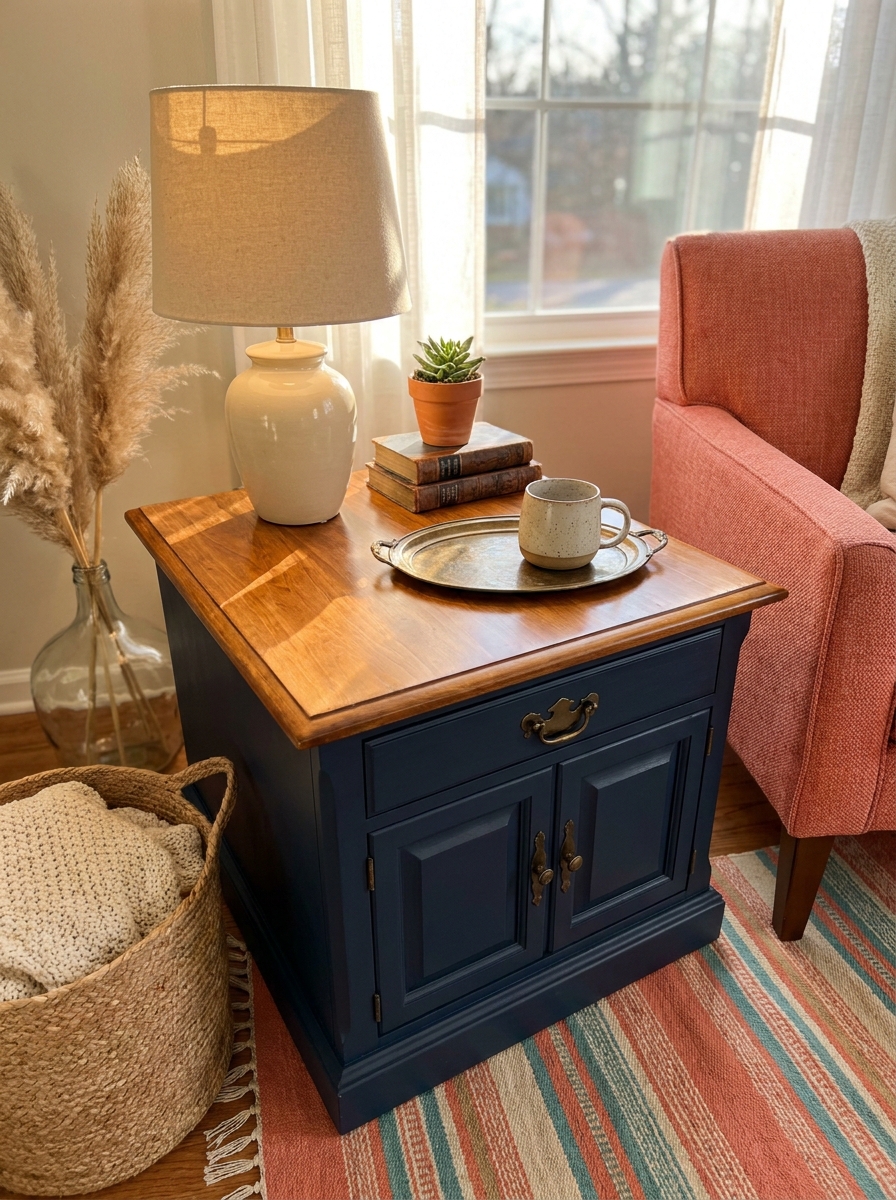
Two-tone furniture is having a serious moment, and you don’t need to buy expensive new pieces to get the look. Thrift store side tables are perfect candidates!
Grab any solid wood side table that’s structurally sound. I don’t care if the finish is scratched or outdated. Sand it down, then paint the base one color and the top another. My favorite combo right now is a navy base with a natural wood top, but you could do white and blush, black and gold, or sage and cream.
The contrast makes even basic furniture look intentional and designer. Plus, keeping the top natural (or staining it) is way more forgiving than painting it. You don’t have to worry about every little scratch showing. I’ve done this to three different side tables, and people always ask where I bought them. The answer? Goodwill for twelve dollars!
23. Create a Jewelry Organizer from Vintage Drawer Pulls
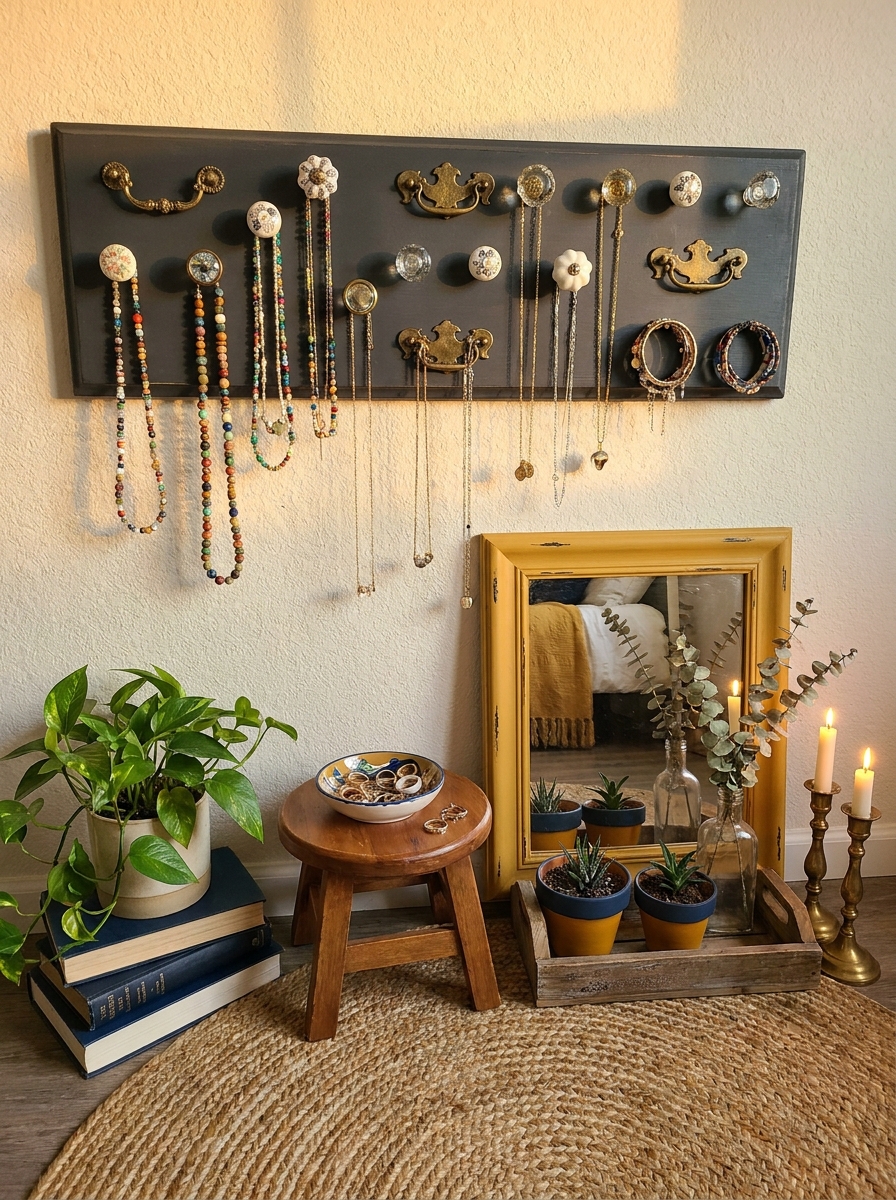
This is one of my favorite tiny projects with huge visual impact. Old drawer pulls and cabinet knobs are everywhere at thrift stores, and they’re usually super cheap or even free in junk bins.
Find a piece of reclaimed wood or an old cutting board as your base. Arrange vintage knobs and pulls in rows and screw them directly into the wood from the front. I like mixing brass, ceramic, and glass knobs for an eclectic look. Once they’re attached, hang your board on the wall and use the knobs to hang necklaces, bracelets, and scarves.
It’s functional art! The different knob styles create this cool texture and dimension that makes it look way more expensive than it is. Hang it in your bedroom, closet, or even entryway. Mine cost about eight dollars total, and I get compliments every single time someone sees it.
24. Upcycle Thrifted Curtain Rods Into Floating Shelves
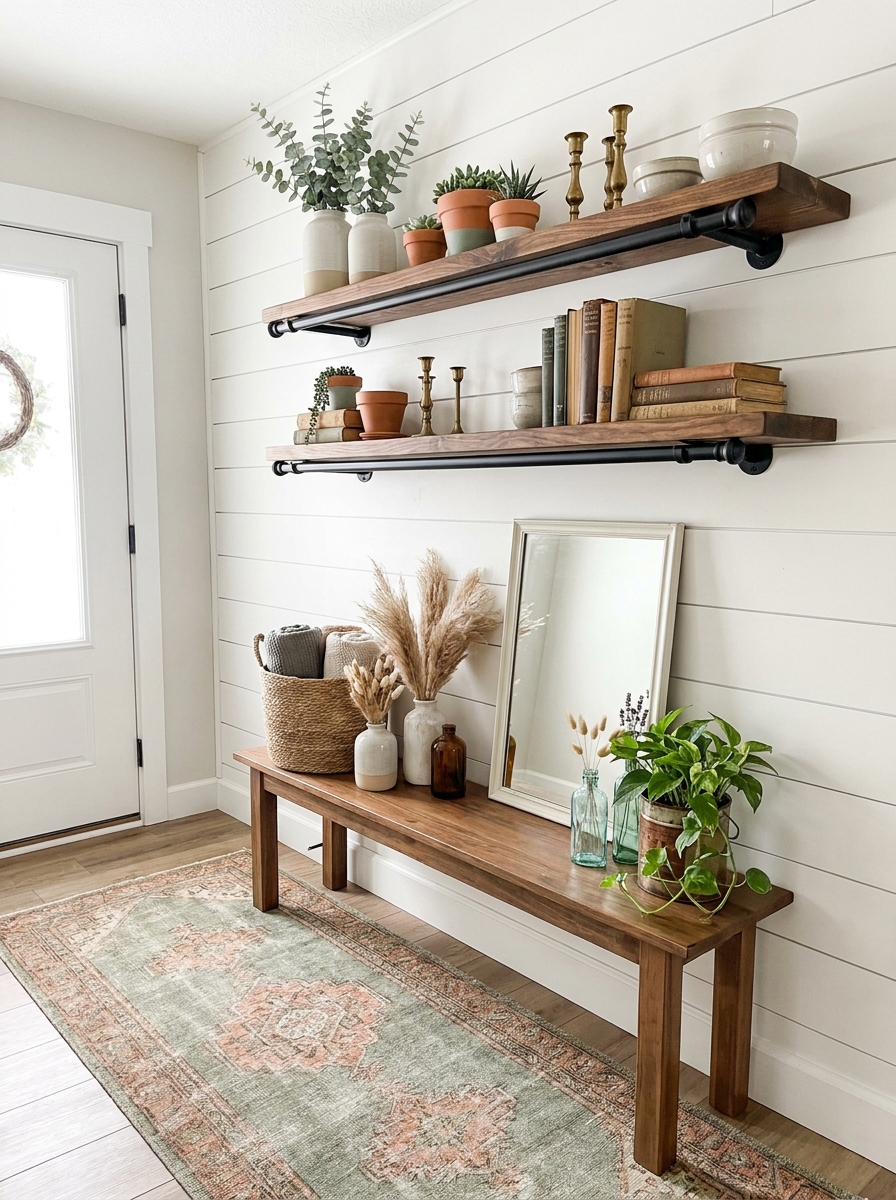
Okay, this one sounds weird but trust me. Those basic curtain rods you see at thrift stores can become the coolest industrial-style floating shelves.
You need two matching curtain rods and some reclaimed wood boards. Mount the rods on the wall using their brackets, then rest your wooden board on top. The rods act like supports underneath. I love using this trick in kitchens for open shelving or in living rooms for display space.
The metal rods give it that modern industrial vibe without the hefty price tag of actual floating shelf hardware. You can spray paint the rods black, brass, or white to match your space. I did mine in matte black with natural wood shelves, and it looks like something from a fancy loft. The whole project cost less than twenty dollars, and people think I hired someone to install custom shelving. Nope, just thrift store curtain rods!
25. Transform Thrifted Lamps with New Shades and Paint
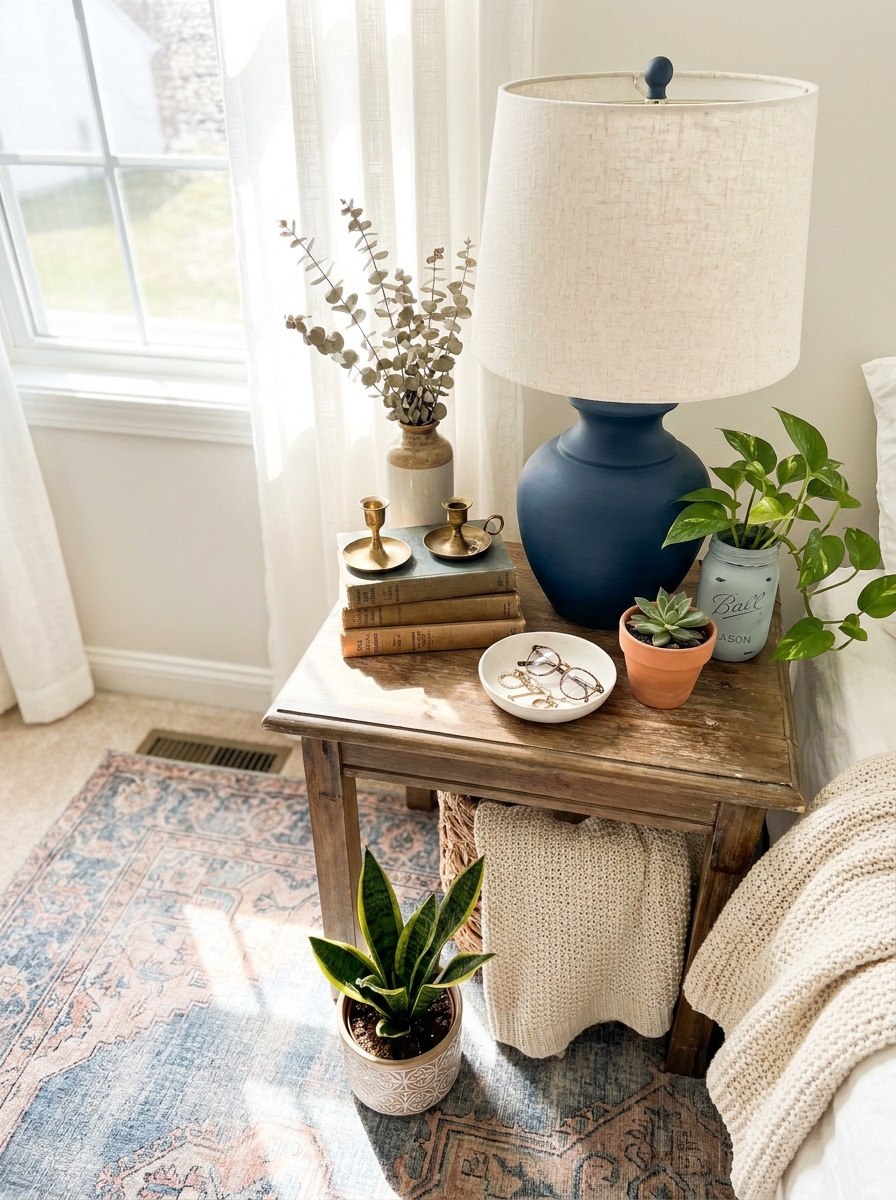
You know those sad lamps sitting in every thrift store? The ones with dated shades and boring bases? They’re absolute goldmines.
I grab them every time because the transformation is so dramatic. Remove that old shade (toss it or save it for another project), then give the base a good clean. Spray paint works wonders here—matte black for modern vibes, brass spray paint for vintage glam, or even a fun pop of color for eclectic spaces. Let it dry completely, then add a new shade that fits your style. Drum shades feel contemporary, pleated ones add classic charm, and textured linen brings warmth.
The best part? You can create custom designer-looking lamps for under twenty bucks. I’ve done this so many times, and guests always ask where I bought them. Mix and match bases with different shade styles to create a collected look that feels intentional. Suddenly that ugly thrift store lamp becomes the statement piece your room needed.
26. Upcycle Thrifted Planters with Drainage and Paint
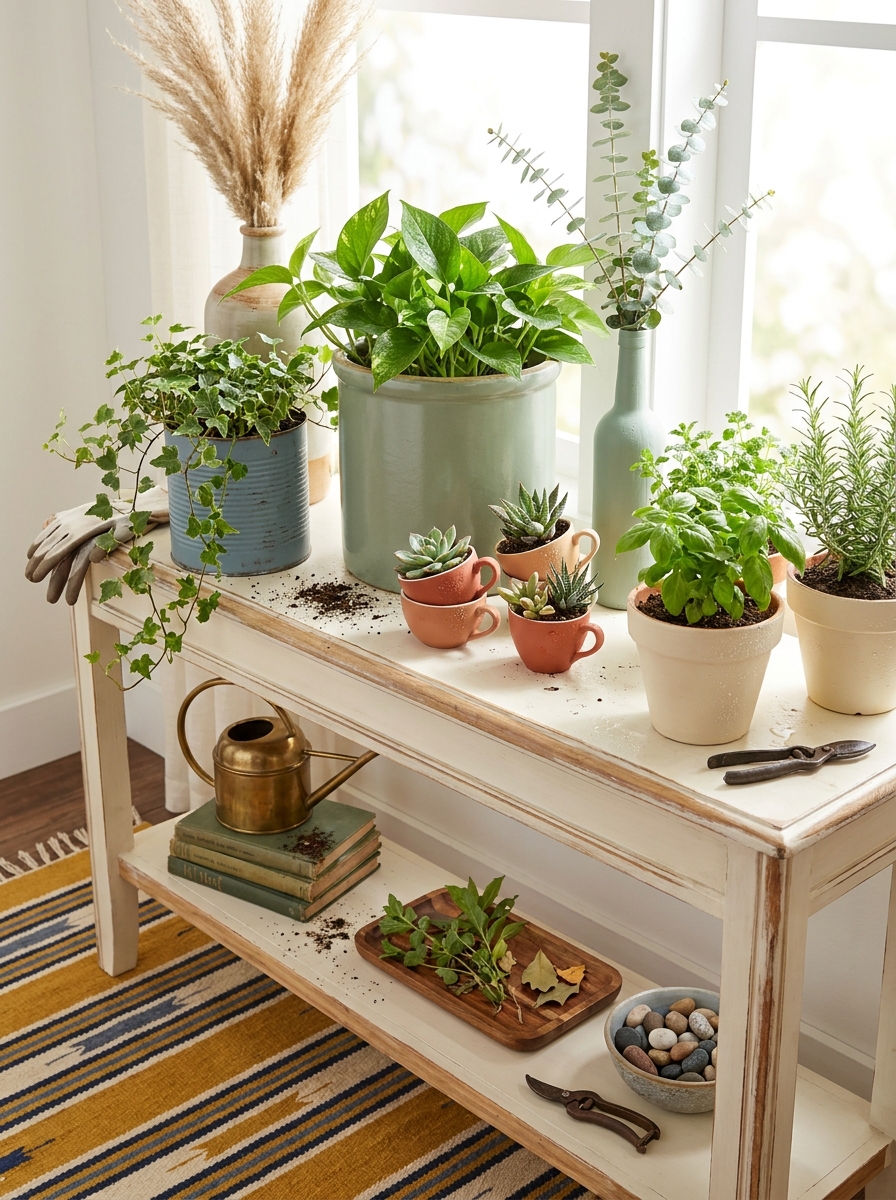
Here’s my secret: almost any thrifted container can become a gorgeous planter. I’m talking vintage bowls, ceramic crocks, old metal tins, even pretty teacups.
The trick is adding drainage if you’re planting directly, or just using them as decorative cache pots. For actual planting, grab a drill with a masonry bit for ceramic pieces and carefully drill drainage holes on the bottom. For metal finds, use a regular drill bit. If drilling feels scary, just pop a plastic nursery pot inside and use your thrifted piece as a pretty outer layer.
Paint transforms everything. A coat of chalk paint in sage green or terracotta makes cheap ceramic planters look expensive. Spray paint turns basic plastic pots into modern matte beauties. I’ve even decoupaged vintage fabric onto plain terracotta for a bohemian vibe. Group different sizes together on a windowsill or shelf for major impact. Your plants deserve better than basic nursery pots, and thrift stores have endless planter potential just waiting to be discovered.
Quick Guide
Quick Flip Cost Breakdown:
| Project Type | Thrift Cost | Supply Cost | Total |
|————–|————-|————-|——-|
| Painted Dresser | $20–$40 | $25–$35 | $45–$75 |
| Reupholstered Chair | $10–$25 | $15–$30 | $25–$55 |
| Gallery Wall (6 frames) | $12–$18 | $10–$20 | $22–$38 |
| Spray Painted Brass | $3–$8 each | $8–$12 | $11–$20 |
Time Investment Guide:
– Quick wins (under 2 hours): Spray painting, frame painting, hardware swaps
– Weekend projects (4-6 hours): Furniture painting, simple reupholstery
– Slow crafts (ongoing): Gallery wall curation, vintage collections
Most projects pay for themselves in style impact alone. And honestly? The time spent is half the fun when you’re creating something totally unique.
Your Thrift Flip Journey Starts Now
Here’s what I love most about thrift flipping—it’s not about being perfect or having a huge budget. It’s about seeing potential in the forgotten stuff and giving it a second life in your home. Every piece you transform tells a story, and that story is so much more interesting than anything you could buy new from a big box store. You’ll make mistakes. Your first painted dresser might have brush strokes, or your gallery wall might need adjusting three times before it feels right. But that’s all part of it.
Start small if you’re nervous. Grab a $5 frame, paint it, and see how good it feels to make something beautiful with your own hands. Then maybe try a lamp, or a side table, or those dining chairs you’ve been eyeing. Before you know it, you’ll be that person who can’t walk through a thrift store without spotting the hidden gems everyone else overlooks. Your home will be full of personality, color, and pieces that actually mean something. And your wallet will thank you. So go ahead—pick one idea from this list and give it a shot this weekend.
Frequently Asked Questions
What’s the best paint to use for thrift store furniture flips?
Chalk paint is the easiest for beginners because it requires minimal prep and sticks to almost any surface without primer. For a more durable finish, try a satin or semi-gloss latex paint with a good quality primer underneath. I always seal chalk paint with wax or poly for high-use pieces like dressers and tables.
How do I know if thrifted furniture is worth flipping?
Look for solid wood construction—it should feel heavy and sturdy, not wobbly or hollow. Check that drawers slide smoothly and doors close properly. Minor cosmetic issues like scratches, dated hardware, or ugly finishes are perfect because they’re easy fixes. Avoid anything with major structural damage, deep water stains, or strong smoke smells that won’t come out.
Can I flip furniture without a garage or workshop space?
Absolutely! I’ve done most of my projects on a covered patio, in a spare bedroom with drop cloths, or even outside on nice days. Chalk paint doesn’t require sanding or ventilation like spray paint does. For messier projects, just protect your floors well and open windows. Small pieces like frames and lamps can be done on a kitchen table.
Where should I look for the best thrift store finds for home decor flips?
Estate sales are my favorite because you find higher quality pieces, but thrift stores like Goodwill and Salvation Army are great for volume and low prices. Facebook Marketplace and Craigslist often have people giving away furniture for free if you’re willing to haul it. Check out church rummage sales and yard sales in older neighborhoods too—that’s where the vintage gold is hiding.
How long does a typical furniture flip project take from start to finish?
Simple projects like painting frames or spray painting brass can be done in under two hours plus drying time. A full dresser flip usually takes me a weekend—a few hours for prep and painting, then overnight drying between coats. Reupholstering dining chairs takes about an hour per chair once you get the hang of it. The key is not rushing the drying time between steps.