32 Gorgeous Pottery Barn Dupes You Can Actually Make
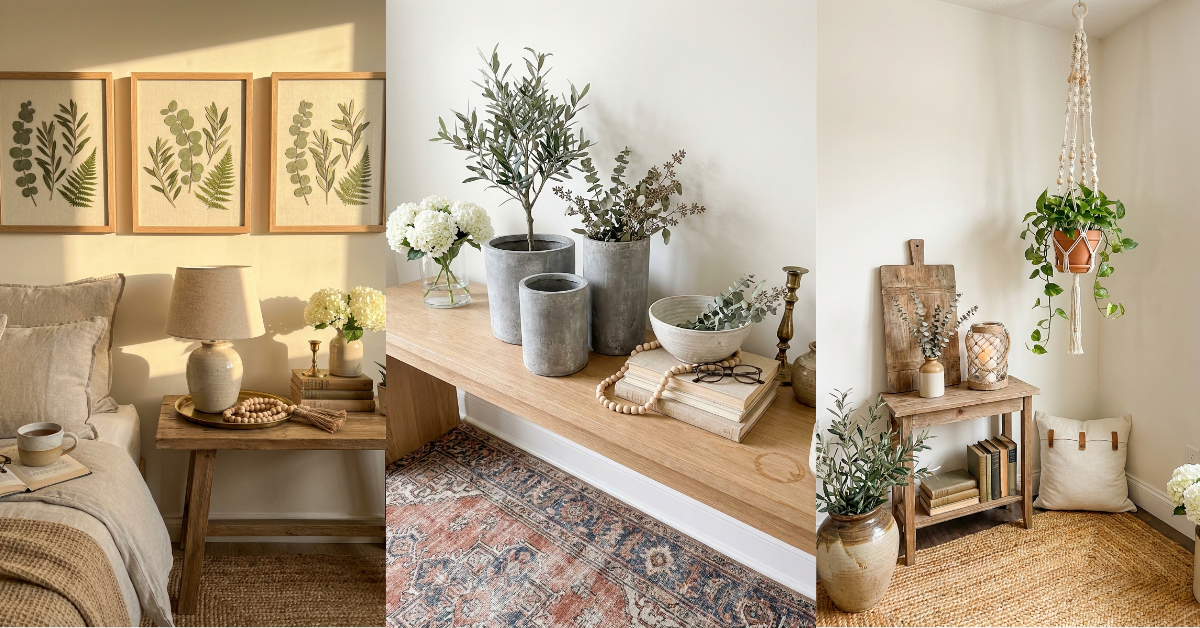
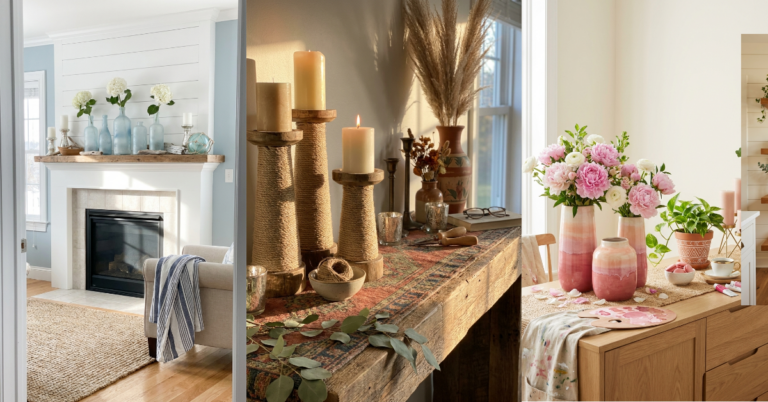
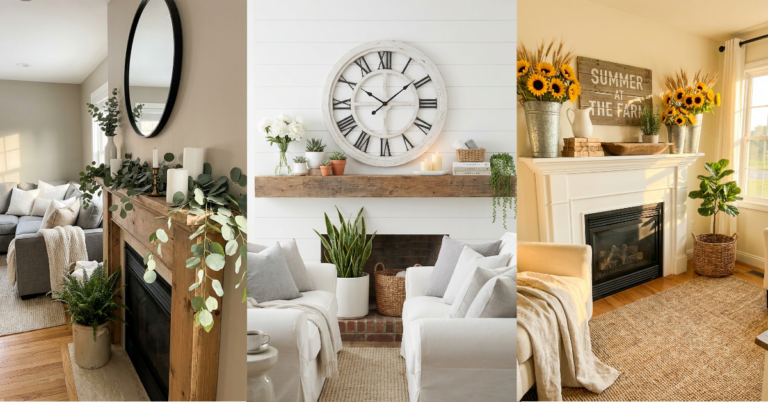
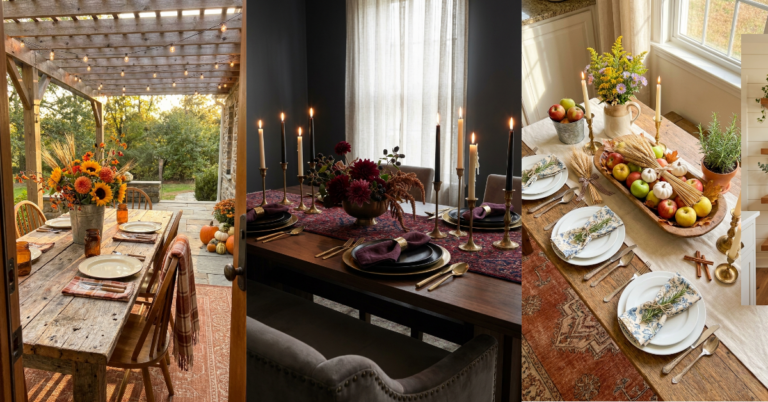
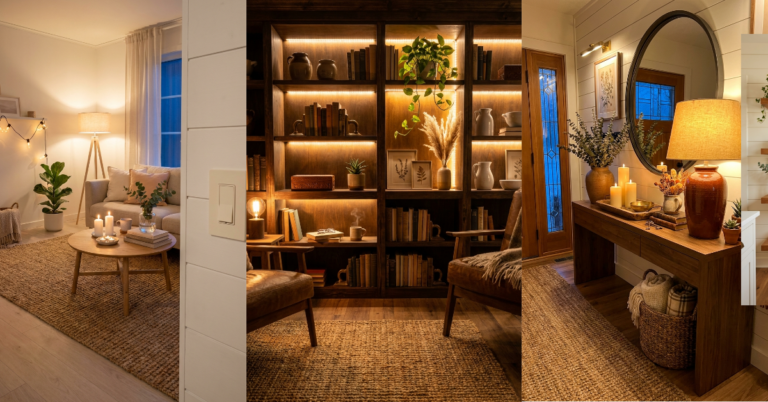
You know that feeling when you walk into Pottery Barn and immediately want to redecorate your entire house? Everything looks so polished and intentional. Then you peek at a price tag and nearly choke on your latte. Here’s the secret though: that signature Pottery Barn look isn’t about spending thousands. It’s about texture, natural materials, and classic shapes you can absolutely recreate yourself. I’ve spent years reverse-engineering their catalog, and honestly? Most of those gorgeous pieces are surprisingly simple DIYs. We’re talking rope-wrapped hurricane lanterns, chunky wood bead garlands, and linen pillow covers that look like you hired a decorator. No crazy skills required. Just a weekend, some basic supplies, and a little bit of that creative energy we all have buried under our daily to-do lists. Let’s get into it.
1. Chunky Wooden Bead Garland
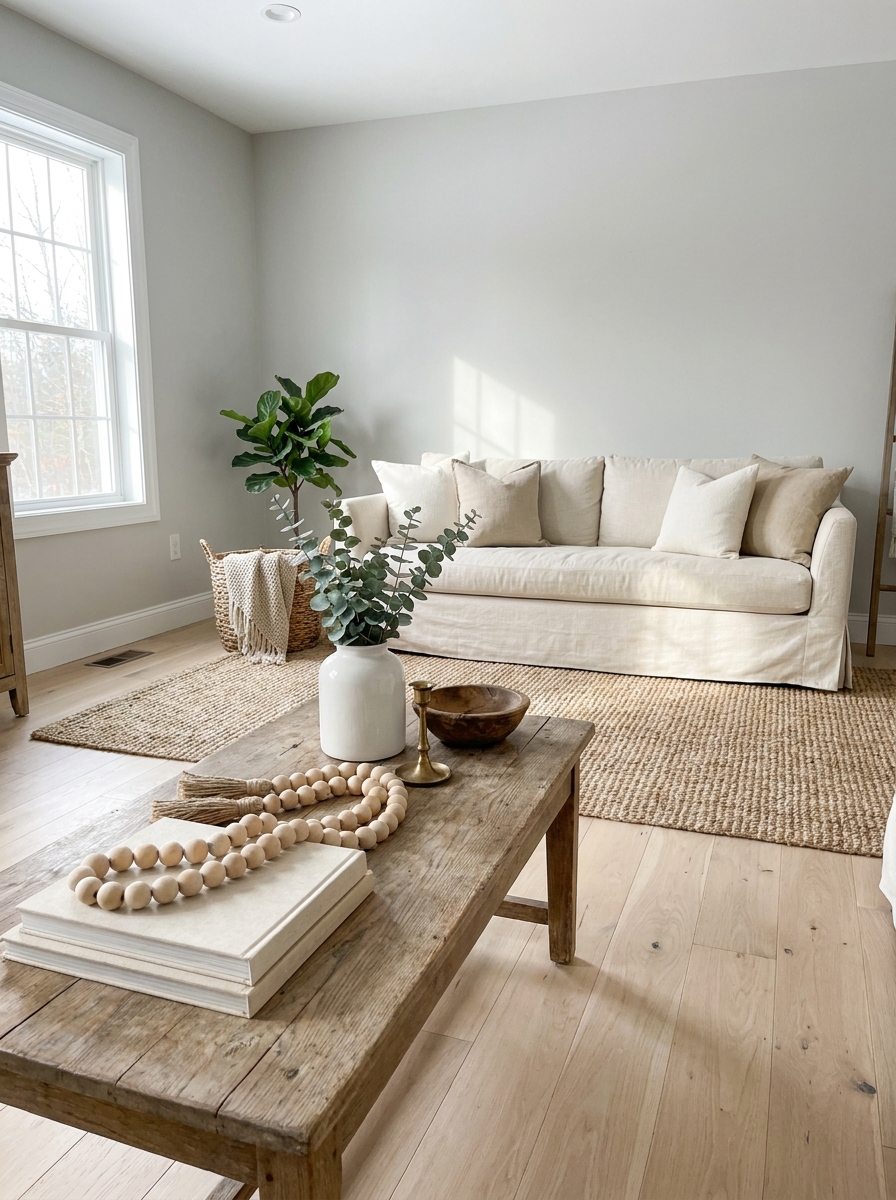
This is probably the easiest Pottery Barn dupe you’ll ever make, and it instantly adds that curated farmhouse vibe to any space. You just need large wooden beads (the 20-30mm size works perfectly), some jute twine or leather cord, and maybe thirty minutes of your time. String them together with intention—don’t make it too uniform. Space some beads closer together, leave gaps in other spots. That’s what makes it look artisan instead of craft-store obvious.
The beauty of this project is how versatile it becomes once you’ve made one. Drape it across a stack of coffee table books, coil it in a dough bowl as filler, or lay it down the center of your dining table as the world’s easiest centerpiece. I’ve made probably six of these in different lengths, and they never look precious or overdone.
Pottery Barn charges upwards of $40 for these. Your version? Maybe eight dollars if you buy beads in bulk online. And honestly, homemade versions often look better because you control the exact vibe you want—whether that’s tight and structured or loose and organic.
2. Rope-Wrapped Hurricane Lanterns
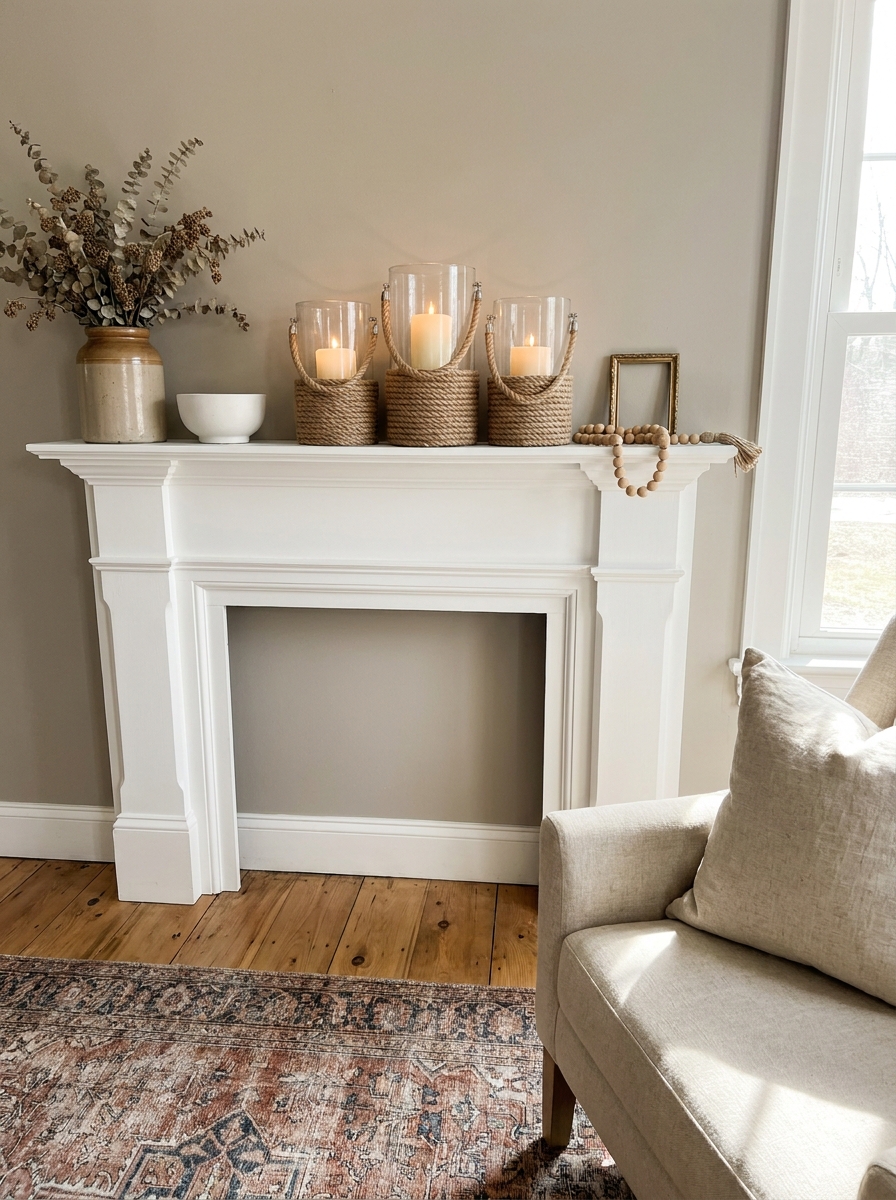
There’s something about thick rope wrapped around glass that just screams coastal sophistication. Pottery Barn sells these for $60 to $80 each, which is wild considering you can make a pair for about fifteen bucks. Grab some plain glass cylinder hurricanes from the dollar store or thrift shop, then pick up natural sisal rope from any hardware store. The thicker the rope, the more dramatic the look.
Start at the bottom and work your way up, using a hot glue gun to secure the rope as you spiral around the glass. Keep the coils tight and even—this is where a little patience pays off big time. Once you reach the top, tuck the end under and glue it down. Drop a pillar candle inside and you’ve got yourself a piece that looks like it came straight from their catalog.
I love using these on mantels during fall or clustering three different heights on a dining table. The rope adds warmth and texture without being too rustic or beachy. It walks that perfect line between casual and elevated that Pottery Barn has mastered.
3. Distressed Wooden Serving Board
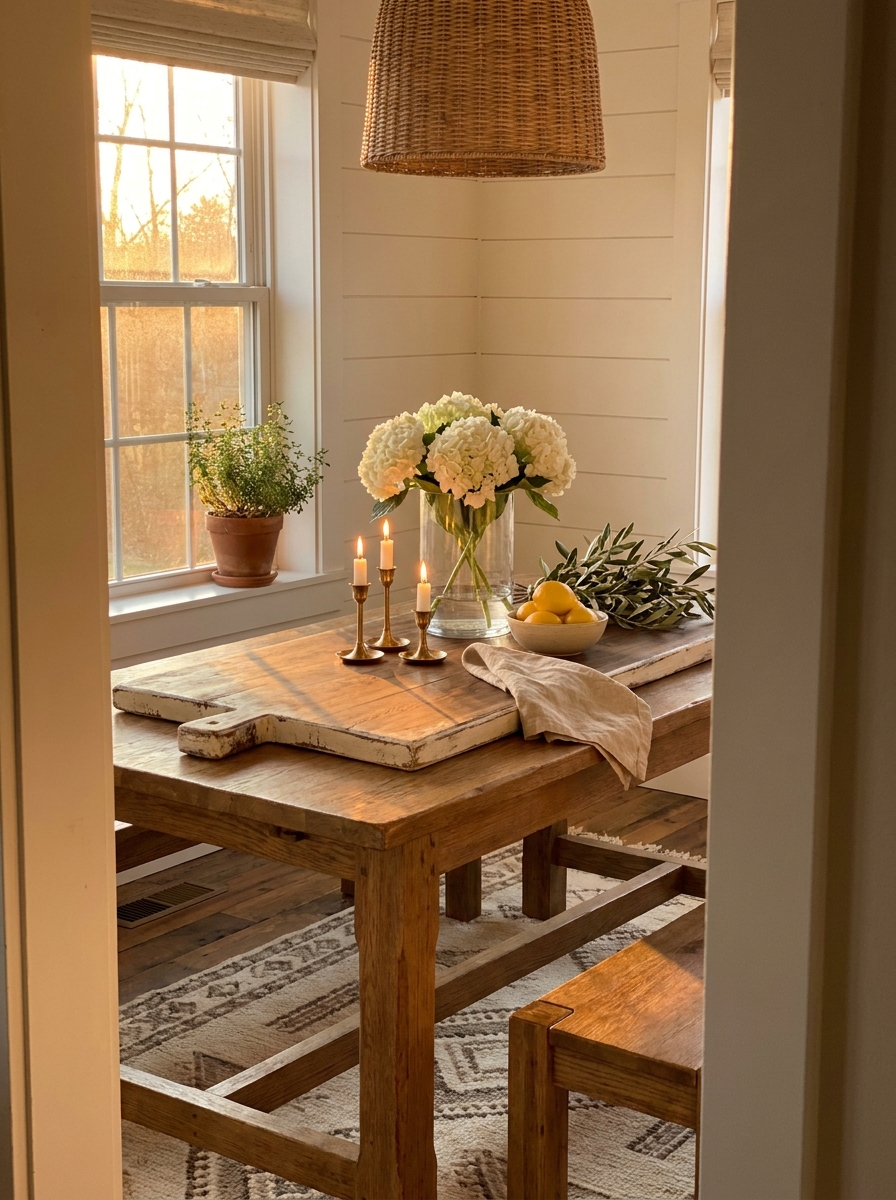
You’ve seen those massive wooden boards styled on every Pottery Barn table, right? The ones that look like they’ve been passed down through generations of French farmhouse kitchens? They want $90 for a piece of wood. Let that sink in. You can make your own version for under twenty dollars and an afternoon in the garage.
Grab a plain cutting board or wood plank from a home improvement store—maple or walnut works beautifully. Sand it smooth, then here’s where the magic happens: create that weathered patina using a combination of stain and paint. Apply a dark walnut stain, let it dry, then lightly brush on watered-down white or grey paint. Sand it back in random spots to reveal the darker wood underneath. It creates those gorgeous layers that look authentically aged.
Once it’s dry, rub it down with food-safe mineral oil to bring out the grain and protect the wood. Now you’ve got a stunning serving piece for cheese and charcuterie, or style it on your kitchen counter with a vase and some lemons. It’s one of those pieces that earns compliments every single time.
4. Linen Pillow Covers with Leather Tabs
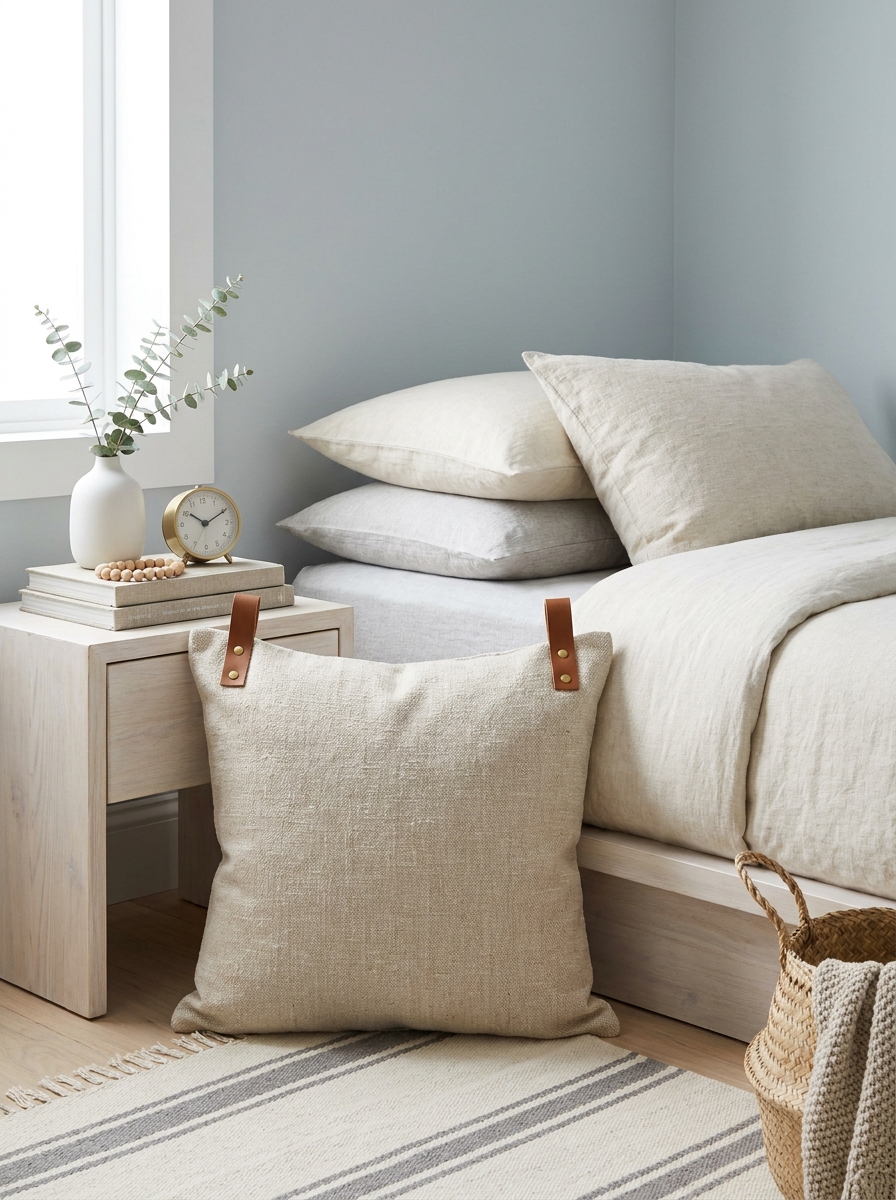
Nothing says expensive minimalism quite like a linen pillow with a single leather accent. Pottery Barn charges $50 per cover for this exact look. You can sew your own for about twelve dollars each, and you don’t even need to be good at sewing. Seriously. If you can sew a straight line, you can do this.
Grab some natural linen fabric from a fabric store—the slightly nubby, pre-washed kind in oatmeal or flax. Cut two squares the size of your pillow insert plus seam allowance. Before you sew the pieces together, cut two small strips of leather (craft stores sell scraps for cheap) and sandwich them between the fabric layers on one side. Sew around three sides, turn it inside out, and add an envelope closure on the back. Done.
The leather tabs are the detail that elevates everything. They give you something to grab when you’re fluffing pillows, but mostly they just look really expensive and intentional. I made four of these for my sofa and people always ask where I bought them. The smug satisfaction of saying “I made them” never gets old.
5. Faux Concrete Planter Pots
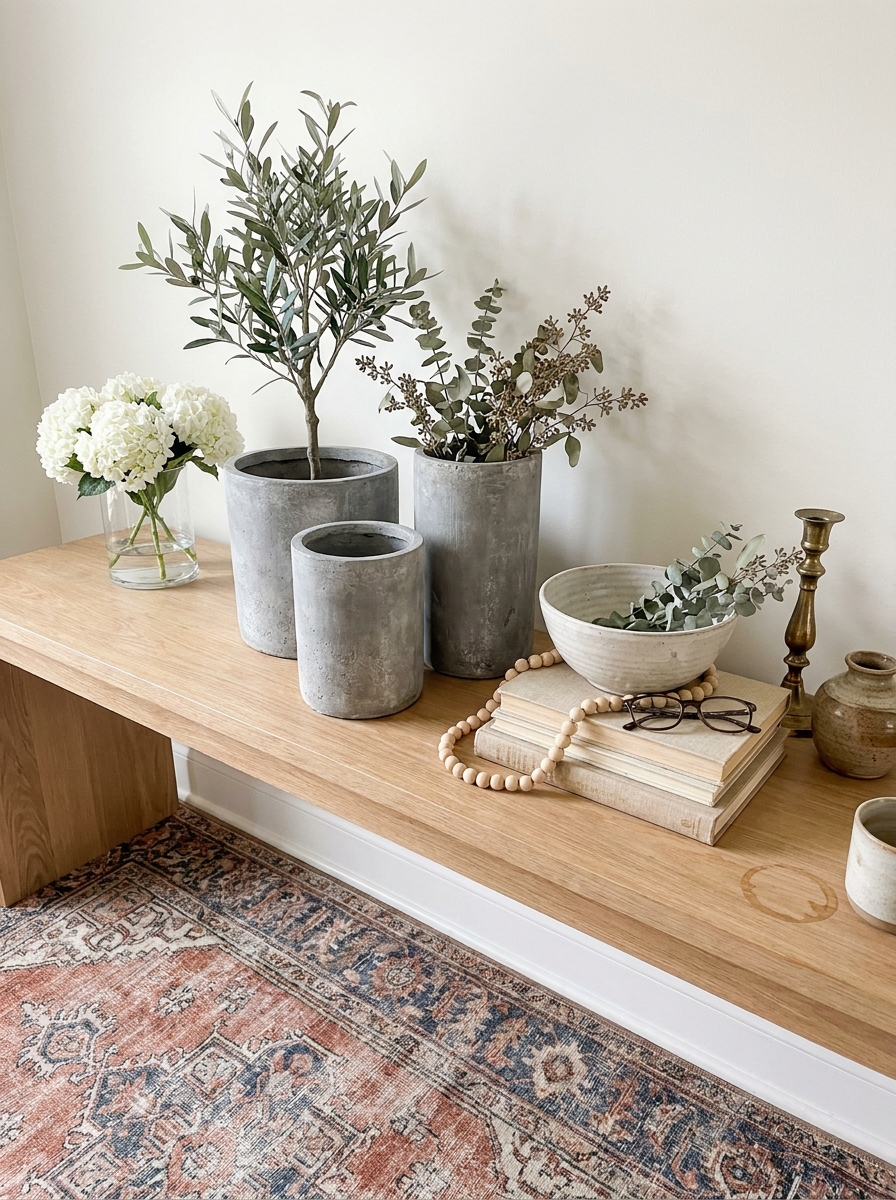
Pottery Barn’s concrete planters are gorgeous but so heavy and pricey. Here’s a secret: you can make lightweight versions that look identical using joint compound and plastic nursery pots. I’m obsessed with this trick!
Grab some cheap plastic planters and slather them with joint compound mixed with a little craft paint for that perfect grey tone. Use a putty knife to create texture, let it dry completely, then distress the edges with sandpaper. The finish looks so authentic that guests always ask where I bought them.
I made six of these in different sizes for my console table and spent maybe twenty dollars total. The best part? They’re light enough to move around when I rearrange, unlike real concrete. Fill them with faux stems or real succulents. The modern-meets-rustic vibe works everywhere from entryways to coffee tables. They photograph beautifully too, which matters when you’re constantly snapping pics of your space!
6. Leather-Wrapped Drawer Pulls
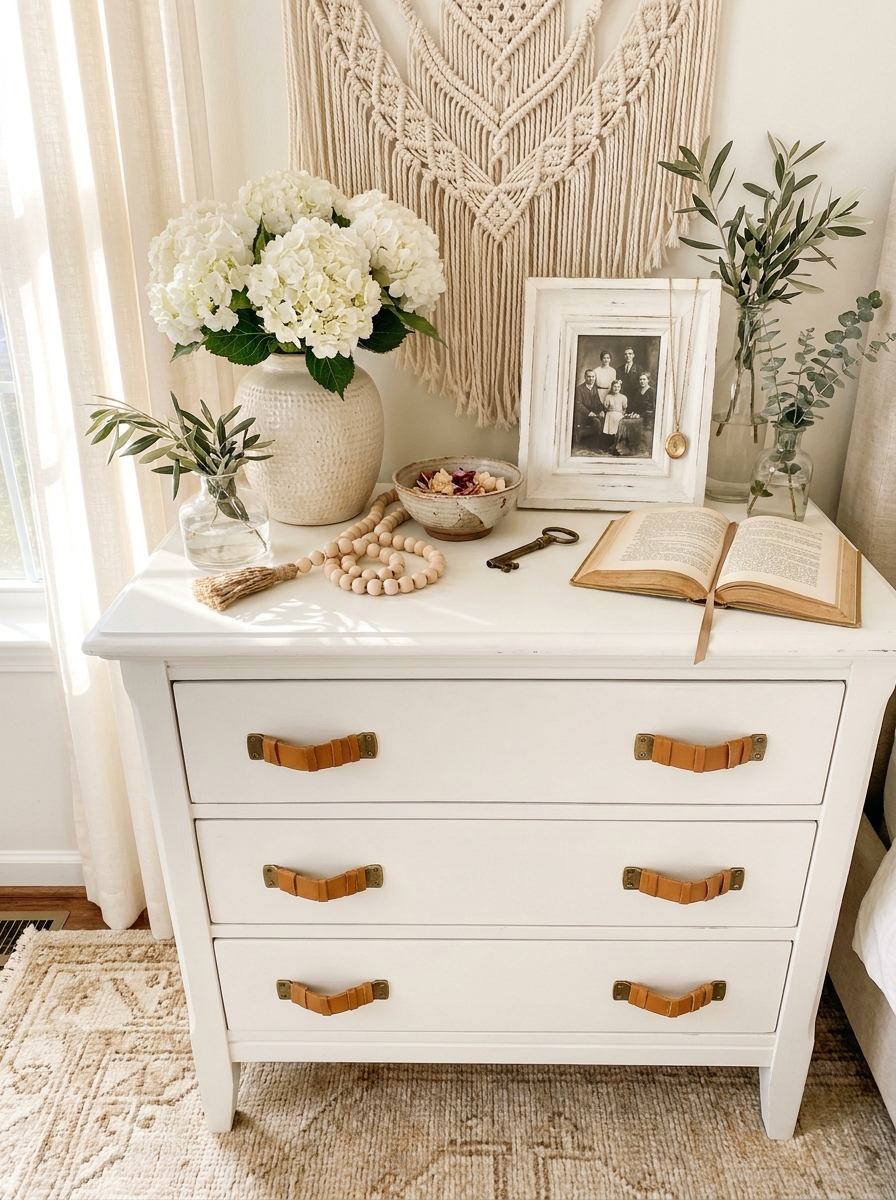
Want to instantly upgrade basic furniture? Leather drawer pulls are your answer. Pottery Barn charges a fortune for these, but you can DIY them for practically nothing using leather cord and basic hardware store knobs.
I transformed my plain bedroom dresser with this simple trick. Buy vegetable-tanned leather cord, brass or black knobs, and strong adhesive. Cut the leather to your desired length, wrap it around the knob base, and secure with glue. You can tie knots, create loops, or just wrap and tuck. Each pull takes maybe five minutes.
The leather adds such a custom, expensive feel. I love how they soften the look of furniture while adding that tactile element. They look especially amazing on white or natural wood pieces. You can match your leather tone to other accents in the room. I went with camel leather and it ties perfectly to my vintage rug and throw pillows. Such a small detail that makes a huge impact!
7. Oversized Dough Bowl Centerpiece
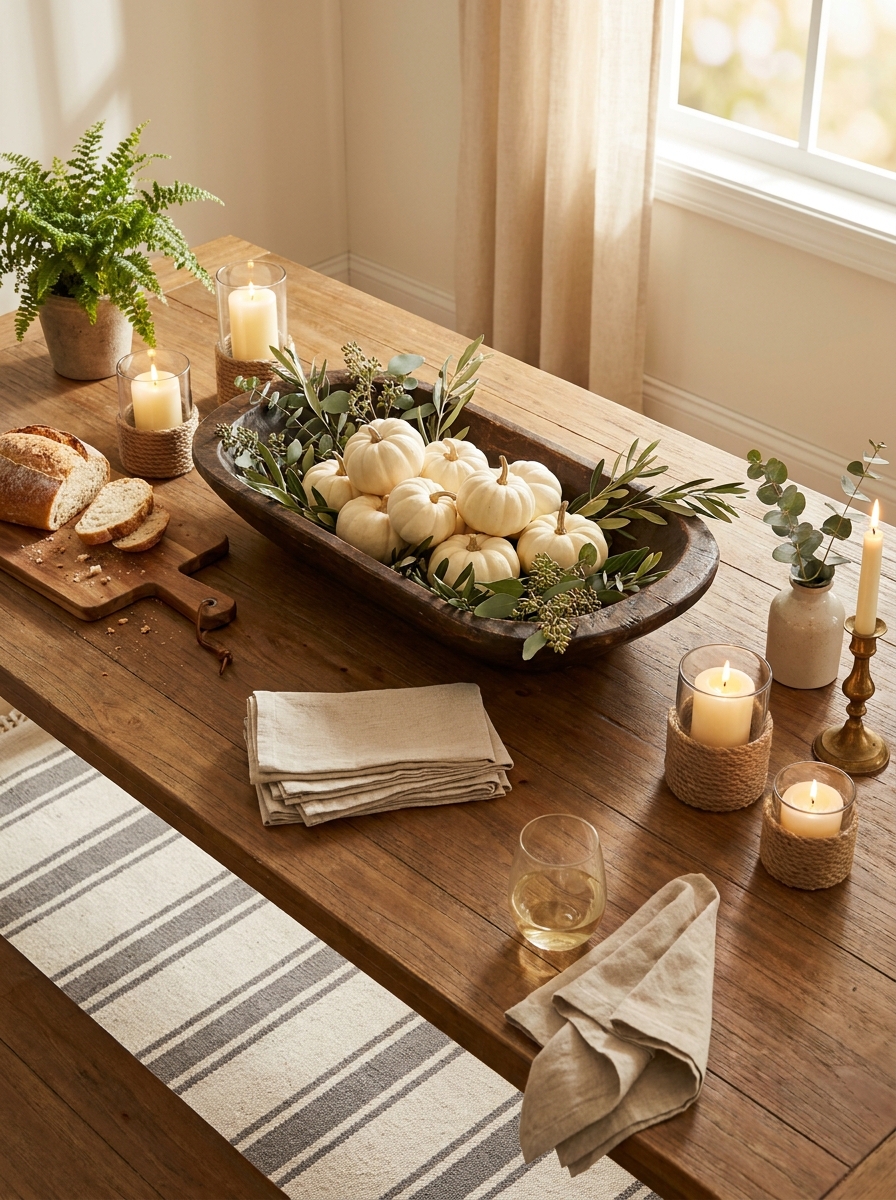
Dough bowls are everywhere in Pottery Barn and they’re never cheap. But you can carve your own rustic version from a wood blank, or even easier, transform a basic wooden bowl with the right distressing techniques.
I found an unfinished wooden bowl at a craft store and gave it the full treatment. Sand it down, apply dark stain, then immediately wipe most of it off to settle in the grain. Add lighter stain in random patches. Use a wire brush to create worn marks. Finish with paste wax for that soft, touchable patina that looks centuries old.
These bowls are styling gold. Fill them with seasonal elements, stack them with faux lemons, or just let them sit empty showing off their beautiful wood grain. I keep mine on the dining table and switch up the contents constantly. Right now it’s holding white pumpkins and eucalyptus, but it’s been filled with everything from ornaments to lemons to just greenery. So versatile and earthy!
8. Woven Jute Basket Storage
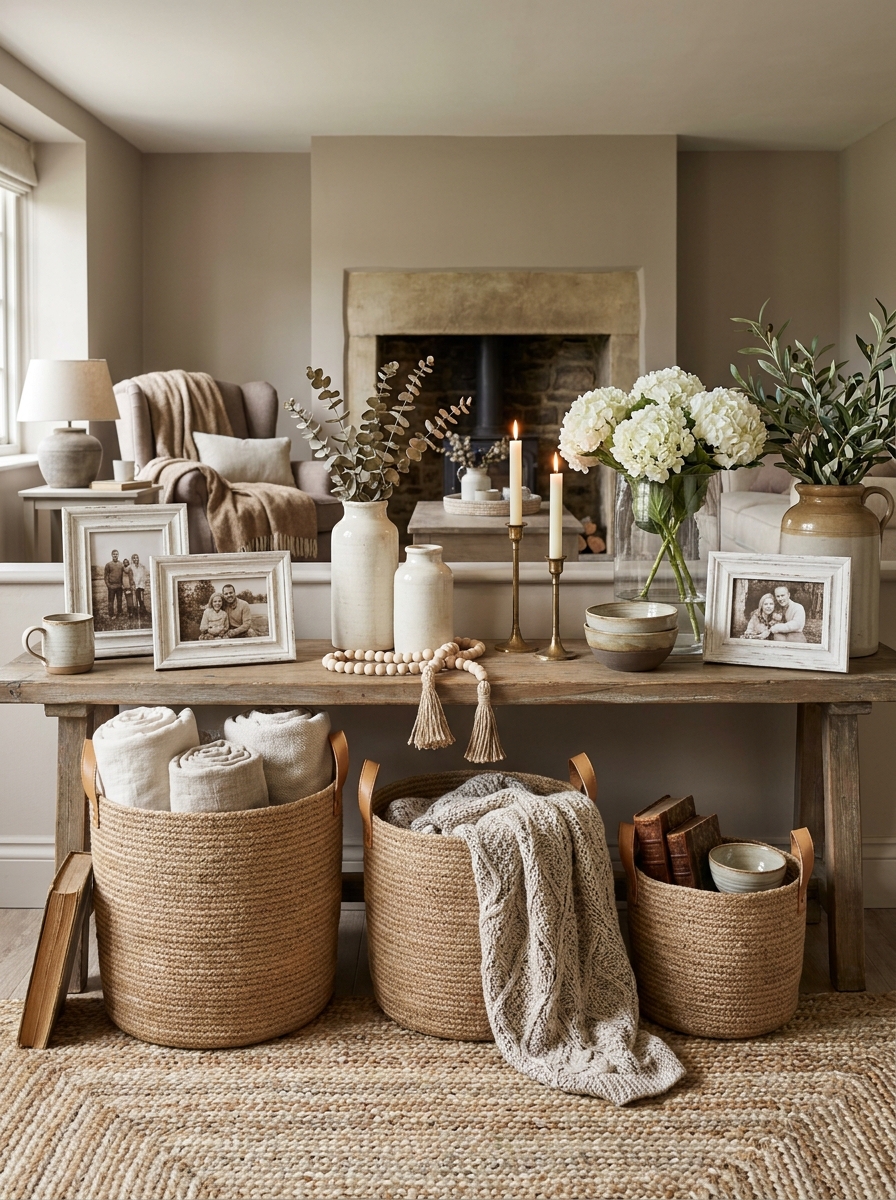
Pottery Barn’s jute baskets are beautiful but add up fast when you need several. Making your own using rope and a coiling technique gives you that same expensive texture for a fraction of the cost. It’s weirdly meditative too!
You’ll need thick jute rope and a hot glue gun. Start coiling the rope flat for the base, gluing as you go, then work your way up the sides. Keep the coils tight and even. I made three different sizes in one weekend while binge-watching shows. The imperfect handmade quality actually makes them look more artisan and expensive.
These baskets work everywhere. I use them for throw blankets in the living room, rolled towels in the bathroom, and toys in the playroom. The natural texture adds warmth without being fussy. You can leave them natural or add leather handles for extra style. They’re surprisingly sturdy too. Mine hold heavy blankets without sagging or losing shape after months of use.
9. Weathered Wood Wall Mirror Frame
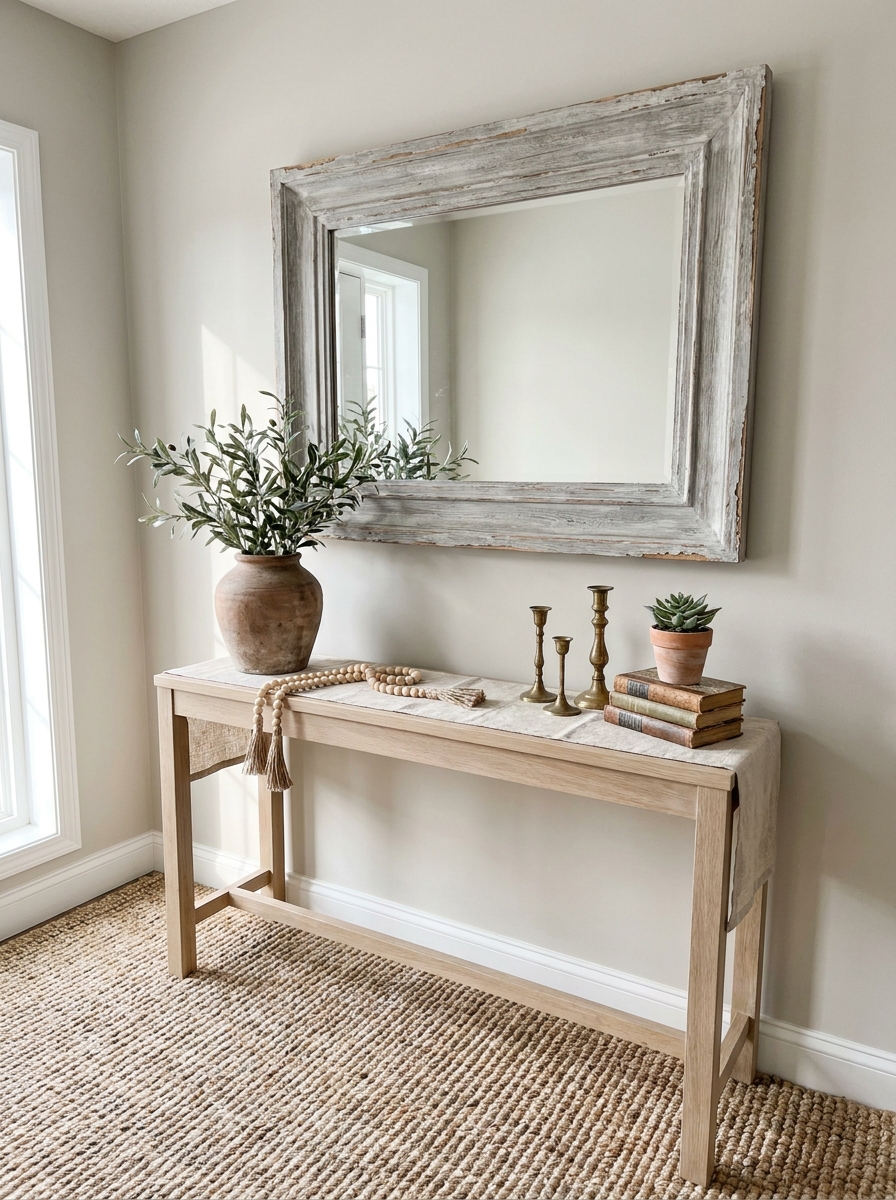
You know that gorgeous weathered wood mirror at Pottery Barn that costs like $400? Yeah, we’re making that for about $50. I picked up a basic rectangular mirror at the hardware store and built a simple frame using pine boards. The magic happens with the finishing technique—layers of grey and white paint, sanded back in spots, then sealed with a matte wax.
The trick is not overthinking it. You want it to look like it’s been hanging in a coastal cottage for decades, not like you tried too hard. I used three different shades of grey-white paint, applying them randomly and wiping some off before it dried. Then I went at it with coarse sandpaper on the edges and corners.
Hang this baby above a console table or over your fireplace, and everyone will ask where you bought it. The weathered finish catches the light beautifully and adds so much character to a room. Mine’s been hanging in my entryway for two years now, and I still love catching my reflection in it every single day.
10. Farmhouse Rolling Ladder Shelf
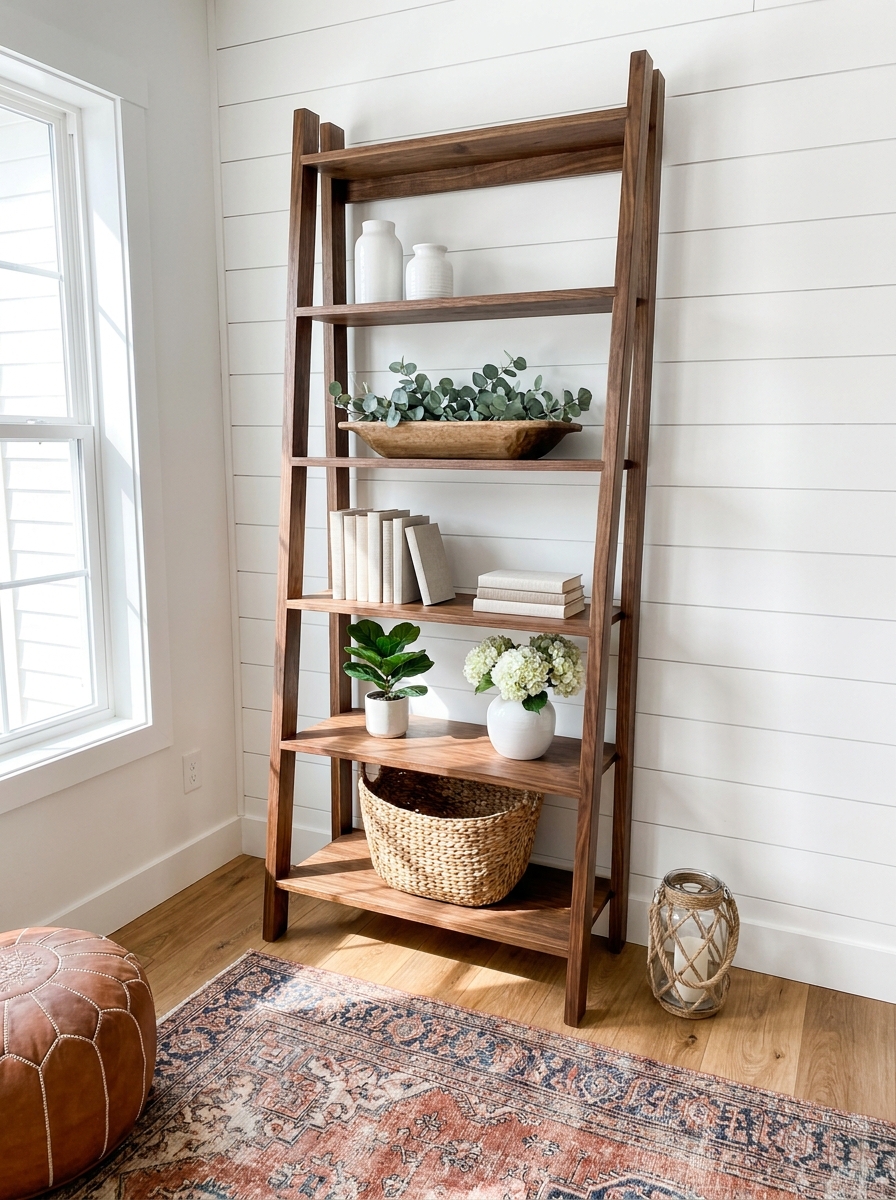
This project is a showstopper, I’m not gonna lie. Remember those leaning ladder shelves that Pottery Barn sells for upwards of $600? We’re building a dead ringer using basic lumber and some good wood stain. The angled design looks complicated, but it’s honestly just geometry—you’re cutting boards at consistent angles and screwing them together.
I made mine last spring and use it in my living room to display all my favorite DIY pieces and collected treasures. The beauty of a ladder shelf is that it’s sculptural even when it’s not fully loaded up. You can style it heavy or keep it minimal—both look intentional and gorgeous.
Stain the wood in a warm walnut or leave it natural with just a clear coat—either way looks expensive and custom. I added metal corner brackets for extra stability, which also gives it that industrial-meets-farmhouse vibe. This piece works anywhere: living room, bathroom, bedroom, even a home office. It’s become my absolute favorite furniture build.
11. Textured Plaster Wall Art Panels
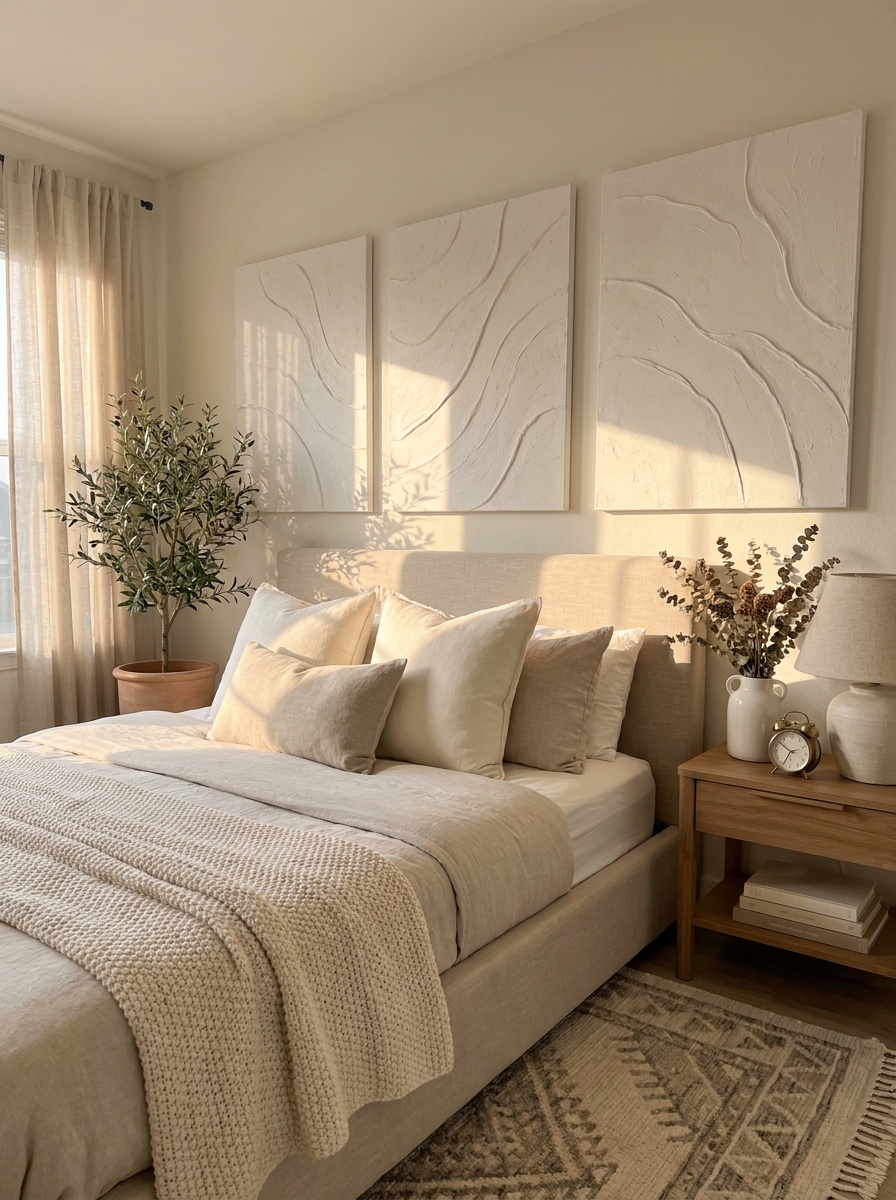
Okay, this one feels like cheating because it’s so ridiculously easy but looks like a million bucks. Those abstract plaster art pieces at Pottery Barn? The ones that are like $300 each? You’re making them this weekend with joint compound, a canvas, and a putty knife. I’m obsessed with how sculptural and modern these turn out.
The technique is super forgiving—you literally just spread joint compound onto a canvas in swooping, textured motions. Let it dry, sand it smooth where you want smoothness, leave texture where you want drama. Paint it all one neutral color or leave it bright white. I made three in different sizes and hung them as a gallery wall in my bedroom.
What I love most is that each one is completely unique. Your hand movements create the design, so no two pieces will ever look the same. They add incredible texture and dimension to any wall without being busy or colorful. Very sophisticated, very expensive-looking, very not-expensive to make.
12. Wire and Wood Produce Basket Tower
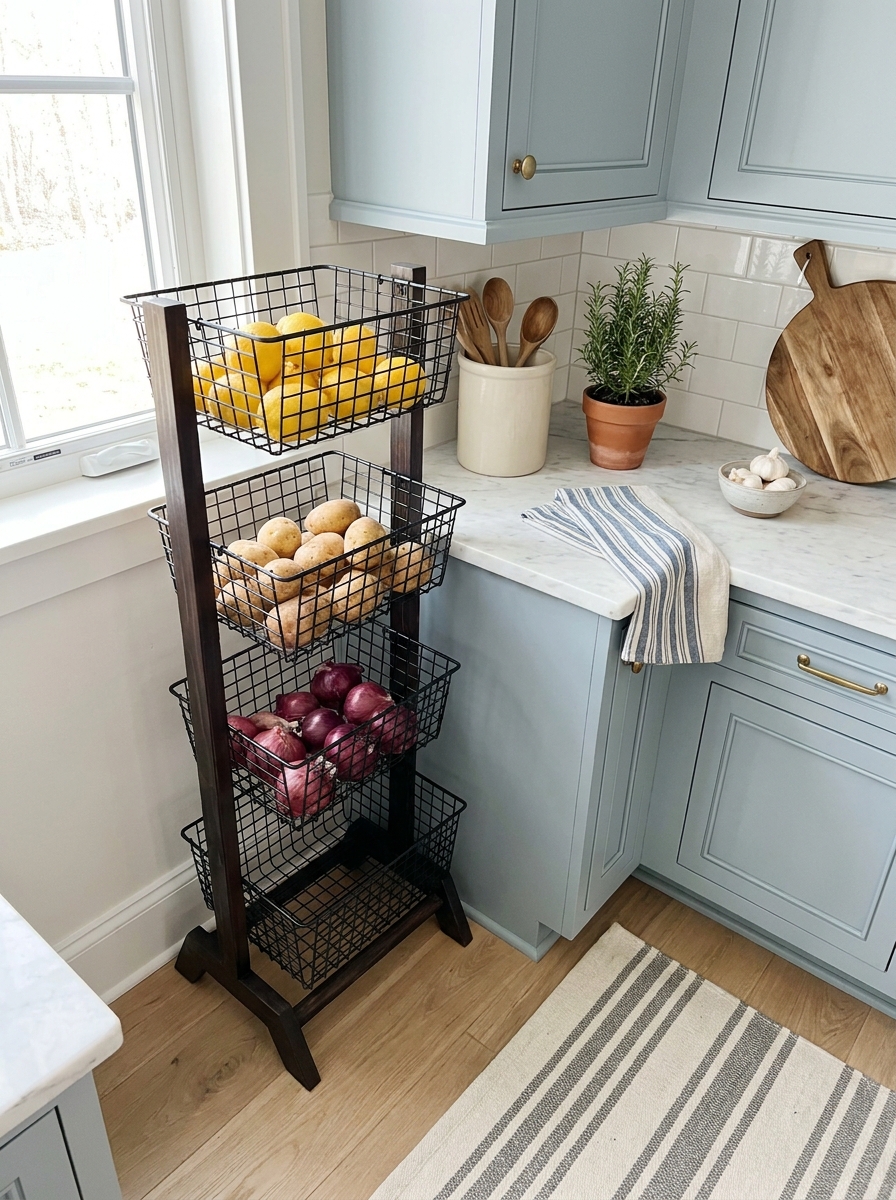
This stackable basket system lives in my kitchen, and I get compliments on it constantly. Pottery Barn’s version is gorgeous but totally overpriced for what’s essentially wire baskets and wooden dowels. I made mine using wire laundry baskets from the dollar store, wooden dowel rods, and some dark stain. The whole thing cost me maybe $25 and took an afternoon.
I use mine for produce storage, but you could absolutely use it in a bathroom for towels, in a mudroom for mittens and scarves, or in a craft room for supplies. The stacked design is space-efficient and just looks so collected and intentional. The wire lets air circulate, which keeps produce fresher longer—actually functional and beautiful.
Staining the wooden connecting posts really elevates the whole thing from craft project to designer storage piece. I went with espresso stain to match my kitchen island, but a lighter oak or even painted white would be stunning. It’s one of those projects that solves a real problem while looking absolutely beautiful doing it.
13. Vintage-Inspired Brass Bookends
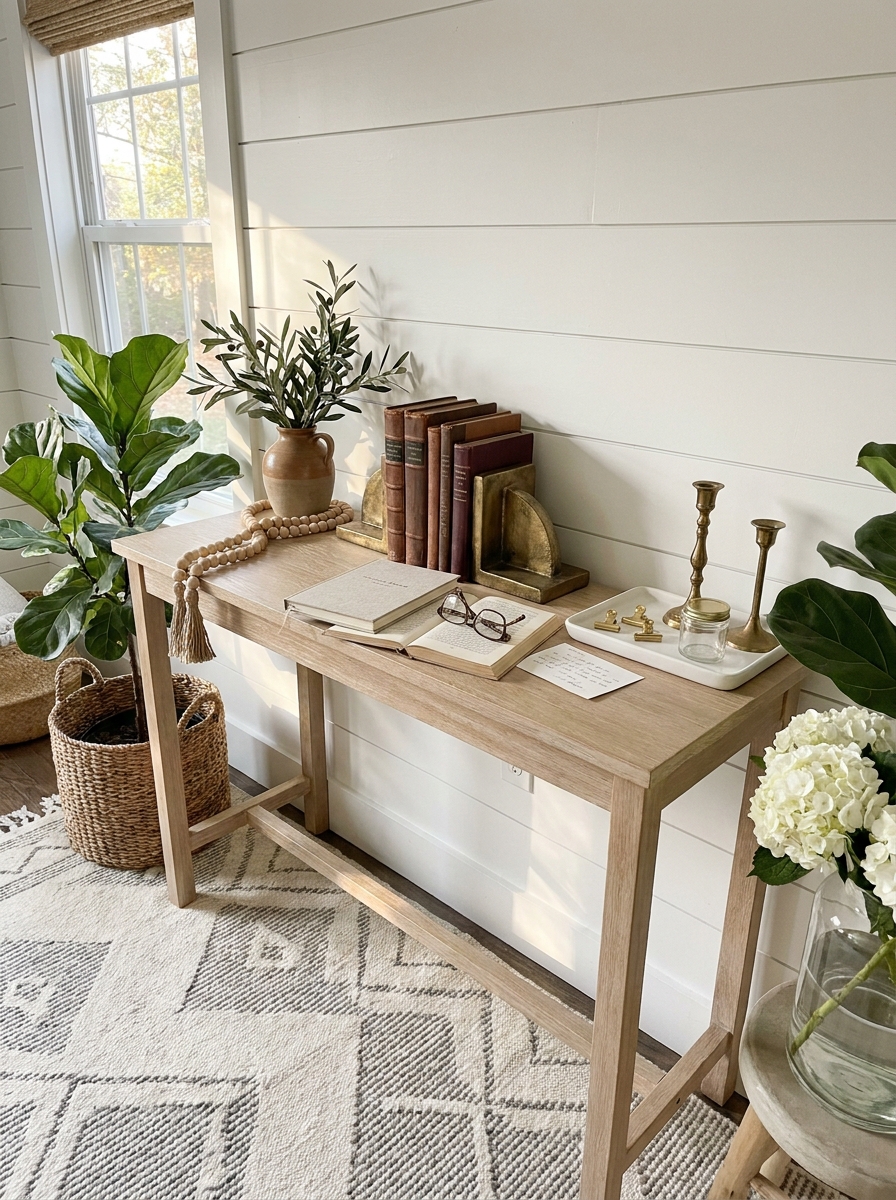
Pottery Barn’s brass bookends are stunning but they’ll set you back serious money. You can make gorgeous dupes using concrete, gold spray paint, and a little creativity.
I mix quick-set concrete and pour it into simple cardboard molds shaped like triangles or rectangles. Once they’re dry, I spray them with metallic brass paint. The weight is perfect for holding books and the finish looks authentically vintage. You can even distress them slightly with sandpaper for that antique patina.
The best part? You can customize the shape completely. I’ve made geometric ones, simple L-shapes, even abstract sculptural forms. Line them with felt on the bottom so they don’t scratch surfaces. These look incredible on bookshelves, mantels, or styled on a console table. Everyone asks where I bought them and nobody believes I made them for about five dollars a pair. They photograph like a dream too.
14. Rustic Iron and Wood Wall Hooks
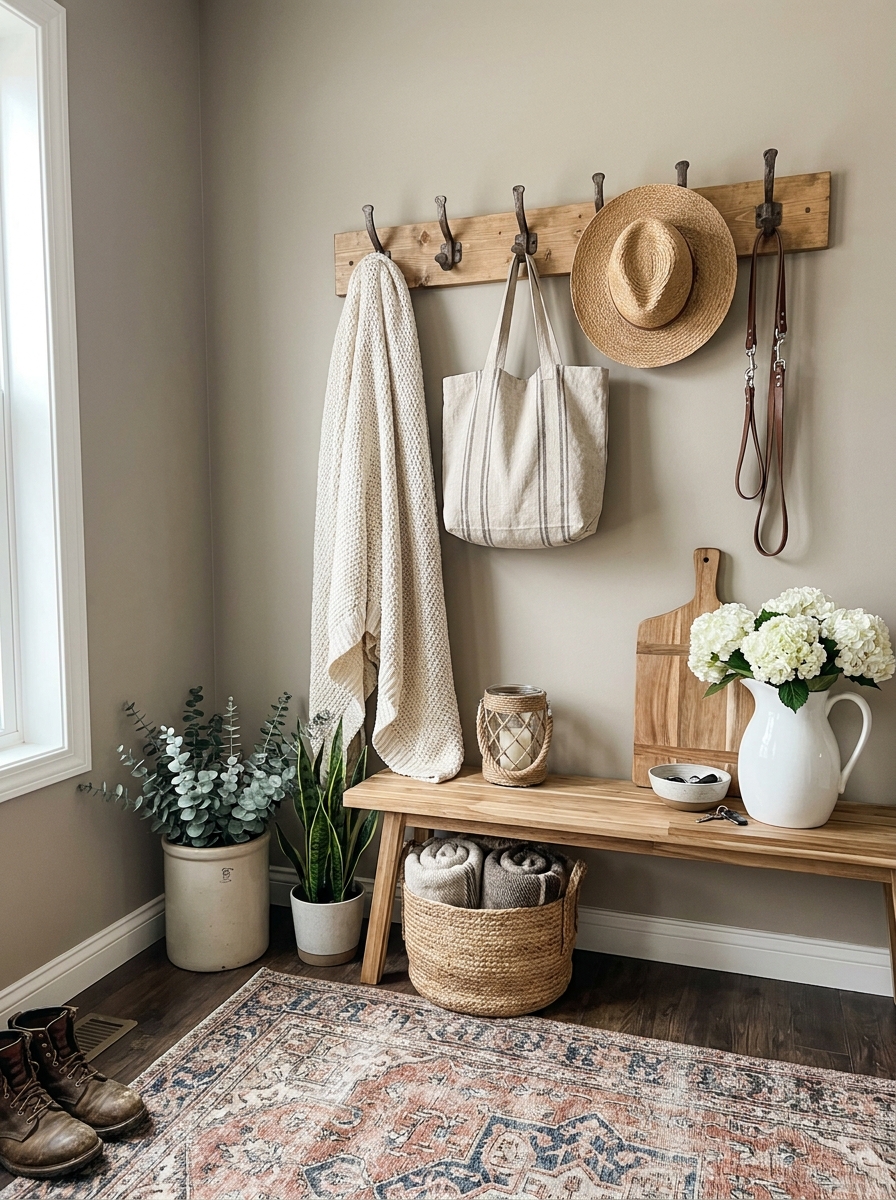
Those gorgeous iron wall hooks at Pottery Barn cost way too much for what they are. I figured out how to make incredibly similar ones using basic hardware store supplies and reclaimed wood.
Grab some black iron pipe flanges and matching short pipes from any hardware store. Mount them onto thick pieces of weathered or stained wood planks. The industrial-meets-rustic vibe is absolutely perfect for entryways, mudrooms, or even bathroom towel storage. I distress the wood with a wire brush first to add texture and age.
You can make a single hook or create a whole row mounted on one long board. I love mixing different wood tones or keeping everything uniform depending on the space. Seal the wood with matte polyurethane so it holds up to daily use. These hooks are seriously sturdy and they look like they cost ten times what you actually spent. Mount them at different heights for visual interest.
15. Framed Pressed Botanical Wall Art
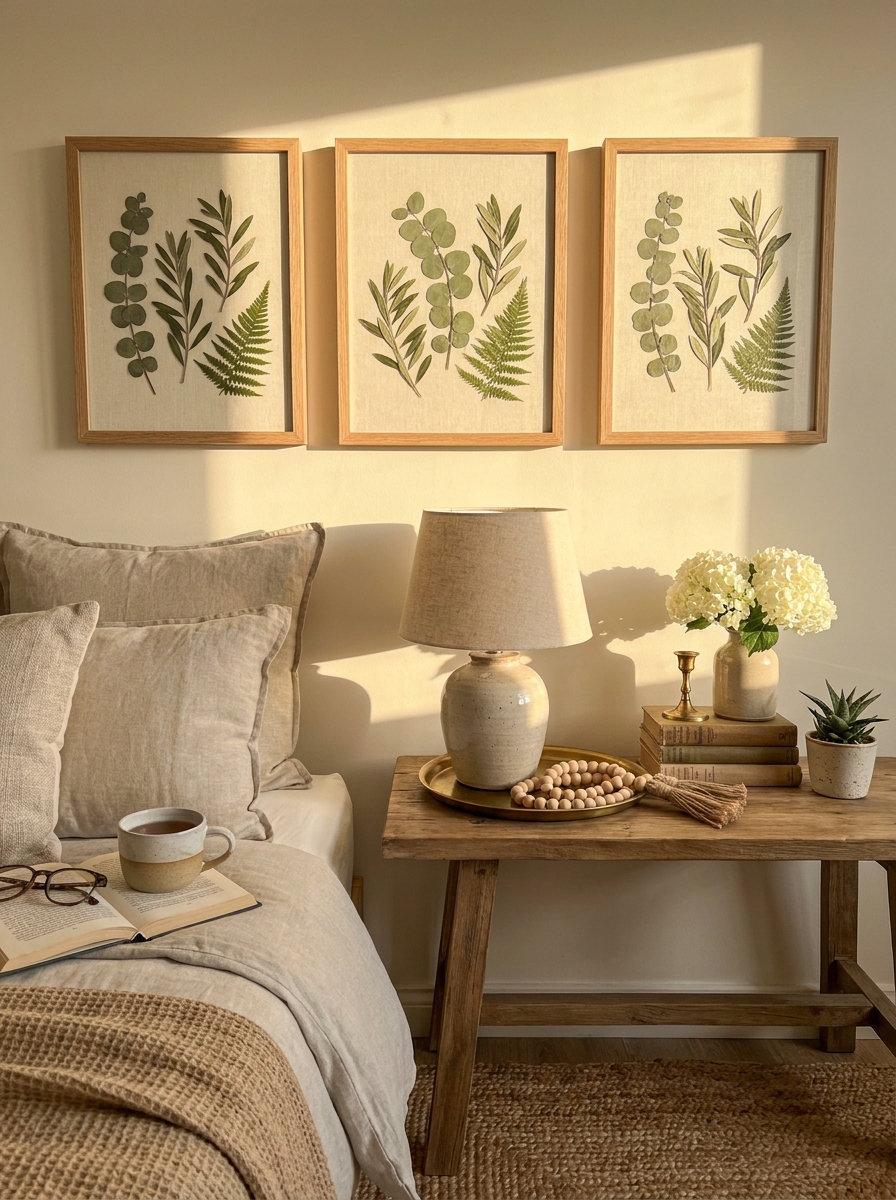
Pottery Barn’s botanical prints are beautiful but you can create something even more special using real pressed plants and simple frames. This project feels so personal and organic.
I collect interesting leaves, ferns, and flowers then press them between heavy books for about two weeks. Once they’re completely dried and flattened, I arrange them on textured paper or linen fabric inside thrifted frames. The natural variations make each piece totally unique and the three-dimensional quality adds gorgeous depth.
You can create a whole gallery wall or just make one statement piece. I love using eucalyptus, olive branches, ferns, or even herbs from the garden. The key is choosing frames with depth so the botanicals don’t get crushed against the glass. Spray the dried plants with hairspray first to help preserve them and prevent crumbling. These look incredibly expensive and sophisticated but cost almost nothing to make.
16. Chunky Knit Wool Throw Blanket
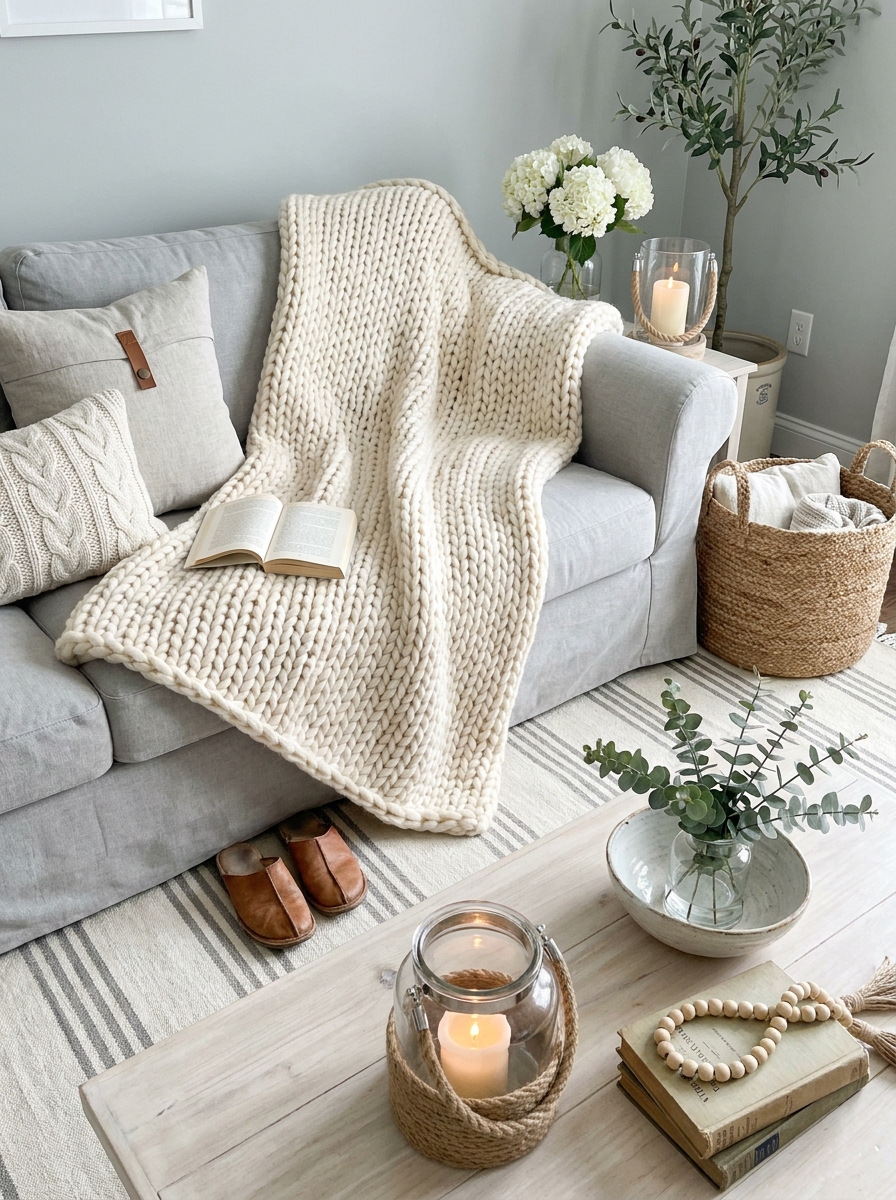
Okay, this one takes some time but the result is absolutely worth it. Those giant chunky knit blankets at Pottery Barn cost over two hundred dollars. You can make one yourself for a fraction of that using merino wool roving and your arms instead of needles.
Arm knitting sounds intimidating but it’s actually easier than traditional knitting. You literally use your arms as giant knitting needles and the thick wool roving works up incredibly fast. I made my first throw in about two hours while watching TV. The texture is unbelievably cozy and the oversized stitches look so luxurious draped over a sofa or bed.
Choose wool roving in neutral colors like cream, grey, or camel for that classic Pottery Barn look. The blanket adds instant warmth and texture to any room. Yes, it’s an investment in materials but still way cheaper than buying one retail. These also make incredible gifts that people treasure forever.
17. Tufted Linen Ottoman Slipcover
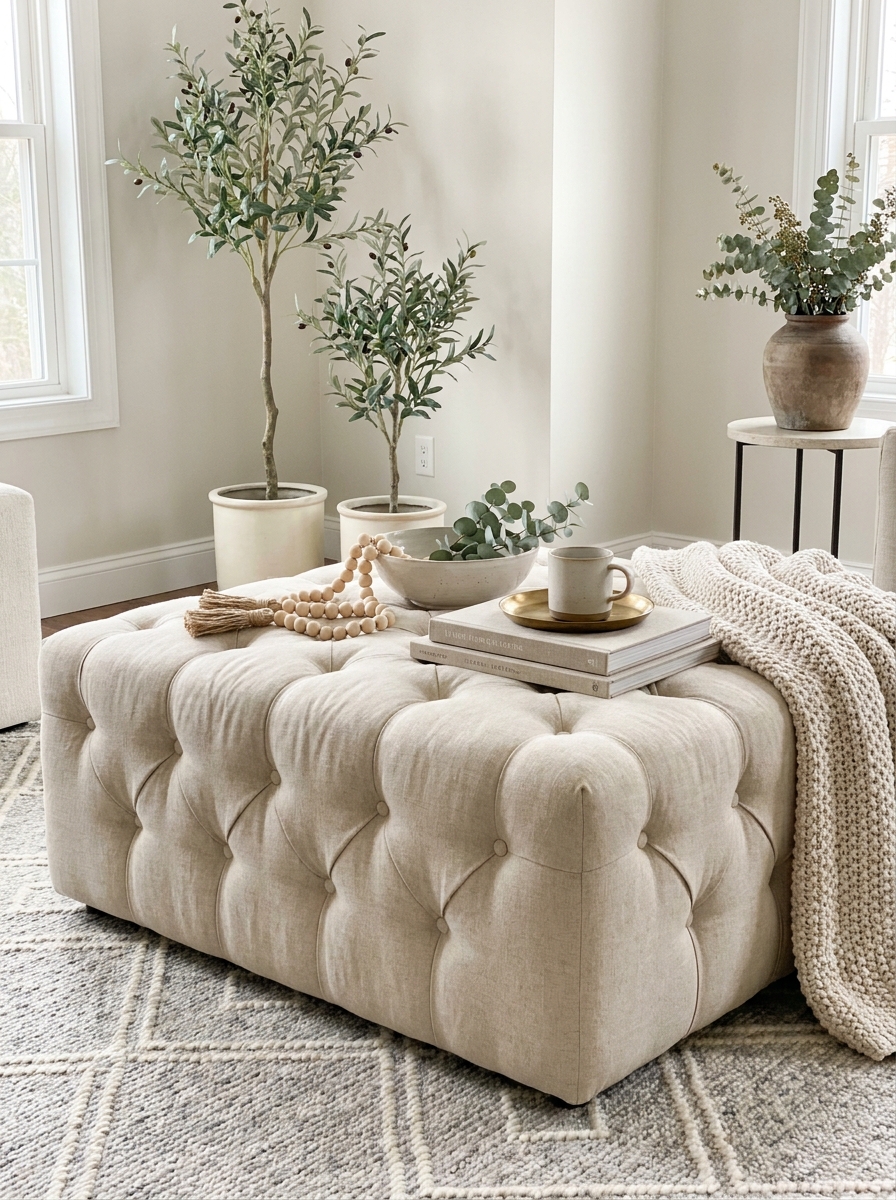
Pottery Barn’s upholstered ottomans cost a fortune, but you can totally transform a basic cube ottoman with a custom linen slipcover and some tufting magic. I picked up a simple storage ottoman from Target for $40 and made it look like a $400 piece.
The secret is using quality linen fabric and creating those signature button tufts that give it that expensive tailored look. You’ll need about 2-3 yards of medium-weight linen, some covered buttons, and a long upholstery needle. The tufting part sounds scary but it’s actually pretty straightforward—you’re just pulling fabric through and securing it with buttons.
What I love most is how this instantly upgrades your whole room. It works as extra seating, a coffee table base, or footrest. And if you get a stain? Just toss the slipcover in the wash. Try that with your fancy upholstered ottoman! Pick neutral linen in oatmeal or natural for that classic Pottery Barn vibe, or go bold with charcoal grey.
18. Macramé Plant Hanger with Wood Beads
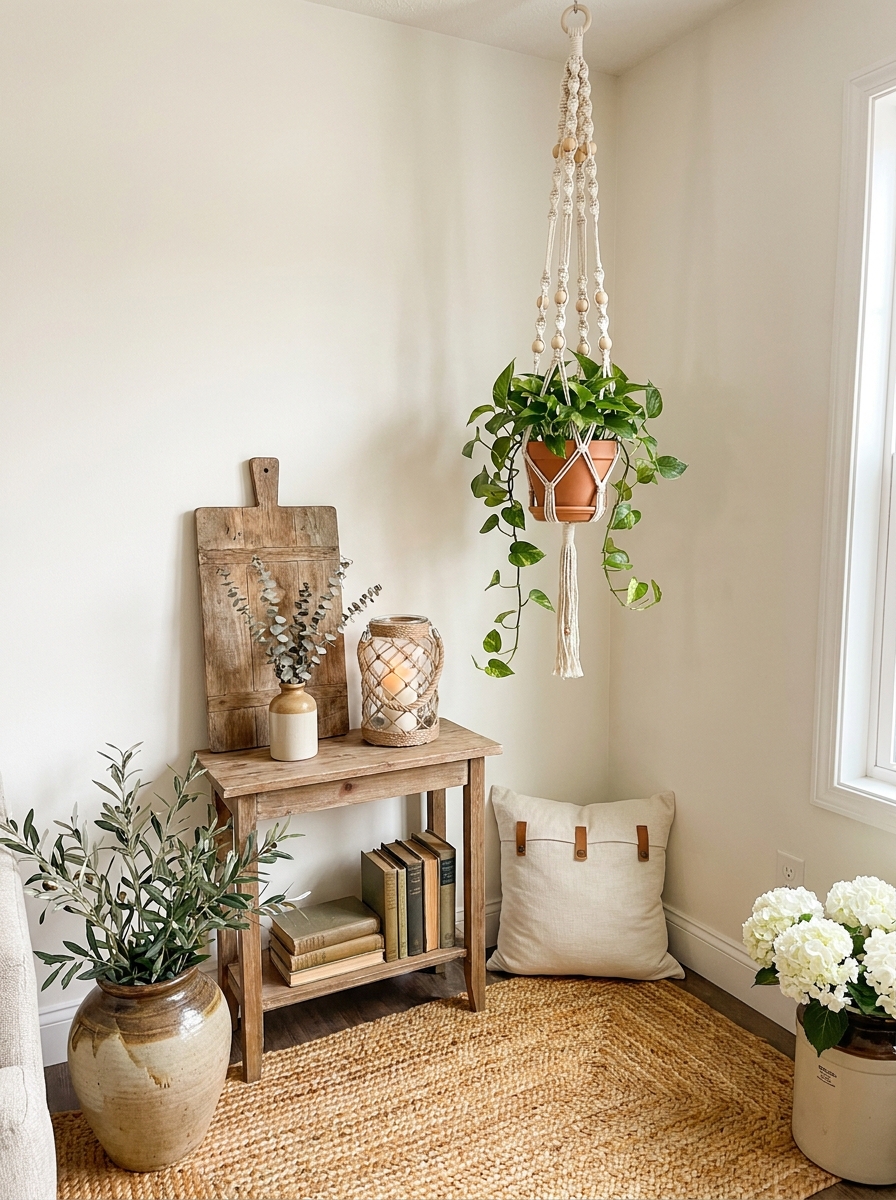
Those gorgeous macramé plant hangers at Pottery Barn are like $80 each. Eighty dollars! For knotted rope! I taught myself basic macramé in one afternoon using YouTube tutorials, and now I make these for about $12 in materials.
You only need to learn four knots, seriously. The square knot, half-hitch, spiral knot, and gathering knot—that’s it. Once you’ve got those down, you can create endless variations. I use natural cotton rope because it’s soft on your hands and has that beautiful organic texture. Adding wooden beads takes it from basic to Pottery Barn-level gorgeous.
The best part? You can customize the length perfectly for your space. I made mine extra long for our vaulted ceiling, and it’s become such a statement piece. Start with a simple four-strand design before getting fancy. Your first one might look a little wonky, but honestly, that handmade vibe just adds character. Mine hold pothos, ferns, anything trailing and dramatic.
19. Ceramic Ring Dish with Gold Rim
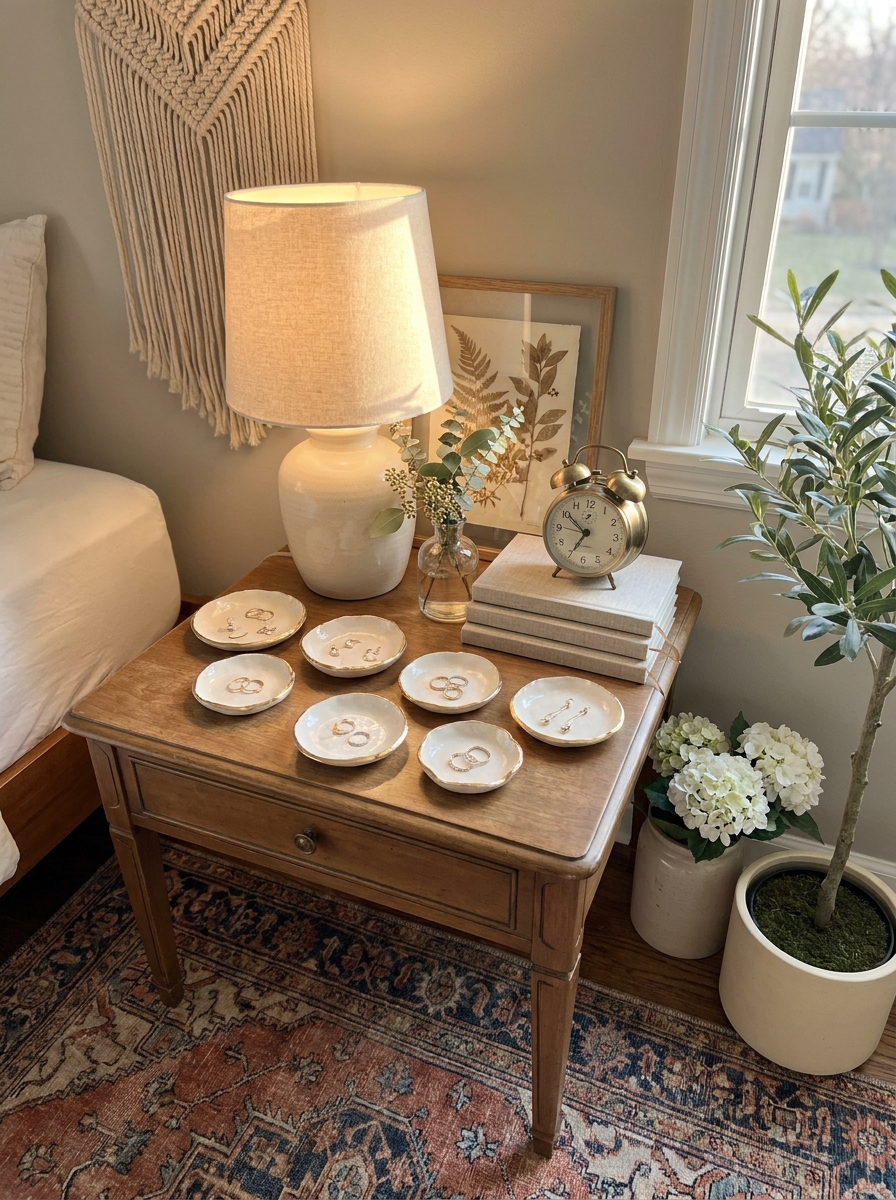
Pottery Barn’s tiny ceramic ring dishes are $24. For a dish the size of your palm! But here’s a fun secret—you can make your own at home with air-dry clay and gold leaf, no kiln required. It’s actually a really satisfying project.
I use white air-dry clay and shape it into simple organic forms—circles, ovals, abstract blob shapes. The imperfect handmade look is what makes them special. Once they’re completely dry (give it 48 hours), you sand them smooth and paint the rim with gold leafing adhesive, then apply the gold leaf. It looks so luxe.
These make amazing gifts too. I made a whole set for my sister’s birthday and she thought I spent a fortune. They’re perfect for rings, earrings, or just as pretty little catchalls on your nightstand or bathroom counter. The gold rim detail is what takes them from craft project to expensive-looking decor. You can also try copper or silver leaf for different vibes.
20. Faux Marble Hexagon Tray
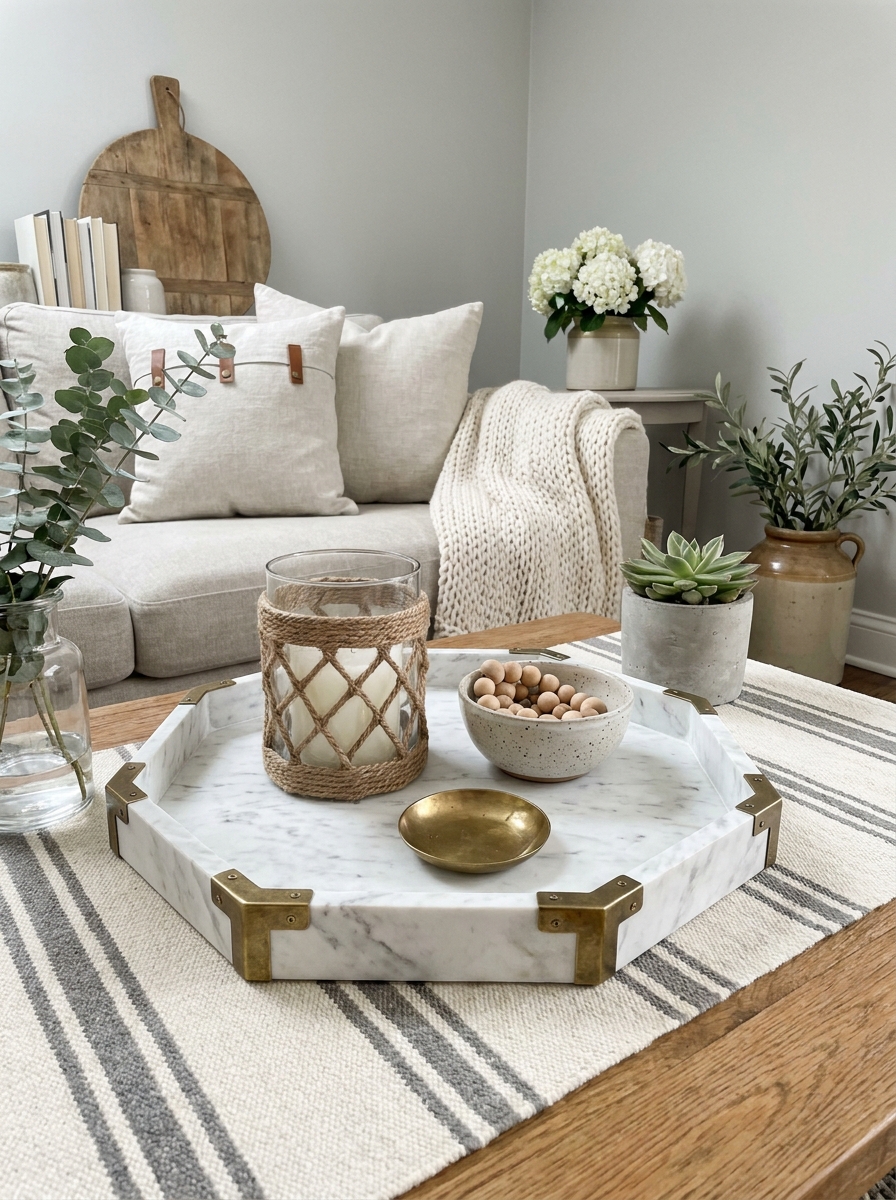
Pottery Barn’s marble serving pieces are stunning but crazy expensive. A simple marble tray can run you $100+. But you can fake that gorgeous Carrara marble look using wood and contact paper—and nobody will know the difference from three feet away.
I start with a plain wooden hexagon tray (unfinished wood from the craft store is perfect). Then I apply high-quality marble contact paper, taking my time to smooth out every bubble. The trick is using a credit card to really press it down and work from the center out. Add brass corner brackets or handles for that elevated designer touch.
These trays are so versatile. I use mine on the coffee table for remotes and candles, on the bathroom counter for perfumes, or as a breakfast-in-bed situation. The hexagon shape feels modern and fresh, but you could totally do this with rectangular or round trays too. It’s one of those projects that looks way harder than it actually is.
21. Stacked Leather-Bound Coffee Table Books
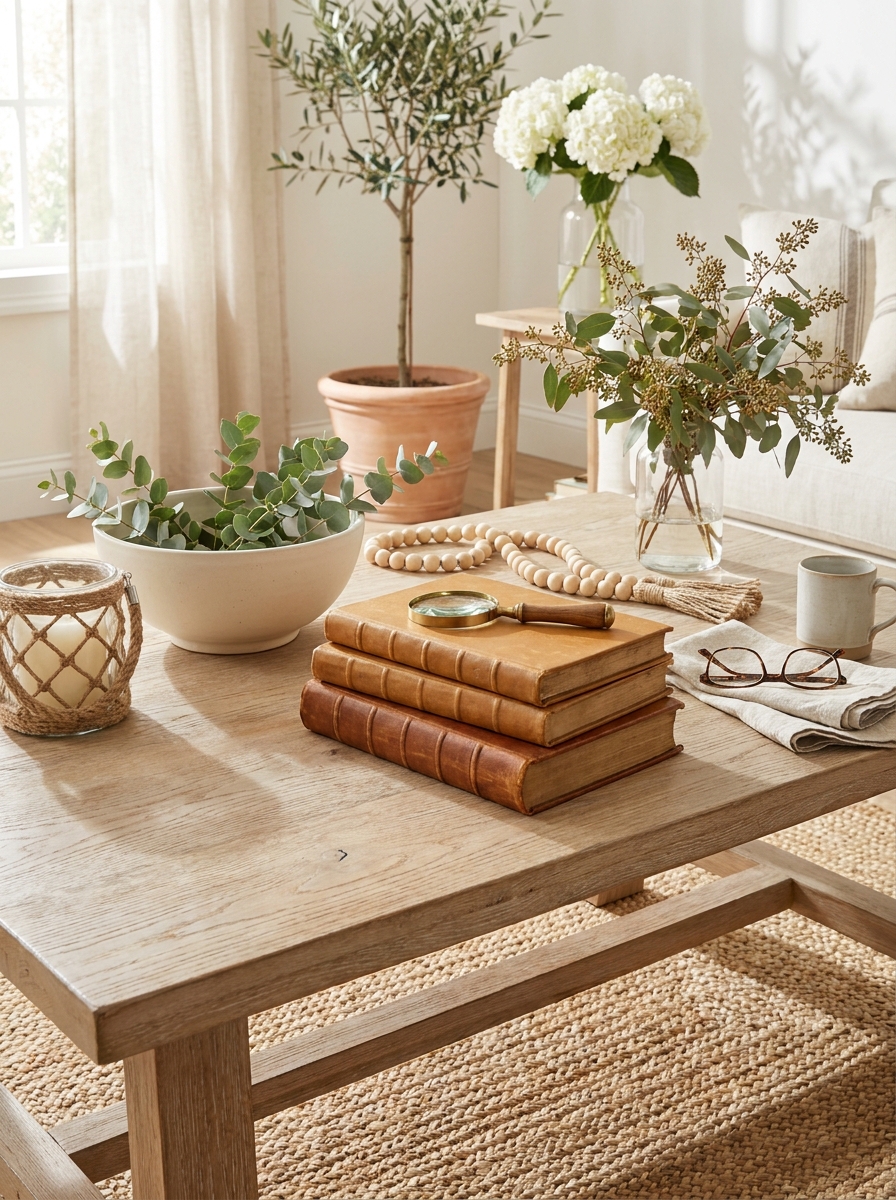
You know those gorgeous stacks of design books at Pottery Barn that cost like $200 for three books? Yeah, we’re making those.
Hit up your local thrift stores for hardcover books with nice dimensions. Look for neutrals or classics you can recover. Then grab some leather remnants or faux leather fabric from the craft store. Wrap those books like presents, tucking and gluing the edges inside the covers. Add a leather strap with brass studs around one or two for that extra designer touch.
The magic is in the styling. Stack them in groups of three to five, mixing heights and widths. I love adding one turned on its side as a base. Top with a small brass object or a sprig of eucalyptus in a bud vase. Suddenly your coffee table looks like it was styled by a professional. Nobody needs to know these were $2 books from Goodwill. The leather wrap transforms them into expensive-looking accessories that ground your whole space.
22. Rope-Handled Wooden Storage Crate
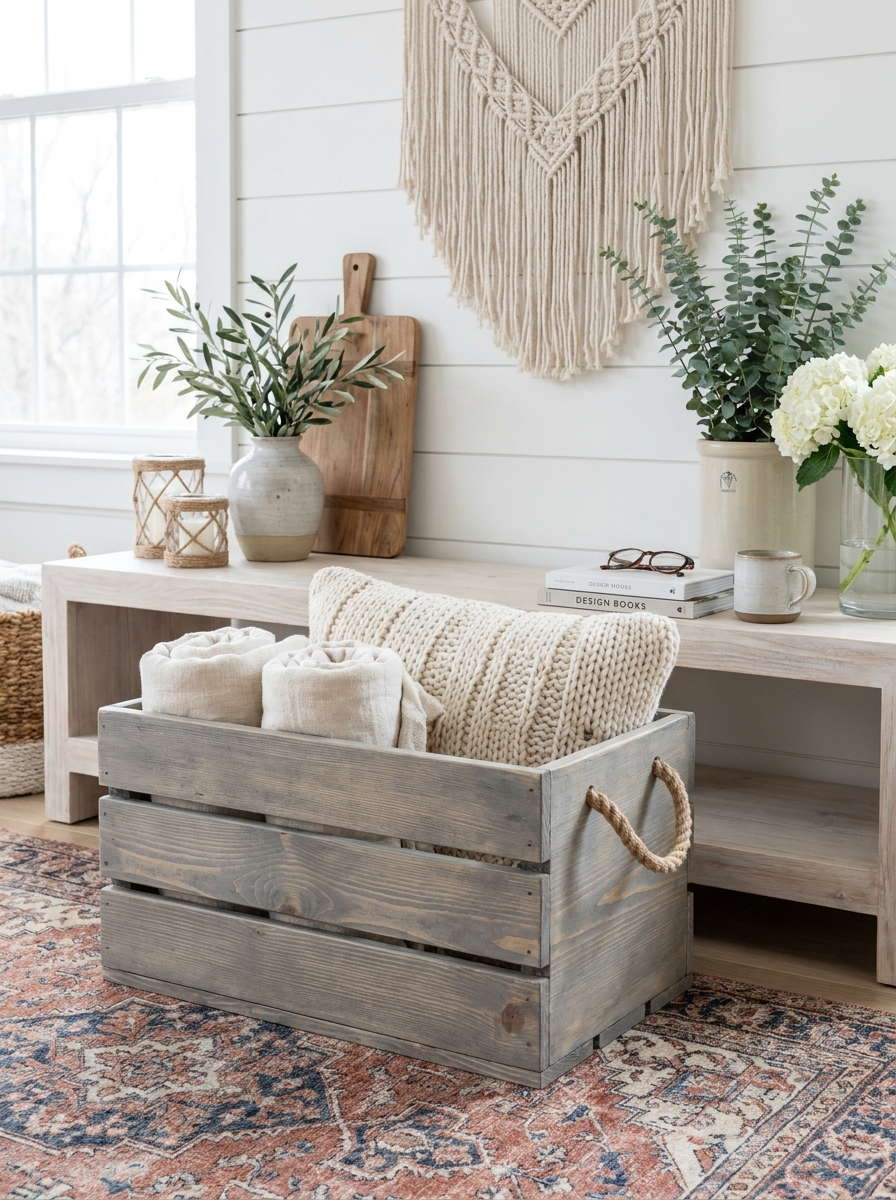
These wood and rope crates sell for $80-plus at Pottery Barn, but you can build one in an afternoon for maybe twenty bucks.
Grab some pine boards from the hardware store and cut them to size for a simple box design. You don’t need fancy joinery here. Wood glue and finishing nails work perfectly. Sand everything smooth, then stain or paint in a weathered finish. The real Pottery Barn trick is those thick rope handles. Drill two holes on each short side, thread through chunky natural rope, and knot it on the inside. So simple but it looks incredible.
I use mine for everything. Firewood by the fireplace. Rolled blankets in the living room. Toys in the playroom. They stack beautifully too, so make two or three in different sizes. The rope handles make them easy to grab and move around, plus they add that nautical-coastal vibe without being too themey. Wax or seal the wood so it ages beautifully over time.
23. Gilded Edge Ceramic Catchall Dish
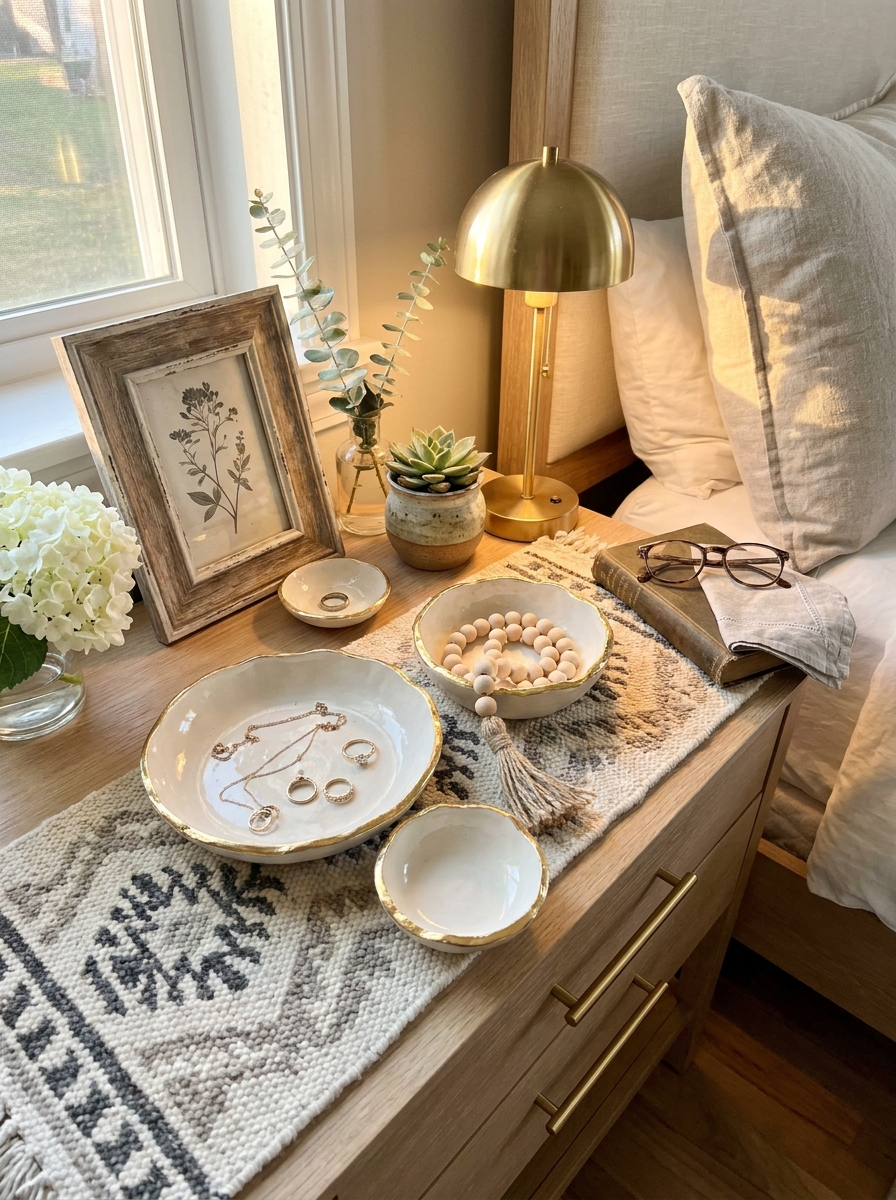
Those little jewelry dishes with the gold edges? Total DIY win. And honestly more fun to make than you’d think.
Start with plain white ceramic or porcelain dishes from the craft store. The shallow ones work best for keys, jewelry, or just looking pretty on your dresser. Clean them really well with rubbing alcohol. Then grab gold leaf paint or actual gold leaf sheets if you’re feeling fancy. Paint or apply the gold around just the rim, keeping it irregular and organic. Some spots thicker, some thinner. That imperfect application is what makes it look artisan and expensive.
Let everything cure for a few days, then seal with a clear topcoat if you’ll actually use the dish. Otherwise, they’re gorgeous just sitting there looking expensive. I made six in one afternoon and gave them as gifts. Everyone thought I spent a fortune at some boutique. Group three together on a nightstand or vanity for major impact. The gold catches the light and adds instant glamour to any surface.
24. Rustic Iron Pipe Curtain Rod
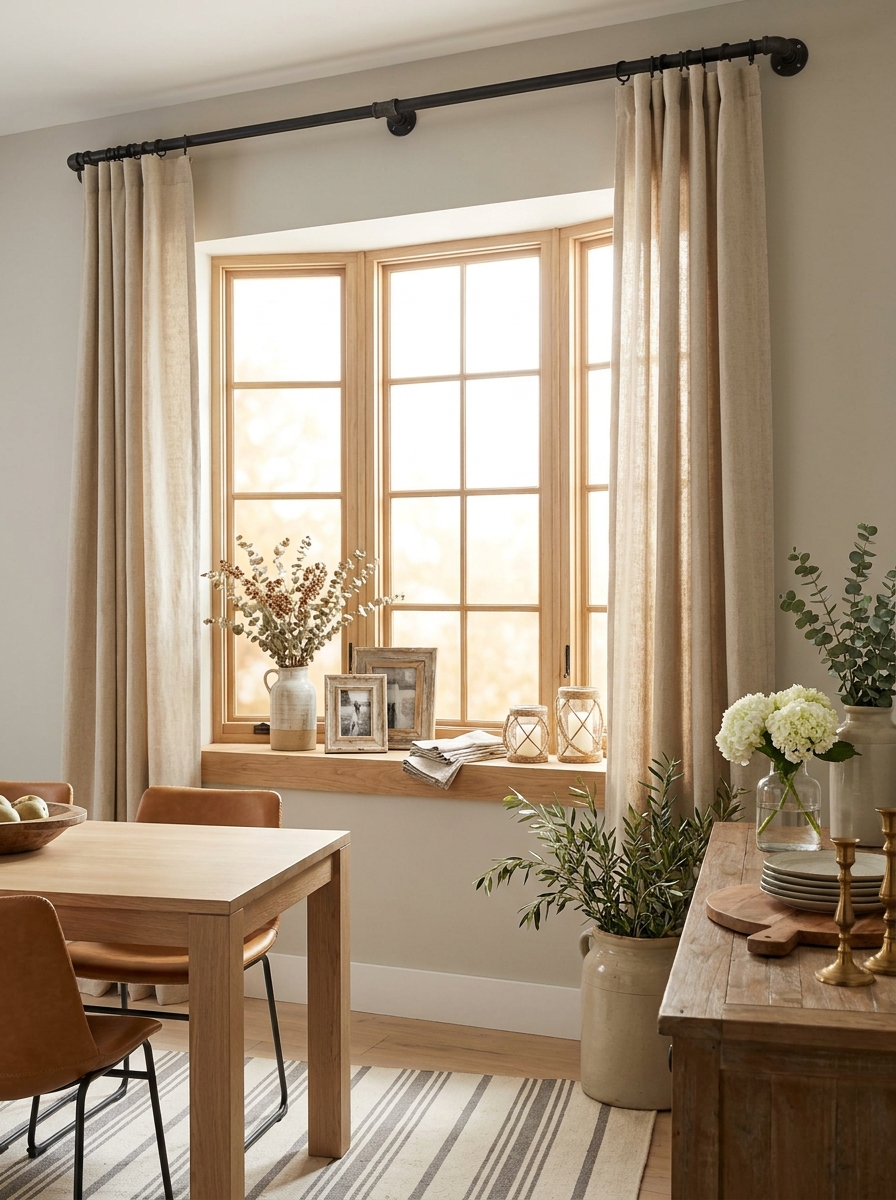
Pottery Barn charges over $150 for their industrial curtain rods. The plumbing aisle has everything you need for thirty bucks.
Black iron pipe and fittings are your new best friends. Measure your window width and grab pipe in the right length, plus floor flanges for the wall mounts and end caps for a finished look. Screw the flanges into your wall studs, thread on the pipe, add those end caps, and boom. You’ve got that expensive industrial-chic look for nothing.
What I love is how substantial these feel. They hold heavy linen curtains without bowing. The black iron looks amazing against white walls, and it works in literally any style room. Farmhouse? Yes. Modern? Absolutely. Coastal? Surprisingly perfect. You can leave the iron raw for an aged look, or spray paint it matte black, brushed bronze, or even white. I’ve made these for every window in my house. Guests always ask where I bought them, and I just smile.
25. Woven Leather Strap Wall Shelf
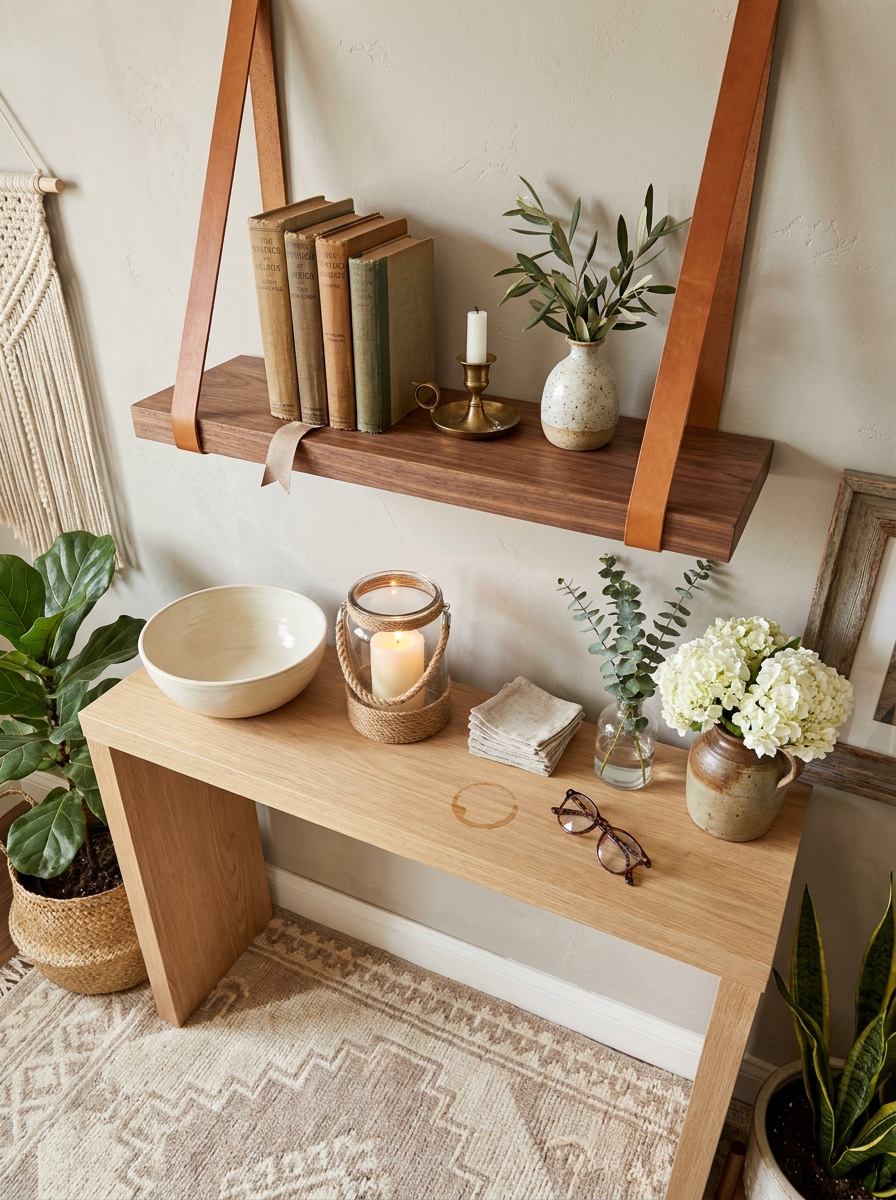
This DIY shelf combines a simple wooden board with leather straps that loop over hooks—it’s basically wall-mounted jewelry for your living room! I made mine in about an hour and it looks so expensive hanging above my desk.
You just need a smooth wood plank (I used poplar and stained it walnut), two long leather straps, and wall hooks. The leather creates this gorgeous contrast against the wood grain, and the whole thing has that effortless modern vibe Pottery Barn does so well. I love how the straps give it movement and texture.
The best part? You can adjust the height by changing where you mount the hooks. Mine holds a few favorite books, a small plant, and a candle. It’s minimal but makes such a statement! The leather develops this beautiful patina over time too, which just adds to the character. People always ask where I bought it, and I love telling them I made it myself for about twenty dollars.
26. Hand-Stamped Clay Ring Holder Cone
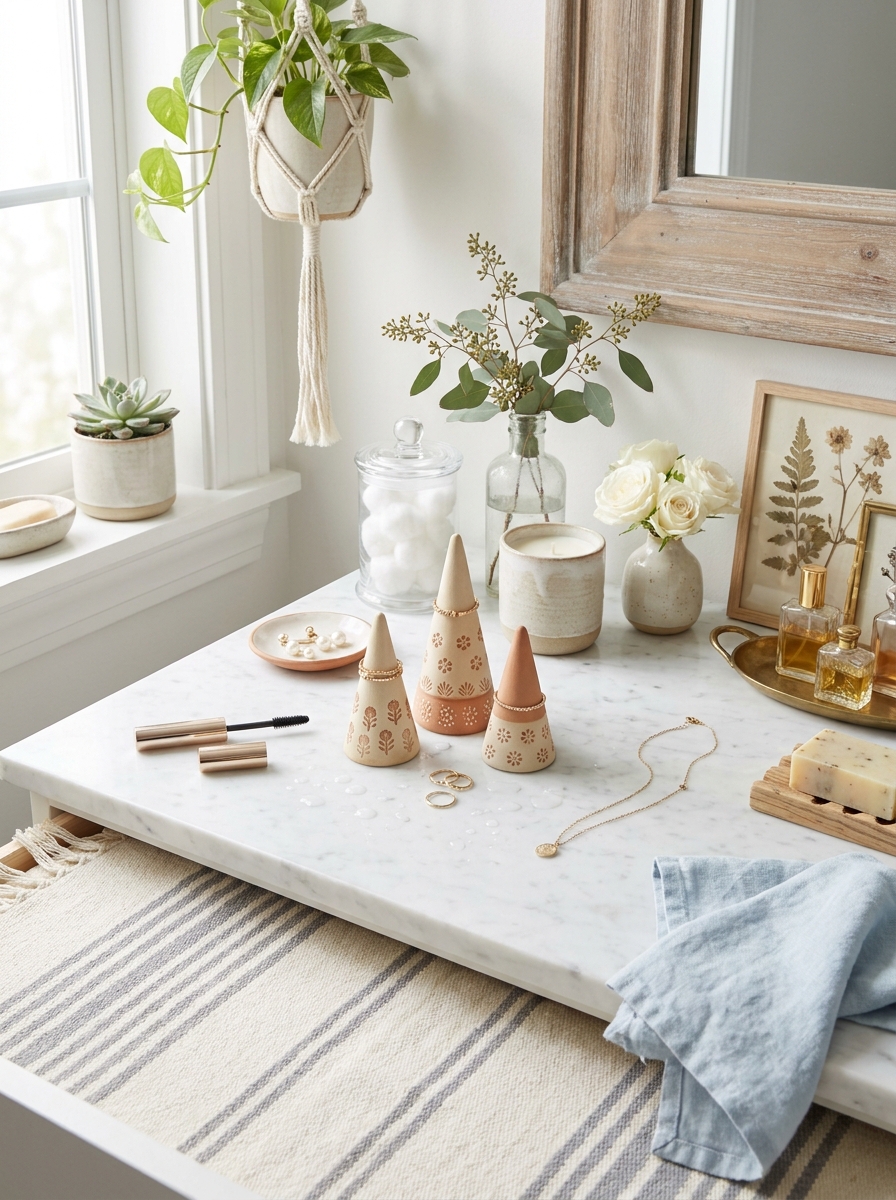
These little cone-shaped ring holders are everywhere at Pottery Barn right now, and they’re shockingly easy to make with air-dry clay! I made a whole collection for my bathroom counter and they look like little sculptural art pieces.
You roll the clay into a cone shape, smooth it out, and use rubber stamps or carved designs to add texture before it dries. I did some with geometric patterns and others with simple dots. Once dry, you can leave them natural white or paint them—I did mine in a mix of matte white and soft terracotta.
They’re perfect for holding rings, earrings, or even tiny treasures on your nightstand. The handmade texture gives them so much more personality than store-bought versions. I made extras as gifts and everyone went crazy for them! The best part is each one turns out slightly different, so they feel really special and one-of-a-kind. They’re also surprisingly sturdy once the clay fully cures.
27. Painted Terra Cotta Pot Collection
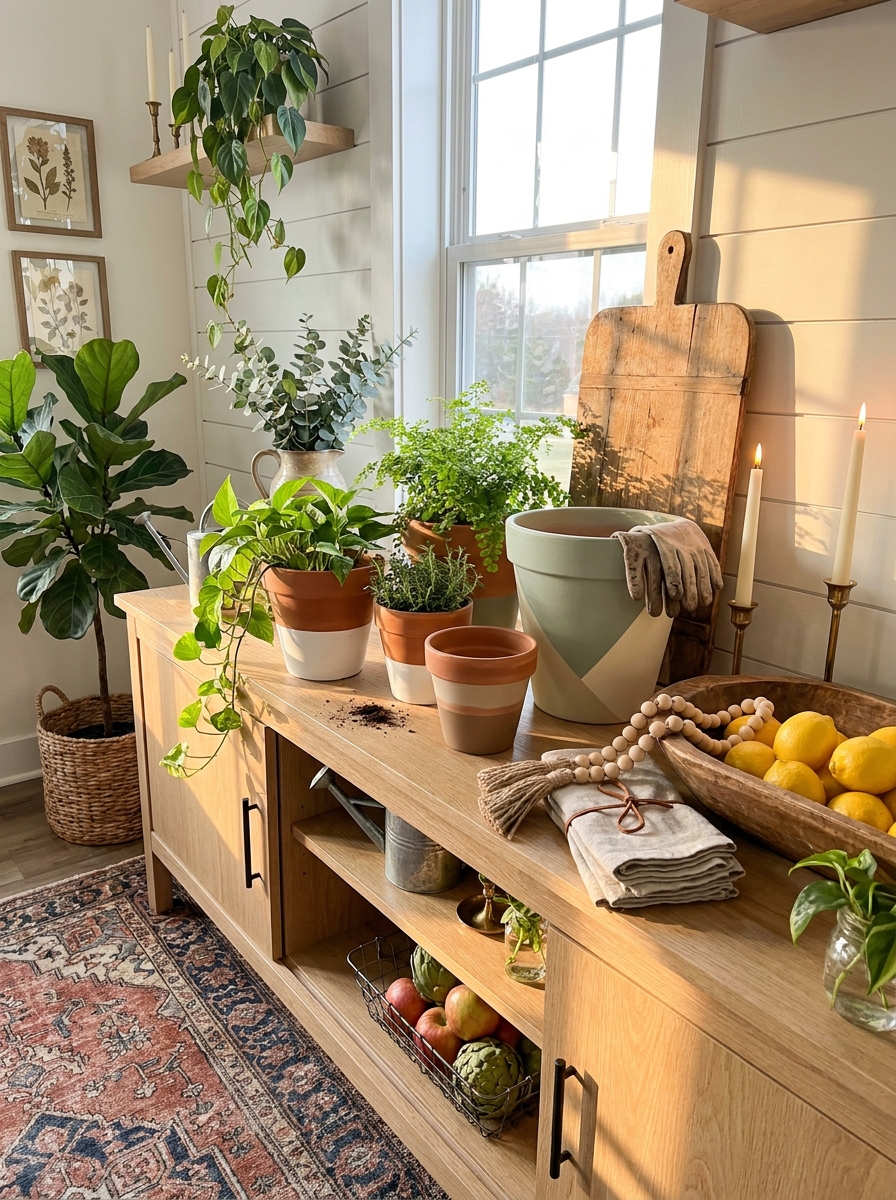
Plain terra cotta pots are like blank canvases waiting to be transformed! I spent one afternoon painting a whole collection and now they look like those expensive two-tone pots that cost fifty dollars each at Pottery Barn. My version? About three dollars per pot.
The trick is using chalk paint or acrylic mixed with a little water for that matte, chalky finish. I did mine in different patterns—some with the top half painted white, others with geometric color blocks, and a few with just the rim painted. The contrast between the natural clay and painted sections is so beautiful!
You can get really creative with patterns or keep it super simple. Either way, they instantly elevate any plant situation. I love grouping different sizes together on my porch with herbs and trailing plants. The terra cotta still breathes through the paint, so your plants stay happy. And if you mess up? Just paint over it! These pots have completely changed how my plant collection looks—way more cohesive and styled.
28. Wrapped Leather Journal Collection Display
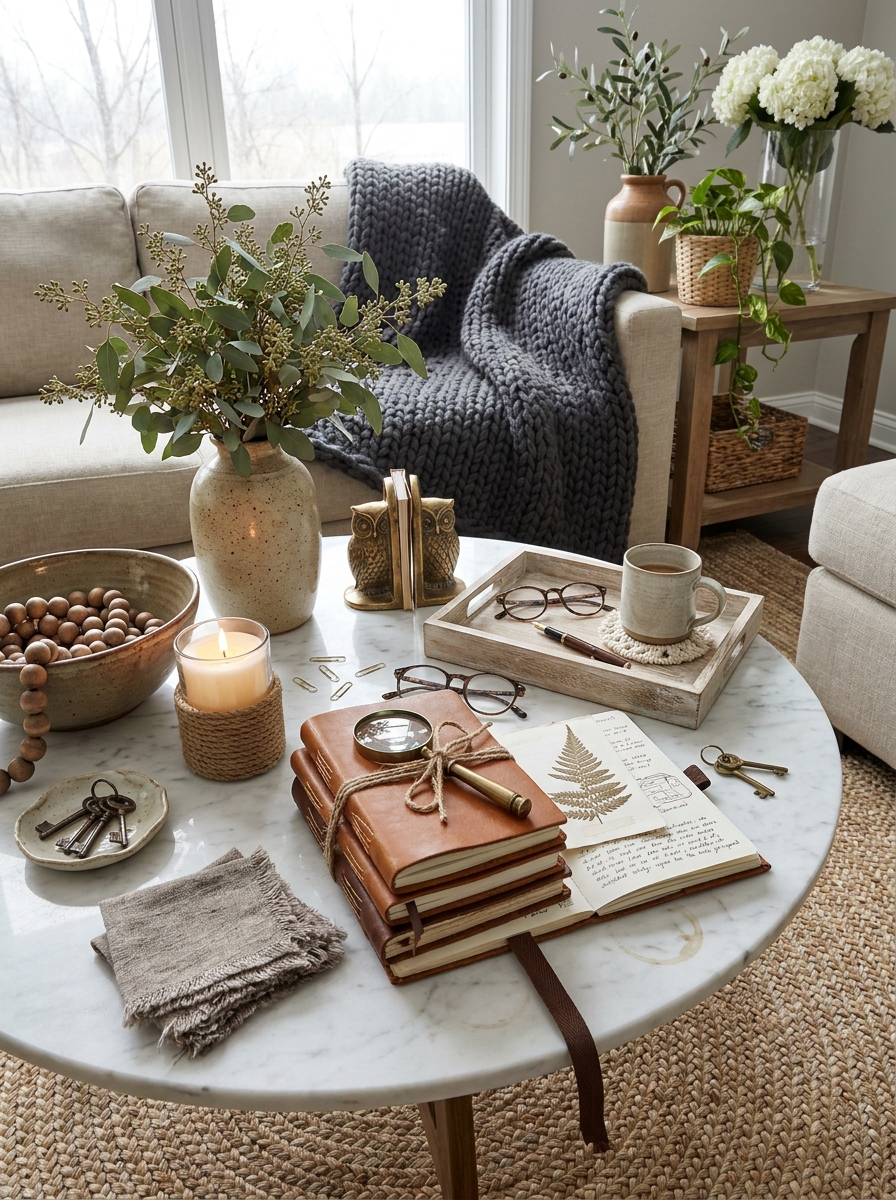
This is more of a styling trick than a craft project, but it creates such an expensive look! Take plain journals or notebooks and wrap them in leather or linen fabric, then stack them like vintage books. They look incredibly high-end displayed on coffee tables or shelves.
I used leather remnants from the craft store (super cheap!) and wrapped them around plain composition notebooks, securing with a thin leather cord or jute twine. You can leave them plain or add labels with a label maker for that library catalog vibe. The leather gives them this timeless, collected-over-years feel.
Stack them with the spines facing out on your coffee table with a candle on top, or lay them flat under a decorative object. They add instant warmth and texture to any space. I also slip meaningful quotes or photos inside the covers as hidden treasures. It’s such an easy way to make ordinary notebooks look like expensive leather-bound books you inherited from your grandmother’s library!
29. Linen-Wrapped Picture Frame Mat
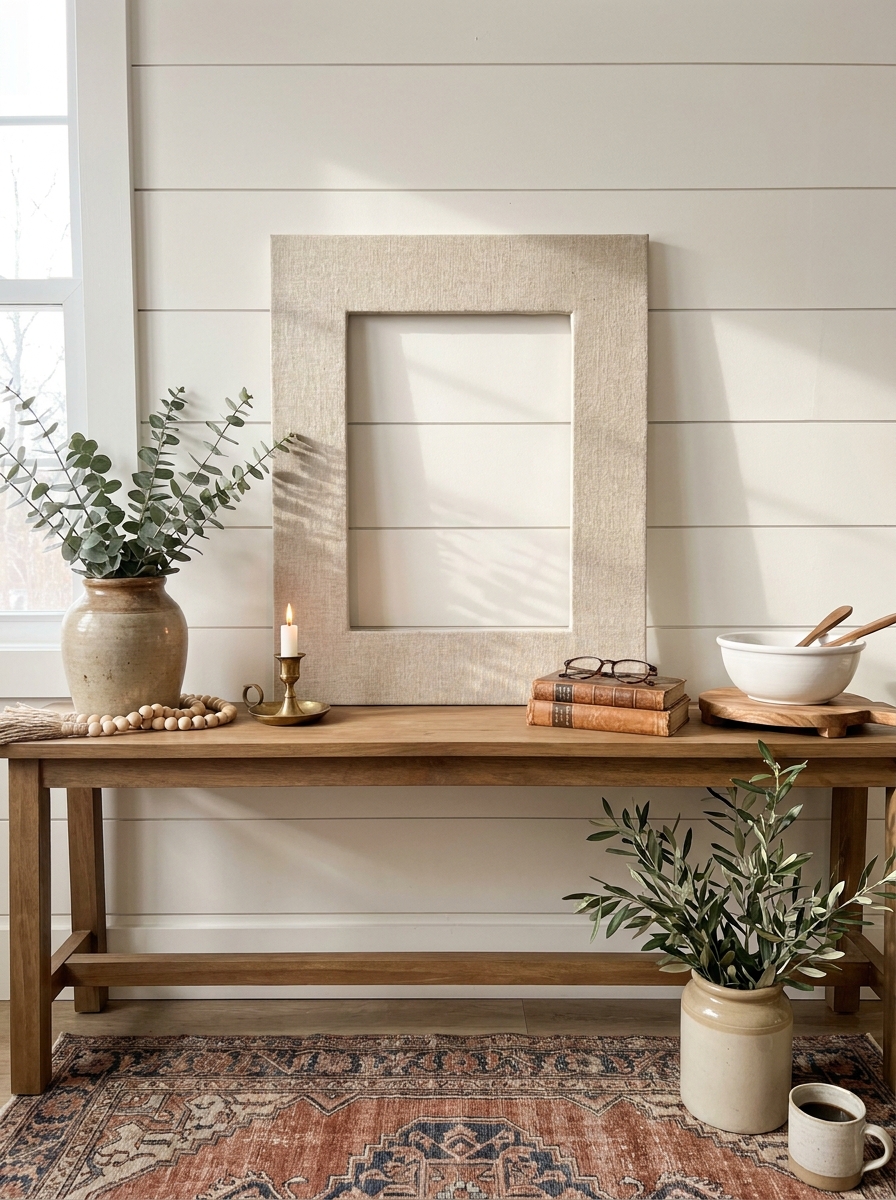
I stumbled on this trick totally by accident when I had a gorgeous print but the mat looked so… basic. Wrapping a simple mat with linen fabric transforms any frame into something that looks straight out of the catalog.
You’ll need a basic mat board, some natural linen fabric, and fabric glue. Cut your linen slightly larger than the mat, wrap it around like you’re wrapping a present, and secure the edges on the back with glue. The key is pulling it taut so you don’t get wrinkles on the front. Use a craft knife to carefully cut out the center opening, then fold those edges to the back too.
What I love is how the texture of the linen adds dimension to your wall. It catches the light differently than paper and just feels more expensive. This works especially well with black and white photography or botanical prints. You can make a whole gallery wall of these for the cost of one Pottery Barn frame.
30. Turned Wood Candlestick Collection
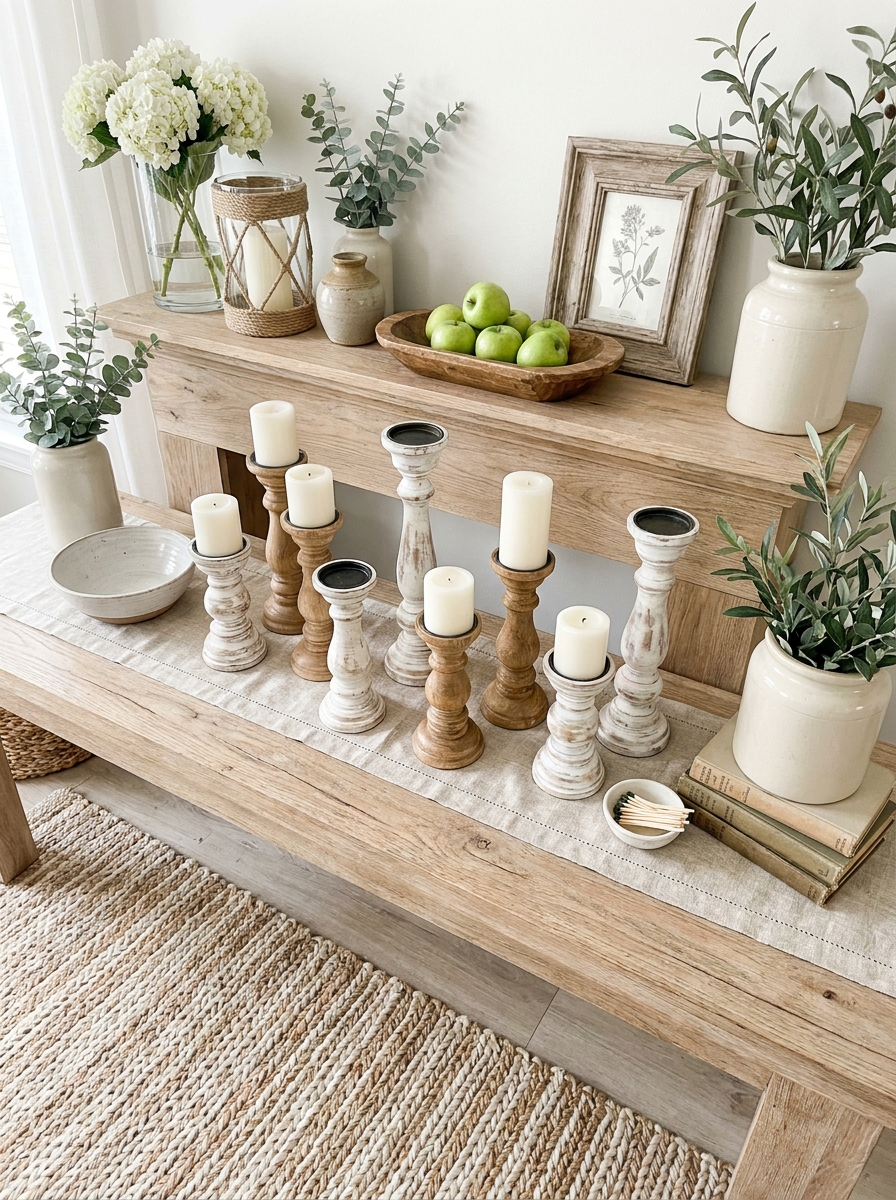
Okay, hear me out on this one. You don’t actually need a lathe. I know Pottery Barn sells those gorgeous turned wooden candlesticks for like forty bucks each, but you can find similar pieces at thrift stores for almost nothing.
The magic is in how you finish them. I collect mismatched wooden candlesticks whenever I see them, then I give them all the same treatment. Sand them smooth, then choose your finish. Sometimes I go with a natural oil that brings out the grain. Other times I’ll do a soft white wash or even a driftwood grey stain. The trick is treating them all the same way so they look like an intentional collection.
I have seven different candlesticks on my mantel right now, all different heights and shapes, but they read as one cohesive moment because of the uniform finish. Group them in odd numbers, vary the heights, and suddenly your mantel looks like a magazine spread.
31. Faux Bois Ceramic Cachepot
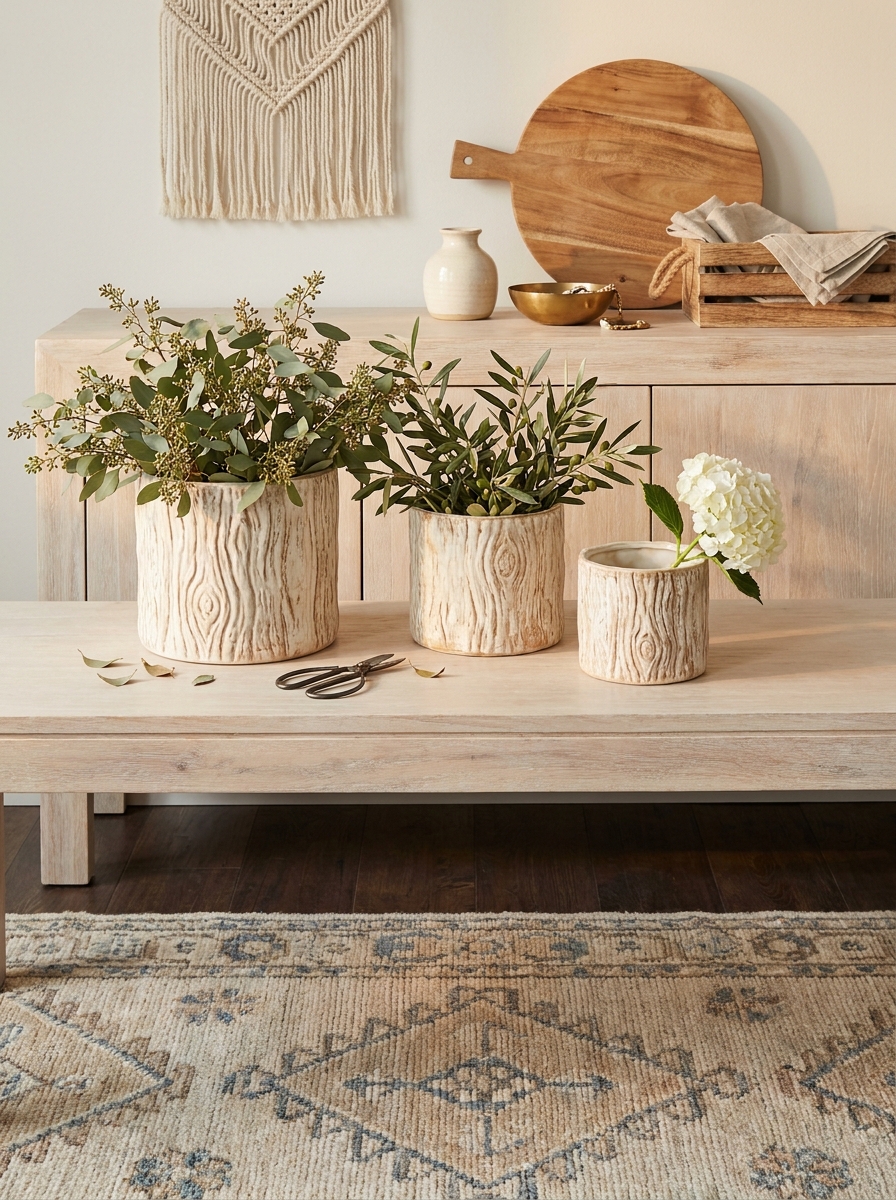
This might be my favorite discovery yet. Those textured ceramic planters that look like tree bark? You can recreate that look with inexpensive smooth ceramic pots and some modeling paste from the craft store.
Grab a basic terra cotta or ceramic pot and use a palette knife to apply modeling paste in rough, bark-like strokes. Don’t overthink it. Real wood isn’t perfect, so your texture shouldn’t be either. Let it dry completely, then paint it in soft neutrals. I love a greige or a creamy off-white. Once the paint dries, dry brush a darker shade into the crevices to add depth.
The result is honestly shocking. These look expensive and organic, like something from a high-end garden shop. I use mine for faux stems on the kitchen counter, but they’d be gorgeous with real plants too. Make several in different sizes and group them together for maximum impact.
32. Herringbone Wooden Tray with Leather Handles
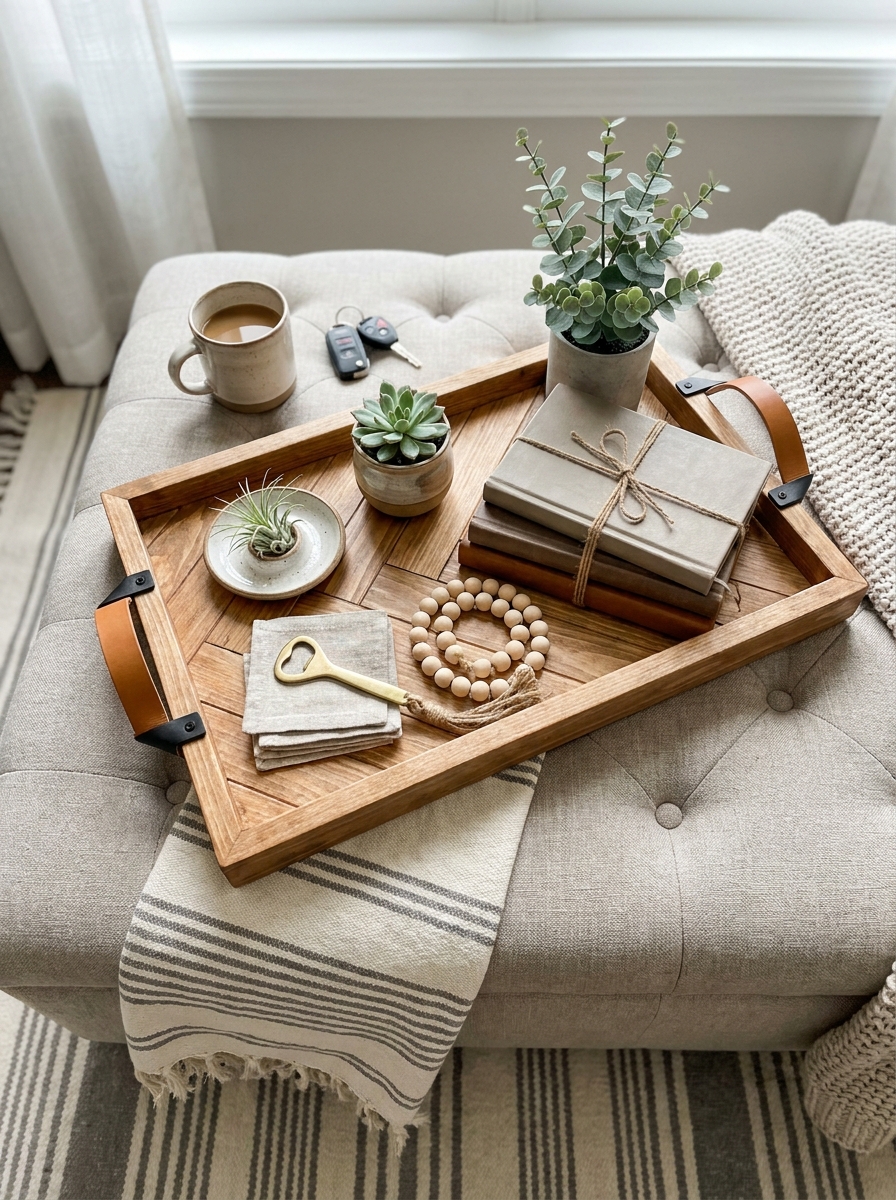
I saved the best for last, friends. This project looks complicated but it’s actually just patience and wood glue. Those gorgeous wooden trays with the herringbone pattern? Totally doable at home.
You’ll need thin wood strips (I get mine from the craft store), a flat base board, wood glue, and leather strapping for handles. Cut your strips to size and start gluing them down in that classic herringbone V-pattern. It’s like a puzzle that actually wants to go together. Once everything’s glued and dried, sand the whole thing smooth and finish it however you want. I always do a natural oil to bring out the grain.
For the handles, just drill two holes on each end, thread through leather strapping, and knot it underneath. These trays are so versatile. I use mine on the ottoman for corralling remotes, on the nightstand for my bedtime essentials, and on the kitchen counter for coffee stuff. Make one and you’ll want three more immediately.
Quick Guide
Quick Cost Breakdown: DIY vs. Pottery Barn
| Project | Pottery Barn Price | DIY Cost | You Save |
|———|——————-|———-|———-|
| Wooden Bead Garland | $42 | $8 | $34 |
| Rope Hurricane (set of 3) | $198 | $15 | $183 |
| Serving Board | $89 | $18 | $71 |
| Linen Pillow Cover | $49 | $12 | $37 |
| Total for 4 Projects | $378 | $53 | $325 |
That’s serious money back in your pocket. And honestly? The DIY versions often look better because you can customize every detail to match your exact style and color scheme. Plus there’s something deeply satisfying about telling guests you made that gorgeous thing they’re complimenting.
Your Home, Your Budget, Your Way
Here’s what I love most about these Pottery Barn dupes—they’re not about being cheap or cutting corners. They’re about being smart and creative with your money so you can create a home that feels expensive without the soul-crushing credit card bill. Every single one of these 32 projects proves that beautiful, timeless design isn’t locked behind a price tag. It’s available to anyone willing to spend a Saturday afternoon with some rope, wood, or fabric.
Start with just one project that excites you. Maybe it’s those wooden beads or the linen pillows. Make it, style it, live with it for a week. I promise you’ll get hooked on that feeling of walking past something you created and feeling proud every single time. Your home should tell your story, not Pottery Barn’s. So grab your glue gun, pick a project, and let’s make something beautiful. You’ve completely got this.
Frequently Asked Questions
Can I really make Pottery Barn dupes that look as good as the originals?
Absolutely, yes. The secret is using the same materials they do—natural linen, real wood, jute rope, leather. Pottery Barn’s aesthetic is all about simple shapes and quality materials, which is actually easier to recreate than trendy, complicated designs. Focus on clean lines and neutral colors, and your DIY will look just as polished.
What’s the easiest Pottery Barn DIY project for complete beginners?
The wooden bead garland is hands-down the simplest. You literally just string beads onto cord—no tools, no skills, takes about 20 minutes. It’s impossible to mess up and instantly makes any space look more styled. Start there to build your confidence.
Where should I buy supplies for DIY Pottery Barn knockoffs?
Hardware stores for rope and wood, fabric stores for linen and leather scraps, and online bulk suppliers for wooden beads. Dollar stores and thrift shops are gold mines for plain glass hurricanes and frames you can transform. You don’t need specialty craft stores for most of these projects.
How can I make my DIY projects look expensive instead of homemade?
Stick to a neutral color palette, use natural materials, and pay attention to finishing details. Sand rough edges, use quality glue that doesn’t show, and style your finished piece with intention. The styling matters as much as the project itself—pair your DIY with a few simple, classic accessories.
How much money can I actually save making Pottery Barn dupes?
Most of these projects cost between $5 and $20 to make, while Pottery Barn charges $40 to $200 for the same look. If you tackle even five or six projects, you’ll easily save $300 to $500. Plus you can make multiples for the cost of one original—think pillow sets or multiple hurricanes.