21 Gorgeous Birthday Party Decor Ideas at Home
You’ve got a birthday coming up and you want your home to feel special without renting a venue or spending a fortune. I get it. There’s something magical about transforming your everyday living room into a celebration space that makes everyone go “wow” when they walk in. The best part? You don’t need a degree in event planning or an unlimited budget. What you need are smart, beautiful ideas that work in real homes with real furniture and real budgets. I’ve rounded up 21 birthday party decor ideas that actually feel doable. Some are quick fixes you can pull off the morning of the party. Others are showstoppers worth a little extra effort. They all have one thing in common: they make your space feel intentionally festive without looking like you tried too hard. Let’s get into it.
1. The Statement Balloon Garland Backdrop
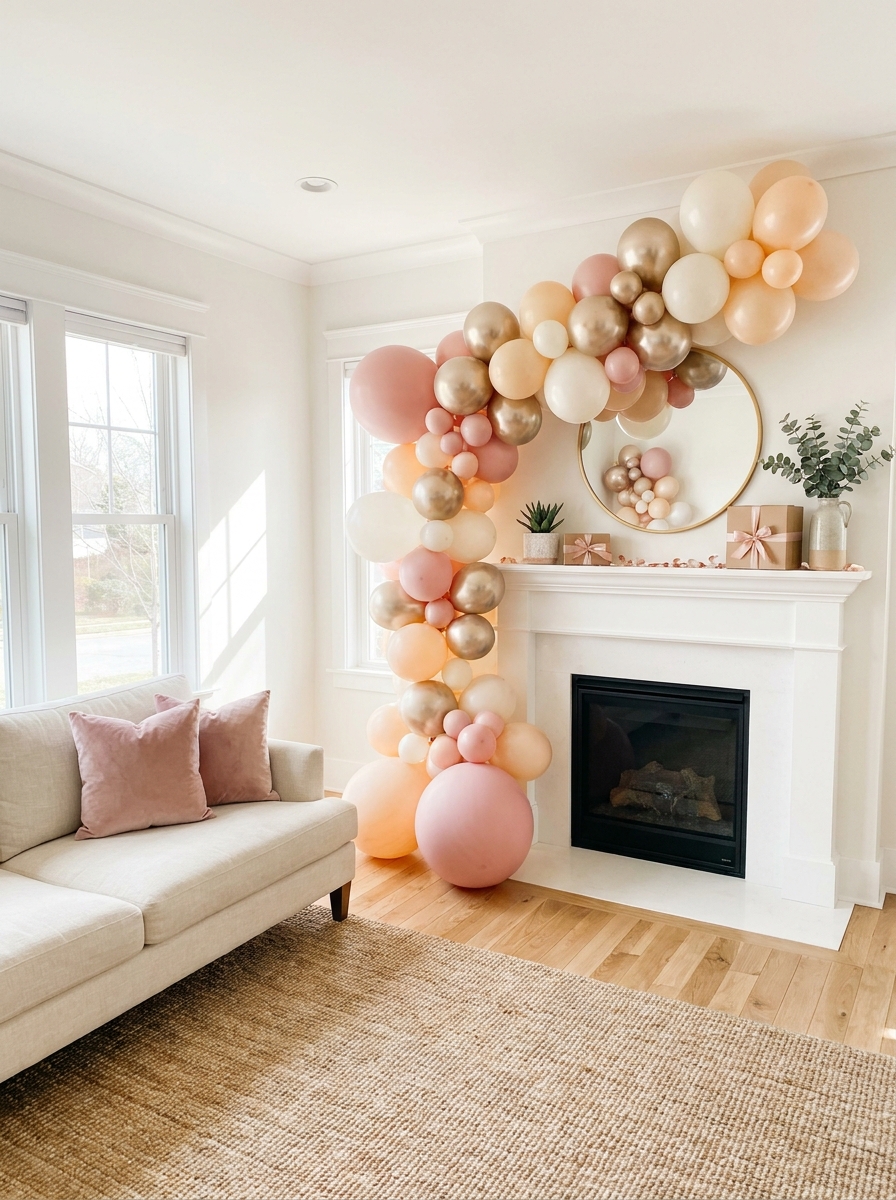
Balloon garlands have completely taken over birthday parties, and honestly, I’m not mad about it. They’re that perfect mix of playful and polished. Drape one across your fireplace mantel, frame a doorway, or create an entire photo wall in your living room. The beauty is in the organic, flowing shape — nothing stiff or symmetrical here.
You can go monochrome for a sophisticated vibe or mix a rainbow of pastels for something more playful. I love adding metallic balloons into the mix because they catch the light and photograph beautifully. And here’s the thing: you don’t need helium for these. They’re designed to drape and cascade, anchored to command hooks or fishing line.
The best part? Balloon garlands work in any room. I’ve seen them transform boring dining rooms into party central and turn basic entryways into “wow” moments. They’re especially genius if you’re working with a rental or a space you can’t paint or modify. Instant impact, zero commitment.
2. Tiered Dessert Table with Pretty Cake Stands
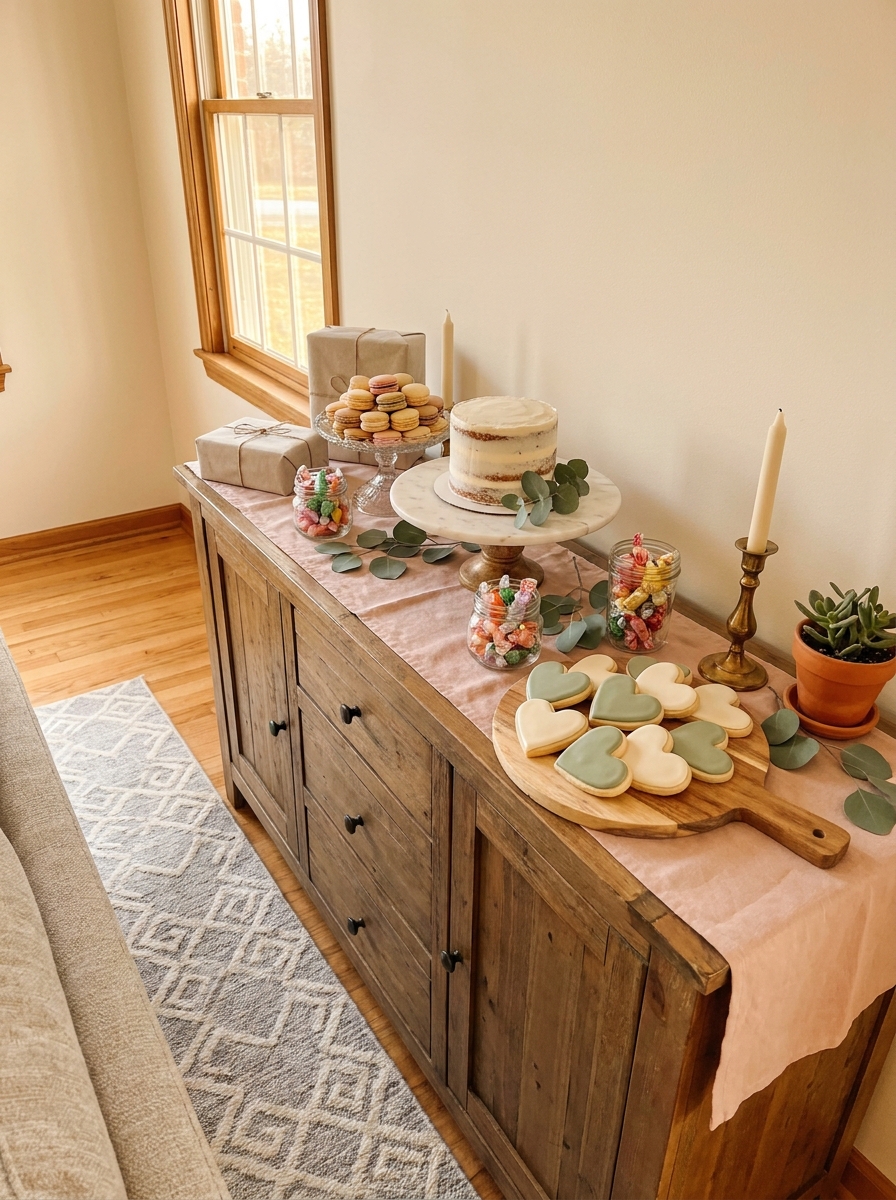
A dessert table isn’t just about the sweets — it’s about creating a visual moment that doubles as decor. Set up a dedicated table or sideboard and style it with varying heights using cake stands, wooden risers, or even stacked books wrapped in pretty paper. This creates dimension and makes everything feel more curated.
I’m obsessed with mixing materials here. Pair a marble cake stand with a vintage glass one and maybe a simple wooden board. Layer in some treats — cupcakes, cookies, candies in glass jars — and suddenly you’ve got something that looks professionally styled. The key is keeping a cohesive color story. If your party palette is sage and terracotta, stick with desserts and packaging in those tones.
Don’t forget the backdrop. A simple linen tablecloth or a runner in your party colors instantly elevates the whole setup. And if you’re feeling ambitious, hang a small “Happy Birthday” banner or paper fan decorations on the wall behind the table. It frames everything beautifully and makes it Instagram-ready without trying too hard.
3. Metallic Fringe Curtain Party Wall
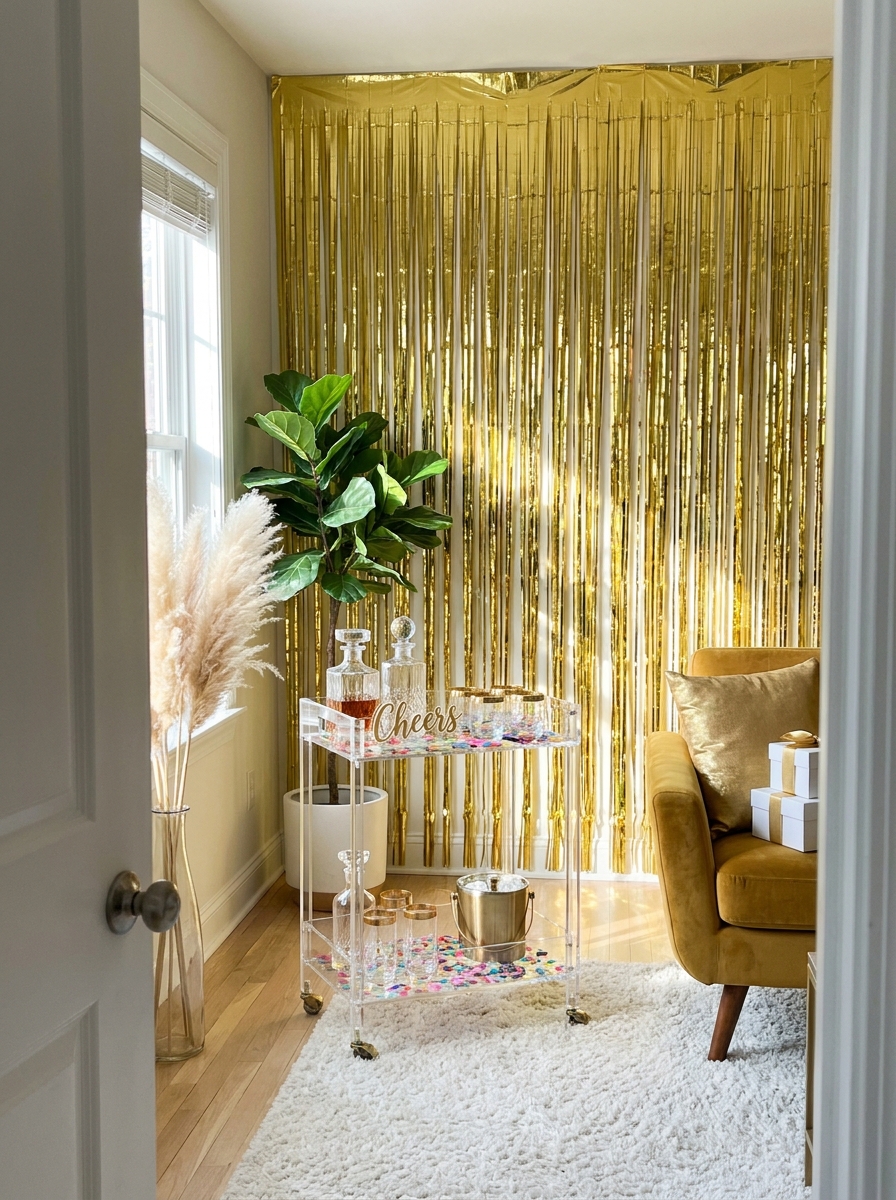
Sometimes you need instant drama, and metallic fringe curtains deliver exactly that. Hang them across an entire wall or use them to section off a party zone in an open floor plan. They shimmer, they move, they photograph like absolute magic. And they’re shockingly affordable.
I love using these behind a drink station or dessert table to create a defined party area. Gold fringe feels warm and celebratory. Rose gold is softer and romantic. Silver gives you that cool, modern edge. You can even layer two colors together for extra dimension. The movement of the fringe adds this playful, festive energy that static decorations just can’t match.
Here’s a fun trick: hang them in a doorway so guests walk through them to enter the party space. It’s an unexpected moment that immediately signals “something special is happening here.” And when the party’s over, they roll up and store flat. No wrestling with deflated balloons or crumpled paper decorations.
4. Number Balloons as Centerpiece Anchors
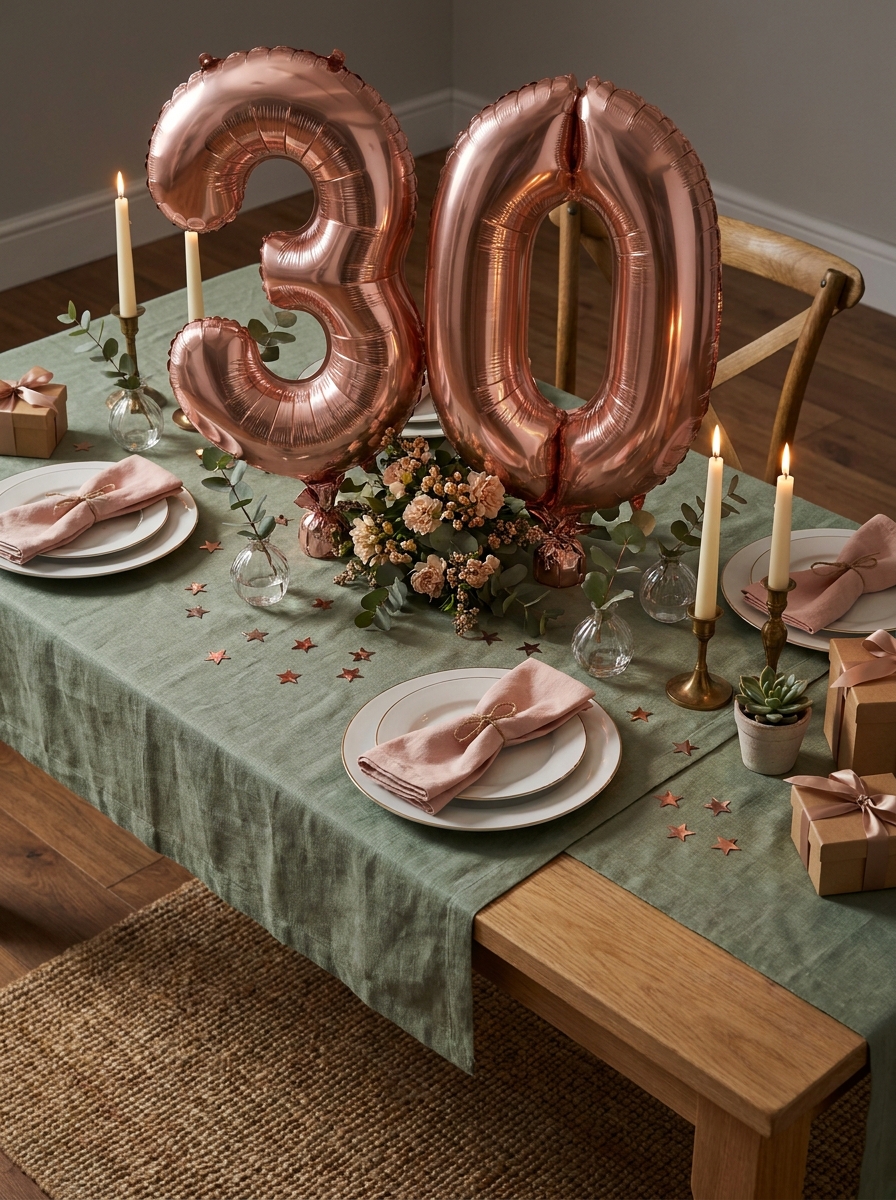
Giant number balloons are having a moment, and I’m here for it. They’re bold, they’re celebratory, and they instantly communicate what you’re celebrating without saying a word. Use them as floor decorations flanking your entryway, or anchor them to your dining table as a centerpiece that’s impossible to miss.
I especially love using them in unexpected ways. Lay a giant metallic number balloon across your party table as part of the tablescape, surrounded by smaller decorations and florals. Or prop two numbers against a wall to create a photo backdrop area. They work beautifully in both minimalist and maximalist setups — it all depends on how you style around them.
The color options are endless now. Classic gold and silver always feel elegant. Rose gold is softer and romantic. But don’t sleep on the matte pastels or even iridescent finishes for something a little different. They’re especially perfect for milestone birthdays when you really want that number to shine. And unlike traditional balloons, these stay inflated for days, so you can set up well in advance.
5. Confetti Table Runner Down the Middle
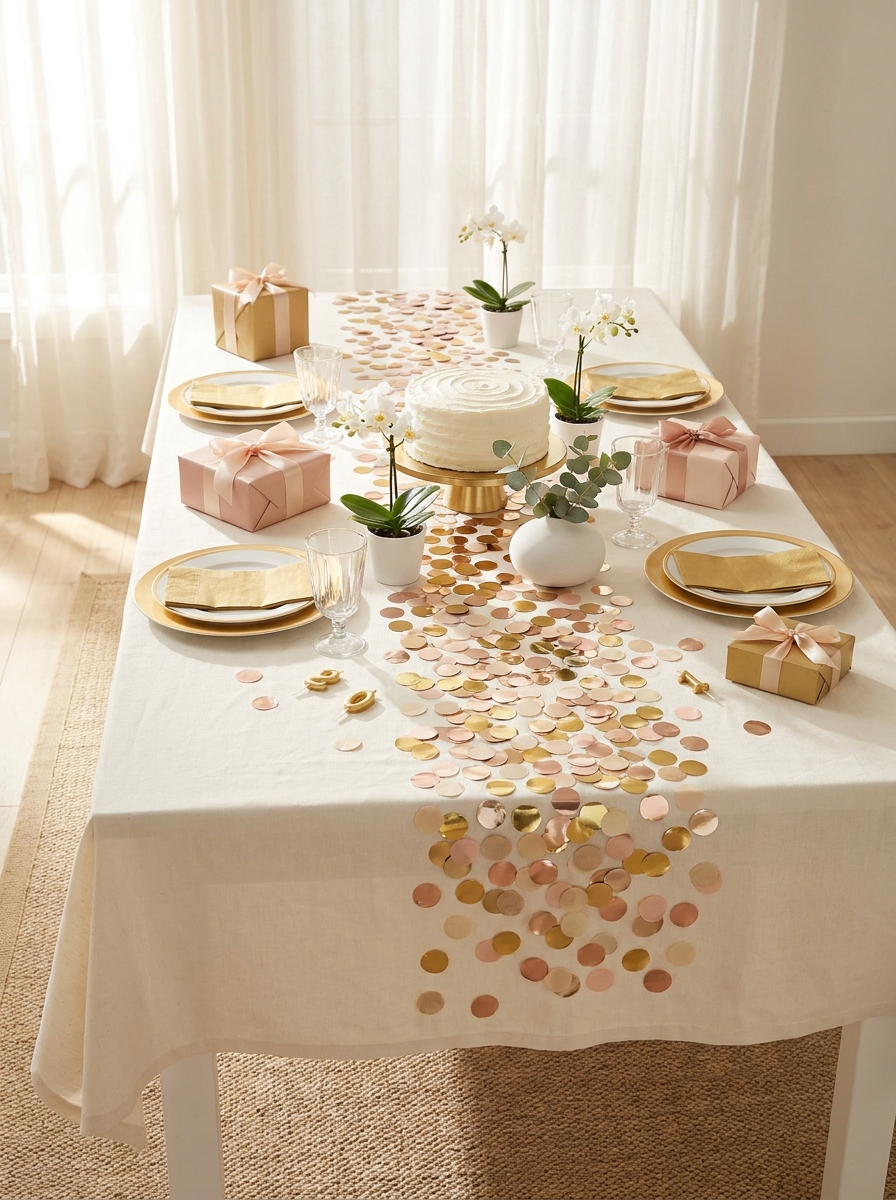
Forget fancy linens—sometimes the best party decoration is a generous scatter of confetti straight down your table. I’m talking about those oversized jumbo confetti circles in metallic gold, rose gold, and champagne mixed with blush pink tissue circles. Just sprinkle them right over a neutral tablecloth or even your bare wood table.
What I love about this approach is how effortlessly festive it looks without being fussy. The confetti catches the light differently throughout the party as people move around the table, and it photographs like a dream. Plus, it frames your cake and food platters beautifully without competing with them visually.
I usually do a concentrated line down the center, then let a few pieces scatter naturally toward the edges. It looks intentional but not too precious. And here’s the thing—when a few pieces fall to the floor during the party, it just adds to that joyful, celebration-is-happening vibe. You can buy pre-made confetti mixes or make your own with a circle punch and pretty scrapbook paper.
6. Paper Lantern Ceiling Installation
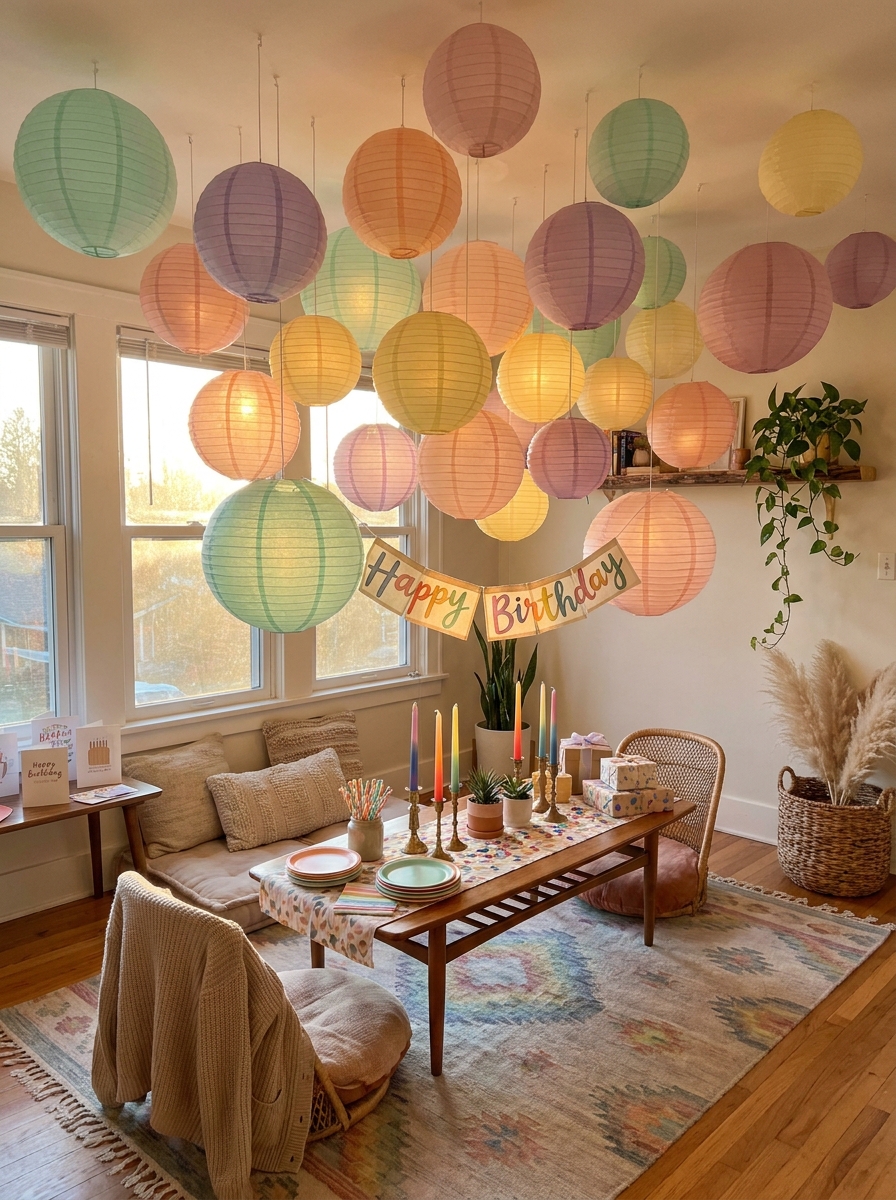
Look up, because that bare ceiling is party real estate you’re not using! Hanging paper lanterns at different heights instantly transforms your space and draws eyes upward. I mix three sizes—small, medium, and large—in a coordinated color palette, hanging them at staggered levels with clear fishing line so they look like they’re floating.
The magic happens when you cluster them over your main party zone, whether that’s the dining table, the gift area, or your makeshift dance floor. They add dimension and fill visual space without taking up any floor area, which matters when you’re working with a smaller room. And they move slightly with air circulation, adding this gentle, festive movement to your party.
I’ve done this in rainbow pastels for a playful vibe and in elegant white and metallics for sophisticated celebrations. Either way, it’s an impressive statement that looks way more expensive and complicated than it actually is. Command hooks on the ceiling or existing light fixtures make hanging them totally damage-free.
7. Styled Gift Display Corner
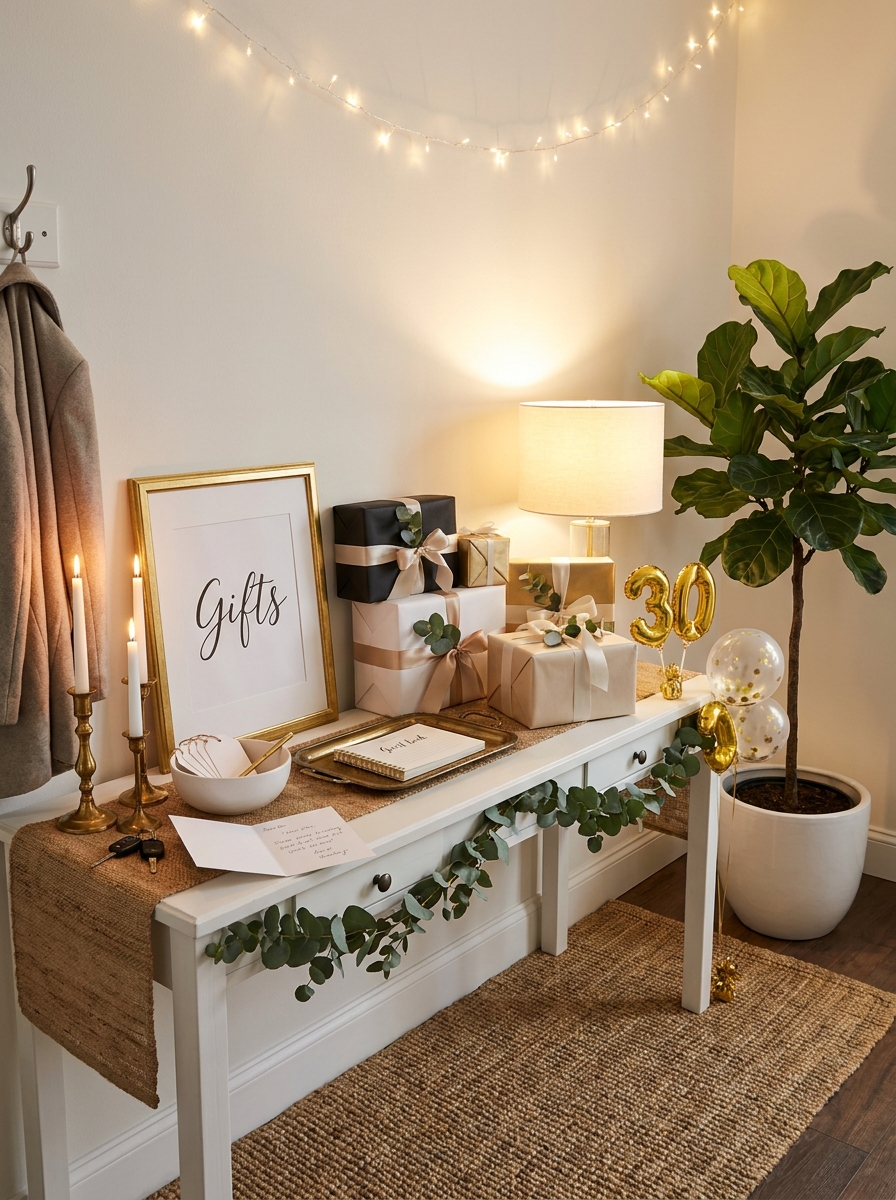
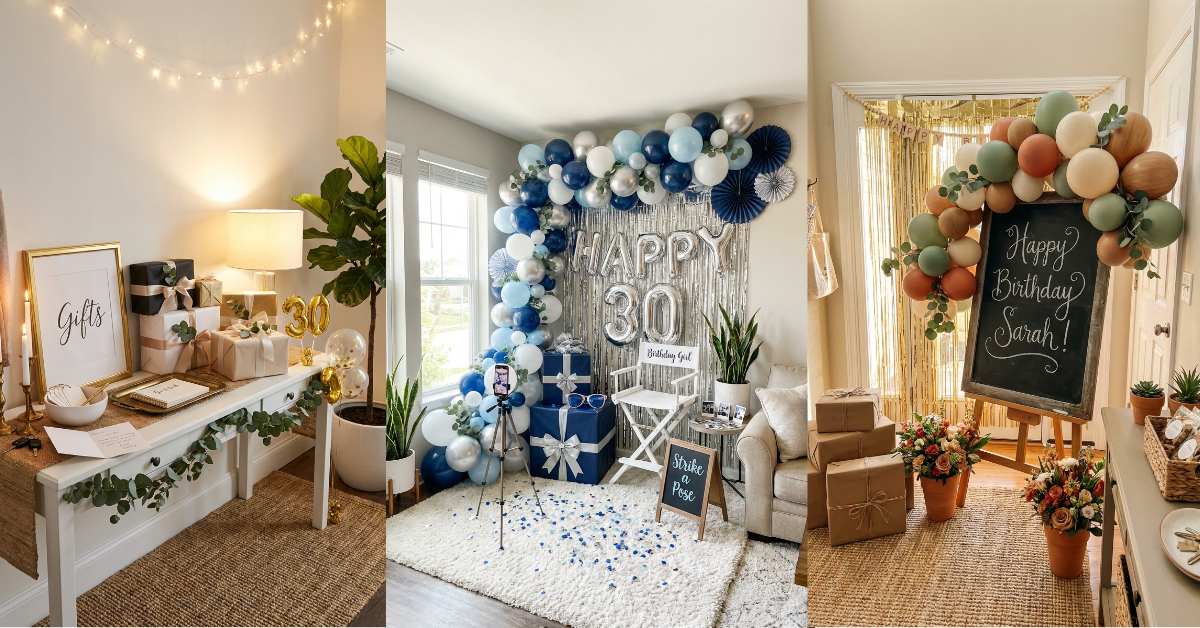
Instead of gifts piling up randomly by the door, create an actual designated gift corner that’s pretty enough to be part of your decor. I’m talking about a small table, a bench, or even a cleared console styled specifically to receive and showcase wrapped presents as guests arrive.
Start with a base layer—maybe a vintage suitcase, a wooden crate, or a pretty tray—then add a few “starter” wrapped boxes in your party colors to set the tone. As real gifts arrive, they stack up into this gorgeous, colorful installation that becomes a focal point. The key is choosing that initial wrapping paper carefully so incoming gifts nestle into a cohesive, styled look.
I love adding a small “Leave your wishes” sign with a basket of cards, or a Polaroid camera for guests to snap a photo with the birthday person. It makes the gift area functional and Instagram-worthy at the same time. This little touch makes guests feel like their gift is part of the celebration decor, not just stuff piled in a corner.
8. Personalized Photo Backdrop Wall
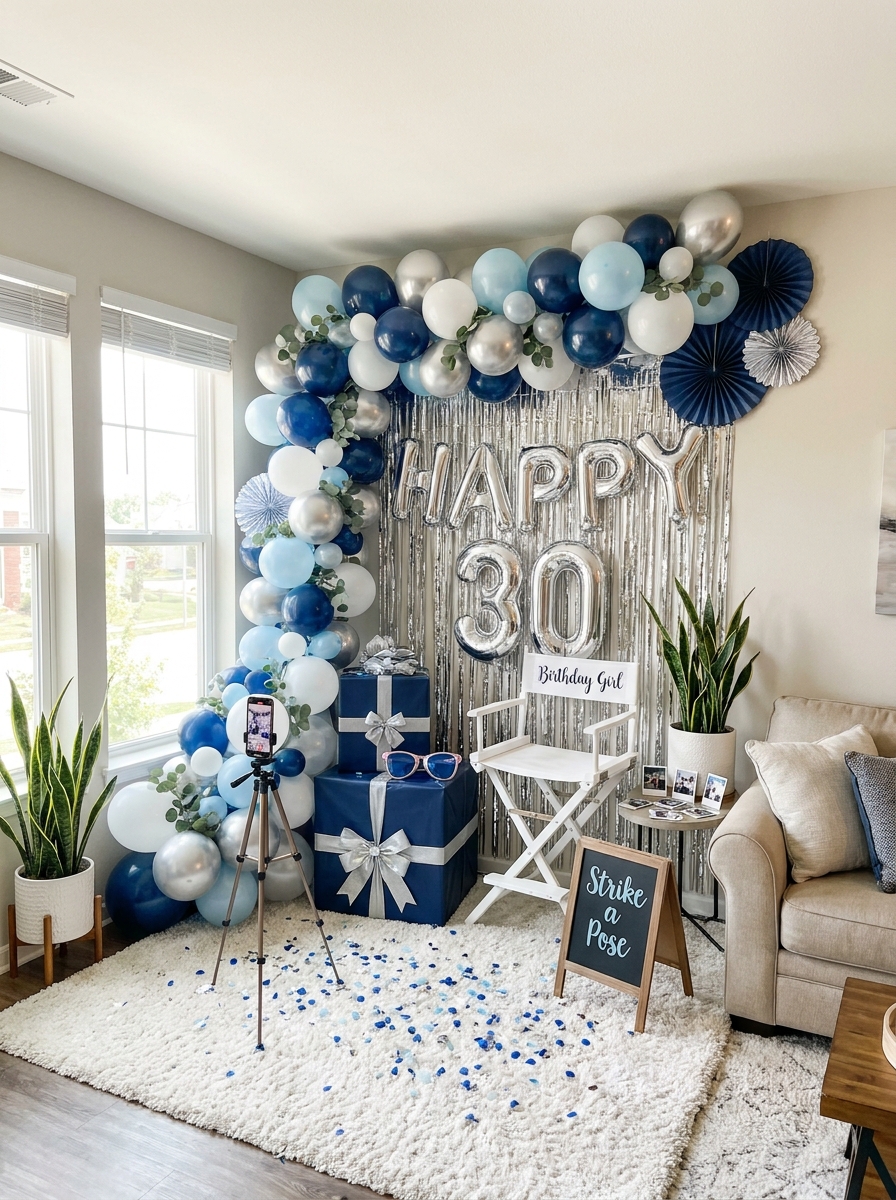
A photo wall isn’t just for weddings anymore—it’s the birthday party detail that keeps on giving. I’m talking about one designated wall transformed into a picture-perfect backdrop where everyone wants to take photos. Start with a base like a metallic fringe curtain, a balloon garland, or even a simple fabric drape, then personalize it.
What makes it special is adding the birthday person’s name, age, or a fun phrase using balloon letters, a custom banner, or even those trendy neon-style signs. Frame it with fresh greenery, add some floor-level decorations like wrapped boxes or oversized number balloons, and suddenly you’ve created the party spot everyone gravitates toward.
The photos guests take here become instant party favors and social media content—which means your beautiful decorating gets shared way beyond the party itself. I always make sure there’s good lighting on this wall and enough space in front for group shots. Set out a small sign encouraging photos, and watch it become the most-used corner of your party.
9. Floating Canopy with Hanging Treats
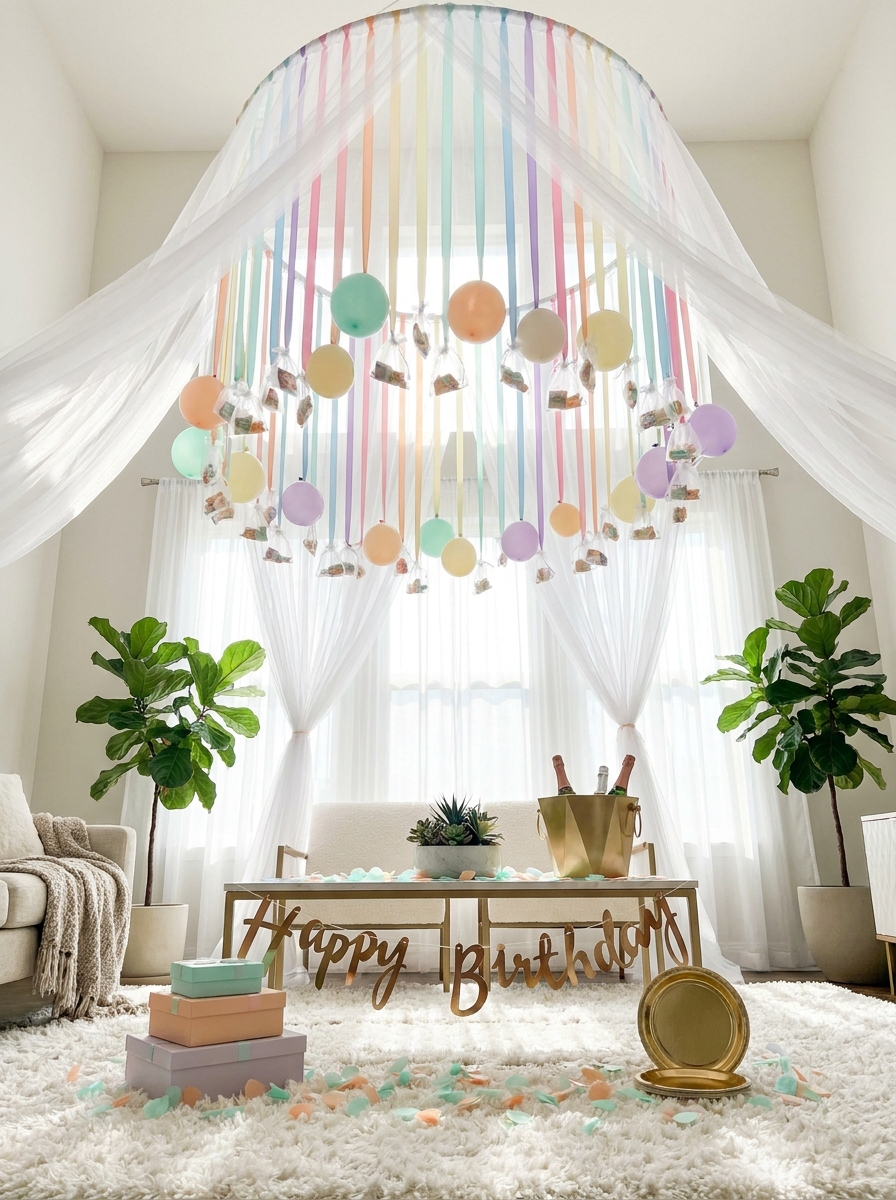
This idea completely transforms your ceiling into something magical. Picture a canopy made from tulle or sheer fabric draped from a central point, with ribbons hanging down attached to little bags of treats, mini balloons, or small wrapped candies. It’s like a festive maypole that guests can actually grab goodies from throughout the party.
I love how this creates dimension in a room without taking up any floor space. The hanging elements move slightly when people walk by, adding this subtle motion that makes everything feel more alive and celebratory. You can match the ribbon colors to your party theme and attach anything lightweight—fortune cookies, small toys, candy bags, even handwritten fortunes.
The setup is easier than it looks. Use a hula hoop as your base structure (spray paint it your theme color first), attach your fabric draping and ribbons, then suspend it from a ceiling hook. Kids especially go wild for this because they can pick their own surprise throughout the party. It’s interactive decor that doubles as party favors.
10. Themed Party Hat Display Station
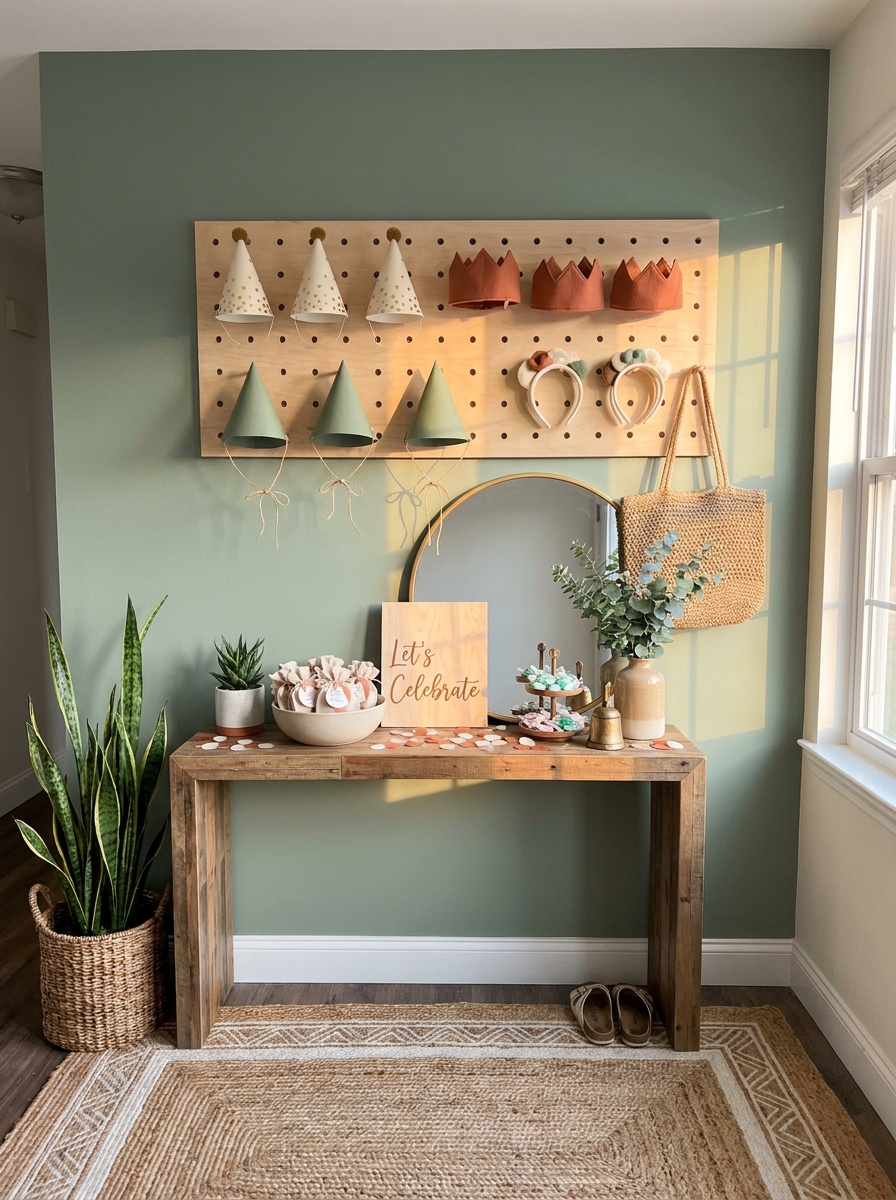
Create a dedicated spot where guests can grab festive party hats the moment they arrive. I’m talking about a styled little station with hats displayed on a pegboard, decorative hooks, or even a vintage coat rack. It’s welcoming, it’s functional, and it immediately tells everyone that this party is happening.
What I love about this approach is how it sets the tone right at your entrance. Instead of awkwardly handing hats to people as they walk in, they can browse and choose their own. Display different styles—classic cone hats, crowns, silly headbands, whatever fits your vibe. Add a small mirror nearby so guests can see themselves, and suddenly this functional element becomes a fun photo moment too.
The display itself becomes part of your decor. Arrange hats by color for an ombré effect, or mix metallic and solid options for visual texture. Between the hats, weave in some greenery, small balloons, or a cute sign that says something like ‘Crown Yourself’ or ‘Hat Hair Don’t Care.’ It’s one of those details that makes your party feel thoughtfully designed without being fussy.
11. Oversized Floor Number or Initial
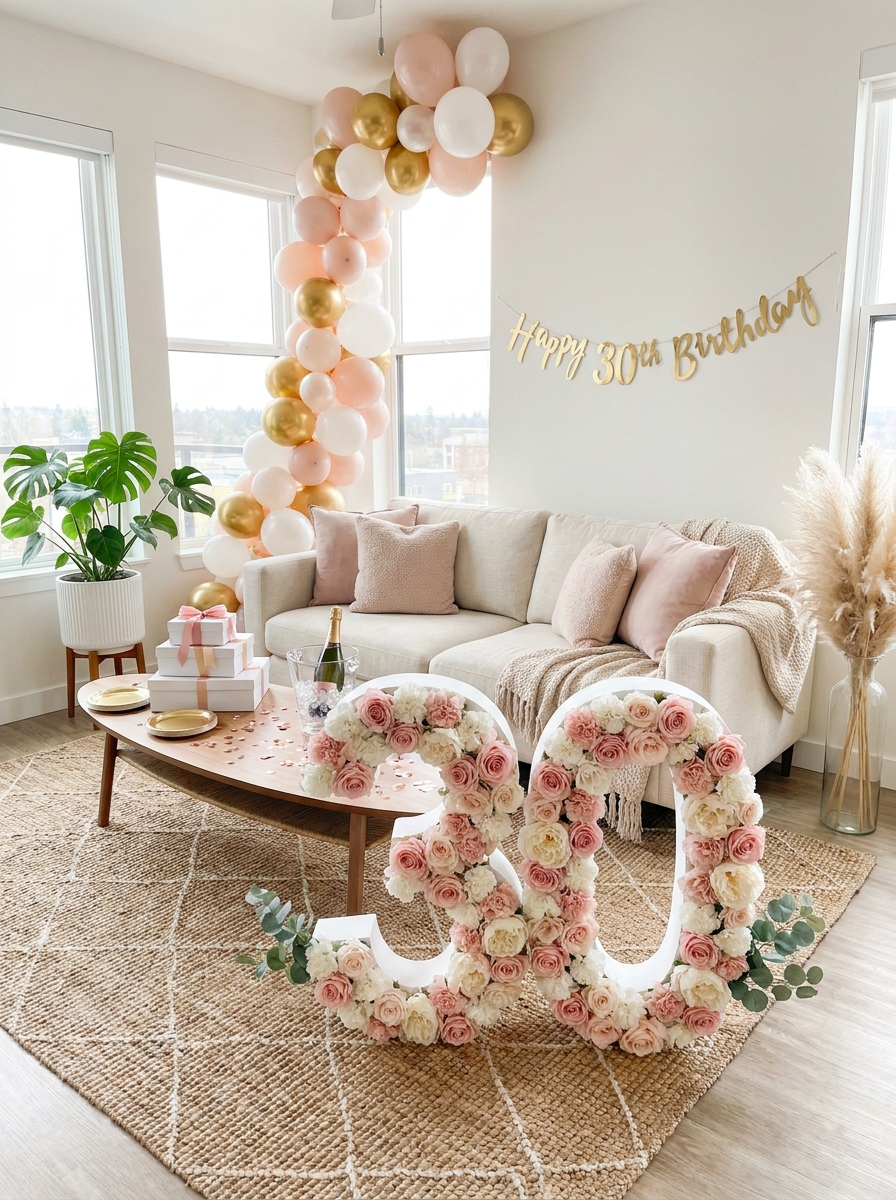
Go big with a statement floor number or the birthday person’s initial. I’m talking huge—like two to three feet tall—made from cardboard, foam board, or even floral foam covered in flowers and greenery. Place it right on the floor as an anchor piece that guests naturally gather around for photos.
This works brilliantly because it’s unexpected. We’re used to seeing numbers on tables or walls, but putting a giant one on the floor creates this installation-art vibe. You can decorate it a million ways: cover it entirely in fresh or faux flowers, wrap it in metallic fringe, stick on hundreds of tissue paper pom-poms, or even glue on photos for a personalized collage effect.
The beauty is in the scale and placement. Position it near your main party area or dessert table so it anchors the whole setup. It photographs incredibly well from multiple angles, and guests will absolutely want pictures with it. Between songs or while waiting for cake, people naturally drift toward it. It becomes this conversation piece that also happens to clearly announce whose day we’re celebrating.
12. Streamer Ceiling Grid Over the Table
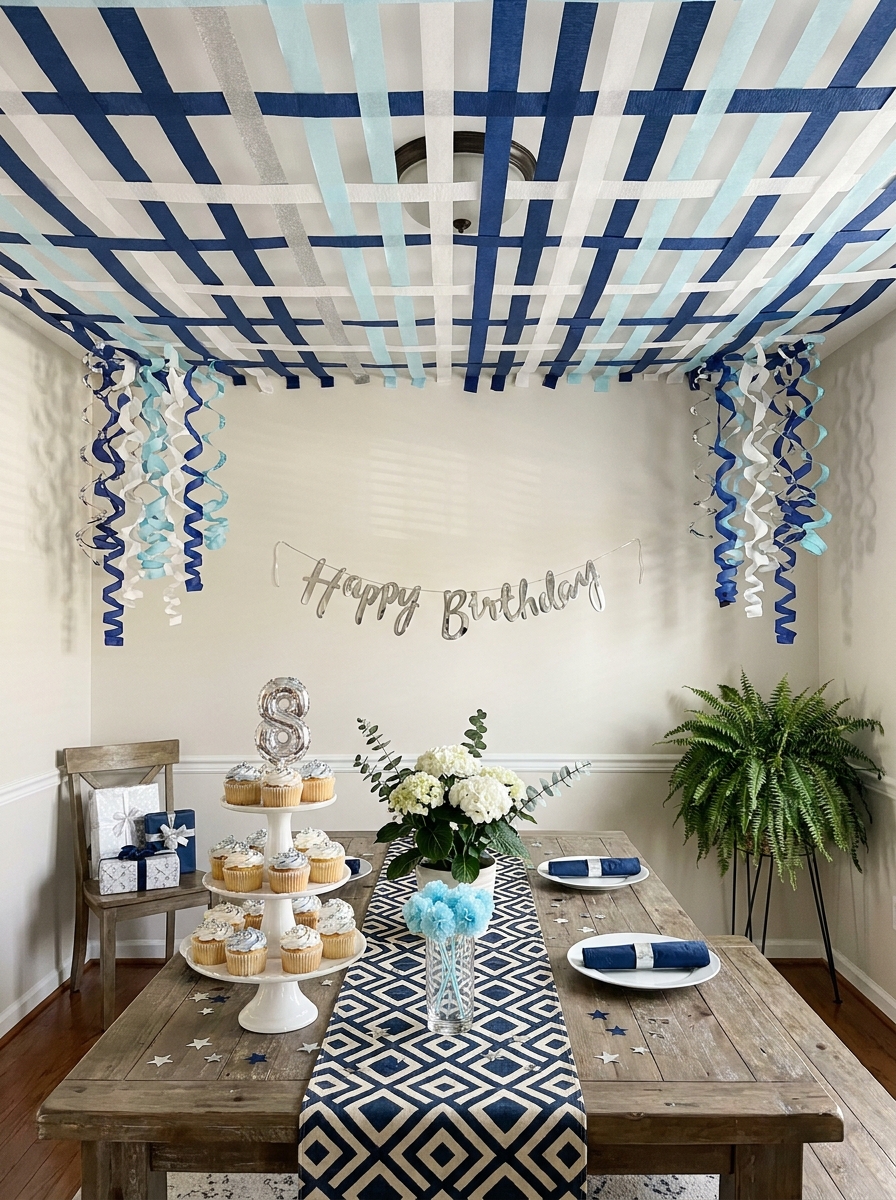
Transform your dining table by creating a streamer grid across the ceiling directly above it. Run crepe paper streamers or ribbon in parallel lines one direction, then weave perpendicular streamers through to create this gorgeous lattice effect. It’s giving vintage party vibes but in the best possible way.
What makes this so visually striking is the geometric pattern overhead. It frames your entire dining or dessert table like a colorful canopy, drawing eyes upward and making the space feel more defined and special. The streamers catch light differently throughout the day, creating this subtle movement and shadow play that flat decorations just can’t achieve.
I’ve done this with both paper streamers for a playful look and satin ribbons for something more elegant. The technique is identical—tape or tack your starting points to the ceiling, pull taut, and secure on the opposite side. Leave the streamers hanging down at the ends or gather them into a swoosh. Pro move: let some streamers cascade down the walls behind your dessert table to connect the ceiling treatment to your other decorations.
13. Donut Wall Display Station
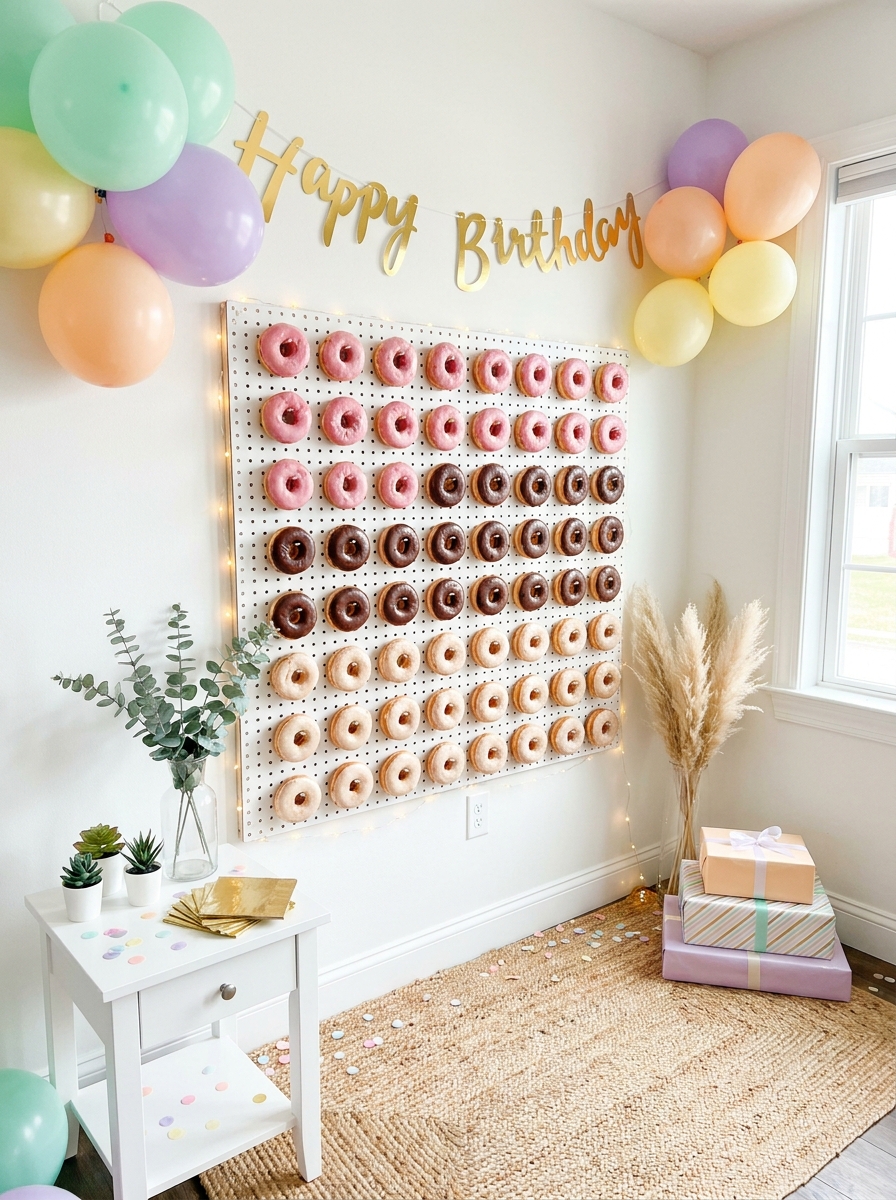
I’m obsessed with donut walls! They’re equal parts decoration and dessert station, and honestly, guests go absolutely wild for them. You can buy a peg board specifically made for this, or DIY one with a painted board and wooden dowels. Either way, you get this gorgeous vertical display that’s interactive and totally Instagram-worthy.
The beauty of a donut wall is that it doubles as art. Even before guests start grabbing treats, it looks like a sculptural installation on your wall. I like setting mine up near the entrance or beside the main party table so it becomes a natural conversation starter. Pro move: use a variety of donut colors and toppings to create an ombre effect from top to bottom.
You can adapt this concept beyond donuts too. Bagels for a brunch birthday, cookies, even small favor bags on the pegs. The vertical display just makes everything feel more special and curated than laying treats flat on a table.
14. Hanging Tassel Garland Over Seating
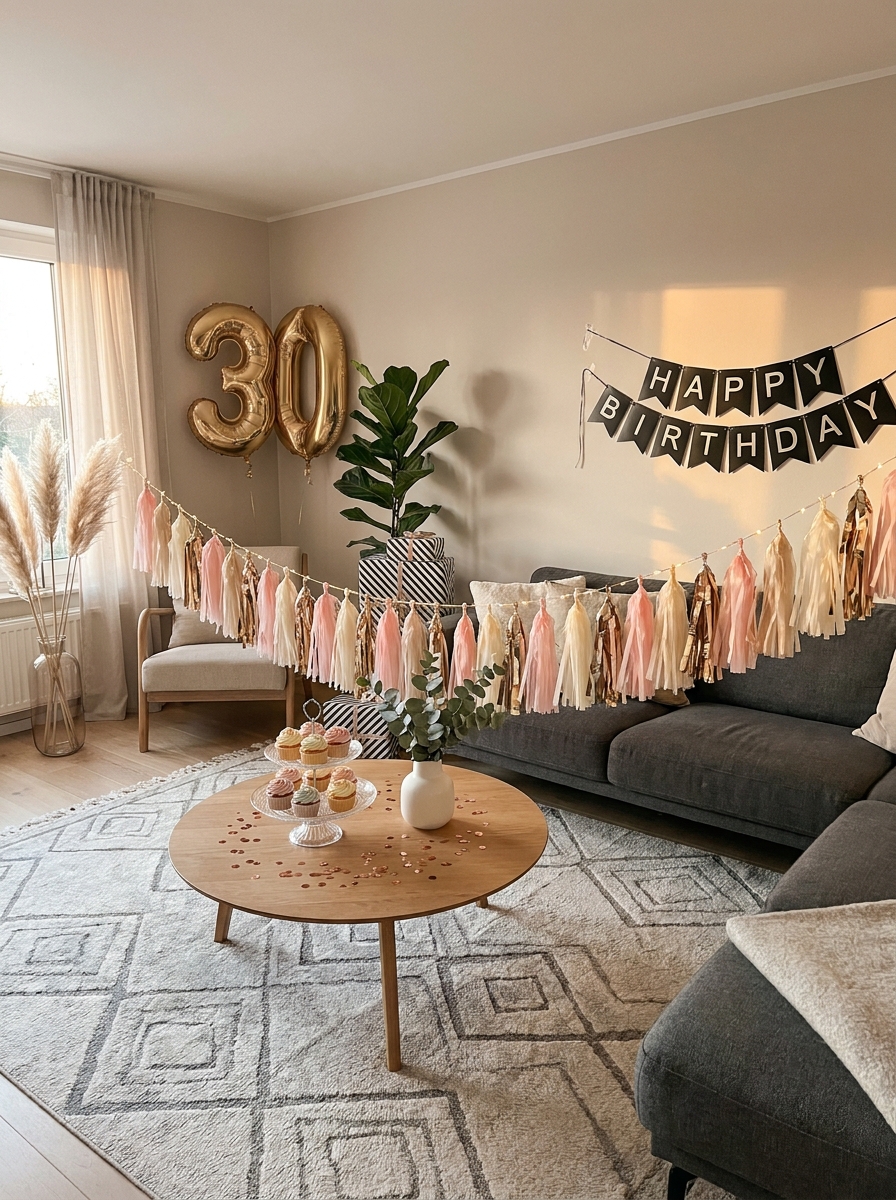
Tassel garlands bring so much movement and texture to a party space! I love hanging them above the main seating area because they frame the celebration zone without blocking sightlines. You can buy pre-made tissue paper tassels or make your own in whatever colors match your theme. The way they sway when people walk by adds this playful, festive energy.
I usually string mine across the room, slightly lower than ceiling height, so they hang right above where people gather. It creates this canopy effect that makes the space feel intentionally decorated and intimate. The tassels catch the light beautifully too, especially if you’ve got natural light coming through windows or string lights nearby.
This is one of those decorations that photographs incredibly well. Every pic your guests take will have this gorgeous textured backdrop. And here’s what I love most: tassel garlands are reusable! Just store them carefully and you’ve got party decor ready for the next celebration.
15. Layered Rug Welcome Zone by the Door
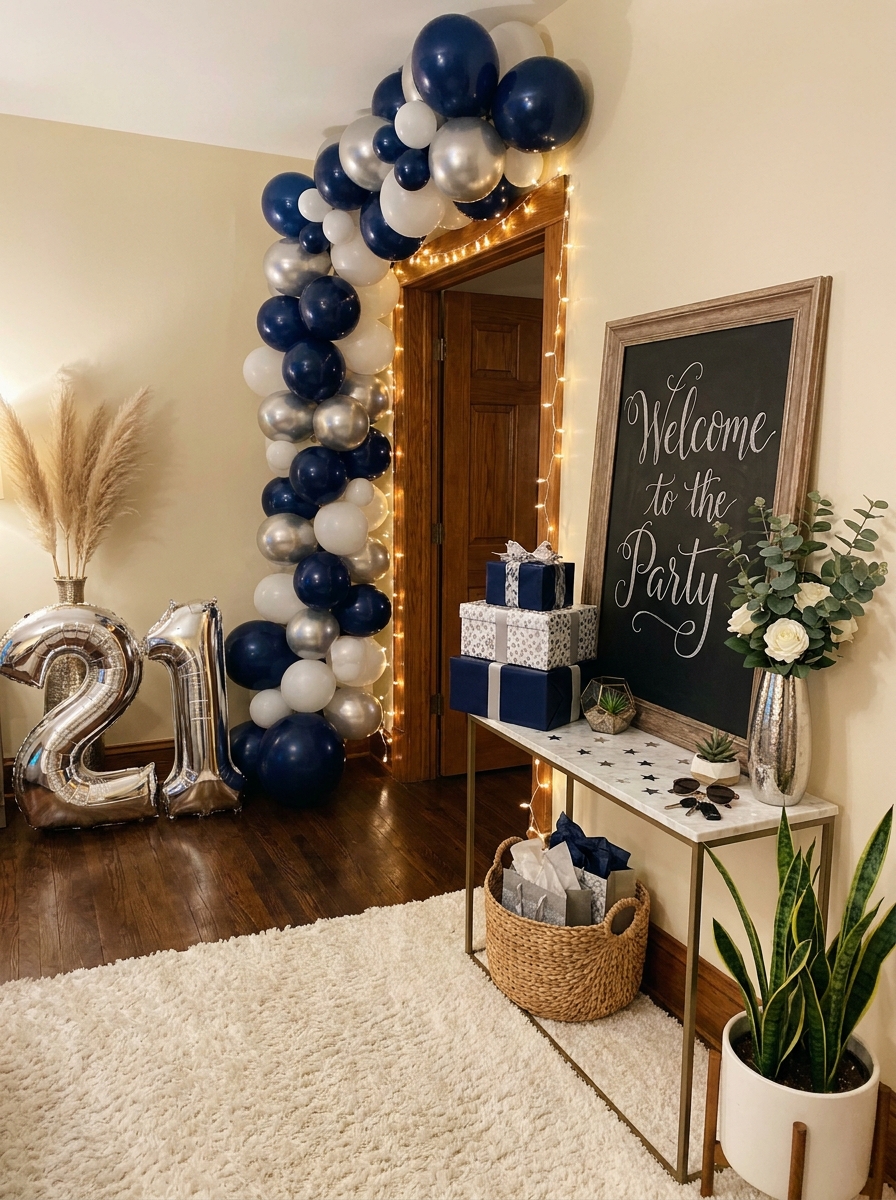
First impressions matter, and your entryway sets the celebration tone! I’ve started creating these mini welcome zones right by the front door with a layered rug situation and party signage. It’s like a little preview of the fun happening inside. Even just a small area rug layered over your existing floor covering instantly signals that something special is happening here.
I like placing a cute birthday sign or chalkboard with a welcome message right at eye level as guests enter. Balloon clusters flanking the doorway make it feel like you’re walking through a party portal. Add a small gift table or birthday card box nearby, and you’ve created this functional, beautiful first stop for arrivals.
This zone also photographs amazingly well. It’s where you’ll naturally snap photos of the birthday person greeting guests, and having it styled means those candid shots look intentionally beautiful. Plus, it keeps the gift-drop organized instead of people wandering around looking for where to put presents.
16. Floating Shelf Bar Cart Party Station
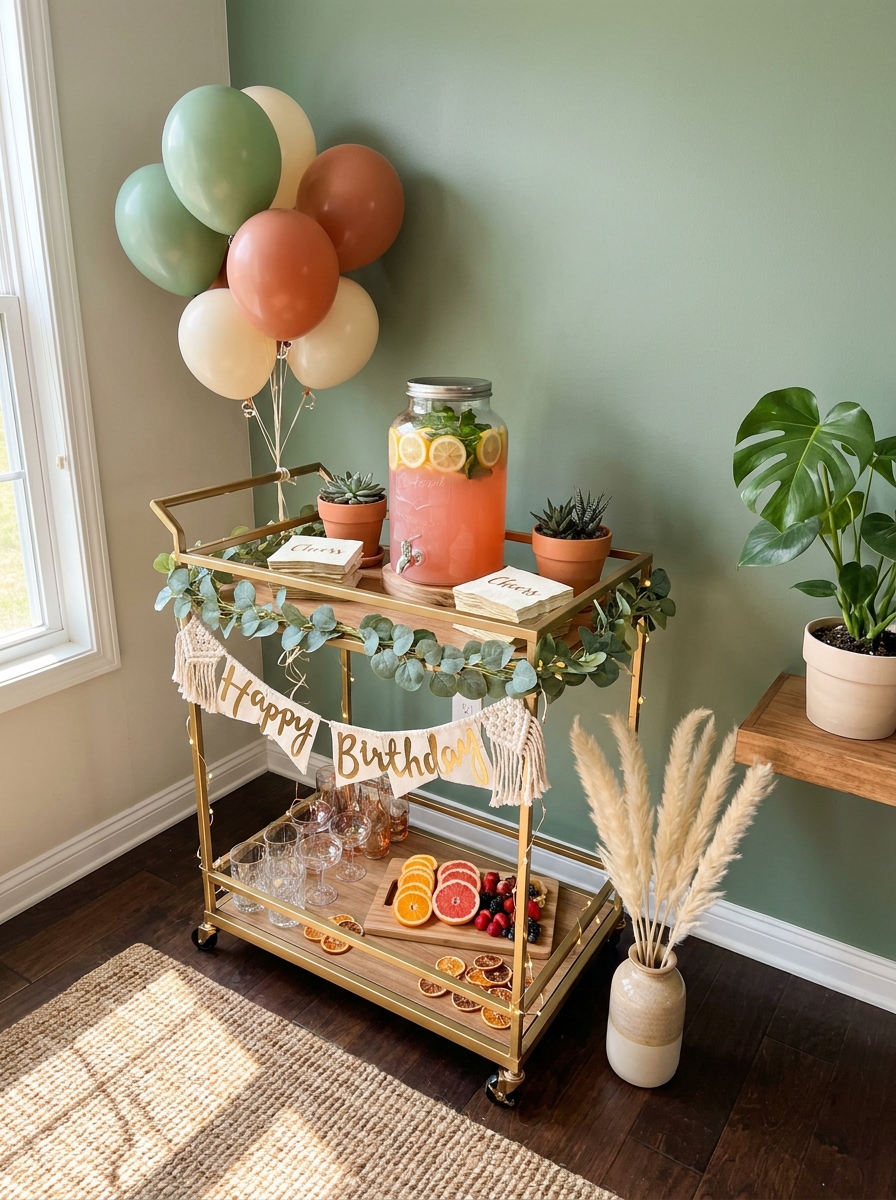
Turn your bar cart or floating shelves into a dedicated party drink station, and watch it become the most popular spot in your house! I style mine with all the festive extras: fun straws, themed napkins, garnish displays, and of course, decorations that tie into the party theme. It’s functional decor at its finest because it looks gorgeous and serves an actual purpose.
The key is treating it like a vignette. Don’t just plop bottles down randomly. Create height variation with cake stands or small risers, add greenery, tuck in some confetti, cluster a few balloons behind it. Frame it with a small banner or tassel garland. Suddenly your drink station looks like something from a party planning magazine.
This setup also encourages self-serve, which takes pressure off the host. Guests can make their own drinks while you’re busy elsewhere. And because it’s so pretty, people naturally gravitate toward it, which helps with party flow and mingling. Win-win-win!
17. Wrapped Favor Boxes Stacked as Decor Towers
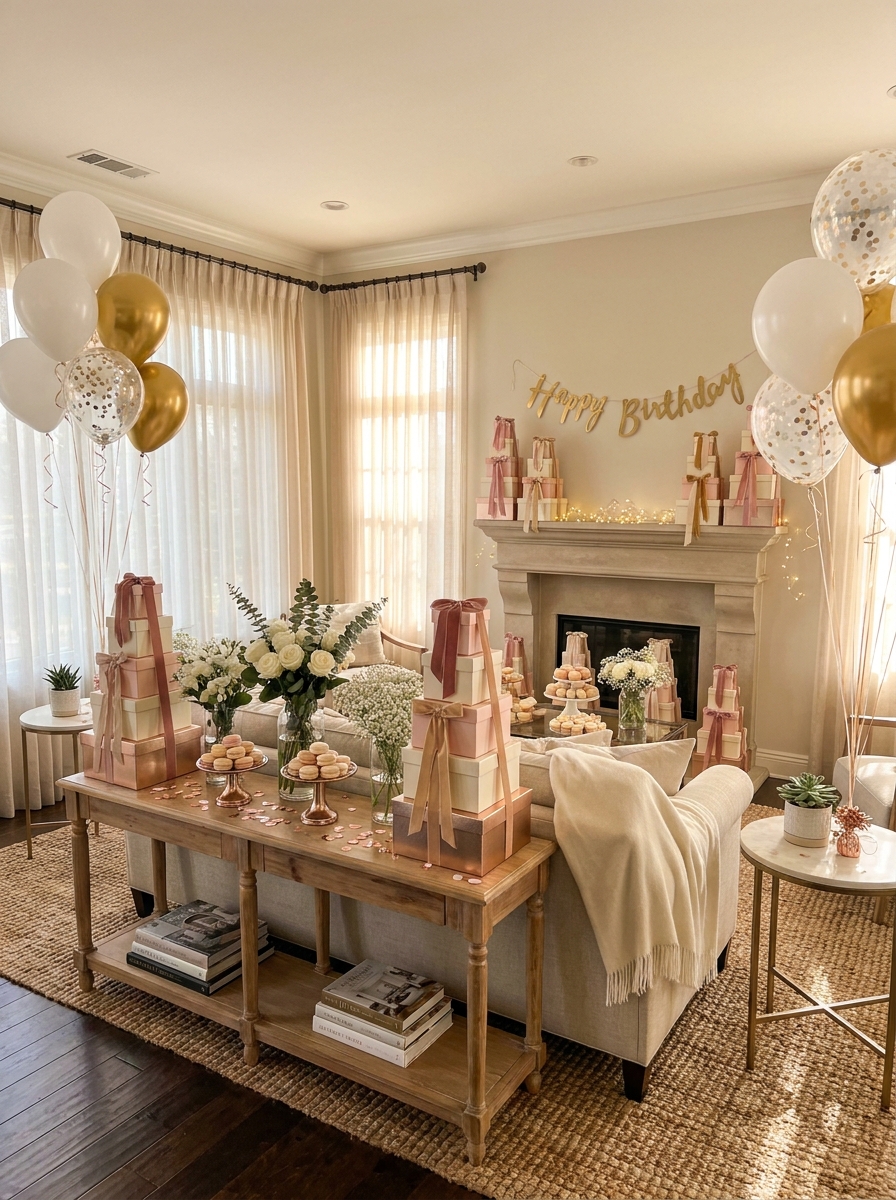
Okay, this one is genius because it does double duty. Stack beautifully wrapped favor boxes in pyramid towers around the party space, and suddenly you’ve got decor AND party favors in one.
I love wrapping boxes in coordinating papers and tying them with different ribbon textures. Velvet ribbon next to grosgrain next to satin creates this rich, layered look. Stack them on side tables, the mantel, or flanking the dessert table. The towers become sculptural elements that add height and visual interest to your party setup.
Guests always ask if they can take them, which is exactly the point! Fill small boxes with candies, bath salts, candles, or homemade cookies. The anticipation of what’s inside adds to the fun. And honestly? Watching people choose their box at the end of the party is such a sweet moment. Pro tip: wrap a few extra boxes empty, just for the stacking visual. Your towers will look fuller and more impressive, and you won’t stress about having exact favor counts.
18. Themed Signage Gallery Wall Display
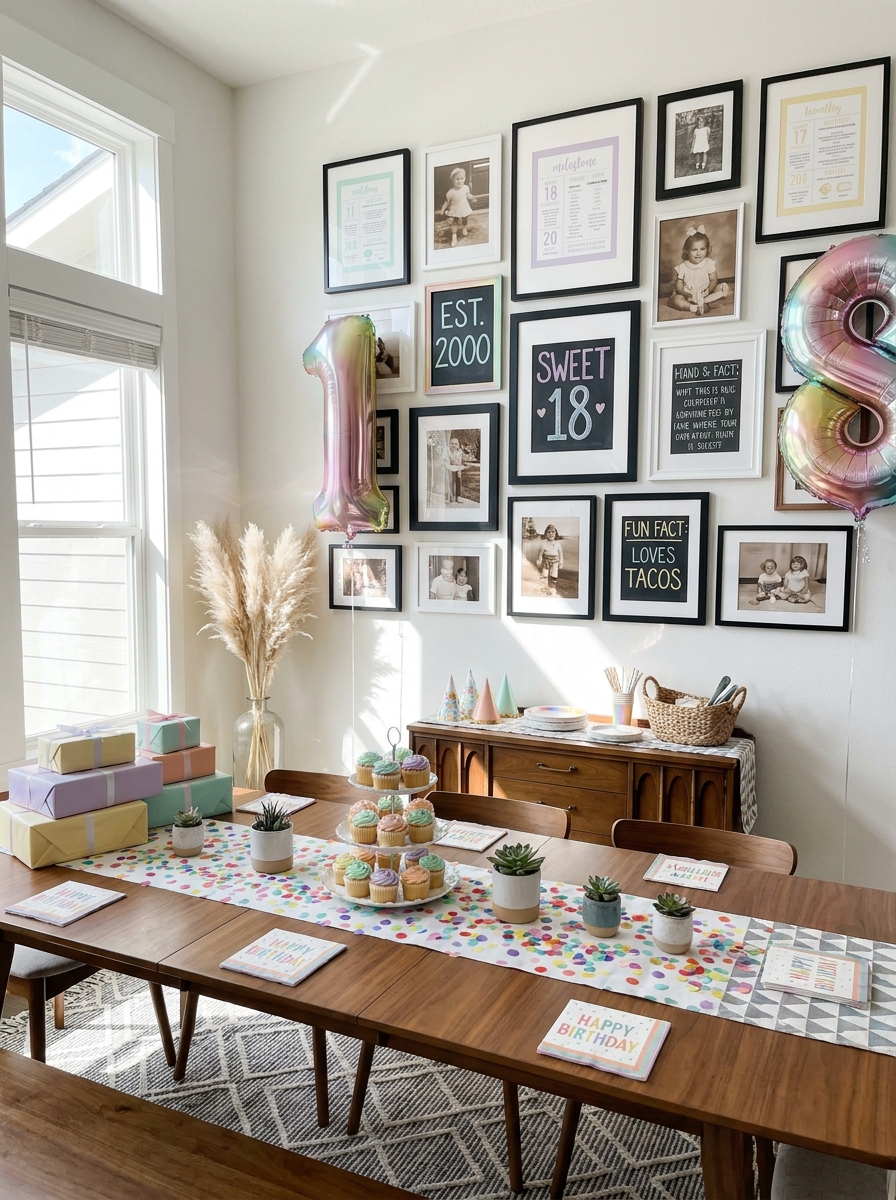
Create a mini gallery wall of party signs that tell your birthday story. I’m talking custom prints, chalkboard messages, milestone facts, and fun stats all arranged together on one wall.
Mix frame styles and sizes for that collected-over-time look, even though you made everything last week. Include signs like “She’s 30!” alongside photos from each decade, favorite memories, inside jokes, or predictions for the year ahead. You can print these at home or use poster board and hand-letter them if you’re feeling crafty.
What makes this so special is how personal it becomes. Guests actually stop and read everything, laugh at the memories, and it becomes a conversation starter. Plus, the birthday person gets this amazing visual tribute that feels way more thoughtful than a single banner. After the party, they can keep their favorite signs as keepsakes. I’ve seen people frame the sweetest ones and hang them in their home office or bedroom.
19. Ceiling to Floor Ribbon Chandelier
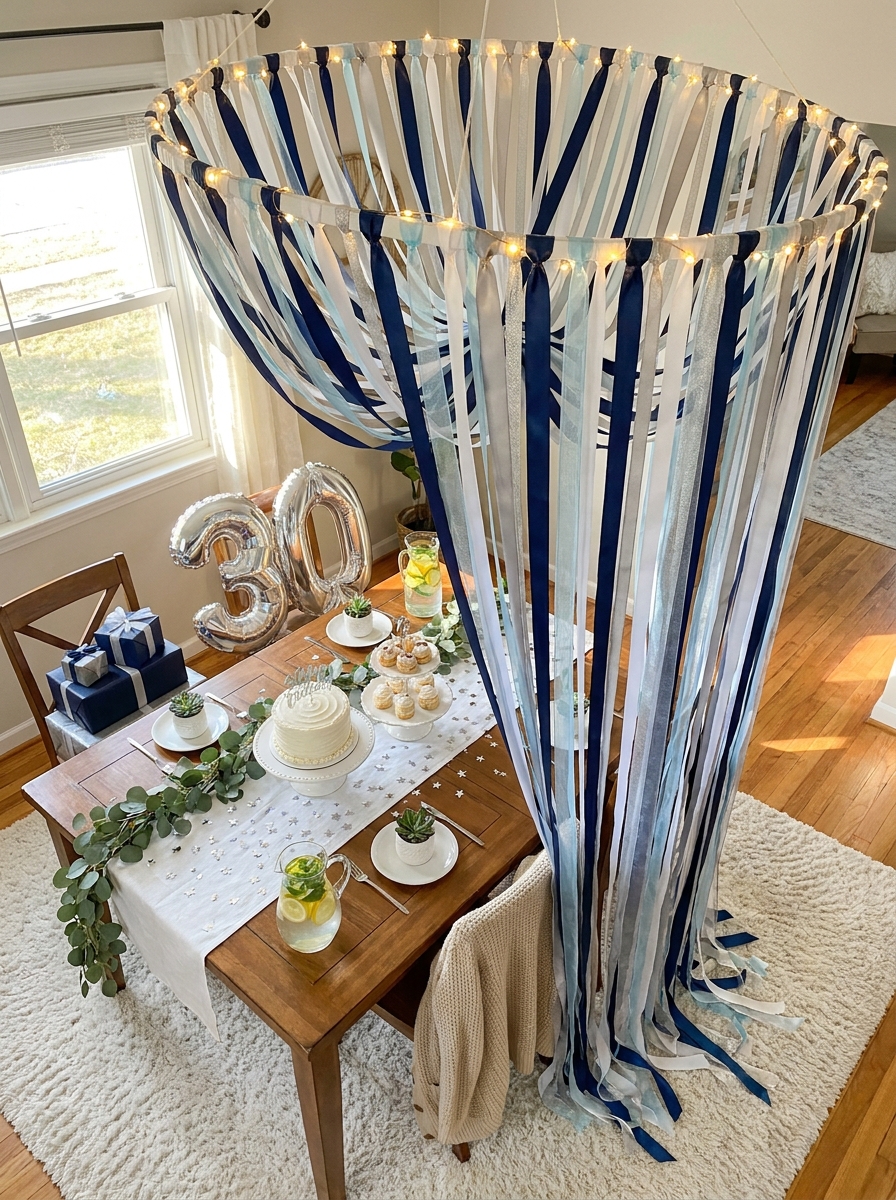
This showstopper takes ten minutes to make but looks like you hired a party planner. Attach long ribbon streamers to a ceiling fixture or hook, and let them cascade down to create a dreamy chandelier effect.
I use ribbons in different widths and textures—satin, grosgrain, organza—all in coordinating colors. Attach them to an embroidery hoop or even just tape them directly to the ceiling in a cluster. The ribbons fall and slightly twist as they hang, catching the light and creating this magical movement above your party table or dance floor area.
The effect is especially gorgeous over a dining table or dessert station. It draws the eye up and makes your ceiling height feel intentional instead of just blank space. Kids absolutely love walking through the ribbon curtain, and it photographs beautifully from every angle. You can even tie small bells or paper stars to some ribbons for extra charm.
20. Birthday Countdown Chalk or Letter Board
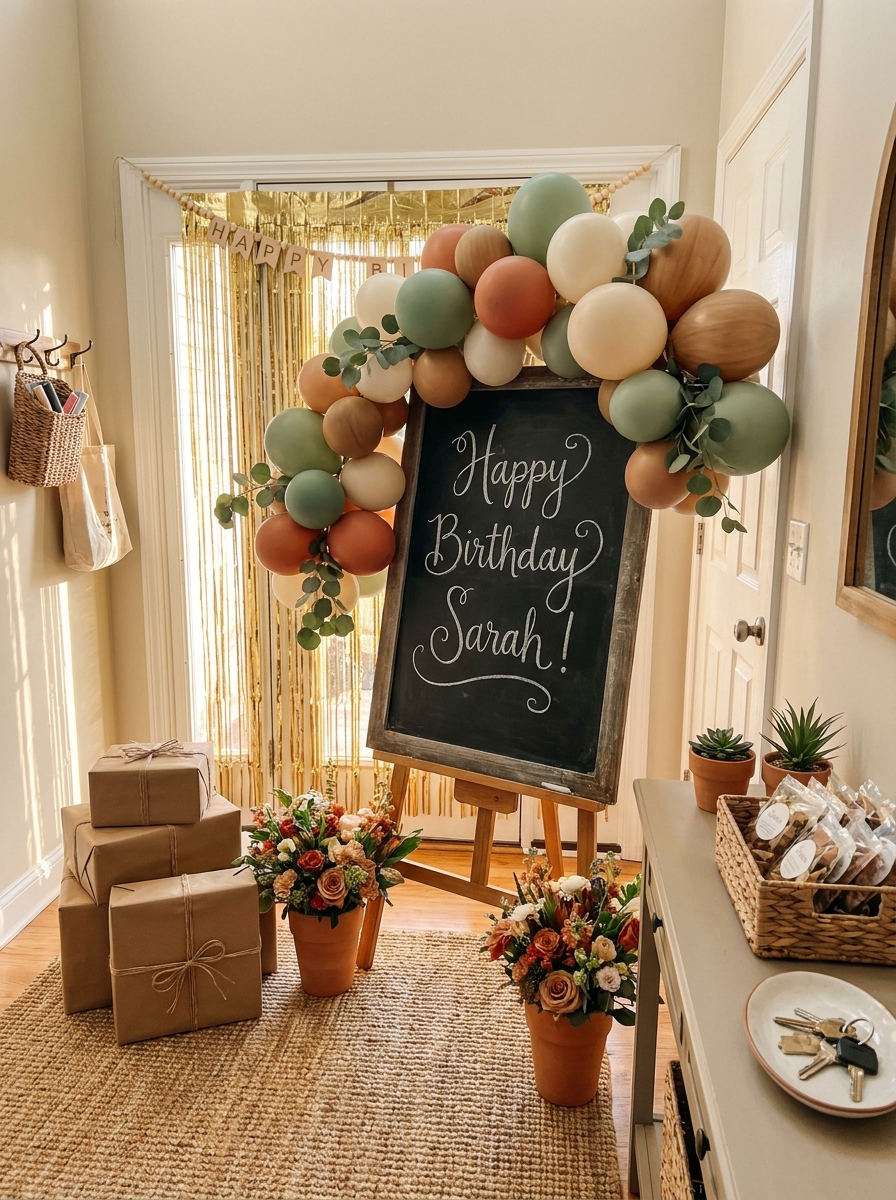
Set up a large chalkboard or letter board as your party welcome piece with fun birthday messages that you can change throughout the celebration. It’s interactive decor that keeps the energy going.
Start with a welcome message when guests arrive, then update it with party milestones: “Time for Cake!” or “Dance Party Starts Now!” or “Make a Toast!” Someone becomes the unofficial board updater, and honestly, it’s always the most creative person at the party who volunteers. They get weirdly into it.
I love vintage-style chalkboards propped on an easel near the entrance, but modern letter boards work just as well. Decorate around the board with balloon clusters, wrapped gifts, or a garland swag across the top. The changing messages keep people engaged and create natural photo opportunities throughout the party. Plus, everyone loves a good letter board moment for their Instagram stories. Just make sure someone’s assigned to update it, or it won’t reach its full potential.
21. Cupcake Tower with Fresh Flower Accents
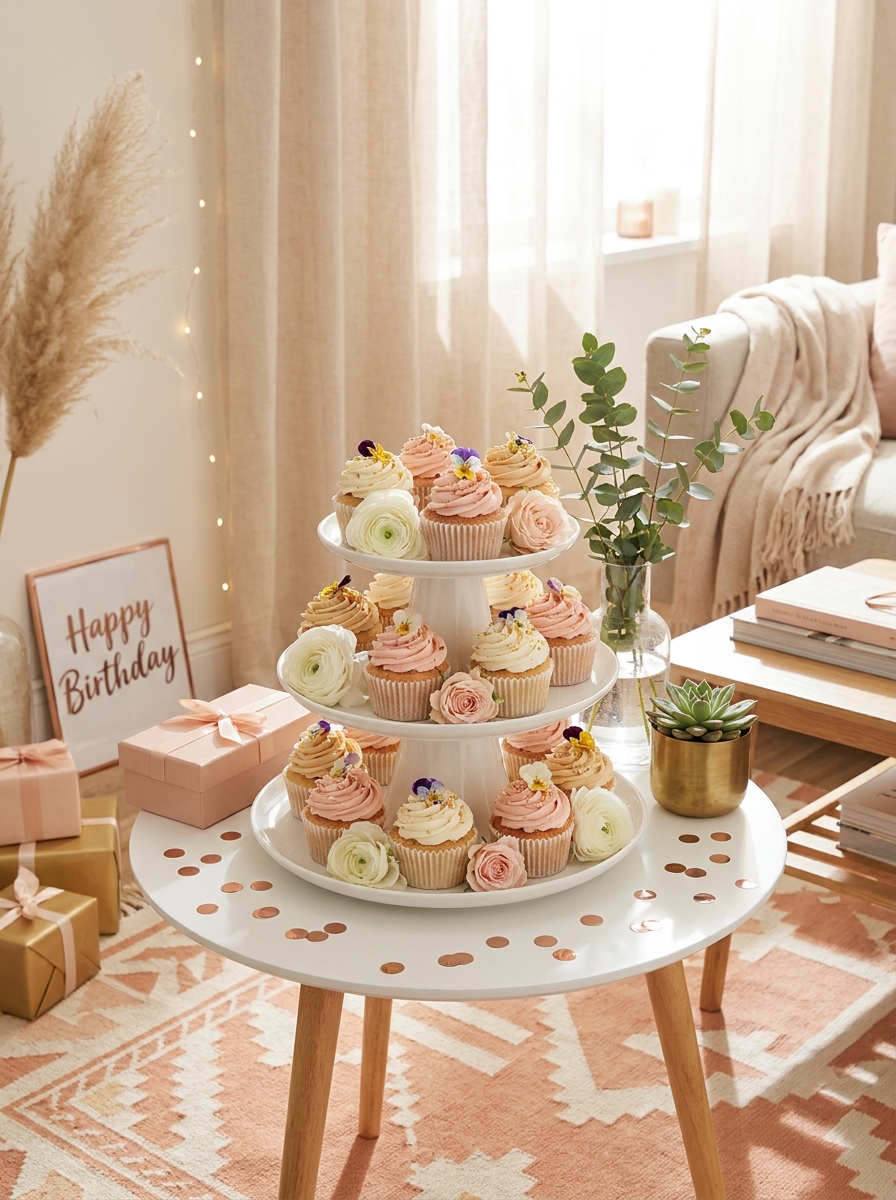
There’s something so cheerful about a cupcake tower that makes everyone smile the second they walk in. It’s the perfect combo of dessert and decor, sitting pretty on a side table or taking center stage on your main buffet. I love using a tiered acrylic or white ceramic stand and tucking fresh flowers between the layers—suddenly it’s not just snacks, it’s a whole moment.
The beauty here is mixing textures. Arrange cupcakes with different frosting styles—some swirled high, some flat with sprinkles, maybe a few with edible flowers on top. Then weave in small blooms like ranunculus, spray roses, or even herb sprigs like rosemary for a garden party vibe. The flowers fill the gaps and make the whole display feel lush and intentional.
This setup works for any age or theme. Kids love the rainbow sprinkle situation, adults appreciate the elevated floral touch, and everyone appreciates easy grab-and-go treats. Plus, it photographs like a dream. Your cupcake tower becomes both the dessert and a gorgeous focal point that ties your whole party palette together.
Quick Guide
Party Decor Budget Breakdown
Wondering how much to spend? Here’s a realistic guide:
| Budget Level | Total Cost | What You Get |
|————–|————|————-|
| Minimal | $30-50 | Balloon garland kit, paper banner, confetti, tablecloth |
| Mid-Range | $75-125 | Everything above plus number balloons, cake stands, fringe curtains, favor supplies |
| Splurge | $150-250 | Full balloon installation, custom signage, florals, premium tableware, backdrop setup |
Honest truth? You can create a stunning party at any budget level. The minimal setup looks amazing if you style it thoughtfully. But if you’re celebrating a milestone or just want to go all out, the splurge tier gives you that “did you hire a party planner?” vibe. Mix and match based on what matters most to you. Maybe you DIY the balloon garland but splurge on a gorgeous cake. Or keep decorations simple but invest in beautiful tableware you’ll use again. There’s no wrong answer here.
Your Home, Your Celebration, Your Way
Here’s what I love most about decorating at home for birthdays: it’s deeply personal. These aren’t cookie-cutter venue decorations. They’re your style, in your space, celebrating someone you care about. Whether you go minimalist with just a balloon garland and cake stand or transform your entire home into a party wonderland, it’s the intention that people feel when they walk in.
You don’t need a huge budget or professional skills. You just need to pick a few ideas that speak to you and run with them. Start with one statement piece — maybe that balloon backdrop or a styled dessert table — and build from there. The beauty of home parties is that your regular furniture and decor become part of the aesthetic. That cozy sofa, your favorite throw pillows, the rug you already love — they all work together with your party decorations to create something that feels warm and welcoming, not sterile or overly staged.
So grab those balloons, style that table, hang that banner. Your home is about to become the party everyone remembers. And honestly? You’re going to have just as much fun creating it as your guests will celebrating in it.
Frequently Asked Questions
How far in advance should I decorate for a birthday party at home?
Most decorations can go up the night before or morning of the party. Balloon garlands stay inflated for days, so you can assemble those 1-2 days early. Paper decorations and banners can go up anytime. Save fresh flowers and food displays for the day of to keep everything looking fresh. If you’re working with a tight schedule, prioritize one big impact piece like a balloon wall first, then fill in smaller details as time allows.
What’s the easiest birthday party decoration for beginners?
Start with a simple balloon garland kit and a coordinating paper banner. These two elements alone create a party atmosphere without requiring any special skills. Add a nice tablecloth and some scattered confetti, and you’ve got a complete look. Balloon garland kits come with instructions and all the supplies you need — just inflate and assemble. It takes about 30-45 minutes and makes a huge visual impact.
How can I make my birthday party decorations look expensive on a budget?
Focus on cohesive colors and intentional styling rather than quantity. Choose 2-3 main colors and stick with them across all decorations. Use what you already own — nice plates, cake stands, vases — and style them with inexpensive additions like fresh greenery and confetti. Metallic accents (gold, rose gold, silver) instantly elevate any setup and are surprisingly affordable. And always, always prioritize good lighting — natural light or string lights make everything look more expensive.
Where should I set up party decorations in a small home?
Focus your decorations in one main area rather than spreading them throughout the space. Create a party zone in your living room or dining area with a balloon backdrop, styled table, and coordinating smaller touches. Use vertical space with hanging decorations to save floor space. A decorated entryway also makes a big impact without taking up room guests need for mingling. Small homes actually photograph beautifully for parties because everything feels intimate and intentional.
What party decorations can I reuse for future celebrations?
Invest in reusable items like nice cake stands, serving platters, fabric tablecloths, and string lights that work for any celebration. Neutral-colored paper fans, fabric banners, and classic balloon colors (gold, silver, white) can be mixed and matched for different occasions. Skip the theme-specific decorations and choose versatile pieces that adapt to different color schemes. Quality tableware in white or neutral tones works for birthdays, holidays, and dinner parties year-round.