20 Gorgeous Bookshelf Styling Tricks That Transform
You’ve got the shelves. You’ve got the books. So why does your bookshelf look like a sad library reject while everyone else’s Instagram shelfies look like magazine spreads? Here’s the thing: styling a bookshelf isn’t about having the fanciest books or the most expensive vases. It’s about knowing a few key tricks that make everything come together. I’ve spent years arranging and rearranging my own shelves, and I promise you don’t need a degree in interior design to nail this. You just need to understand the rhythm of it—the way books stack, how objects play off each other, where your eye should land. Whether you’re working with built-ins in your living room or a single bookshelf in your bedroom, these 20 styling tricks will help you create that perfectly imperfect shelfie you’ve been pinning. Let’s get into it.
1. Start With Everything Off the Shelves
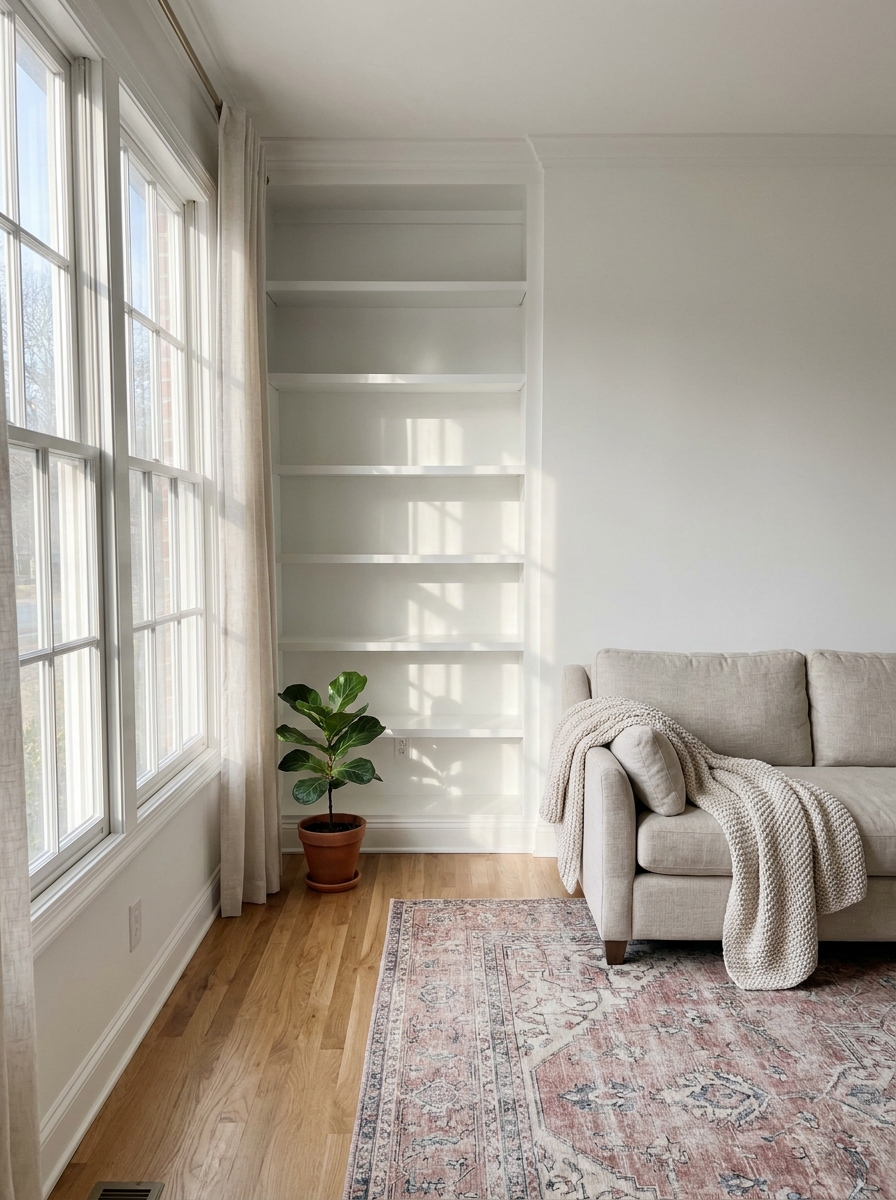
I know it sounds dramatic, but trust me on this one. The biggest mistake people make is trying to style around what’s already there. Pull everything off and start with a clean slate. This gives you a chance to see what you’re actually working with—not just the books, but the decorative objects, the random tchotchkes you forgot you had.
Once everything’s off, you can sort through it all. Make piles: books you love, books you’re keeping but don’t need to display, objects that make you happy, things that can go to donation. This is your editing phase, and it’s crucial. You don’t have to display everything you own.
When your shelves are completely empty, you’ll also notice things you didn’t see before. Maybe the shelves need a quick dust. Maybe you want to paint the back of the bookshelf a fun color. Starting fresh gives you options. And honestly? It makes the whole process feel less overwhelming. You’re not moving things around aimlessly—you’re creating something from scratch.
2. Group Books by Color for Visual Impact
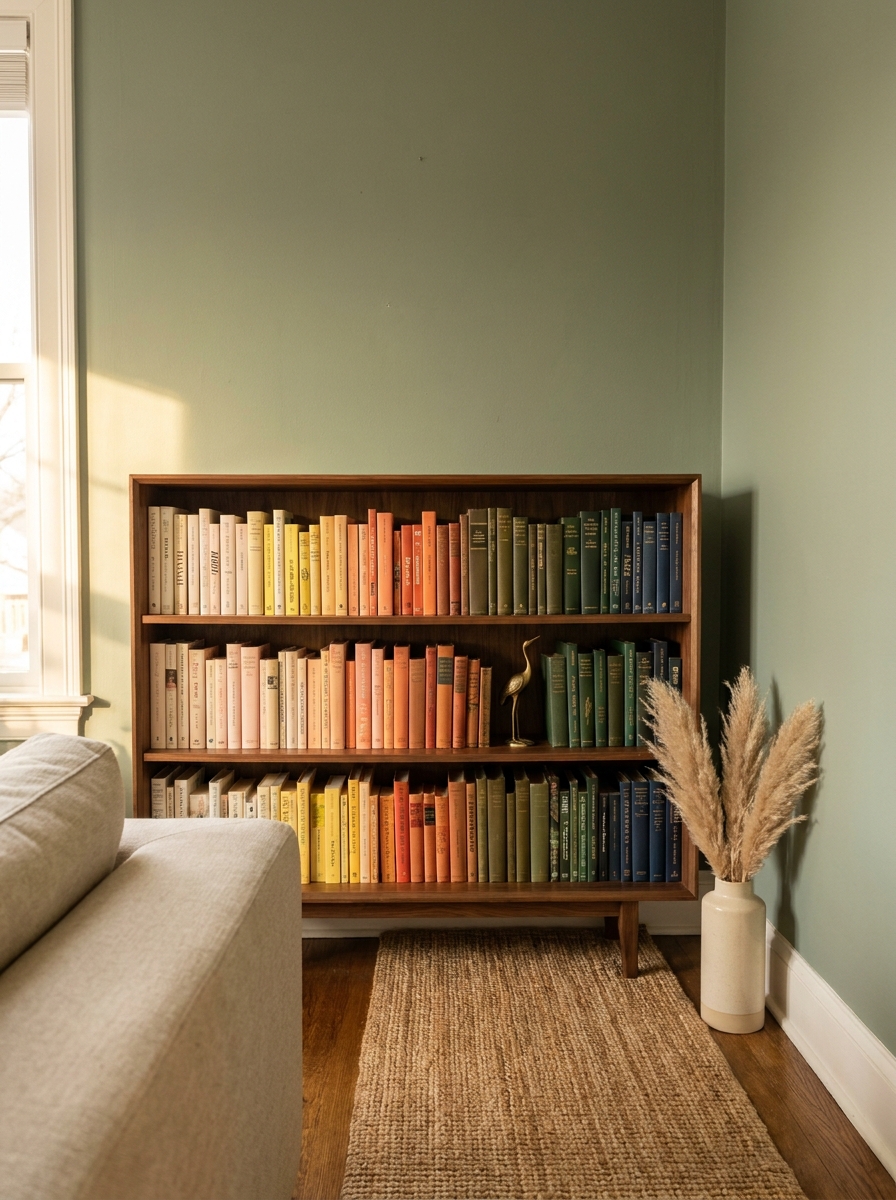
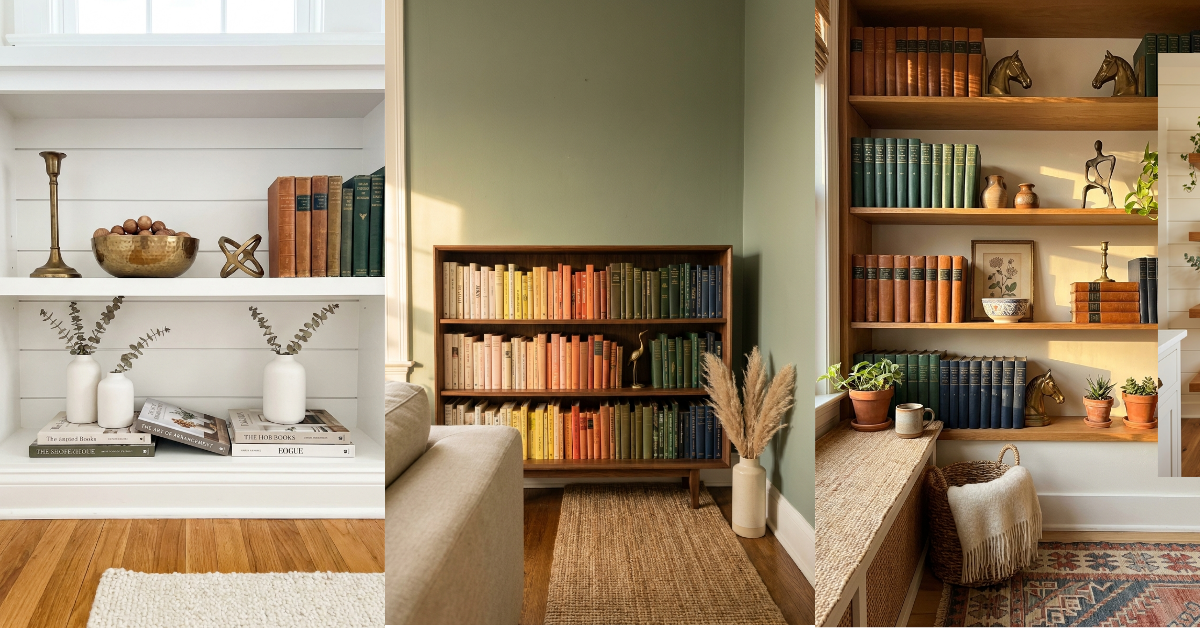
This is the trick that makes people stop scrolling. Organizing books by color creates an instant rainbow effect that’s ridiculously photogenic. And before you say it’s impractical—yes, you might not find that one book as quickly, but we’re talking about display shelves here, not your cookbook collection.
Start with your longest shelf and arrange books from light to dark, or create a rainbow pattern if you have enough color variety. White and cream books on one end, moving through pastels, then deeper colors. It creates a gradient that’s so satisfying to look at. If you don’t have enough books in one color, you can mix in objects that fill the gaps.
But here’s the secret: you don’t have to do this on every shelf. Maybe just one or two shelves get the color treatment while others stay mixed. That contrast actually makes the color-coordinated sections pop even more. Play around with it. See what feels right for your space and your collection.
3. Mix Vertical and Horizontal Book Stacking
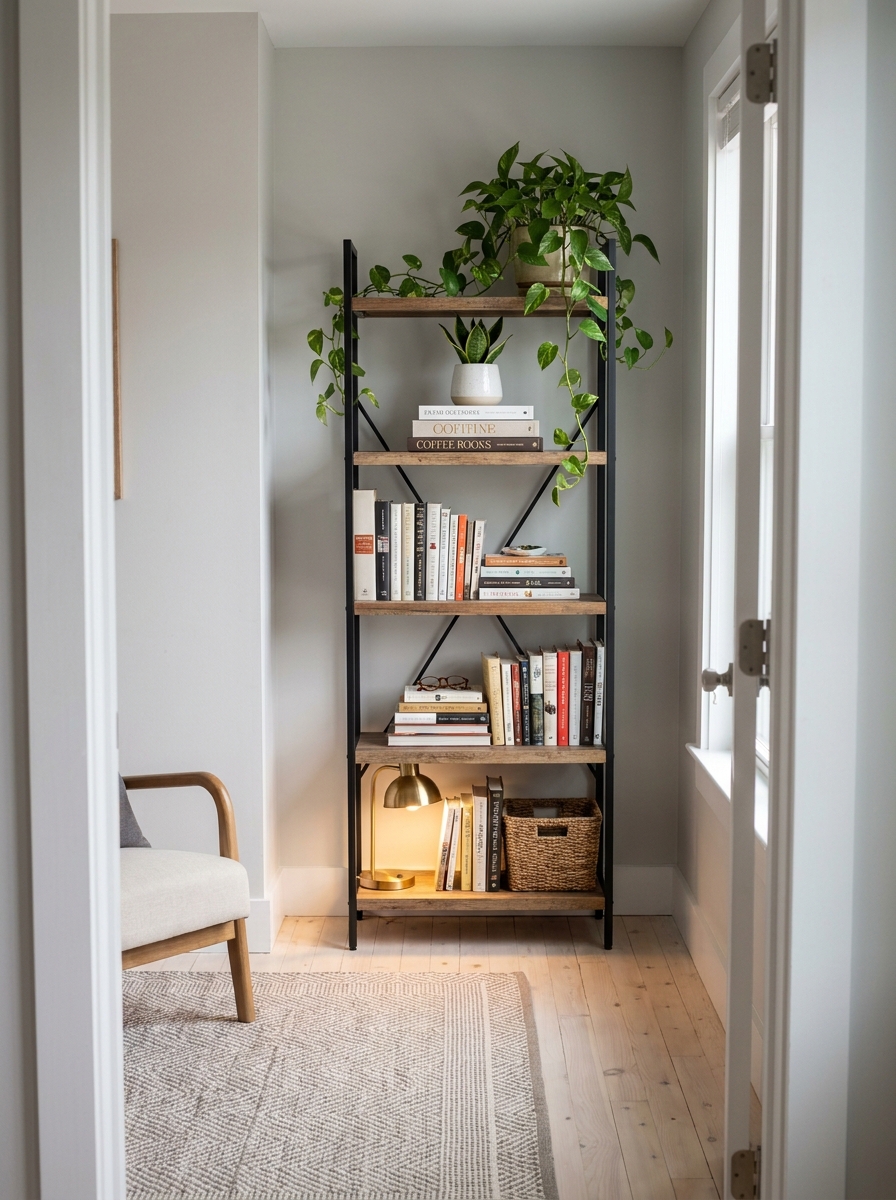
All vertical books? That’s a library. All horizontal stacks? That’s trying too hard. The magic happens when you mix both. This creates visual rhythm and gives you surfaces to style on top of.
Start by placing most of your books vertically—that’s the backbone. Then every so often, pull out a few books and stack them horizontally. These stacks become little platforms for your decorative objects. A small vase on top of three stacked books. A sculptural object resting on a horizontal pile. It adds dimension.
I like to create horizontal stacks in groups of three to five books, choosing the larger or more visually interesting ones. These become anchor points on your shelf. They break up what could be a monotonous line of spines and give your eye a place to rest. Don’t overthink the pattern—place a horizontal stack, step back, see if it feels right. You’ll know when the rhythm clicks.
4. The Rule of Threes for Decorative Objects
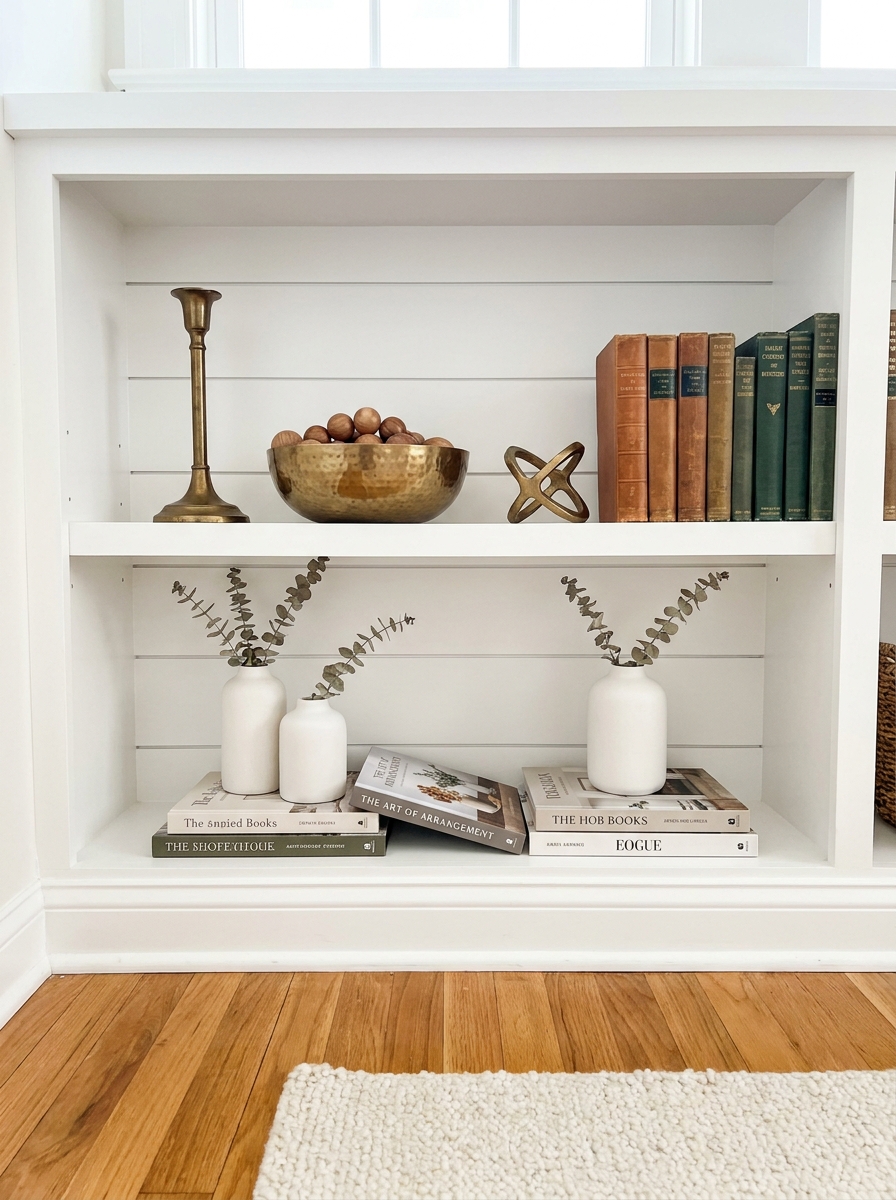
Here’s a styling principle that works everywhere, but especially on bookshelves: group decorative objects in odd numbers, particularly threes. Three candlesticks at different heights. Three small vases. Three frames. Your brain finds odd-numbered groupings more visually interesting than even numbers.
But don’t just plop three random things together. Think about variation—different heights, different textures, different shapes. Maybe a tall brass candlestick, a medium ceramic vase, and a small sculptural object. They work together because they’re varied but cohesive. Same color family or material can tie them together.
You can also use this rule with books themselves. Three books stacked horizontally. Three oversized art books standing together. It creates little vignettes within your larger shelf composition. And if three feels like too much in one spot, that’s fine—move one object to another shelf. The rule is a guide, not a mandate. Your shelves should feel balanced, not formulaic.
5. Add Height Variation with Risers and Platforms
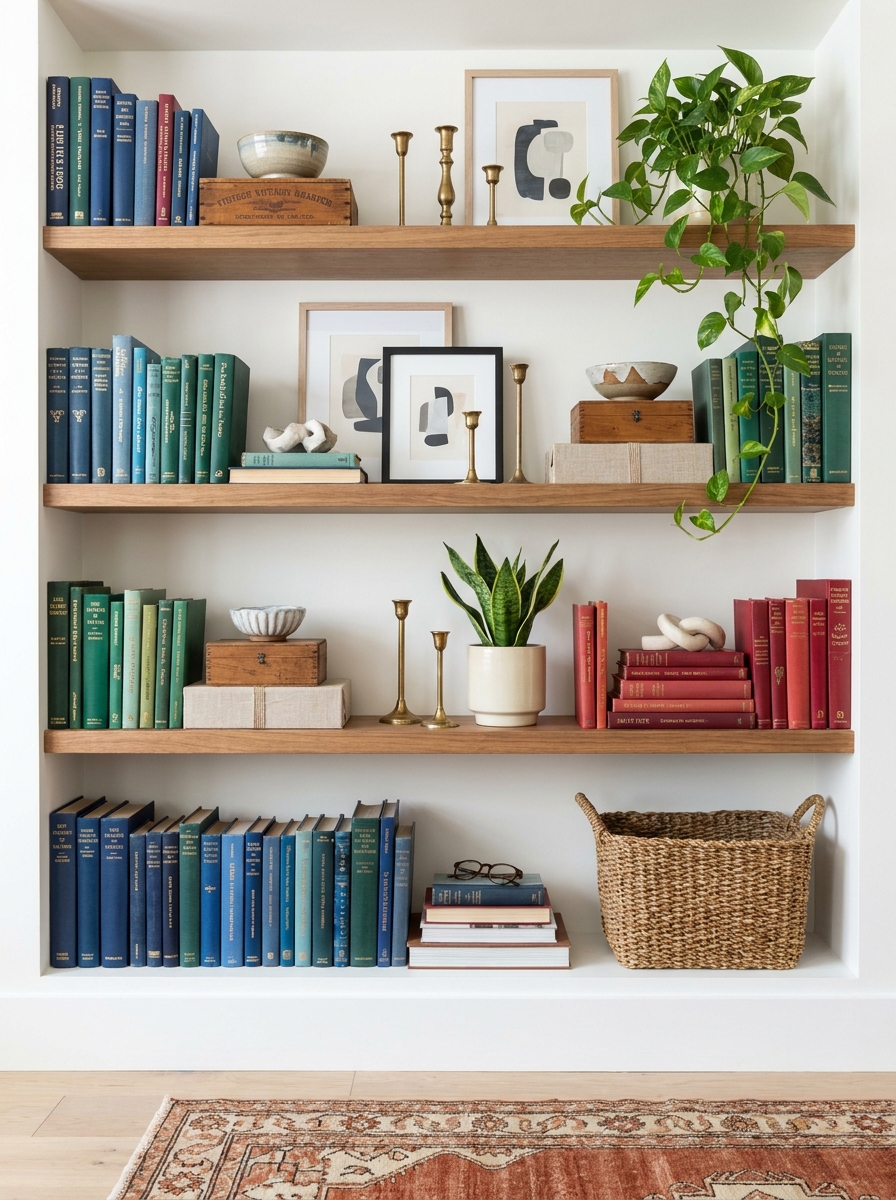
This trick totally changed my shelf game! Using small boxes, pedestals, or even stacks of books as risers creates different levels on each shelf. It makes your eye travel up and down instead of just scanning straight across.
I love placing a pretty ceramic bowl or a small sculpture on top of a vintage wooden box. It instantly gives that object more importance and creates visual interest. You can use anything as a riser – decorative storage boxes, small cake stands, or even pretty hardcover books you’re not currently reading.
The key is mixing these heights throughout your shelves. One shelf might have a tall candlestick next to a low succulent on a riser. The next shelf could feature books at different levels with a vase sitting on a hidden box. This layering creates depth and makes your bookshelf look intentionally curated instead of just filled. Play around until you get that perfect balance where nothing feels flat or boring!
6. Leave Breathing Room with Negative Space
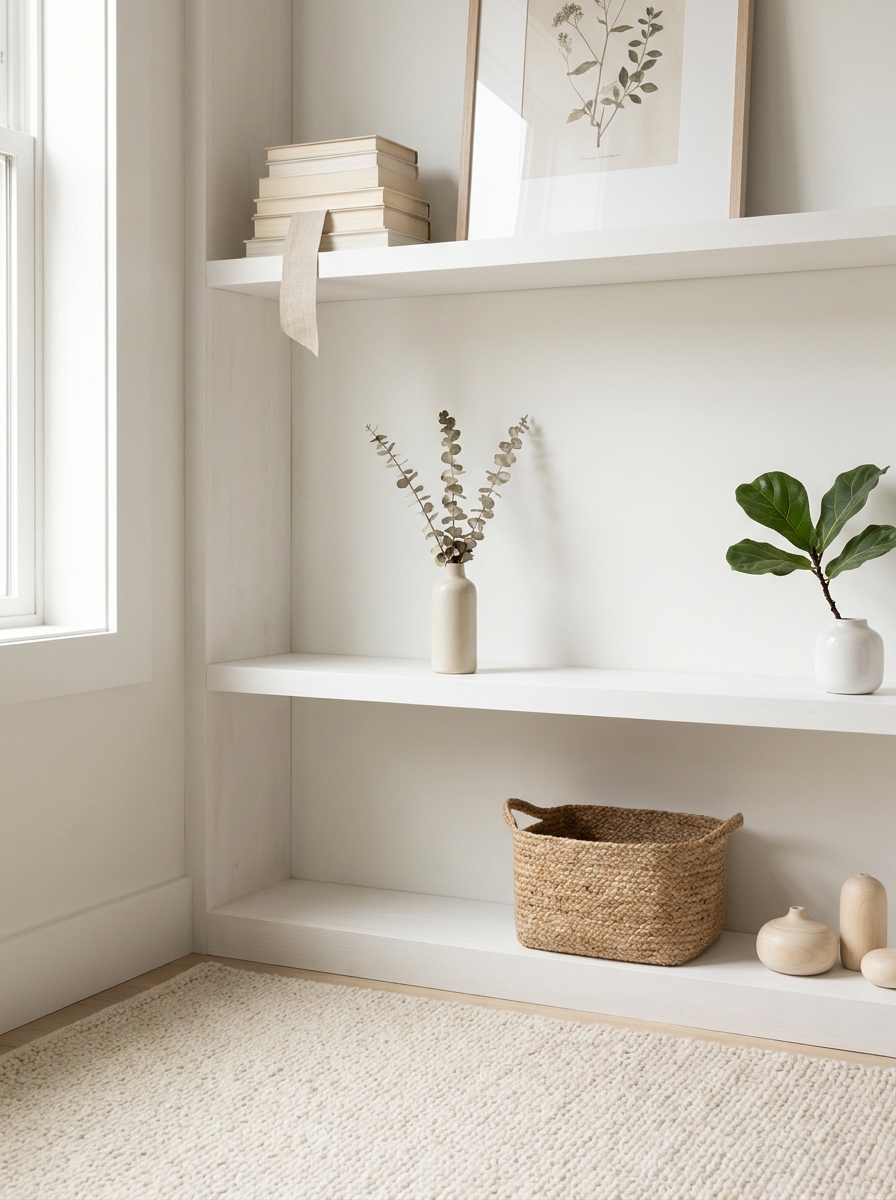
Here’s where people get it wrong – they fill every single inch! Your bookshelf needs room to breathe. Empty space is just as important as the stuff you display. It gives your eyes a place to rest and makes everything else stand out more.
I aim to leave about 30% of my shelf space open. That doesn’t mean big empty gaps everywhere, but rather strategic pockets of nothing. Maybe it’s the space beside a tall vase, or a whole section of shelf with just one beautiful object sitting there by itself.
This breathing room makes your bookshelf look expensive and curated instead of cluttered. It’s the difference between a boutique and a storage unit, you know? When I edit my shelves, I actually remove things until it feels too empty, then add back just one or two pieces. That sweet spot where it feels collected but not crowded? That’s the magic zone you’re going for!
7. Layer Objects in Front of Books for Depth
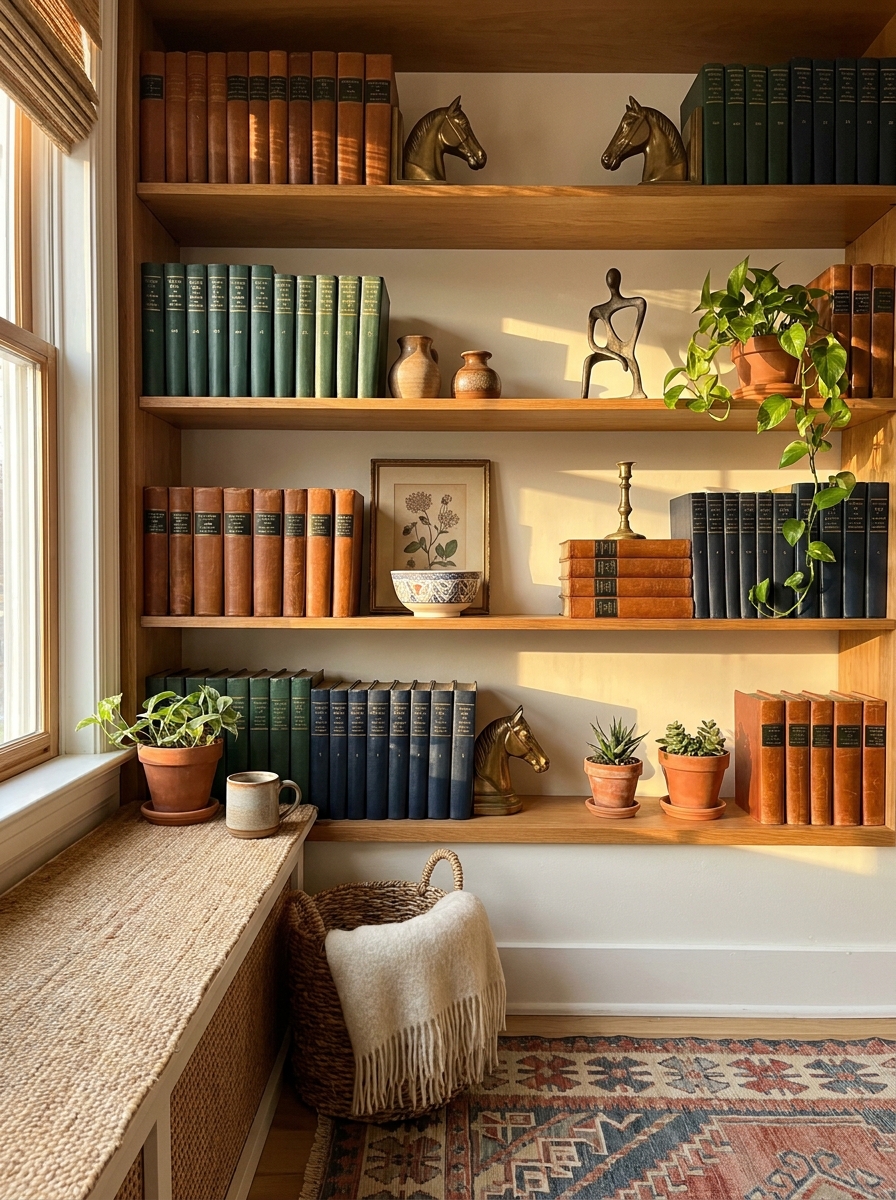
This is my absolute favorite styling trick! Instead of lining everything up in a straight row, place objects in front of your books. It creates this beautiful layered look that feels collected over time, not staged in five minutes.
Start by pushing some books toward the back of the shelf. Then place a small vase, picture frame, or decorative bowl a few inches in front. The books become a gorgeous backdrop while your special pieces get the spotlight. I love doing this with a pretty candle in front of neutral book spines, or a small plant sitting in front of colorful vintage covers.
The depth this creates is everything! Your bookshelf goes from flat to dimensional instantly. Mix this technique with books you’ve pulled forward too – some pushed back, some flush with the edge, objects layered throughout. It mimics how we naturally live with our things and makes the whole shelf feel more organic and personal.
8. Balance Each Shelf But Keep It Asymmetrical
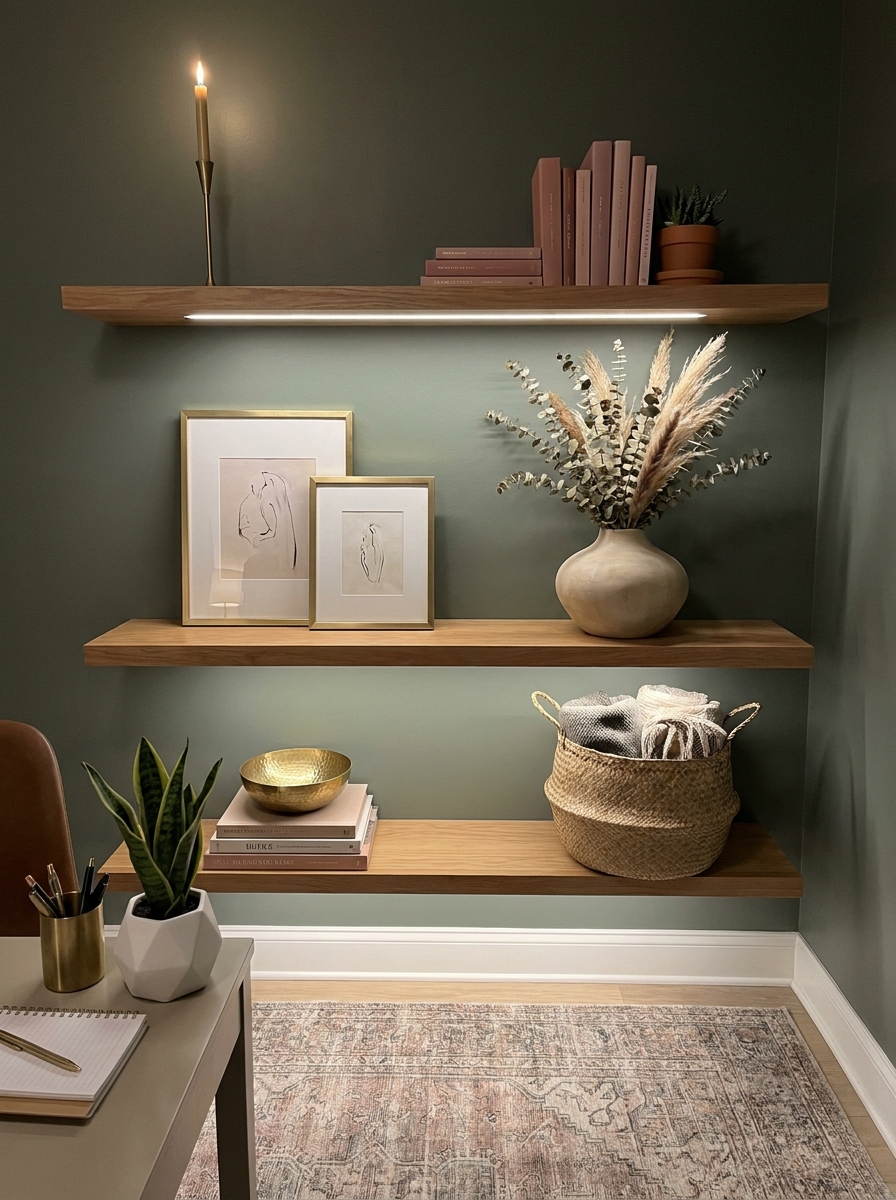
Okay, this sounds contradictory but hear me out! You want each shelf to feel balanced – like neither side is way heavier than the other. But you don’t want them to be identical mirror images. That’s too stiff and formal.
Think of it like a scale. If you have a tall vase on the left side of a shelf, you might balance it with a stack of three books and a small plant on the right. They’re different objects but they have similar visual weight. Or balance one large object on one side with two smaller objects grouped on the other.
I step back every few minutes while styling to see if anything feels lopsided. Sometimes a shelf needs something moved just a few inches to feel right. The goal is that relaxed, effortless vibe where everything feels anchored and intentional, but not perfectly symmetrical. It’s that slightly imperfect balance that makes bookshelves feel personal and lived-in instead of designed by a robot!
9. Anchor Bottom Shelves with Heavier Objects
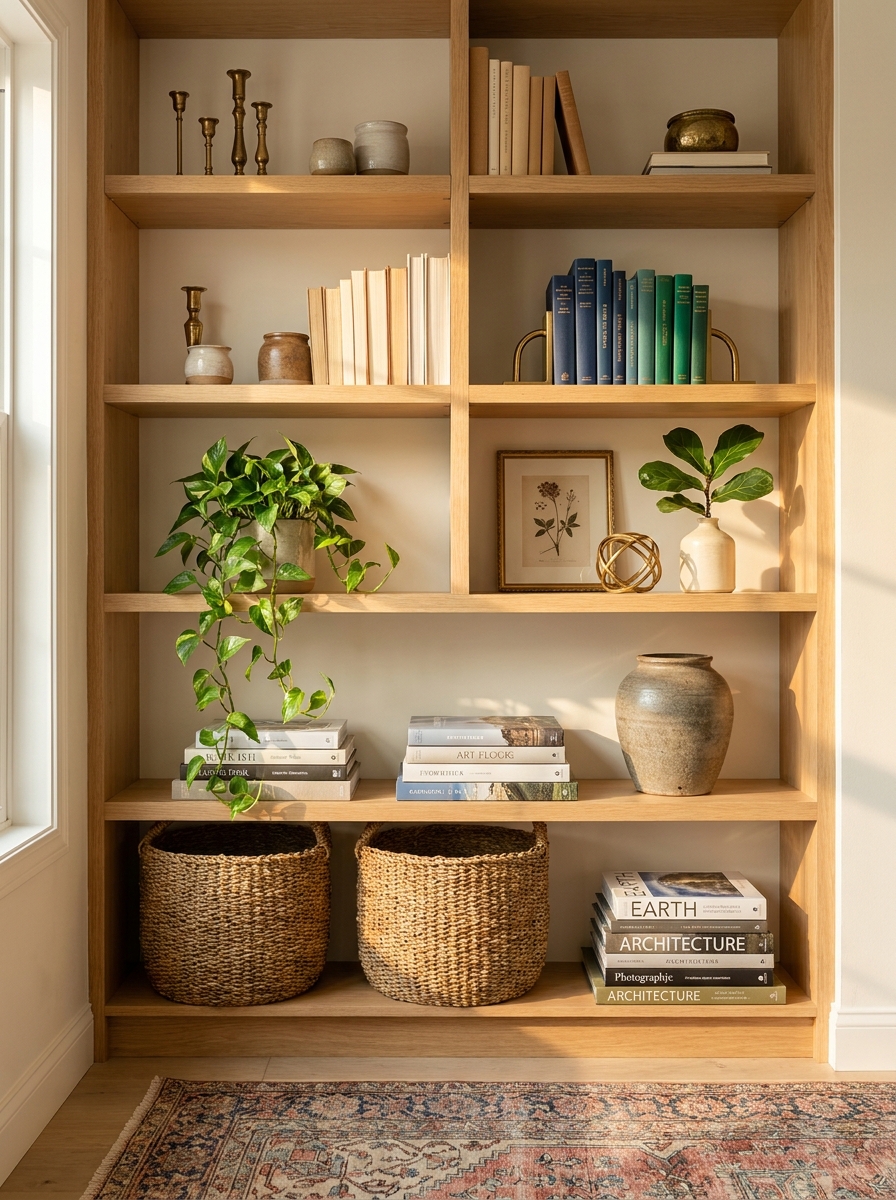
Here’s something I learned the hard way: when all your shelves feel equally weighted, the whole thing looks floaty and unstable. Your eye doesn’t know where to land.
This is where anchoring comes in. I always put my heaviest, most substantial objects on the lower shelves. Think chunky woven baskets, stacks of oversized art books, a ceramic vase with serious presence. These grounded pieces tell your brain that everything above is supported and intentional.
It’s basically the same principle as decorating a room. You wouldn’t hang heavy furniture on the walls, right? Same energy here. The bottom shelves do the visual heavy lifting so your upper shelves can be lighter and more playful. I’ll often use the bottom shelf for practical storage baskets while keeping the eye-level shelves for my prettiest objects. It just feels more balanced and way less top-heavy.
10. Use Books as Risers for Small Objects
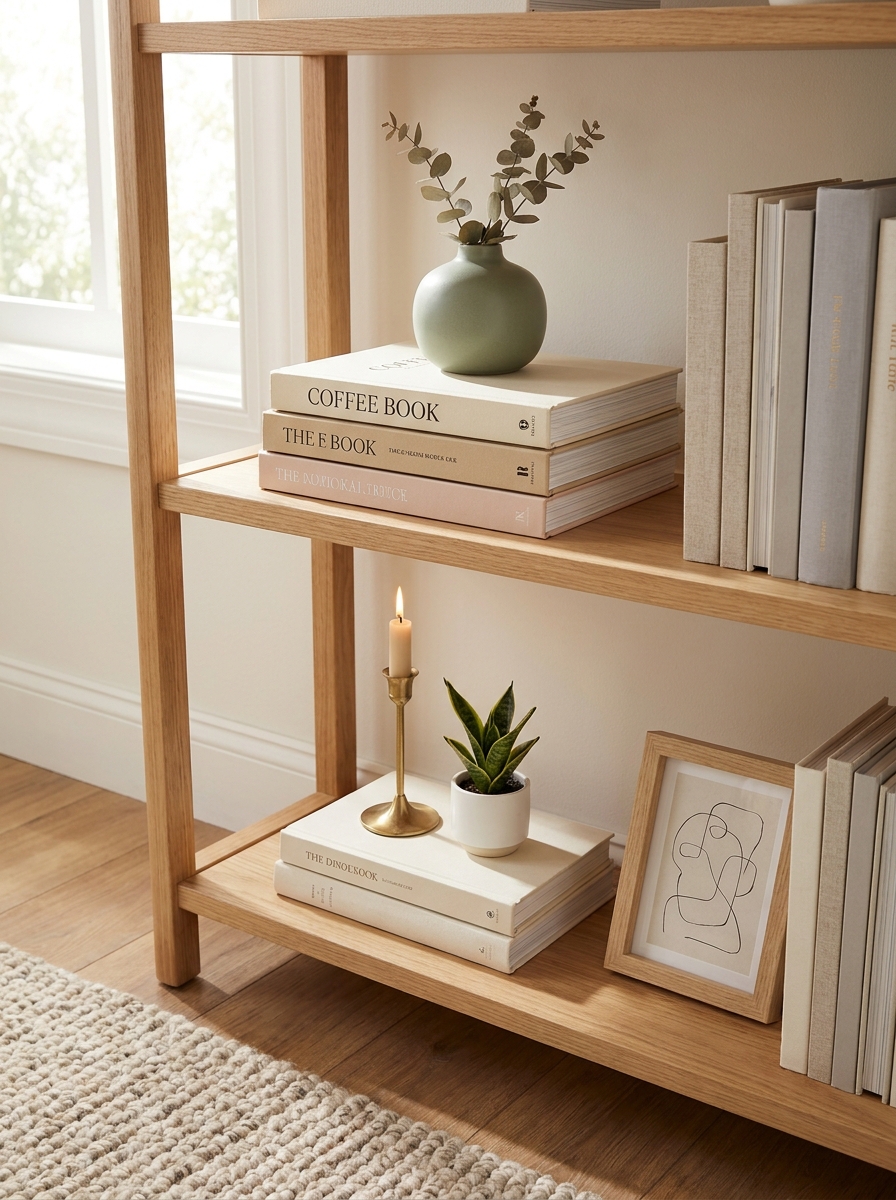
Okay, this trick changed my whole shelfie game. Instead of buying fancy acrylic risers or little pedestals, just use your books as platforms for smaller decorative objects.
Stack two or three books horizontally, then pop a tiny vase or sculpture on top. Instant elevation! It gives those small objects way more presence and creates all these cool layers within each shelf. Plus it looks so much more organic than obvious display risers.
I love doing this with my tiniest treasures that would get lost otherwise. A small ceramic dish, a delicate candlestick, a mini plant in a precious pot. When you lift them up on a book stack, suddenly they’re getting the attention they deserve. And here’s the bonus: you can change the height just by adding or removing a book from the stack. It’s flexible styling that still feels curated and intentional, not staged.
11. Incorporate Meaningful Personal Items
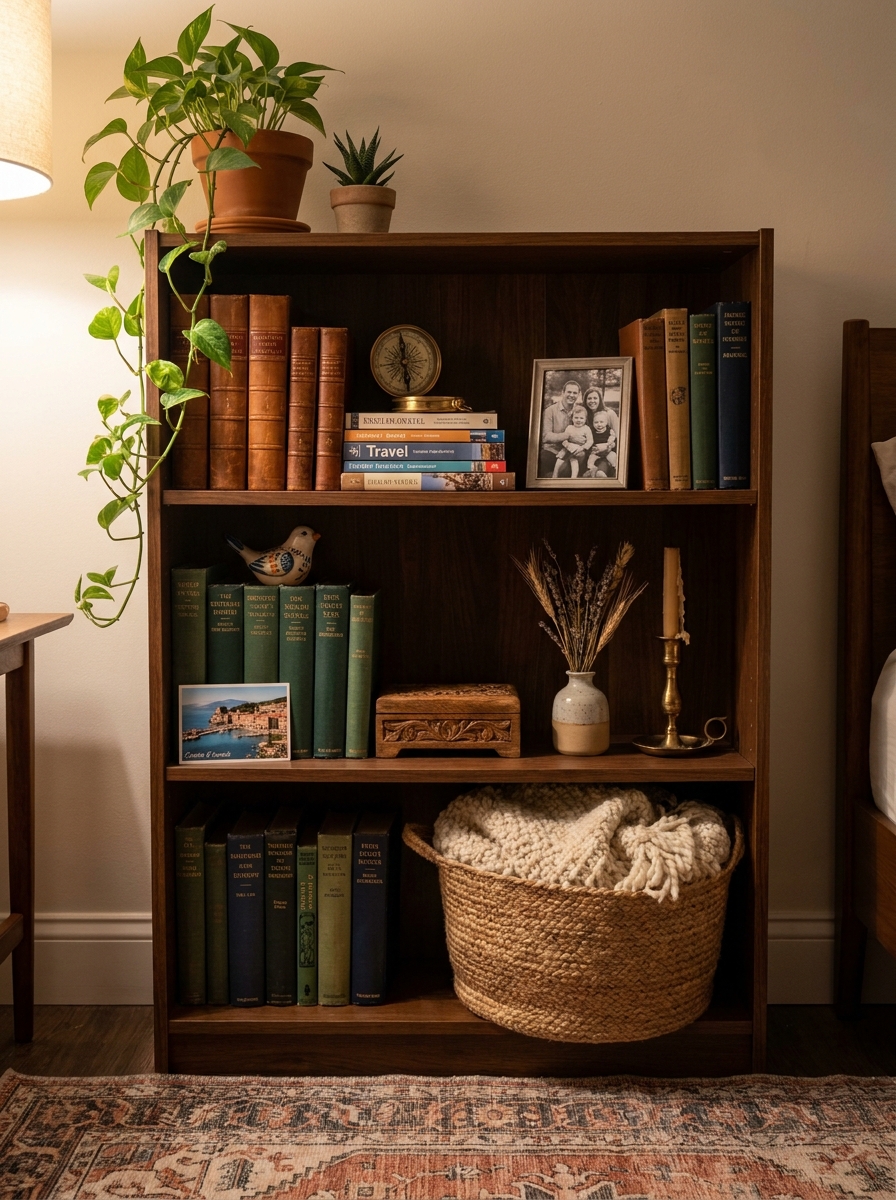
This is the difference between a styled bookshelf and a showroom display. Your shelves should tell YOUR story, not look like a catalog page.
I always mix in things that actually mean something to me. A vintage camera from my grandfather, a postcard from my favorite trip, a quirky thrifted figurine that makes me smile every time I see it. These personal touches make the whole shelf feel lived-in and authentic.
The trick is balancing sentimental with stylish. I don’t display every single treasure I own, just the ones that also happen to look good with my color scheme. And I treat them like any other decorative object, applying the same rules about height, spacing, and visual weight. Your meaningful stuff deserves to be styled beautifully too! When someone asks about an item on my shelf, I love having an actual story to share instead of just saying I bought it at HomeGoods last Tuesday.
12. Refresh Seasonally to Keep It Interesting
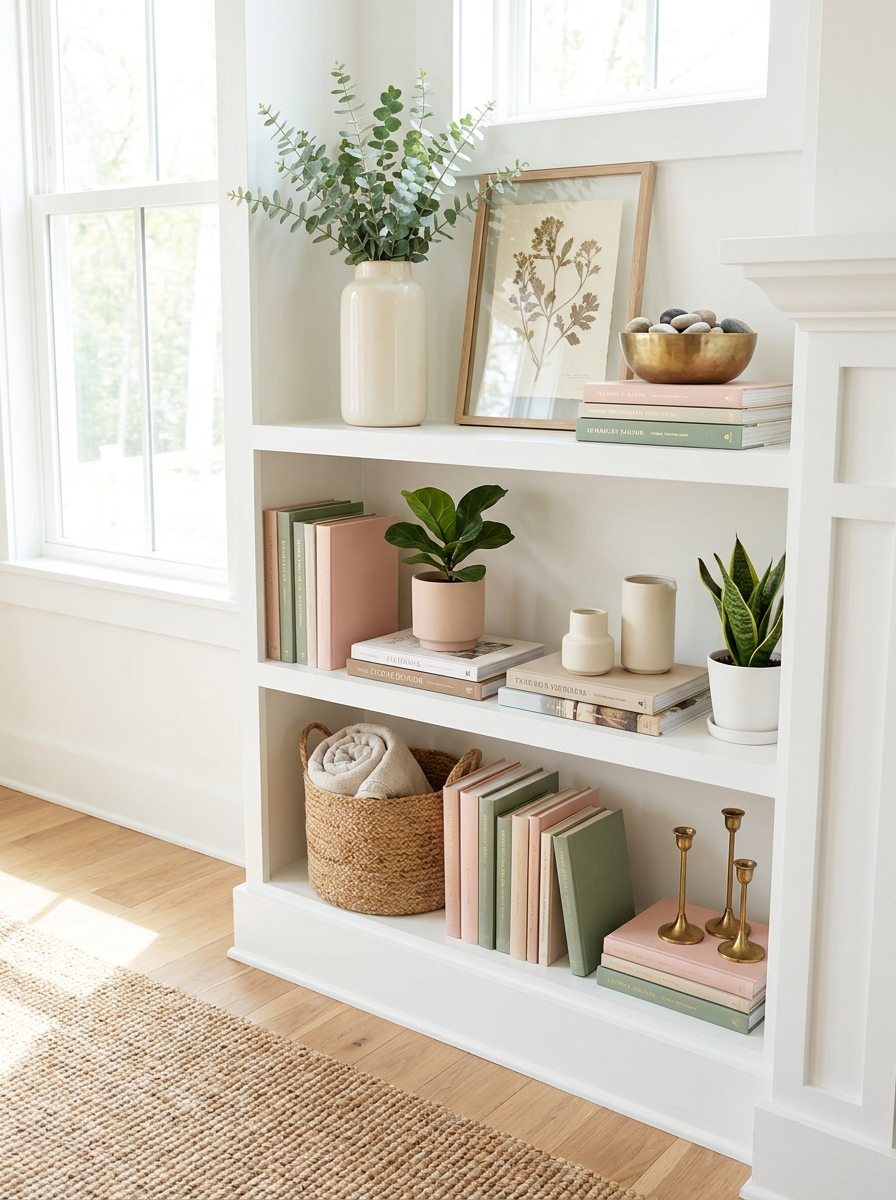
I used to think once my shelves looked good, I was done. But then they started feeling stale and I’d stop noticing them altogether. Total waste of a beautiful styled moment!
Now I do mini shelf refreshes with the seasons. In fall, I swap in warmer tones, add some dried leaves or mini pumpkins. Winter brings in pine branches and cozy candles. Spring means fresh flowers and lighter colors. It keeps my shelves feeling current and exciting without a complete overhaul.
The best part? You don’t need to buy new stuff constantly. Just rotate what you already have. Move that brass vase from the bedroom to the bookshelf. Swap book arrangements. Change out which objects you’re displaying. It’s like getting a new bookshelf four times a year without spending a dime or losing the foundation you worked so hard to create. Your shelves should evolve with you and your home!
13. Create Visual Triangles with Object Placement
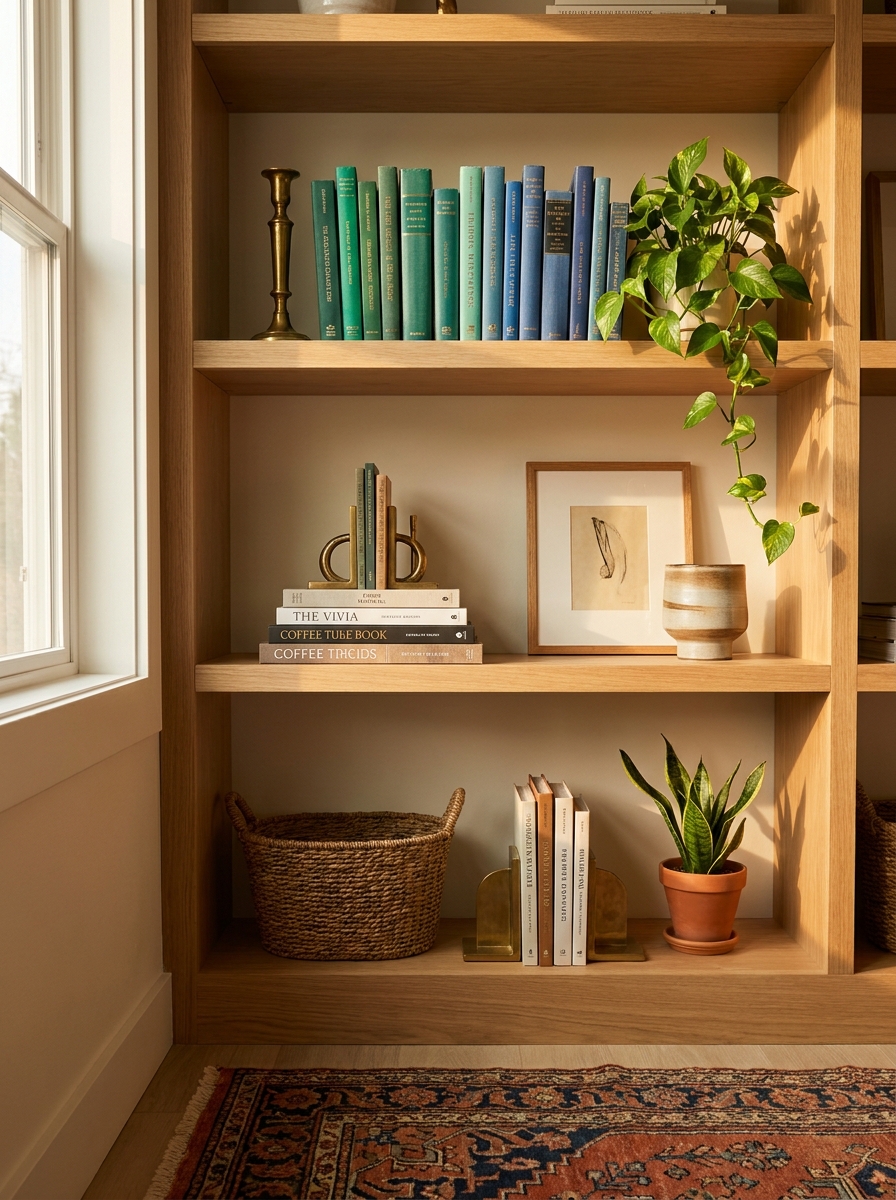
Here’s a styling trick that interior designers use constantly: arrange objects in invisible triangles across your shelves. Your eye naturally follows triangular patterns, so when you place three similar items—say, three brass candlesticks or three ceramic vases—in a diagonal pattern across different shelves, it creates movement and visual interest.
You don’t need to be super precise about this. Just avoid lining everything up in straight rows. If you have a tall vase on the top left shelf, maybe place a medium sculptural object on the middle right shelf, then a smaller decorative piece on the bottom left. See the triangle?
This technique works with colors too! Three pops of the same color scattered diagonally across your bookshelf creates cohesion without being matchy-matchy. It’s like your shelves are having a visual conversation with themselves, and honestly? That’s when styling starts feeling less like work and more like fun.
14. Mix Textures to Add Tactile Interest
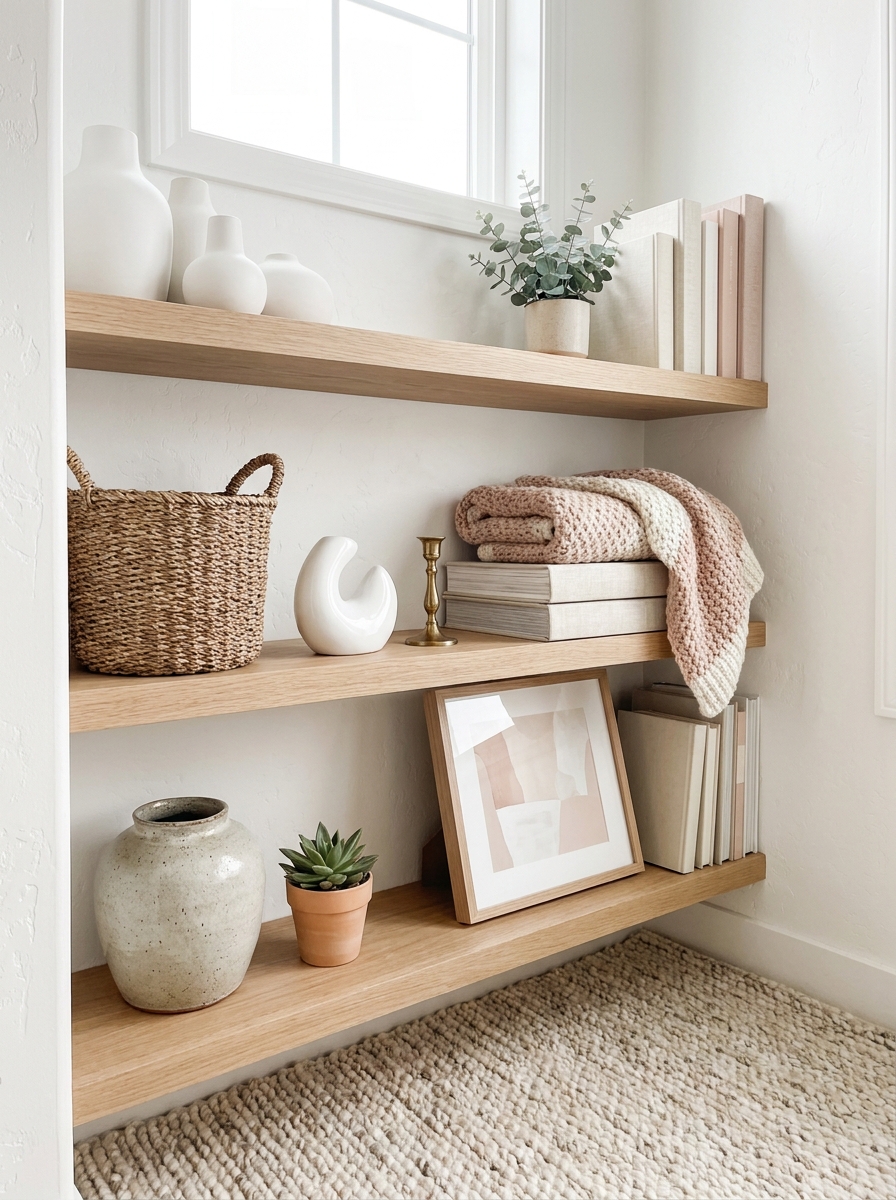
Books are already pretty texture-rich when you think about it—cloth covers, smooth dust jackets, embossed spines. But adding even more textures takes your bookshelf from flat to fabulous. Think smooth ceramic next to rough woven baskets. Shiny brass bookends beside matte pottery. A nubby wool throw draped casually over a stack of books.
Texture creates depth even in photos, which is why those Pinterest-perfect shelfies always look so touchable. When you’re shopping for bookshelf décor, don’t just think about color and shape—think about how it feels. Would running your hand across this shelf be interesting?
I love mixing in natural textures especially. A piece of driftwood, a stone sculpture, dried pampas grass in a vase—these organic elements make styled shelves feel less precious and more livable. Your bookshelf shouldn’t look like a museum display. It should look like someone interesting lives there and actually touches their stuff.
15. Style One Shelf as a Mini Vignette
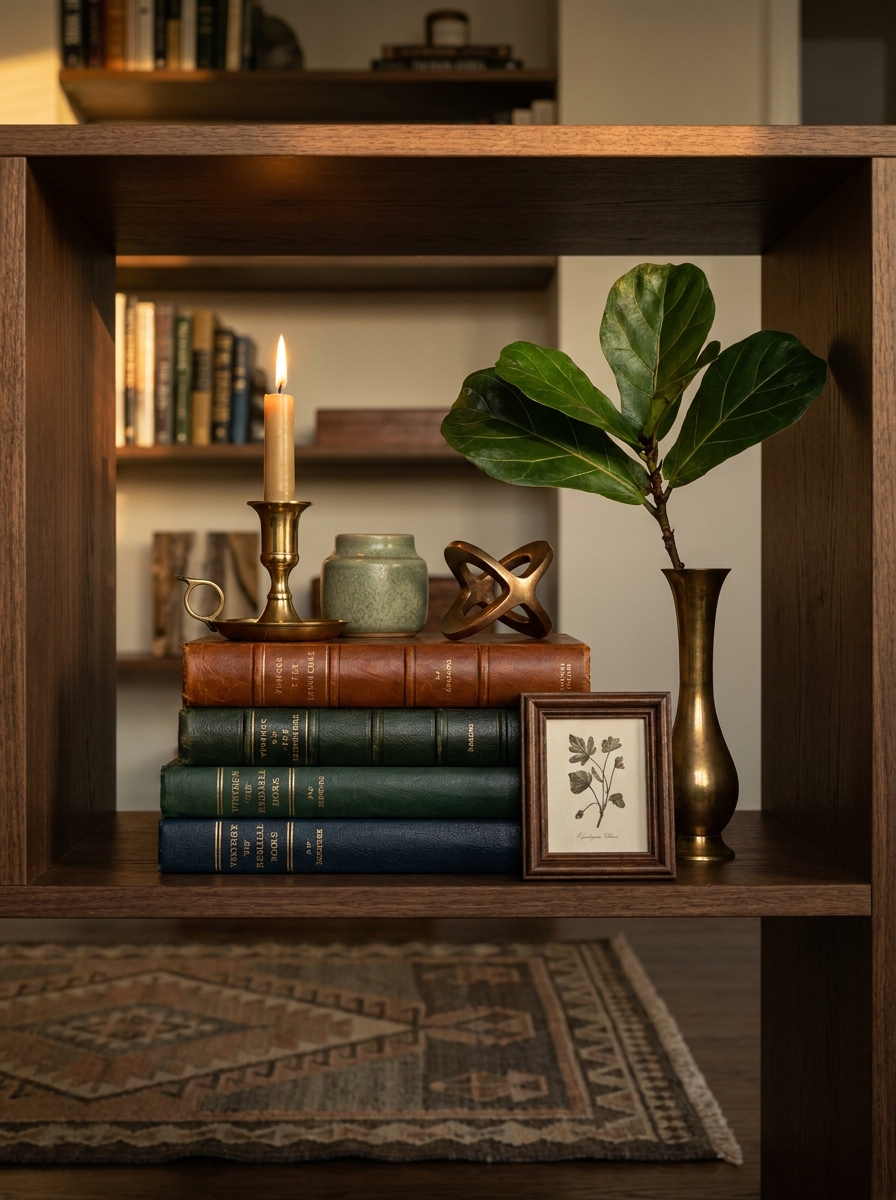
Sometimes the whole bookshelf feels overwhelming, so let’s zoom in. Pick one single shelf and style it like it’s the only shelf in the world. Treat it as a mini vignette—a perfectly curated little moment that could stand alone in a magazine spread.
Start with a stack of 3-5 books laid horizontally as your base. Add one medium-height object (a vase, a small sculpture, a pretty box). Then layer in one smaller finishing touch—maybe a tiny plant or a decorative object placed right in front of the books. Leave space. Let it breathe. This shelf is your masterpiece.
Once you nail one shelf, the rest becomes so much easier because you have a template. You’re not trying to reinvent the wheel on every single level. You can repeat this vignette formula with different objects and books, adjusting slightly for variety. One perfectly styled shelf gives you the confidence to tackle the whole thing.
16. Play with Scale for Drama and Surprise
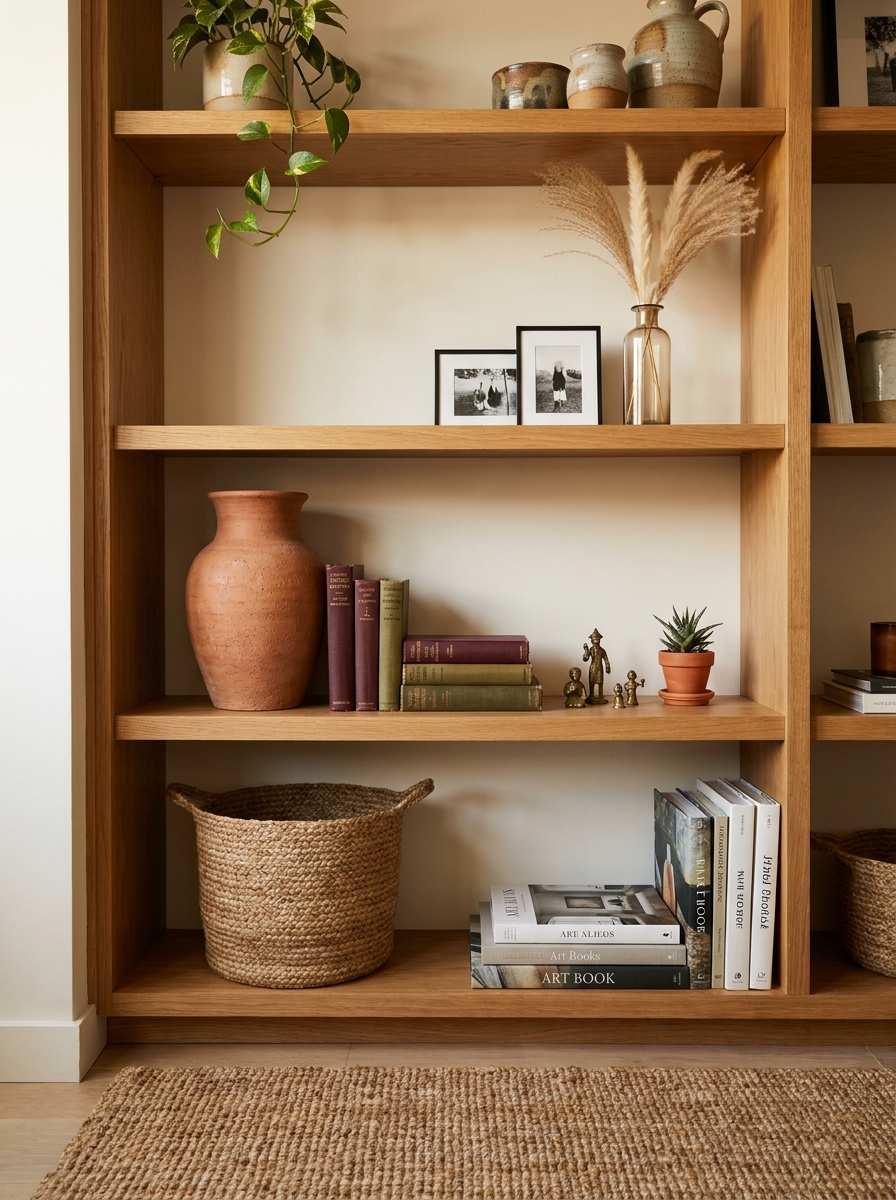
Want to know what makes a bookshelf really interesting? Unexpected scale. When everything is the same size, your eye gets bored. But when you mix a tiny vintage matchbox next to an oversized coffee table book? Now we’re talking.
Don’t be afraid of really big objects on your shelves. An oversized vase, a large sculptural bowl, a substantial piece of art leaning against the books—these anchor pieces give your styling weight and importance. Then contrast them with delicate little treasures. A small vintage bottle. A tiny succulent. A petite brass figurine.
This push-and-pull between big and small creates visual tension in the best way. It makes people lean in closer to discover the small details, while the larger pieces provide those satisfying anchor moments. Your bookshelf should have both whisper moments and shout moments. That’s what keeps it interesting every single time you walk past it.
17. Use Bookends as Functional Art Pieces
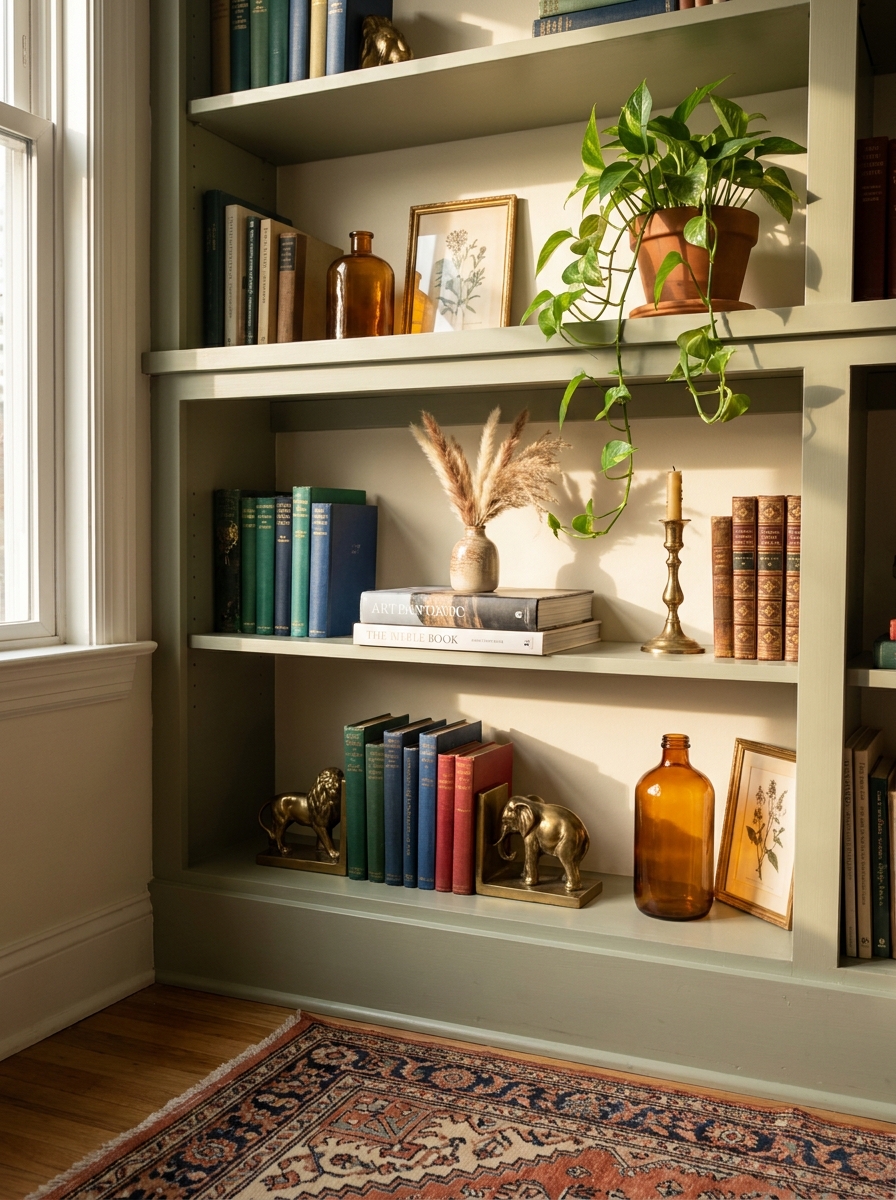
Bookends are those unsung heroes that do double duty—they keep your books upright AND look gorgeous doing it. I’m obsessed with finding unique bookends that add character to my shelves. Think beyond basic metal L-shapes and hunt for sculptural pieces that tell a story.
I love mixing materials here. A pair of agate bookends next to leather-bound classics? Chef’s kiss. Brass animal figurines holding up travel guides? Perfect. Even stacked vintage cameras or heavy ceramic pieces work beautifully as bookends. The key is choosing pieces that complement your overall shelf aesthetic while being heavy enough to actually do their job.
Don’t feel like you need matching pairs on every shelf either. Sometimes I’ll use a single beautiful bookend on one side and let books lean naturally against a decorative object on the other. It’s that perfectly imperfect vibe I’m always chasing. Just make sure whatever you choose is substantial enough to support your books—nothing’s worse than a toppling stack!
18. Create Color Stories Within Each Shelf
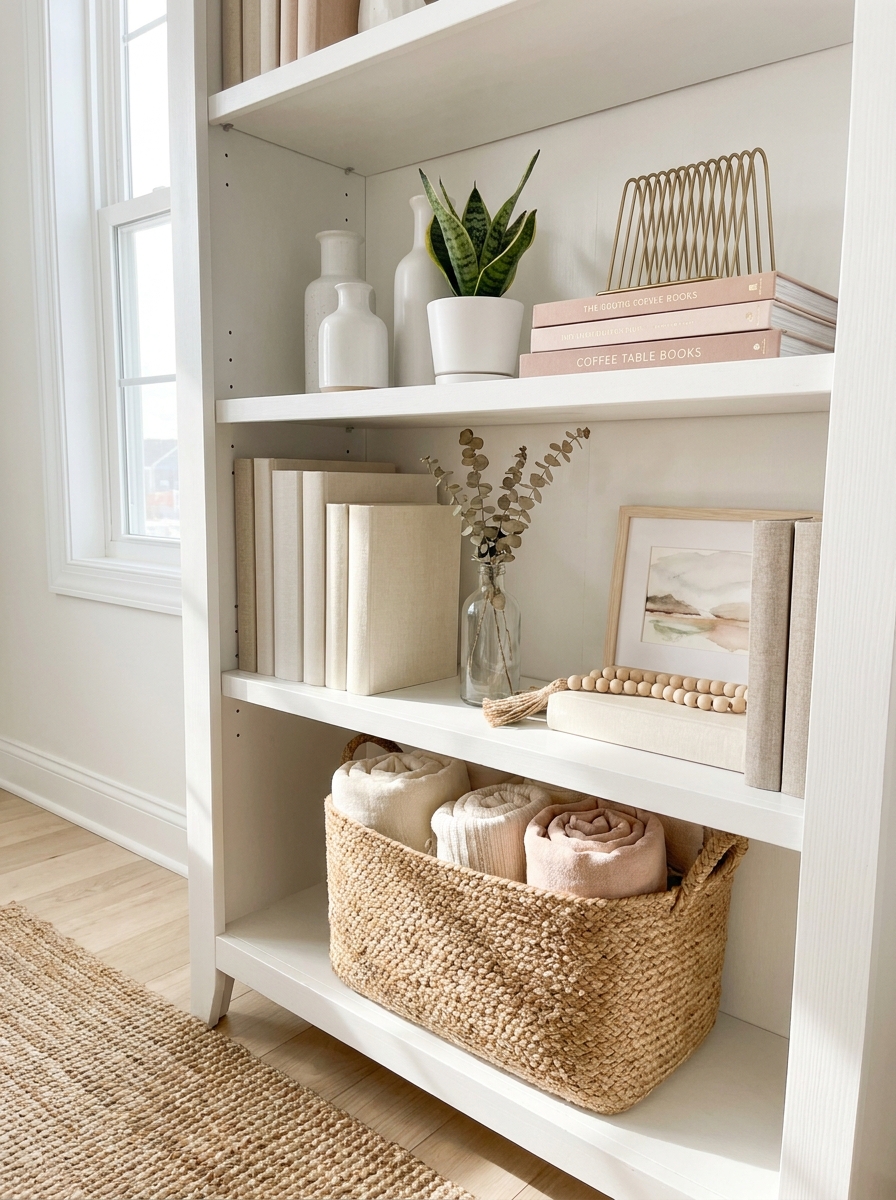
Here’s where you can get really fun with it—treat each shelf like its own little color story. I don’t mean everything has to match perfectly, but there should be a thoughtful flow of color that ties things together. One shelf might feature warm cognac and cream tones, while the shelf above plays with cool blues and whites.
I like to pull colors from one decorative object and echo them in the book spines nearby. Maybe you have a gorgeous turquoise vase—surround it with books that have blue or green spines. Or place a coral-colored bowl next to books with warm pink and orange covers. It’s like creating mini color families that talk to each other across the shelves.
The magic happens when these individual color stories still work together as a whole unit. Step back and squint at your bookshelf—your eye should travel smoothly from shelf to shelf without any jarring color clashes. Think of it like painting with books and objects instead of a brush!
19. Style Lower Shelves for Both Beauty and Function
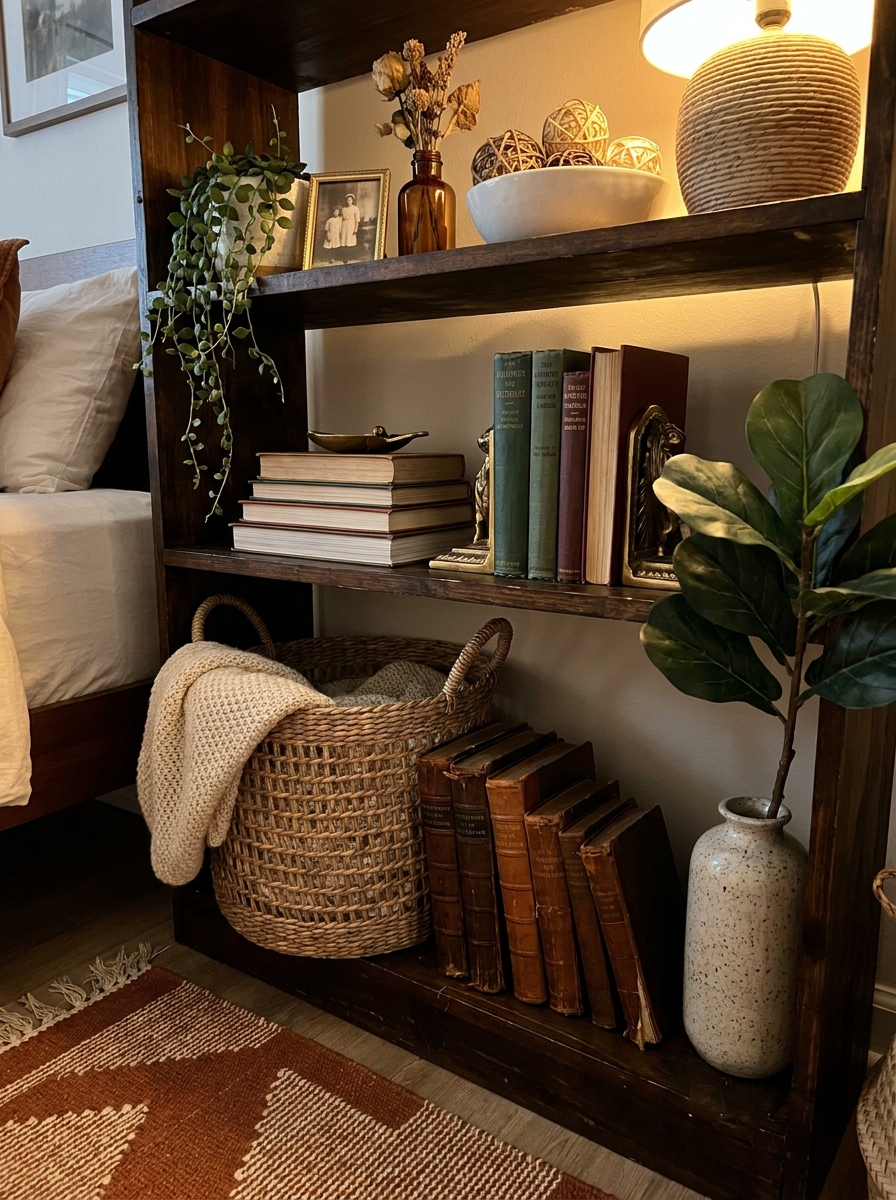
Those bottom shelves are prime real estate that often get ignored or stuffed with random items we’re trying to hide. But here’s the thing—they’re actually the easiest to style because they can handle larger, heavier pieces that would overwhelm upper shelves. Plus, they’re at eye level when you’re sitting down, so they deserve some love!
I always use lower shelves for my most substantial decorative pieces—chunky woven baskets, stacks of oversized art books, a beautiful wooden box, or a sculptural ceramic piece. These grounded elements anchor your entire bookshelf and make the whole thing feel more intentional. And here’s the functional part: those baskets can absolutely hold stuff you need to stash away. Win-win!
Don’t be afraid to leave some lower shelves less styled too. Maybe it’s just a few gorgeous books and one statement plant in a large pot. Sometimes that simplicity at the bottom helps balance busier styling up top and gives your eyes a place to rest.
20. Add Lighting to Make Your Shelves Glow
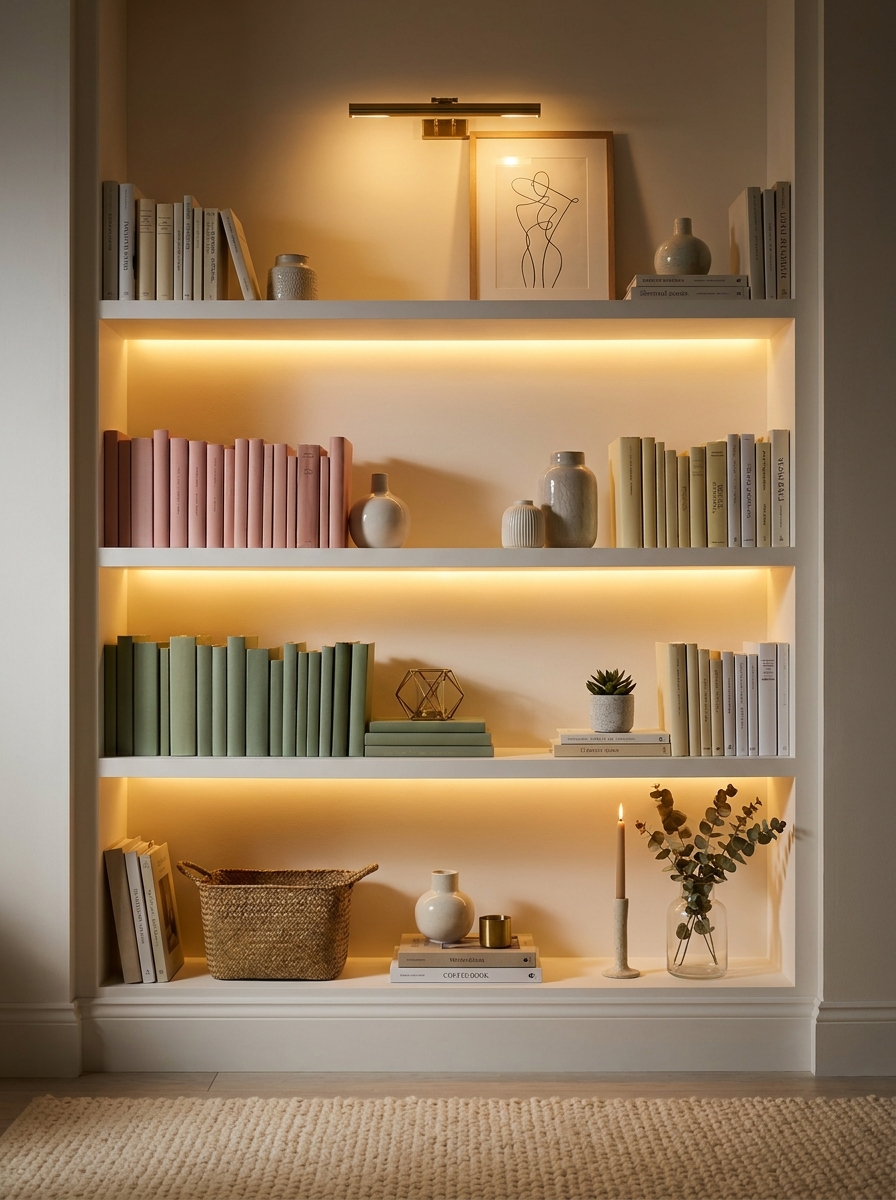
Okay, this is the secret weapon that takes a bookshelf from pretty to absolutely stunning—lighting! I cannot tell you how much of a difference it makes when your shelves are properly lit. It adds depth, highlights your favorite pieces, and makes everything feel more intentional and gallery-like.
You’ve got options here. Battery-operated puck lights attached to the underside of each shelf create that beautiful downward glow. Small LED strip lights hidden along the back edge make books and objects pop. I even love placing a small cordless table lamp ON a shelf as both functional light and decorative object. And don’t forget natural lighting—positioning your bookshelf near a window creates gorgeous shadows and highlights throughout the day.
The right lighting transforms your shelfie into a focal point that draws people in, especially in the evening. It’s like your books and treasures are performing on a little stage, and honestly? They deserve the spotlight. This is the finishing touch that makes your styling effort really shine—literally!
Quick Guide
Shelfie Styling Cheat Sheet
Balance Check: Step back every few items. Does one shelf feel heavier than others? Redistribute visual weight.
Color Distribution: Don’t cluster all your colorful items on one shelf. Spread pops of color throughout for cohesion.
Height Variation: Every shelf should have tall, medium, and low elements. This creates natural rhythm.
Breathing Room: Leave some empty space. Not every inch needs to be filled. Negative space makes your styling intentional, not cluttered.
The Touch Test: Include at least one texture per shelf—woven basket, smooth ceramic, rough wood, soft plant leaves.
Eye Level Matters: Put your most beautiful or meaningful objects at eye level. That’s where people look first.
Lean, Don’t Hang: Small framed art or prints can lean against books instead of being perfectly placed. It adds that casual-cool vibe.
Your Shelves Are Ready for Their Close-Up
Look at you. You’ve gone from bookshelf chaos to shelfie goals, and it probably took less time than you thought it would. The beauty of bookshelf styling is that it’s never really done—you can swap things out seasonally, move objects around when you get bored, add new finds from your weekend market trips. Your shelves get to evolve with you.
What matters most isn’t following every single rule perfectly. It’s creating something that feels like you. Maybe you love the color-coordinated look, or maybe you prefer a more eclectic mix. Maybe you want tons of plants spilling over, or maybe you’re a minimalist who likes plenty of breathing room. All of it works.
So grab your phone, take a photo, and admire what you’ve created. And when your friends ask how you made your shelves look so good? Just smile and say you’ve been practicing. These 20 tricks are your secret weapon, and now your bookshelf is doing exactly what it should—telling your story in the most beautiful way possible.
Frequently Asked Questions
How do I style a bookshelf when I don’t have many books?
Use what you do have strategically—stack books horizontally to take up more visual space, then fill in with decorative objects, baskets, plants, and framed photos. Honestly, some of the best-styled shelves have more objects than books. You can also face some books outward to show their covers, which takes up more room than just spines.
Should I organize books by color or keep them organized by author or genre?
It depends on how you use them. If these are reference books you reach for often, organize by topic or author. But if they’re mostly for display, color organization creates that Instagram-worthy look. You can also compromise—organize most shelves by color and keep one shelf for your frequently-used books organized functionally.
How do I keep my styled bookshelf from looking too cluttered?
Follow the 70/30 rule—fill about 70% of your shelf space and leave 30% empty. Group items together rather than spacing them evenly across the shelf, which paradoxically makes it look less cluttered. And edit ruthlessly—if something doesn’t make you happy or serve the aesthetic, it doesn’t earn a spot.
What’s the best way to incorporate plants into bookshelf styling?
Mix different types—a trailing pothos on a top shelf, a small succulent on a middle shelf, maybe a taller snake plant on a lower shelf. Vary the planters too—ceramic, brass, woven baskets. Just make sure the shelves can handle the weight when the plants are watered, and choose low-light tolerant plants if your bookshelf isn’t near a window.
How often should I restyle my bookshelves?
There’s no rule, but many people do a refresh seasonally—swapping in seasonal objects, changing out a few books, or rearranging the layout. Even small tweaks every few months keep your shelves feeling fresh. That said, if you love how they look, leave them alone. You’re allowed to enjoy your work without constantly changing it.