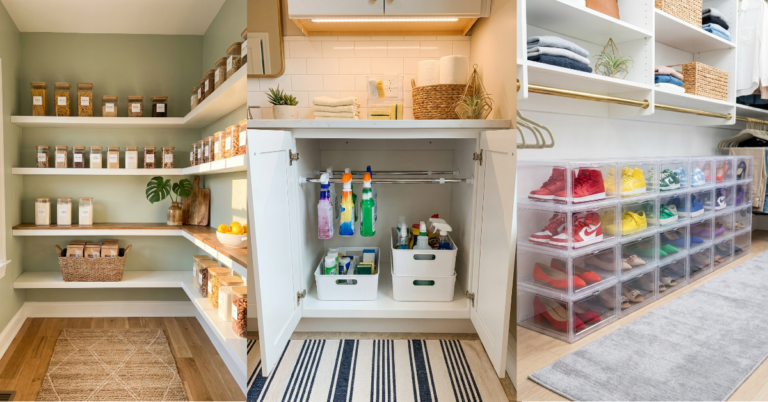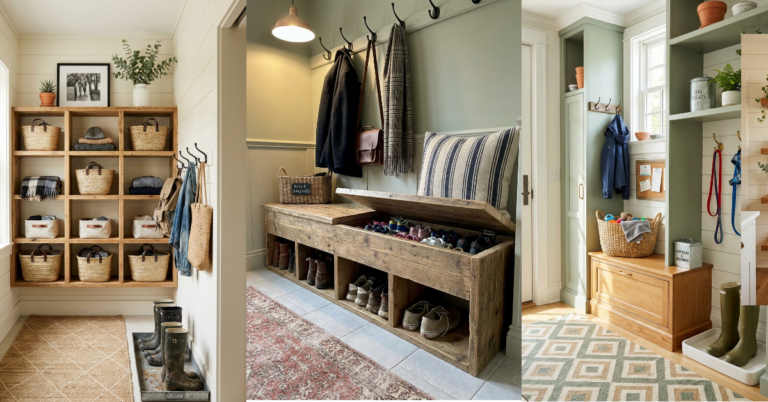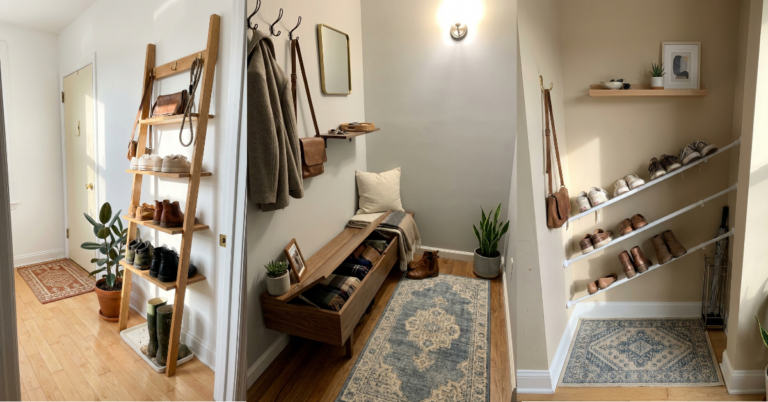
35 Dreamy Laundry Room Ideas That Spark Joy
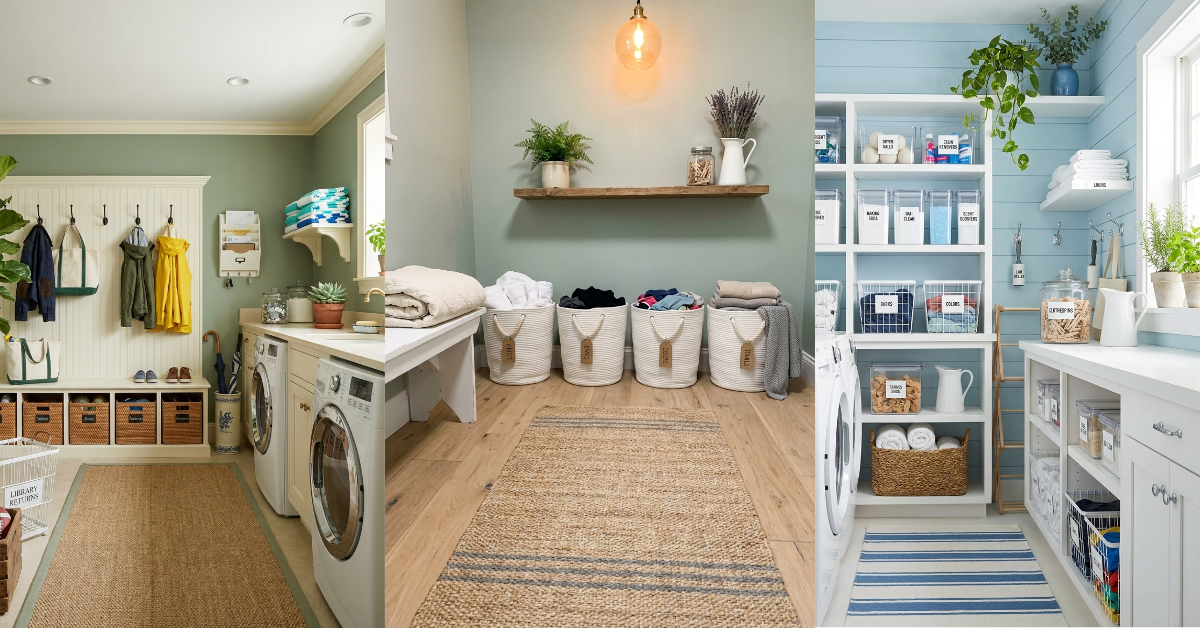
You know that feeling when you open your laundry room door and just… sigh? The mismatched baskets. The detergent bottles everywhere. That one sock that’s been on the floor for three weeks. I get it. Your laundry room doesn’t have to be the forgotten corner of your home that you’re embarrassed to show anyone. It can actually be a space that makes you smile when you walk in—even if you’re carrying a mountain of dirty towels. The truth is, a well-organized laundry room with a little personality can completely change how you feel about the most repetitive chore on earth. And you don’t need a massive budget or a complete renovation to make it happen. Sometimes it’s just about the right basket. Or a pretty label. Or finally putting that shelf where it actually makes sense. Here’s what actually works.
1. Install Floating Shelves Above Your Washer and Dryer
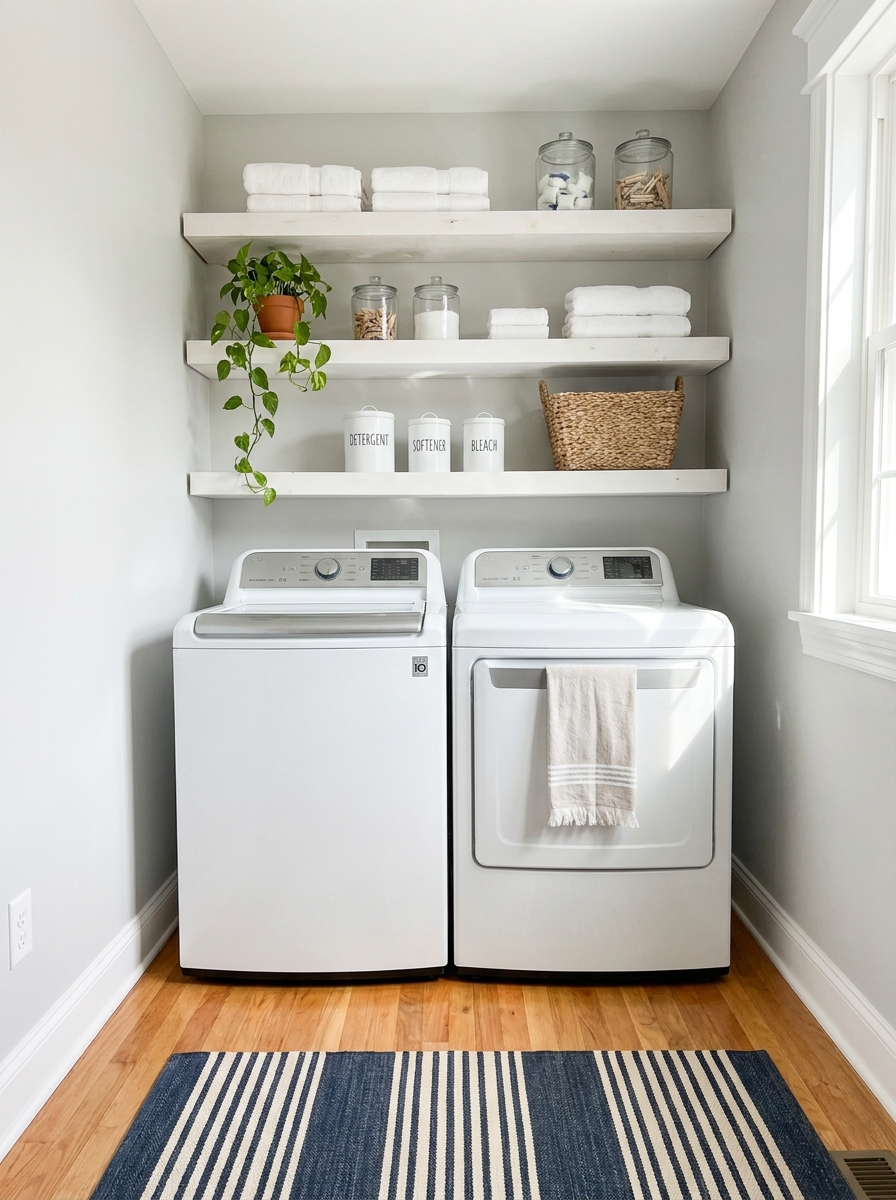
This is the easiest win in laundry room organization, hands down. Those few feet of wall space above your machines? Total wasted real estate right now. But add some sleek floating shelves and suddenly you’ve got a home for all those bottles and boxes that are currently crowding your dryer top.
I love using white or natural wood shelves because they keep things feeling light and open. You can stack matching baskets up there for dryer sheets and stain removers, line up your prettiest detergent bottles, or even add a small plant that somehow survives despite your best efforts to forget about it.
The key is keeping things contained. Use matching jars or bins so it doesn’t turn into another cluttered shelf situation. And don’t overload them. Leave some breathing room. A few well-styled essentials look way better than every cleaning product you’ve ever purchased crammed up there. Plus, everything you need is right at eye level when you’re switching loads, which is such a small convenience that makes a huge difference on laundry day.
2. Create a Folding Station with Butcher Block Countertop
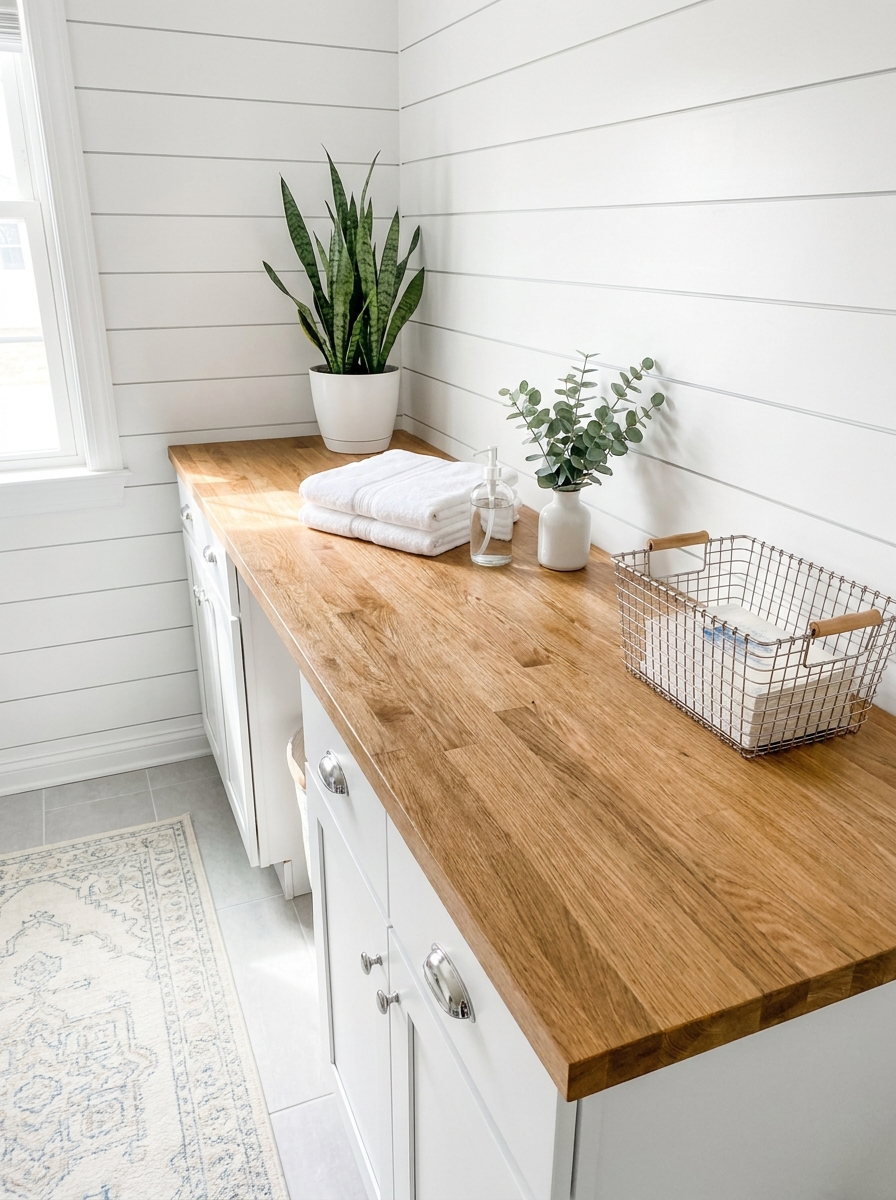
If you’ve ever tried to fold a fitted sheet while balancing it on top of your dryer, you know the struggle is real. A dedicated folding station changes everything. And butcher block countertops aren’t just for kitchens anymore.
This warm wood surface gives you actual workspace in your laundry room. No more folding on your bed or couch and ending up with cat hair all over your clean towels. You can install a butcher block counter between your washer and dryer if they’re not side-by-side, or along an empty wall if you’ve got the space. Some people even build it right over their machines for a built-in look.
What I love about butcher block specifically is how it warms up what’s usually a pretty sterile space. It adds that little touch of kitchen coziness to a room that desperately needs it. And it’s durable enough to handle wet clothes, laundry baskets, and whatever else you throw at it. Style it with a pretty soap dispenser, a small vase with fresh eucalyptus, and maybe a cute little tray to corral your supplies. Suddenly folding laundry feels less like a chore and more like you’re working at the world’s tiniest, most efficient café.
3. Use Matching White Baskets for Sorting Laundry
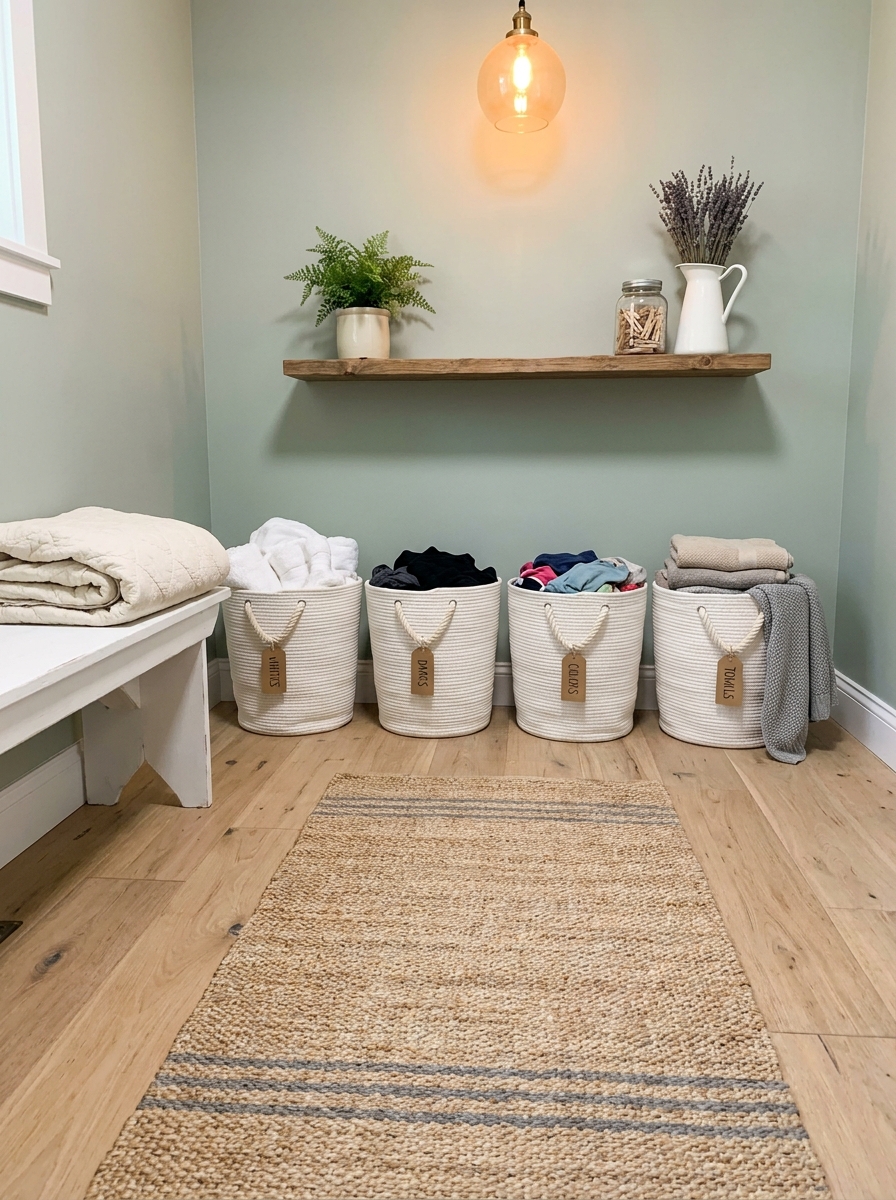
Can we talk about laundry baskets for a second? Because the random collection most of us have is doing nothing for the vibe. Switching to matching white baskets is one of those small changes that makes your laundry room look like it belongs on Instagram.
I’m obsessed with those rope-handled canvas baskets or the plastic weave ones that actually look good. Get three or four of them—one for whites, one for darks, one for colors, and maybe one for delicates if you’re feeling fancy. Label them with simple tags or leave them label-free if the system makes sense to your household.
The magic here is the visual calm. When everything matches, your brain stops registering chaos even when there’s a week’s worth of dirty clothes sitting there. It just looks… intentional. Like you meant for it to look exactly this way. Stack them on a shelf, line them up on the floor, or slide them into cubbies if you’ve built those. And here’s the thing nobody tells you: when your laundry system looks this good, other people in your house are way more likely to actually use it correctly. Something about pretty baskets makes people want to participate.
4. Add a Pegboard Wall for Hanging Storage
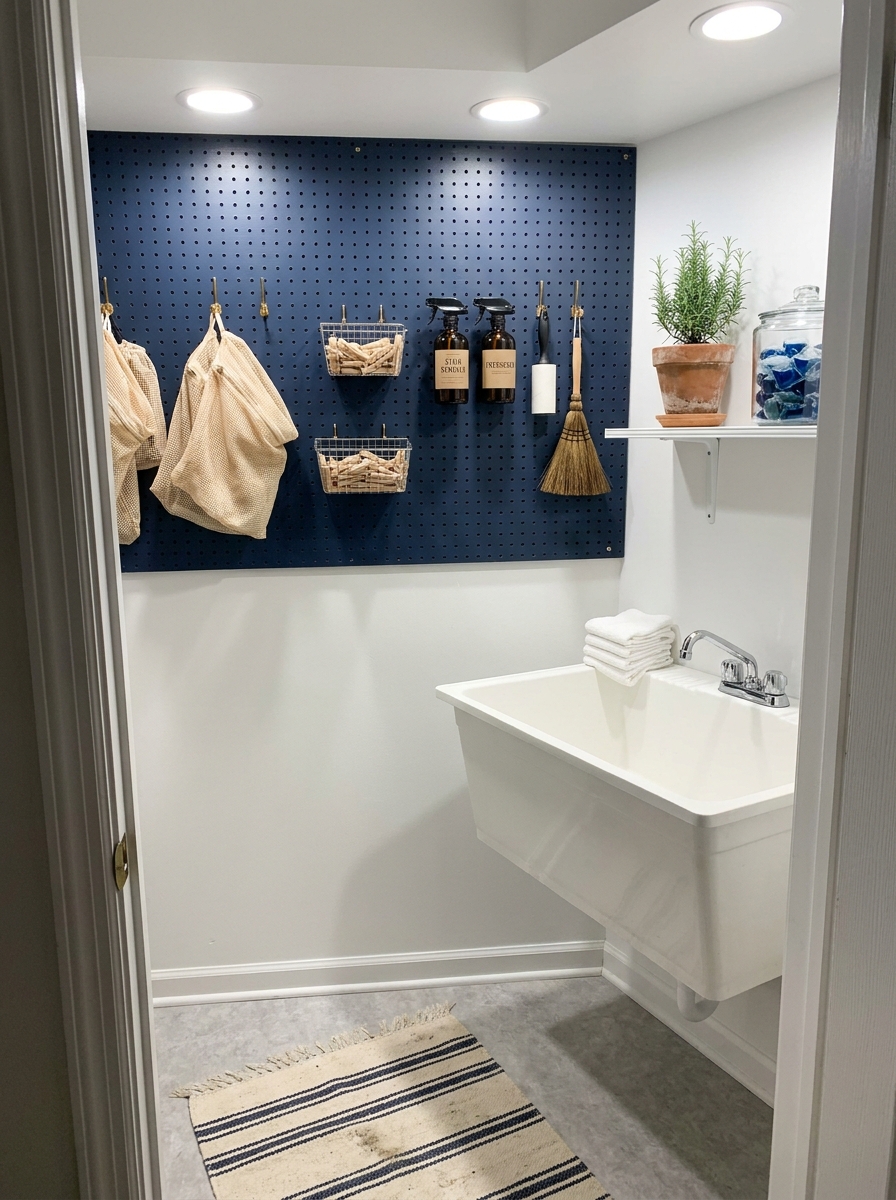
Pegboard isn’t just for garages anymore. It’s having a serious moment in laundry rooms, and honestly, I’m here for it. This is vertical storage that actually works and looks cute at the same time.
Paint your pegboard in a fun color—navy, sage green, even a soft blush if that’s your vibe—or keep it classic white. Then load it up with hooks and small baskets to hold all those little things that always end up scattered everywhere. Hang your mesh laundry bags, your lint roller, small spray bottles, even a cute hand broom for sweeping up dryer lint.
What makes pegboard so genius is how customizable it is. Need to move a hook because you bought a bigger bottle of stain remover? Done. Want to add another basket because you’re suddenly really into wool dryer balls? Easy. It adapts to your life instead of forcing you to adapt to it. And there’s something so satisfying about seeing all your supplies organized and visible right there on the wall. No more digging through drawers trying to find the fabric shaver you know you own but can never locate when you actually need it.
5. Install a Pull-Out Drying Rack Between Cabinets
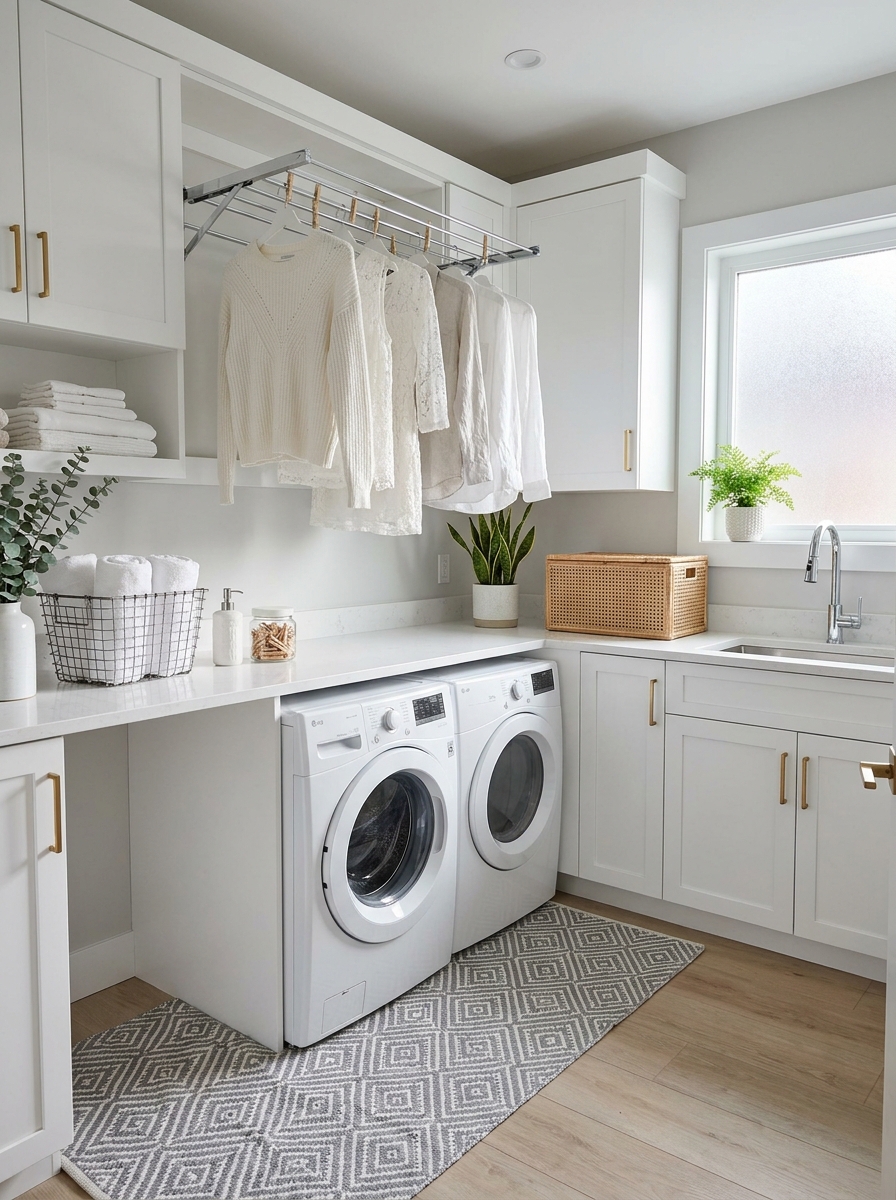
This is one of those genius solutions that makes you wonder how you ever lived without it! A pull-out drying rack fits perfectly in that narrow space between cabinets or alongside your washer. When you need it, you pull it out and hang all those delicate sweaters and bras that can’t go in the dryer. When you’re done, it slides right back and disappears.
I love this because it keeps wet clothes off your counters and doesn’t take up permanent space like those clunky floor racks. You can find really sleek metal ones that hold a surprising amount of weight. Some even have multiple tiers so you can hang several items at once without them touching.
The installation is pretty straightforward if you’re mounting it to cabinet sides. Just make sure you measure twice because you want smooth gliding action. This is especially perfect for small laundry spaces where every inch counts. No more draping damp clothes over door frames!
6. Label Everything with a Label Maker
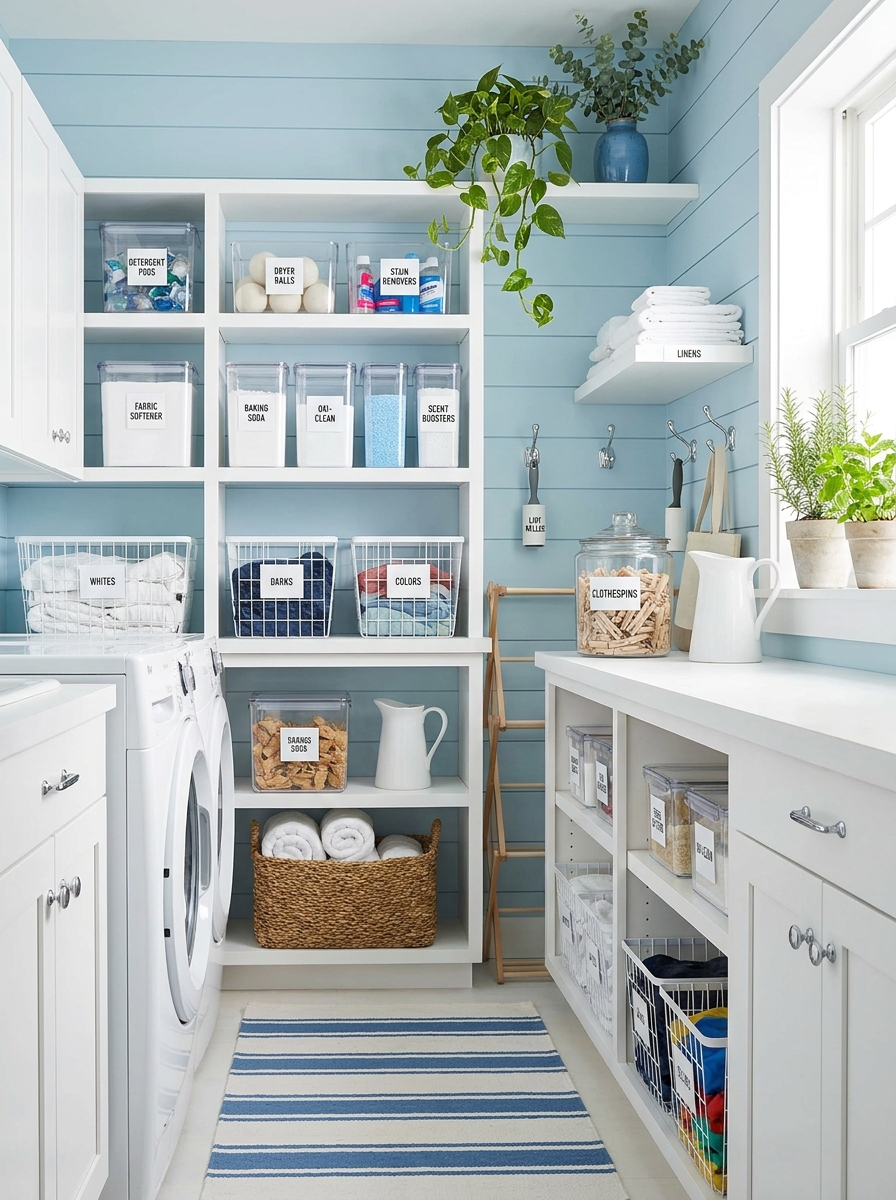
Okay, I’m slightly obsessed with my label maker and the laundry room is where it really shines! When everything has a clear label, your whole family actually knows where things go. No more “where do we keep the stain remover?” questions shouted from three rooms away.
Start with your sorting baskets—whites, darks, delicates, whatever system works for you. Then label your storage containers for detergent pods, dryer sheets, stain sticks, and all those random laundry supplies. Clear bins with crisp white labels look so satisfyingly organized. It’s like a Pinterest board came to life in your house.
I even label my shelves so folded towels and linens have designated homes. It sounds a bit extra, but it keeps everything tidy when you’re rushing to put away laundry. Plus, there’s something really satisfying about opening a cabinet and seeing perfectly labeled rows. It makes laundry feel less like a chore and more like you’ve got your life together!
7. Add a Rolling Cart for Extra Storage
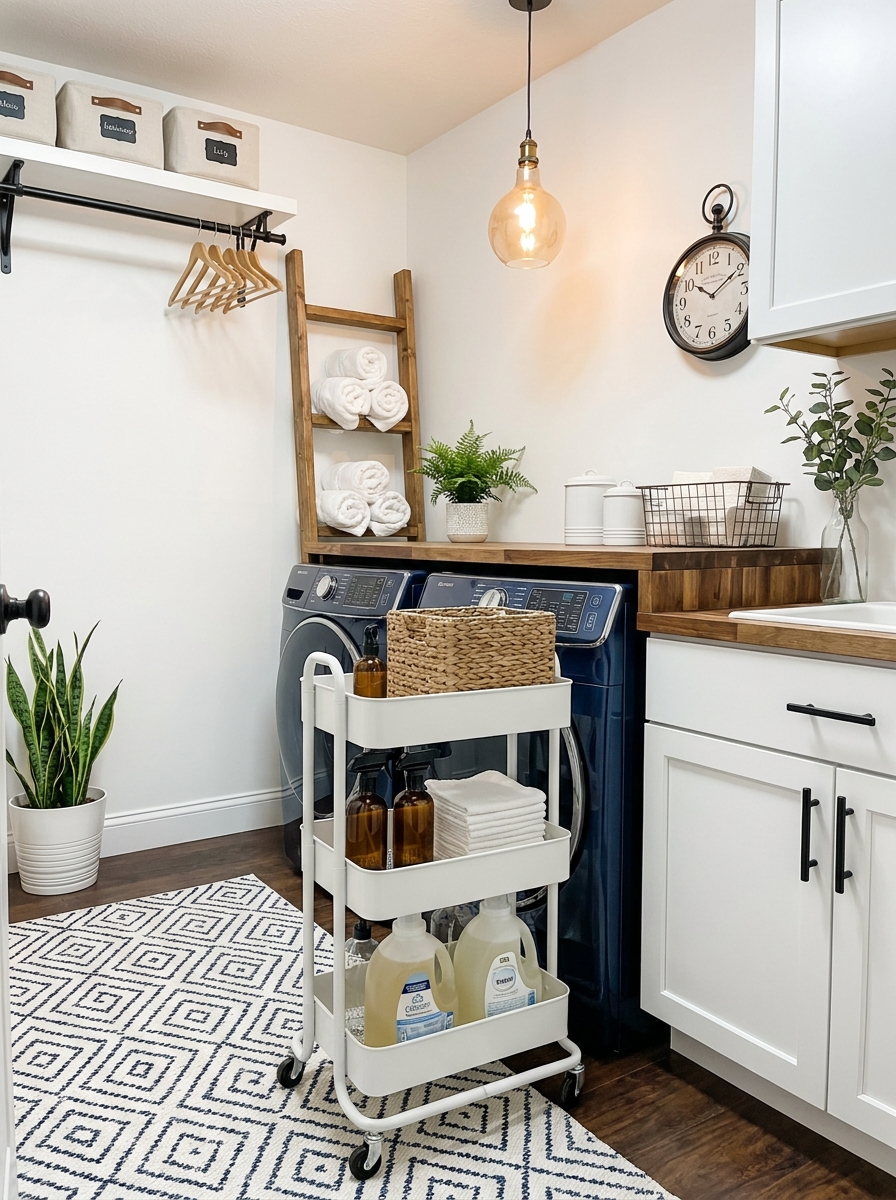
A slim rolling cart is like a secret weapon for laundry room organization! You can tuck it into that narrow gap beside your washer or dryer, and it holds way more than you’d think. I use mine for all the overflow stuff—extra detergent bottles, spray bottles, cleaning rags, and those weird specialty products you only use occasionally.
The beauty of a rolling cart is that it’s mobile. Need to deep clean behind your washer? Just roll it out of the way. Want to bring your stain-fighting supplies to the kitchen for a spill emergency? Wheel it right over. Look for ones with multiple tiers so you can really maximize vertical space.
I especially love the narrow carts that are only about six inches wide but have three or four levels. They slip into spaces you didn’t even know you had. Keep your most-used items on the top tier and less frequent stuff below. It’s amazing how much you can fit without making your laundry room feel cluttered!
8. Create a Command Center with Hooks and Bins
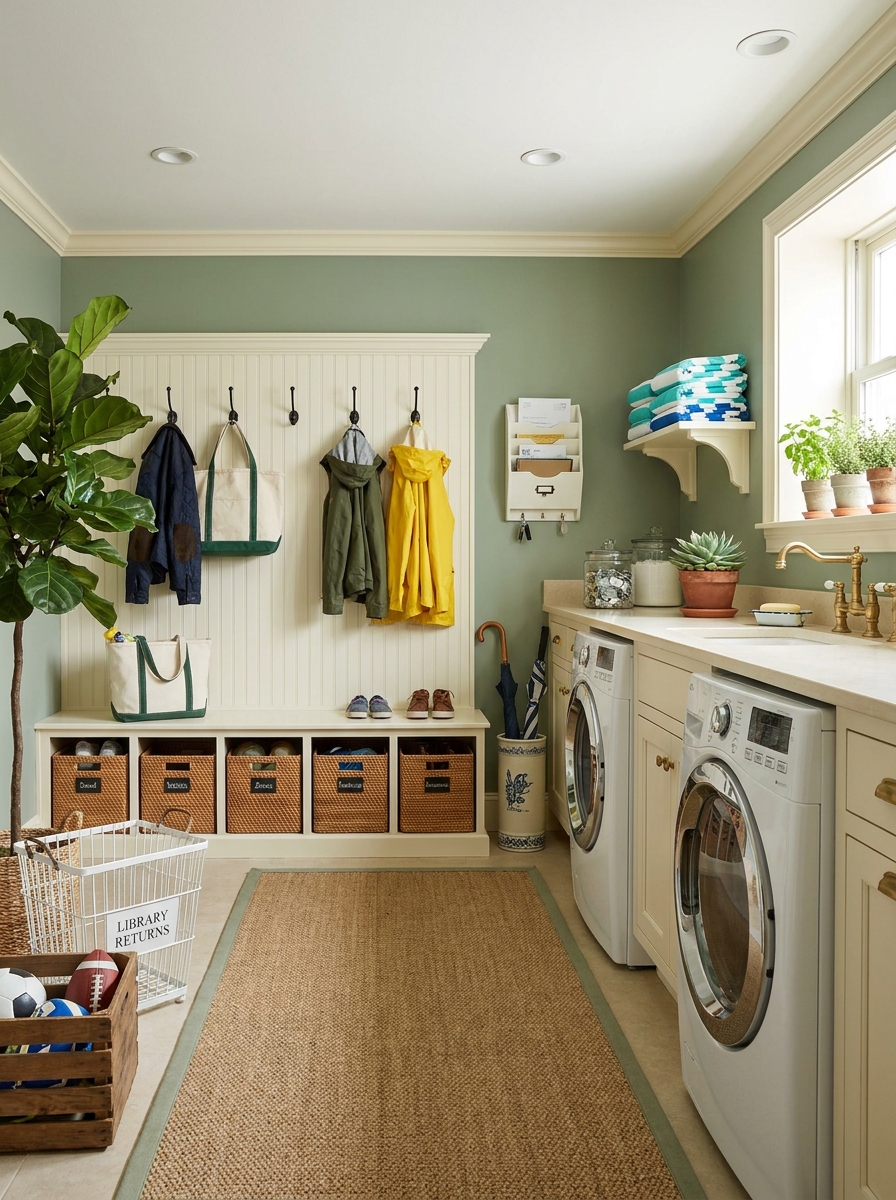
Turn one wall of your laundry room into a family command center and watch the magic happen! Install a row of sturdy hooks at different heights for hanging jackets, bags, and that random stuff everyone dumps when they walk in. Below the hooks, add open bins or cubbies for shoes, sports equipment, or each family member’s odds and ends.
This works especially well if your laundry room doubles as a mudroom entry. Everyone gets their own designated hook and bin, which somehow makes people actually put their stuff away. Add a label above each section with names or fun icons. It keeps the chaos contained instead of spreading throughout your house.
I like using a mix of hooks and bins because some things hang better while others need to be tossed in a basket. Keep a small bin for items that need to go upstairs or things waiting to be returned. This little addition transforms your laundry room from just a cleaning space into an actual functional hub of your home!
9. Install a Tension Rod Under Your Sink for Spray Bottles
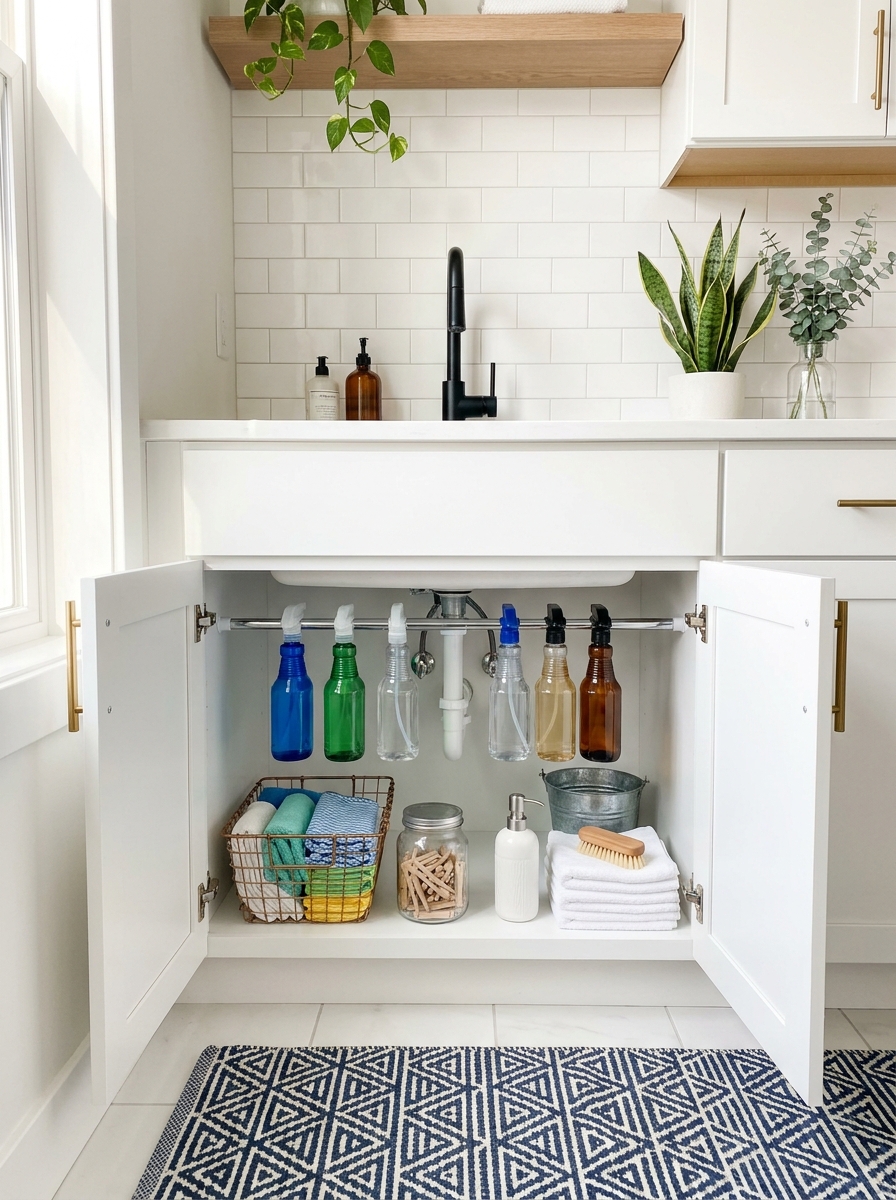
You know those spray bottles that always fall over and create chaos under your sink? Game changer alert! A simple tension rod installed under your utility sink creates instant hanging storage for all those bottles. Just loop the triggers over the rod and suddenly everything has a home.
I love this trick because it works in literally any laundry room. Whether you’ve got a deep utility sink or just a small cabinet underneath, a tension rod costs like three dollars and takes thirty seconds to install. Plus you can actually see what you have instead of digging through a pile of bottles every time you need stain remover.
The vertical storage frees up so much space underneath for larger items like your bucket or extra paper towels. And honestly? It just looks so satisfyingly organized when you open that cabinet door. Everything’s visible, nothing’s tipping over, and you feel like you’ve got your life together.
10. Add a Countertop Caddy for Daily Essentials
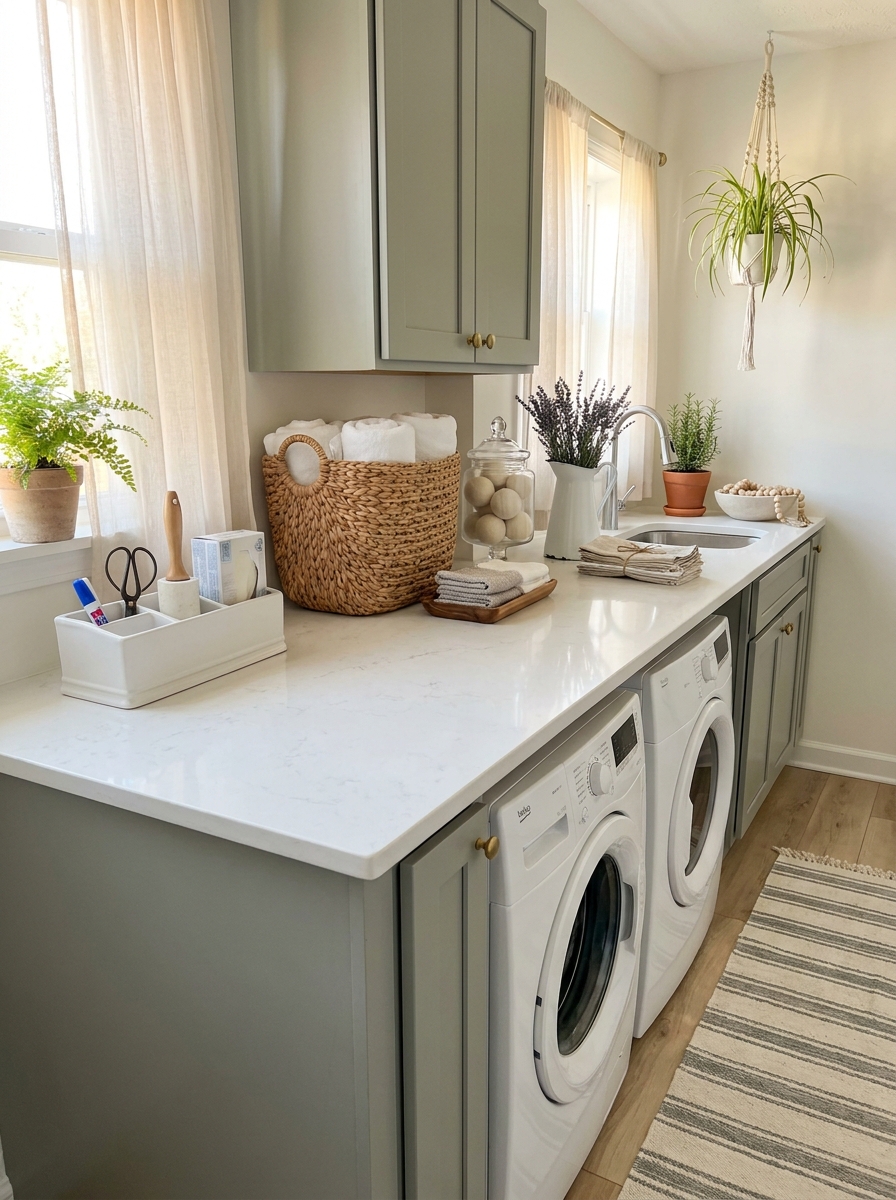
Stop leaving your stain stick, dryer sheets, and fabric softener scattered all over your folding station! A cute countertop caddy keeps everything you grab constantly in one pretty spot. I’m talking about those things you reach for multiple times a day that somehow always end up in random places.
You can use a ceramic utensil holder, a wire basket, or even a vintage metal toolbox. The key is choosing something that actually fits your laundry room vibe. I have a white ceramic pitcher that holds my stain remover pen, lint roller, and scissors, and it makes me ridiculously happy every time I see it.
This is one of those tiny changes that makes a huge difference in your daily routine. Instead of opening drawers and digging around, everything’s right there at arm’s reach. Plus it keeps your countertop from looking cluttered because there’s an actual designated spot for the stuff you use all the time.
11. Use Clear Stackable Bins in Upper Cabinets
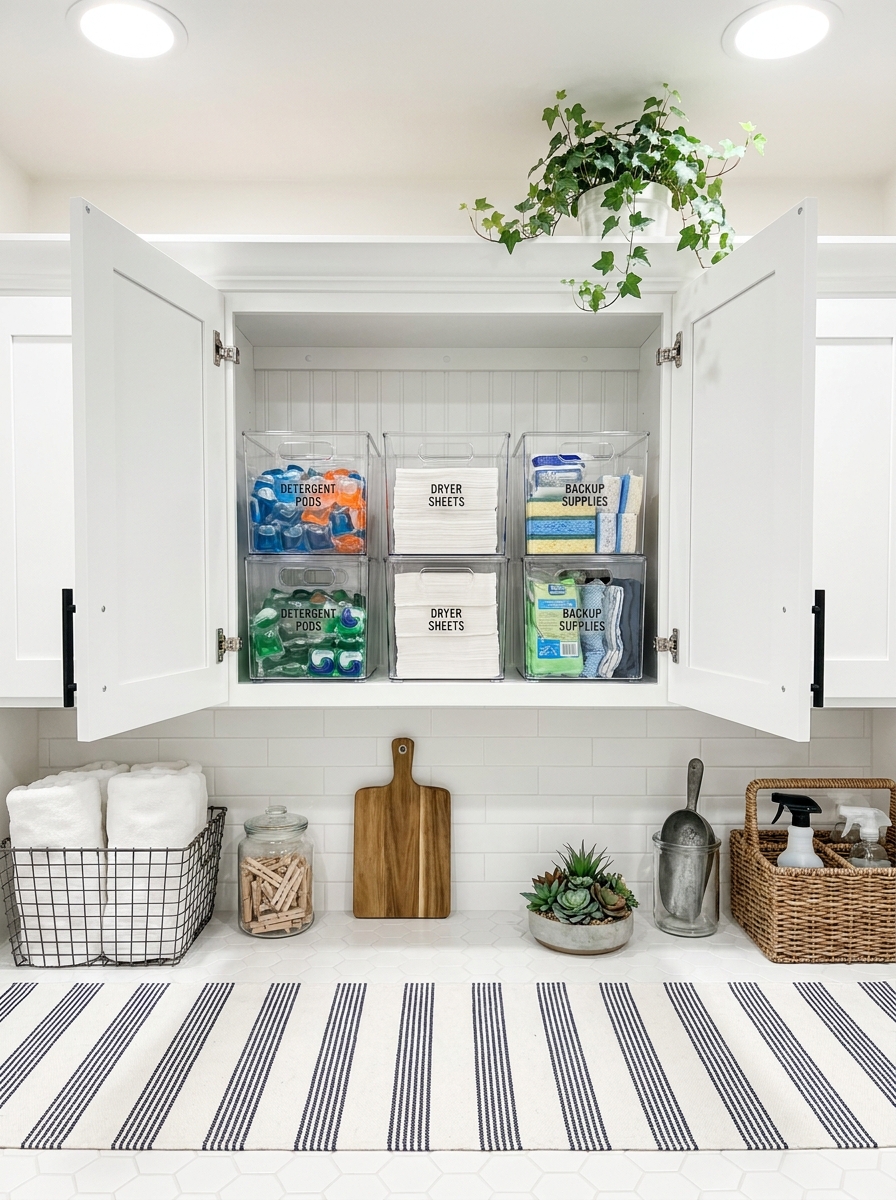
If you can’t see it, you’ll forget you have it. That’s why clear stackable bins in your upper cabinets are absolute magic for laundry room organization. Instead of shoving random stuff into dark cabinet corners and losing track of everything, you can actually see your inventory at a glance.
I use these for backup supplies like extra detergent pods, stain removers, and dryer sheets. The stackable part is key because you’re maximizing vertical space in those cabinets. And because they’re clear, I know exactly when I’m running low on something without playing cabinet Tetris every time.
The best part? You can pull out the whole bin instead of reaching into the back of a deep cabinet and knocking everything over. Label the front of each bin and suddenly your laundry cabinet looks like a Container Store display. It’s that satisfying organized feeling that makes you want to show everyone who visits your house.
12. Create a Lost Sock Station with Small Baskets
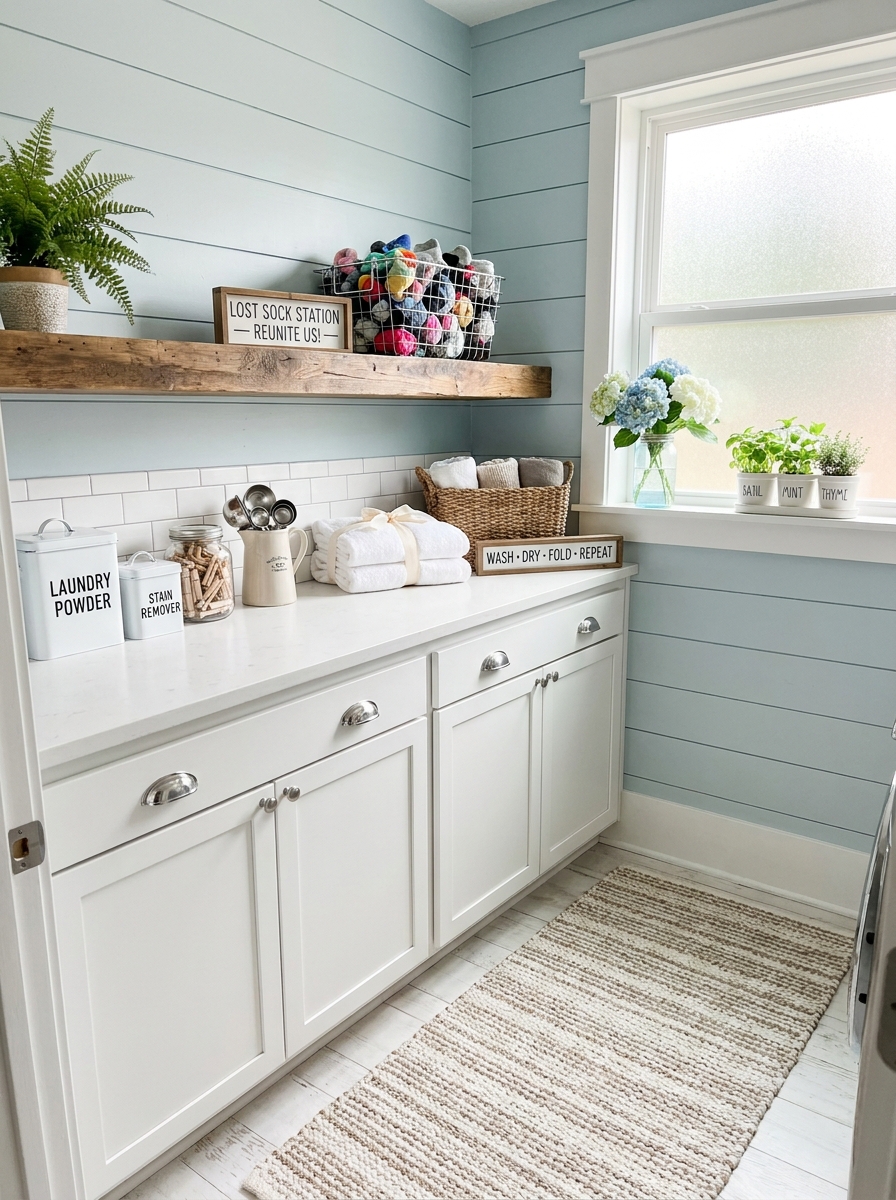
Let’s be real—the missing sock situation is never going away. But you can at least manage the chaos with a dedicated lost sock basket. I keep a small wire basket on my shelf specifically for lonely socks waiting to be reunited with their partners, and it’s honestly been life-changing.
Instead of throwing single socks back in the drawer or leaving them in the dryer hoping their match shows up, they all go in one spot. Then once a month I do a sock matching session and it’s like a little reunion party. The ones that never find their match? They become cleaning rags or dog toys. Problem solved.
This works especially well if you have kids because their tiny socks are the worst offenders for going missing. Having a visible basket means everyone in the family knows where orphan socks live, and occasionally someone will actually match them up without being asked. Miracles do happen!
13. Mount a Fold-Down Ironing Board Inside a Cabinet
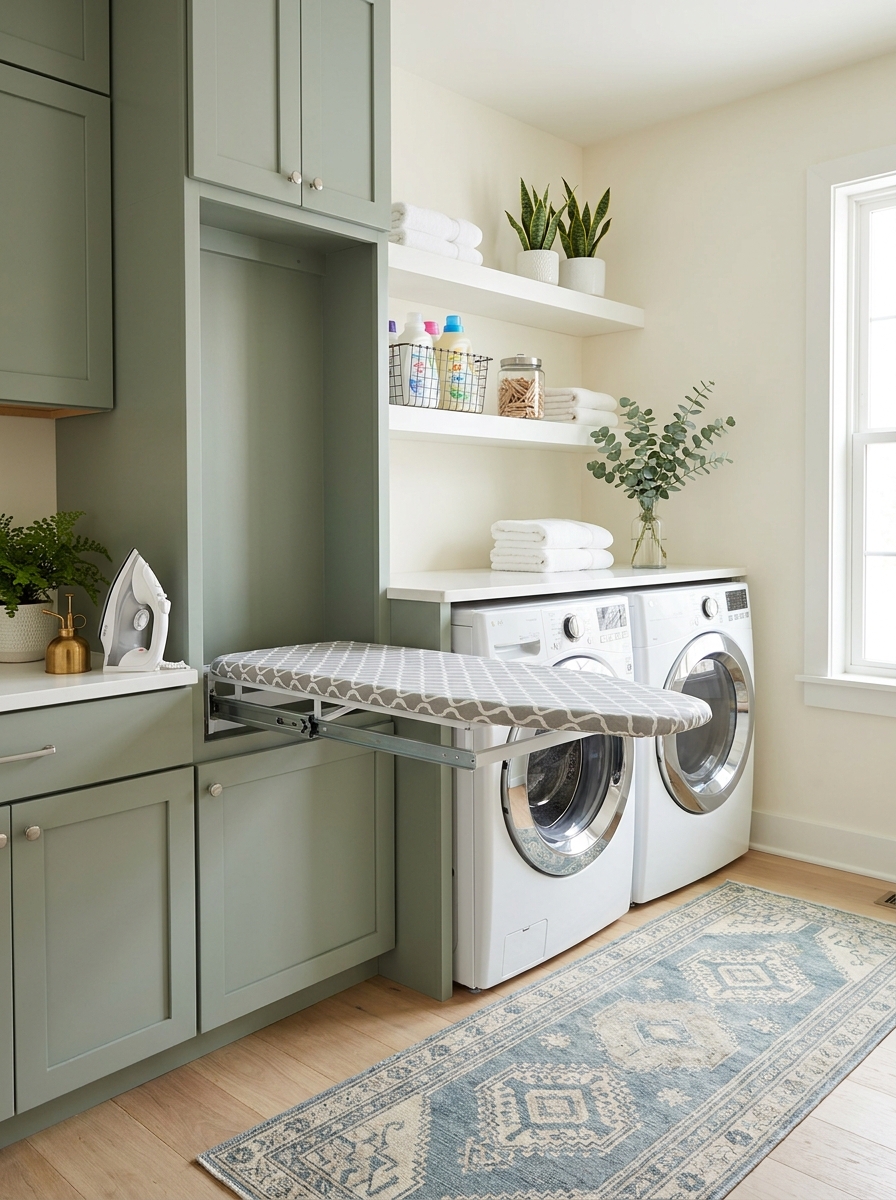
This is one of those why-didn’t-I-think-of-this solutions that makes me giddy! A fold-down ironing board mounted inside a cabinet door or on the wall saves so much floor space. You just pull it down when you need it, iron your stuff, then tuck it away completely out of sight.
I love this because it keeps your laundry room looking clean and uncluttered while still giving you a proper ironing station. No more dragging that bulky board from the closet or tripping over it in the corner. Some models even have built-in storage for your iron and spray bottle right there in the same unit.
Installation is pretty straightforward if you’re handy with a drill. Mount it to a solid cabinet door or directly to the wall studs. Make sure you measure your space first so the board has enough clearance to swing down fully without hitting anything.
14. Install a Backsplash Behind Your Washer and Dryer
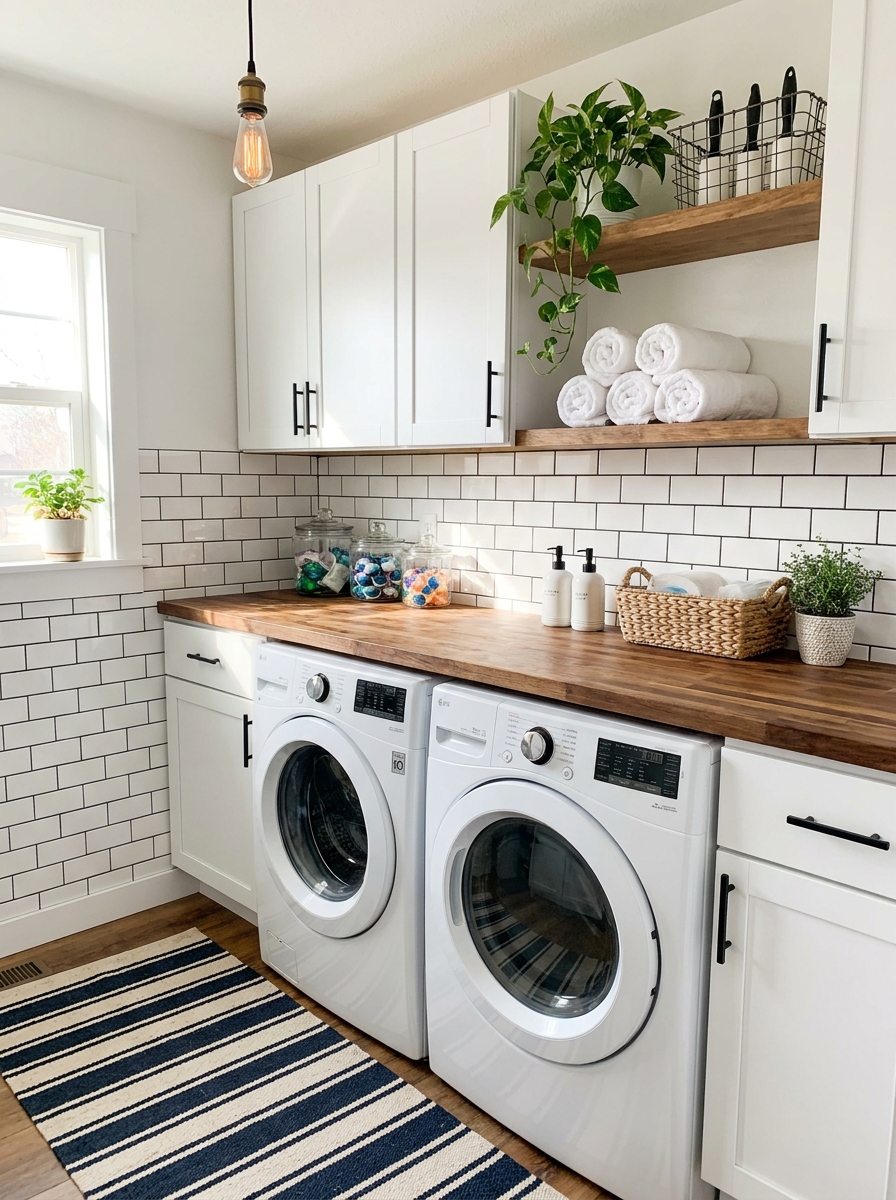
Okay, hear me out! A backsplash isn’t just for kitchens. Adding tile or beadboard behind your washer and dryer protects your walls from water splashes and detergent drips while making the whole space look intentionally designed.
I’m obsessed with how this tiny upgrade makes a laundry room feel finished and special. You can go with classic white subway tile for a clean look, or try peel-and-stick tiles if you’re renting or want an easy DIY project. Even a simple beadboard panel painted in a fun color completely transforms the vibe.
The practical side is huge too. Instead of repainting water-stained walls every year, you just wipe down the backsplash. It’s especially smart if you have top-loading machines where water and soap can splash around. Plus it gives you a pretty backdrop for all those cute storage containers you’re styling on top of your machines!
15. Add Under-Cabinet Lighting for Better Visibility
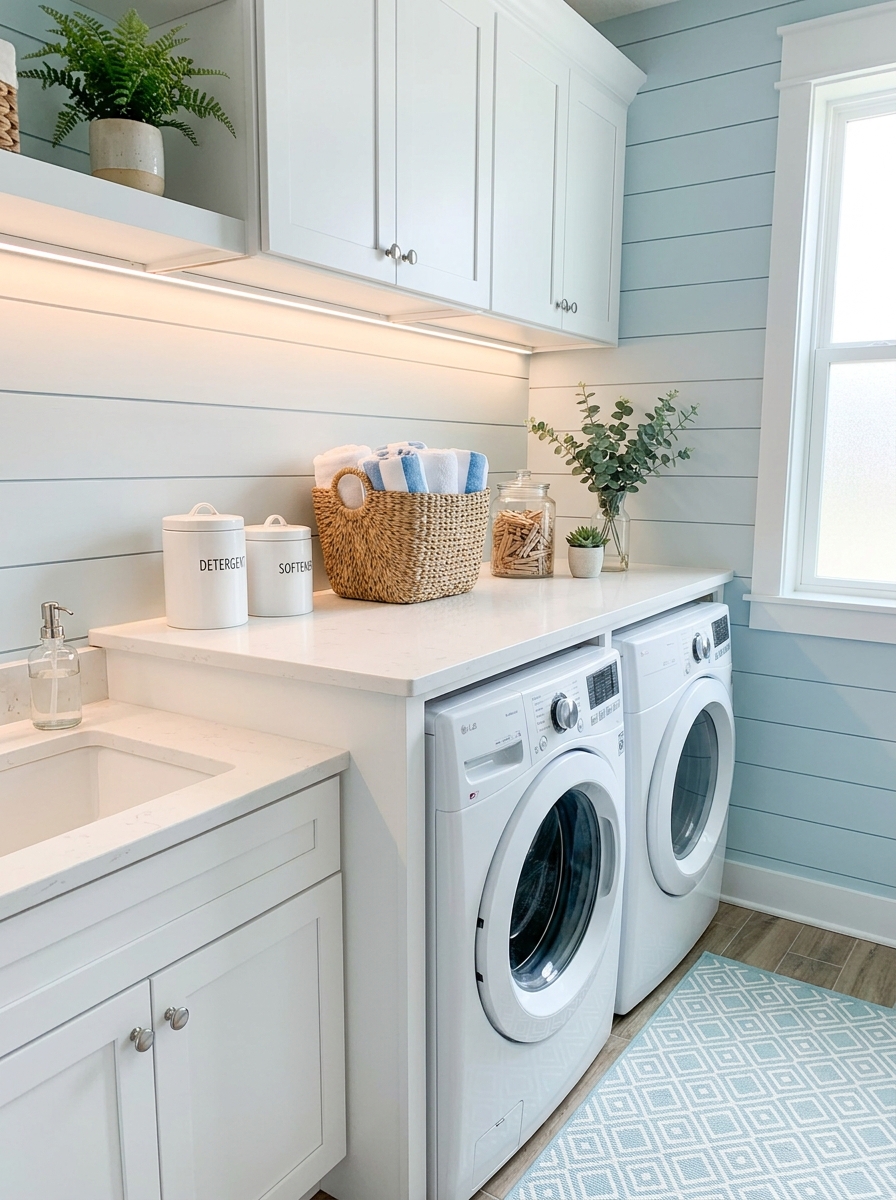
This one’s a total game-changer if you do laundry at night or have a windowless laundry room. Under-cabinet LED strip lights brighten up your workspace so you can actually see what you’re doing when you’re treating stains or folding clothes.
I cannot tell you how much easier it is to spot that random grass stain or find the dryer sheet that fell behind the machine when you have proper task lighting. Most LED strips are battery-operated or plug-in, so you don’t need to hire an electrician. Just stick them under your upper cabinets or shelves and boom—instant upgrade.
The lighting also makes your laundry room feel more welcoming and less dungeon-like. There’s something about good lighting that makes even chores feel less terrible, you know? Go for warm white bulbs rather than harsh cool white so the space feels cozy instead of clinical.
16. Create a Stain Treatment Station with a Small Tray
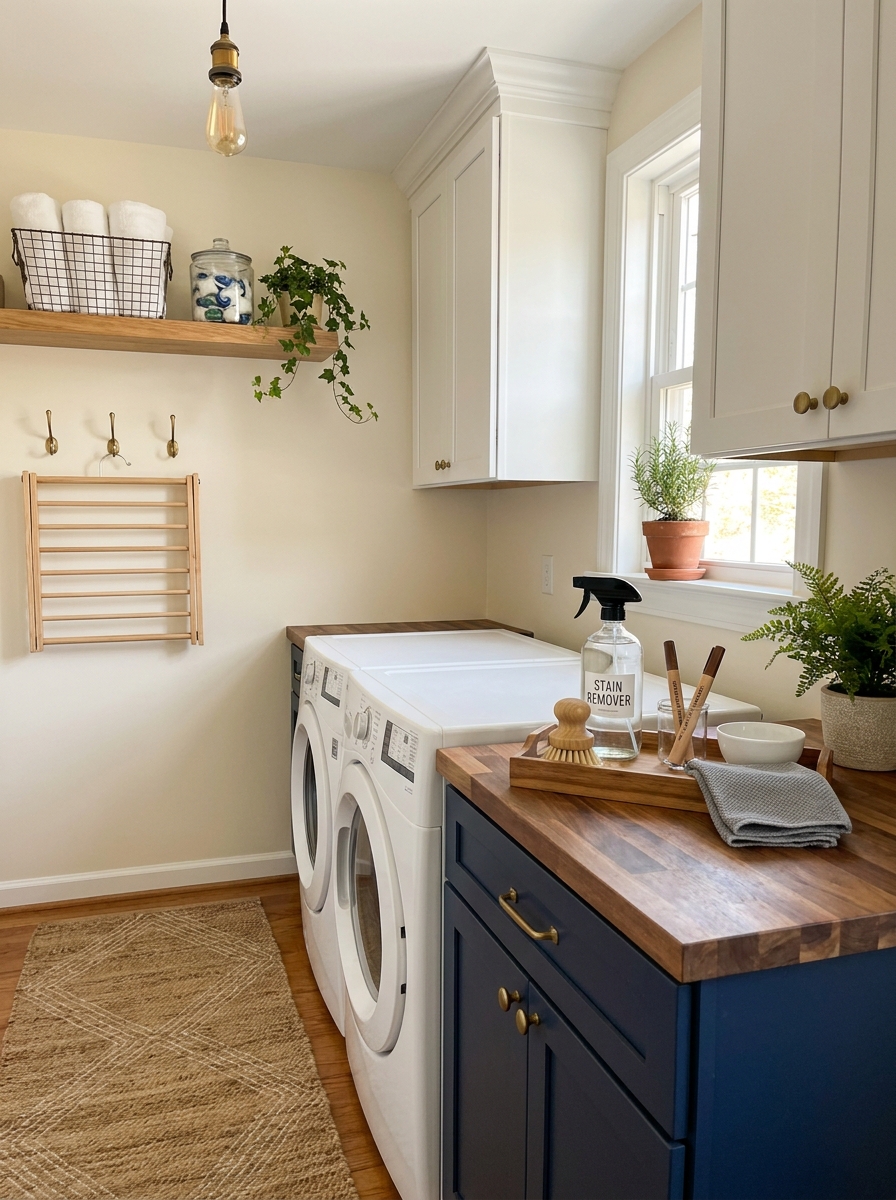
Let’s be real—stain treatment happens way more often than we’d like. Instead of hunting for your stain stick every single time, create a dedicated little station on your countertop with everything you need in one spot.
I use a small wooden tray or a cute ceramic dish to corral my stain remover spray, a stain stick, a soft brush for scrubbing, and maybe some oxygen cleaner powder. Having it all together means you can tackle stains the second you spot them, which is when treatment actually works best. Plus it looks intentional and pretty instead of like random bottles scattered everywhere.
This is one of those micro-organization things that makes daily life so much smoother. No more running around looking for supplies while that coffee stain sets deeper into your favorite shirt. Everything’s right there, ready to go, looking cute on your countertop.
17. Install a Wall-Mounted Drying Rack That Folds Away
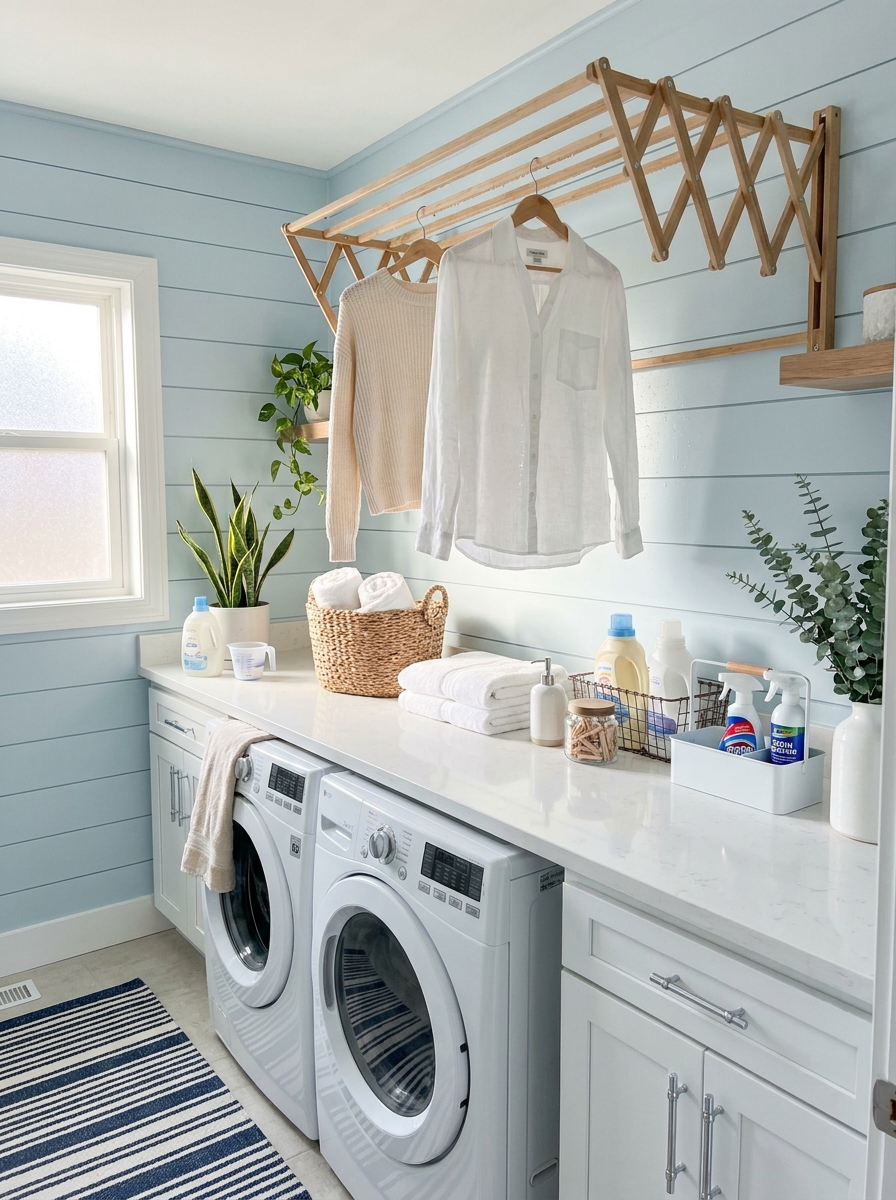
I discovered these wall-mounted accordion racks years ago and honestly? Game changer. They pull out when you need them and fold flat against the wall when you don’t. No more draping delicates over door frames or chair backs!
Mount one above your washer or next to your utility sink. The wooden ones look gorgeous and hold way more weight than you’d think. I can fit multiple sweaters, bras, and delicate tops all at once. When everything’s dry, I just fold it back up and it practically disappears.
The best part is reclaiming your space. My old freestanding drying rack lived in the corner taking up valuable floor space even when I wasn’t using it. Now I have room to move around, and my laundry room actually feels bigger. Plus it looks intentional and pretty, not like laundry chaos took over. If you hand-wash anything regularly, this is absolutely worth the wall space.
18. Design a Pretty Detergent Decanting Station
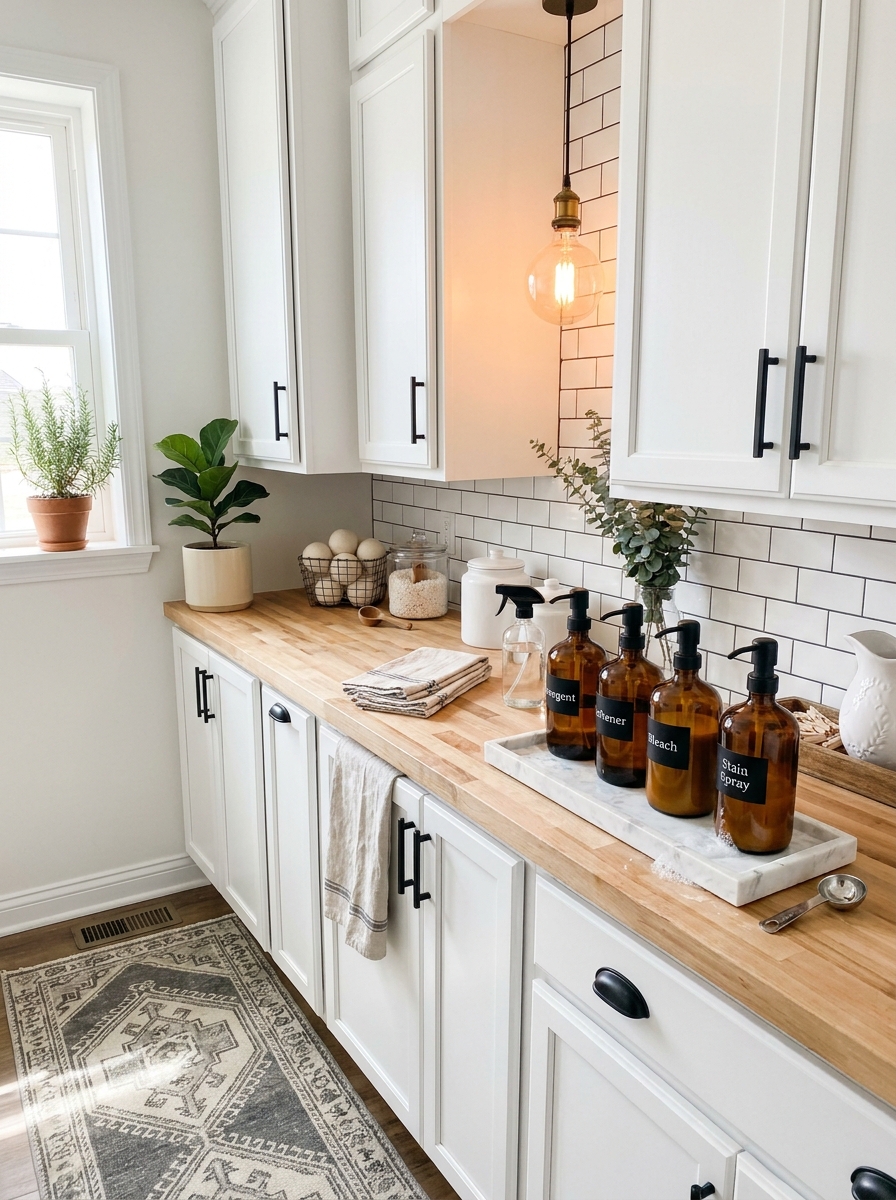
Can we talk about how ugly laundry detergent bottles are? Those bright orange and blue monstrosities do not spark joy. I started pouring everything into matching glass dispensers and suddenly my laundry room felt like a boutique spa instead of a utility closet.
Get a set of glass or ceramic containers with pumps and labels. Pour your liquid detergent, fabric softener, and stain spray into them. Line them up on a pretty tray on your countertop or shelf. It sounds extra, but hear me out—it makes doing laundry feel less like a chore and more like self-care.
I keep mine on a marble tray with a small plant and suddenly I don’t mind spending time in there. Friends always comment on how pretty it looks. Plus, those glass dispensers with pumps are way easier to use than wrestling with giant plastic jugs. One pump is exactly one load. No more glugging and guessing and making sticky messes everywhere.
19. Add a Magnetic Board for Laundry Care Instructions
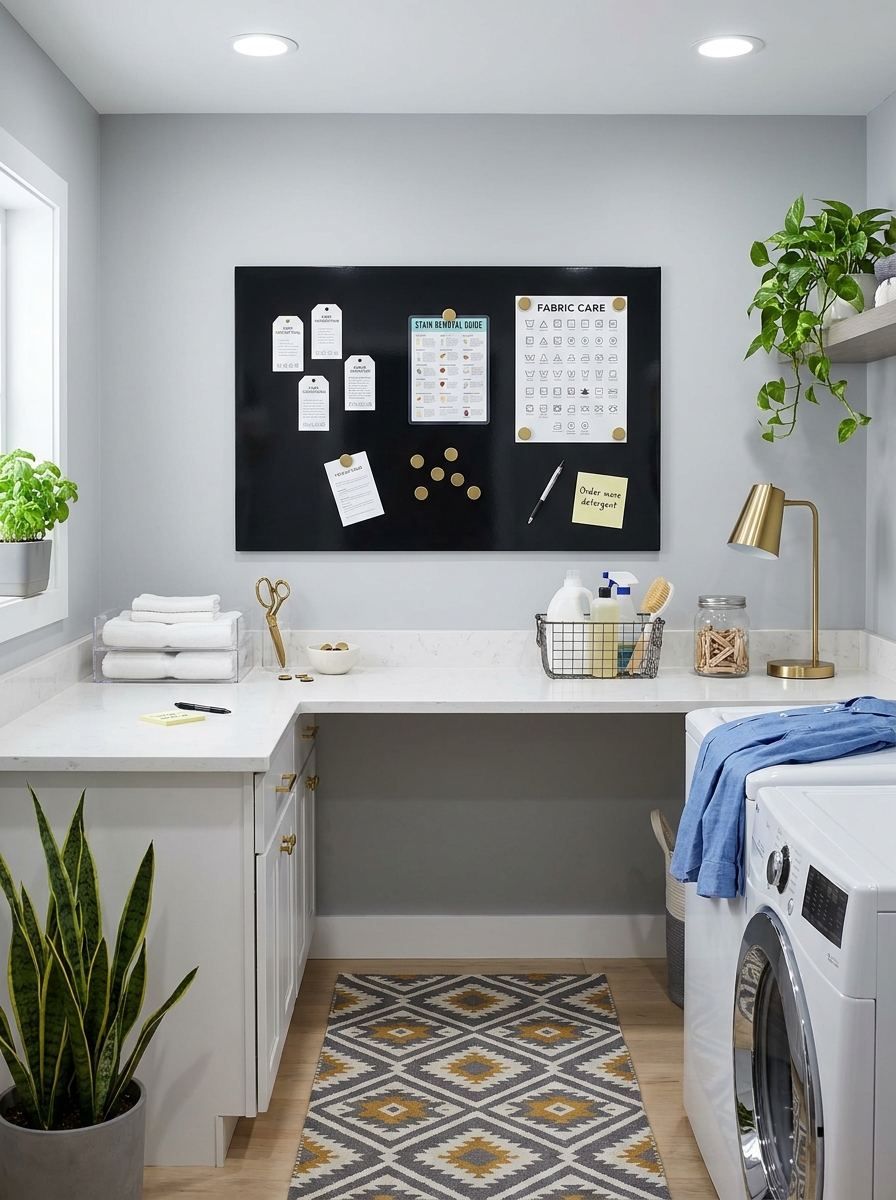
I used to keep a crumpled pile of care tags in a drawer because I could never remember if that one sweater needed cold water or if those new jeans could go in the dryer. Then I hung a magnetic board and started pinning up important care tags and quick reference charts. Total sanity saver.
Mount a small magnetic board or even a framed metal sheet on your wall. Use magnets to attach care labels from tricky garments, a cheat sheet for stain removal, or washing temperature guidelines. You can even clip up color-safe bleach instructions or that one friend’s hand-me-down cashmere sweater tag.
Mine lives right above my folding station so I can glance up while sorting. No more shrinking sweaters or turning white shirts pink because I forgot to check pockets. It’s especially helpful when your partner does laundry and doesn’t know which items need special treatment. Just point to the board and everyone’s on the same page.
20. Create a Color-Coded Hamper System for the Whole Family
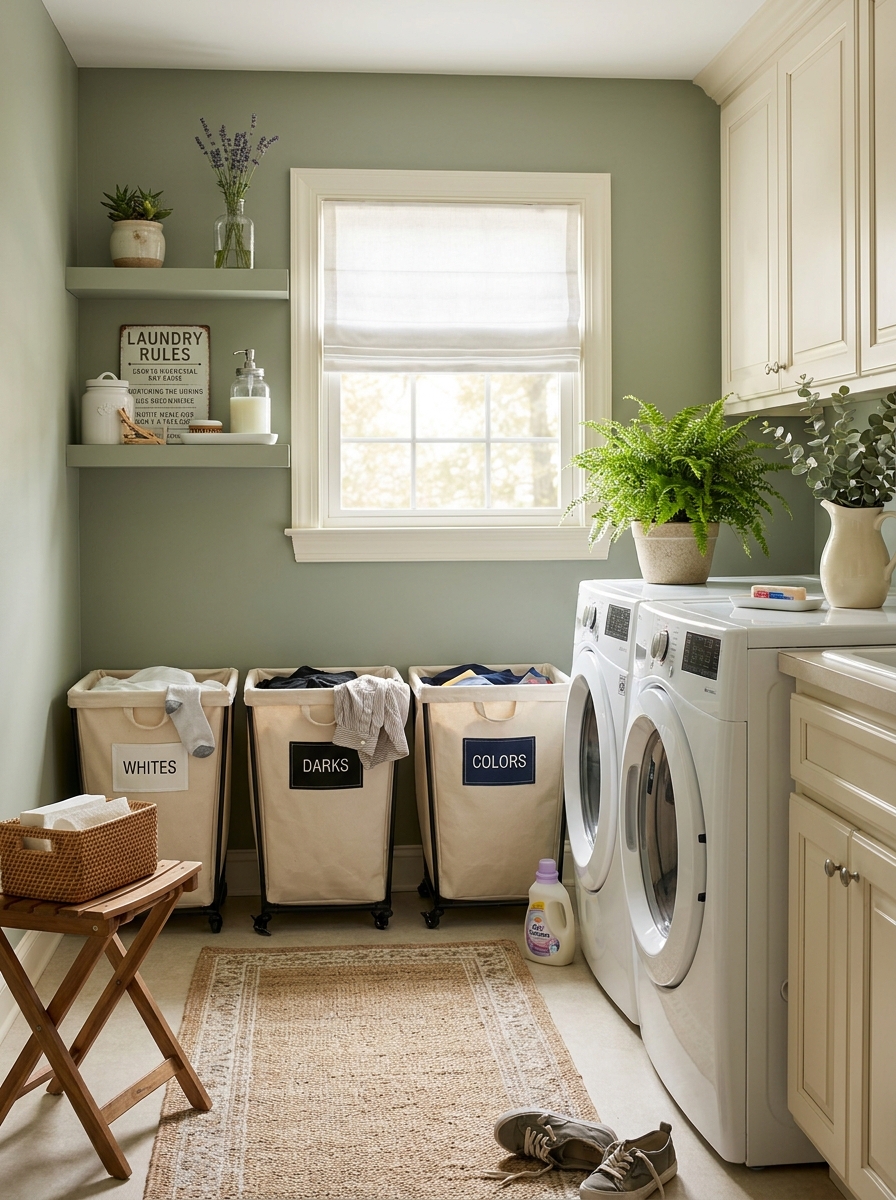
This idea changed laundry day from chaos to clockwork in my house. Instead of everyone dumping mixed clothes in one hamper, I set up color-coded bins—whites, darks, colors. Everyone sorts as they go. No more sitting on the laundry room floor making piles before every load.
Get three matching hampers or large canvas bins in different colors or with different colored labels. Put them in your laundry room or even in a hallway closet. Train everyone to toss clothes in the right bin. When one fills up, it goes straight into the wash. No pre-sorting needed.
My kids actually love it because it’s visual and easy. Even my husband got on board once he realized it meant less time spent doing laundry. I’ve been doing this for three years and I’ll never go back. It’s one of those simple systems that makes you wonder why you didn’t think of it sooner. Less time sorting means more time for literally anything else.
21. Build a Custom Shelf Above Your Door for Seasonal Items
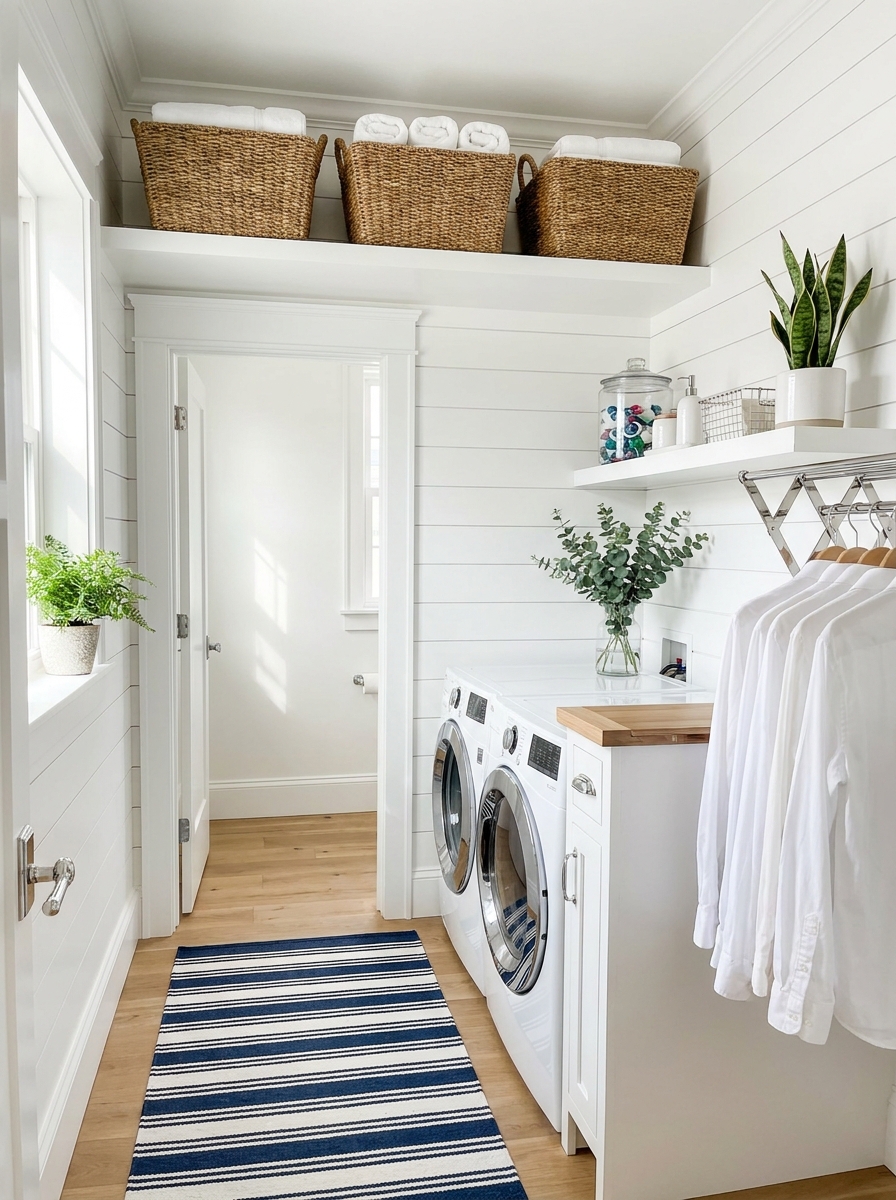
That awkward space above your laundry room door is actually prime real estate! Most of us just ignore it, but adding a shelf up there creates the perfect spot for things you don’t need every day.
I’m talking about seasonal stuff like beach towels in winter, extra blankets, or those bulky comforters that take up way too much room everywhere else. You could also stash cleaning supplies you buy in bulk or those random items that don’t have a home.
The key is making it look intentional, not just like you threw stuff up there. Use matching baskets or fabric bins so everything looks cohesive from below. I love the look of woven baskets because they add texture without feeling cluttered. And honestly? Once it’s up there, you kind of forget about it, which is exactly what you want for storage that works.
22. Install Cabinet Risers to Double Your Shelf Space
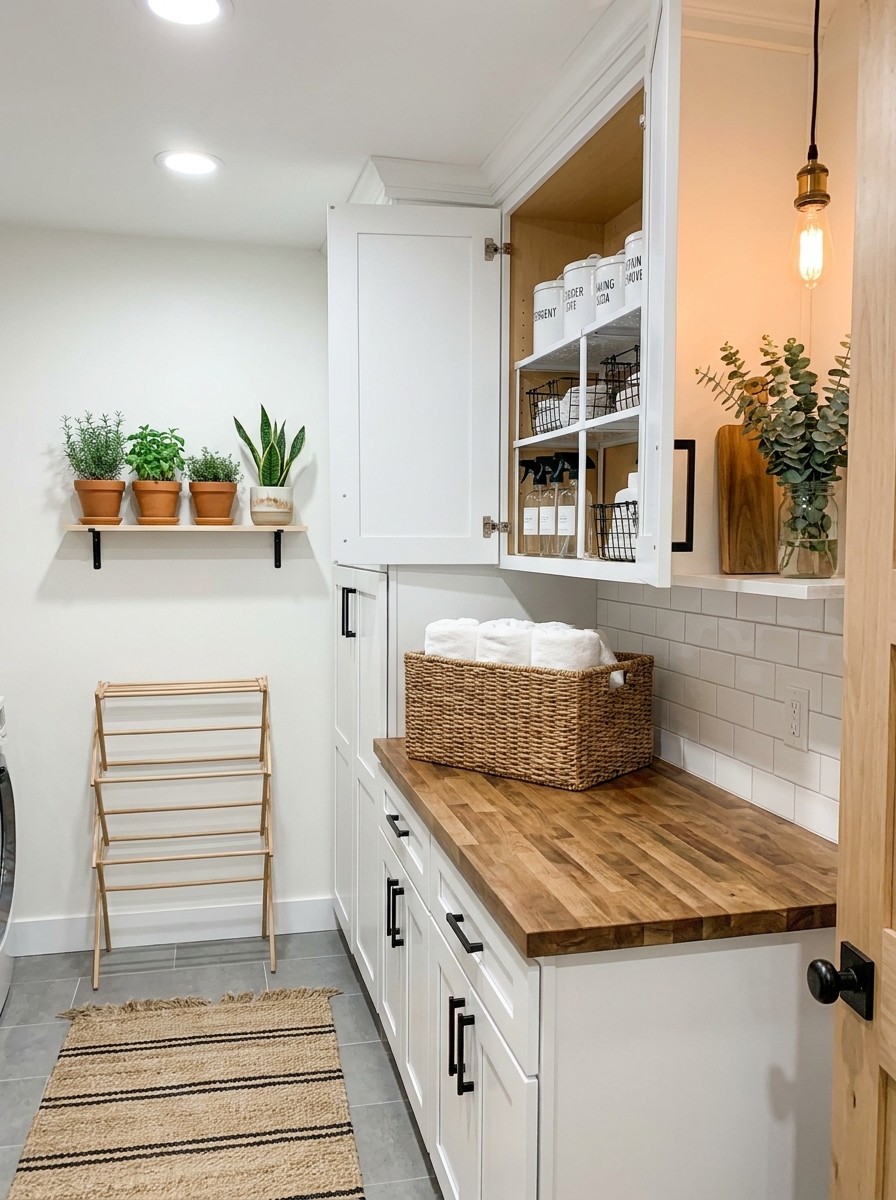
Cabinet risers are one of those things that seem too simple to actually work, but oh my gosh, they’re magic. You basically just pop these little shelf platforms inside your existing cabinets, and suddenly you’ve doubled your storage space.
I use them in my upper cabinets for stacking cleaning supplies, extra dryer sheets, and all those little bottles that always tip over. Instead of stacking things on top of each other where you can’t see what’s in back, everything gets its own level. Game changer.
They’re perfect for organizing by category too. Put all your stain removers on one riser, laundry boosters on another, and fabric softeners on the bottom. No more digging through a messy pile to find what you need. And because you can see everything at once, you’ll actually know when you’re running low on something before you completely run out.
23. Add a Slim Trash and Recycling Station Between Appliances
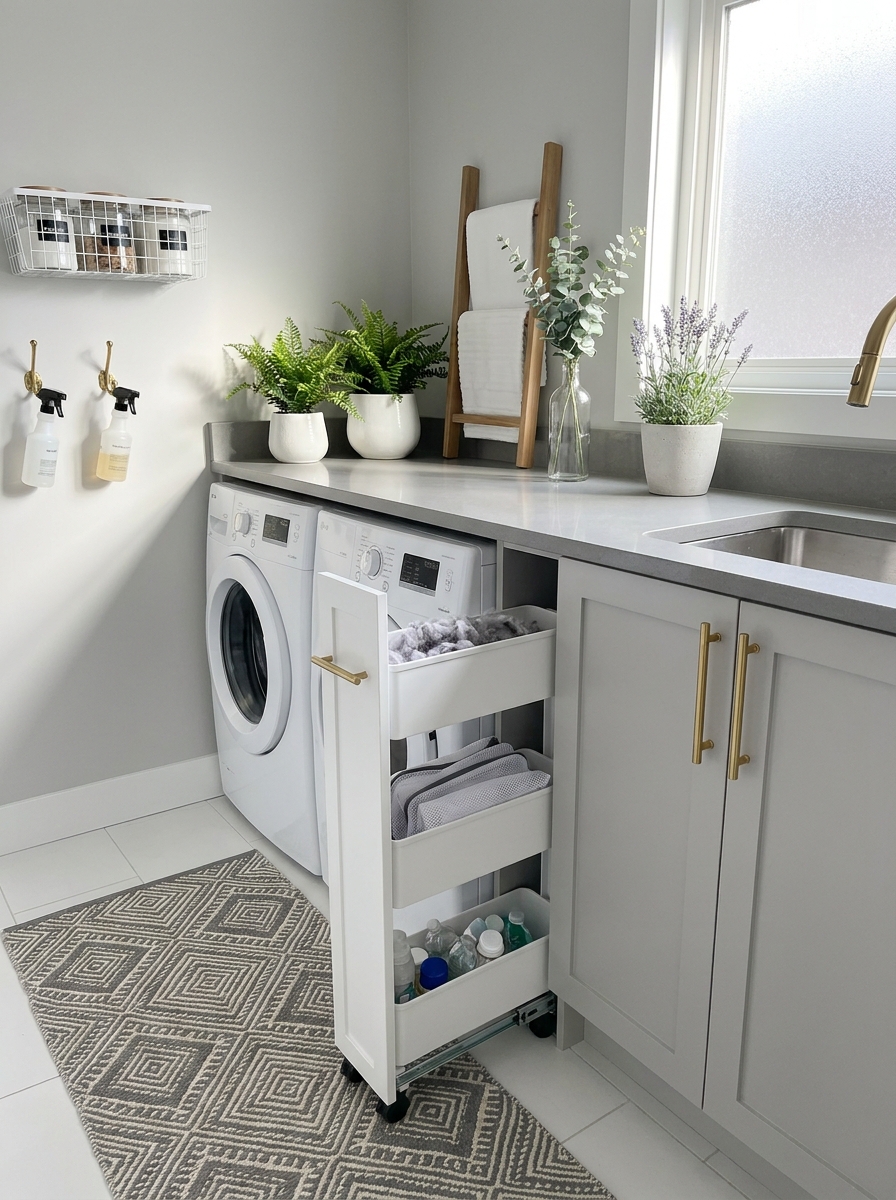
You know that narrow gap between your washer and dryer that just collects lint and lost socks? Turn it into something actually useful! A slim rolling trash and recycling station fits perfectly in that weird space.
I’m talking about those narrow carts that are only about 6 inches wide but surprisingly roomy. You can dedicate one bin for dryer lint and lint roller sheets, another for empty detergent bottles and cardboard, and maybe even a third for delicates that need hand washing.
The rolling feature is clutch because you can pull it out when you need it and tuck it away when you don’t. It keeps trash out of sight but totally accessible, which means you’ll actually use it instead of letting empty bottles pile up on your counter. Plus, having a designated spot for recyclables means you’re more likely to actually recycle those big detergent jugs.
24. Create a Lint Roller Station with Wall-Mounted Holder
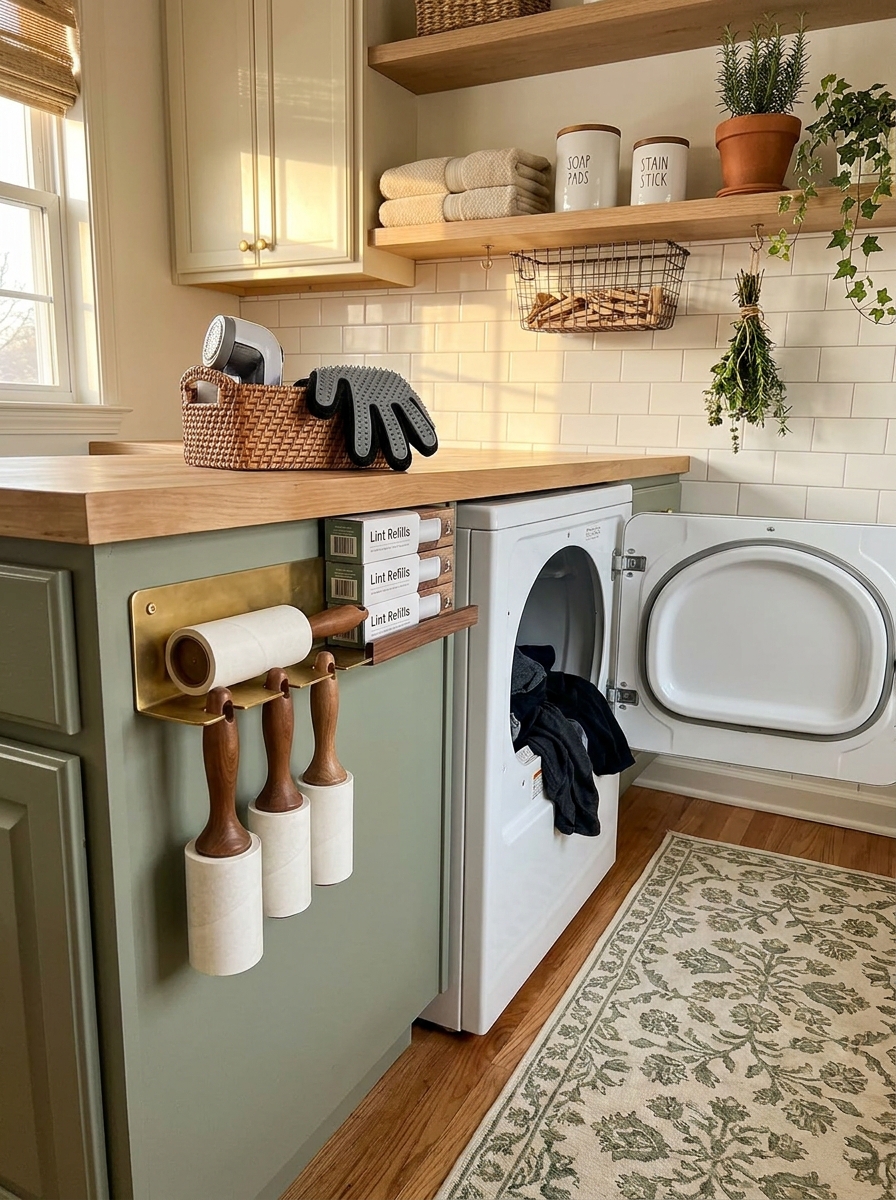
Lint rollers always seem to disappear right when you need them most, don’t they? Create a dedicated spot with a simple wall-mounted holder and you’ll never frantically search for one again while running late.
Mount it right inside your cabinet door, on the wall next to your dryer, or even on the side of a cabinet where it’s super accessible. Stock it with a few extra refills so you’re never caught without one. I also like keeping a small basket nearby with fabric shavers and those pet hair removal gloves.
Honestly, this is one of those tiny organizational wins that makes daily life just a bit smoother. When you’re grabbing clothes from the dryer and notice some fuzz, you can fix it immediately instead of walking around with linty black pants all day. It’s the little things that make a laundry room truly functional!
25. Install Over-the-Door Organizers for Cleaning Supplies
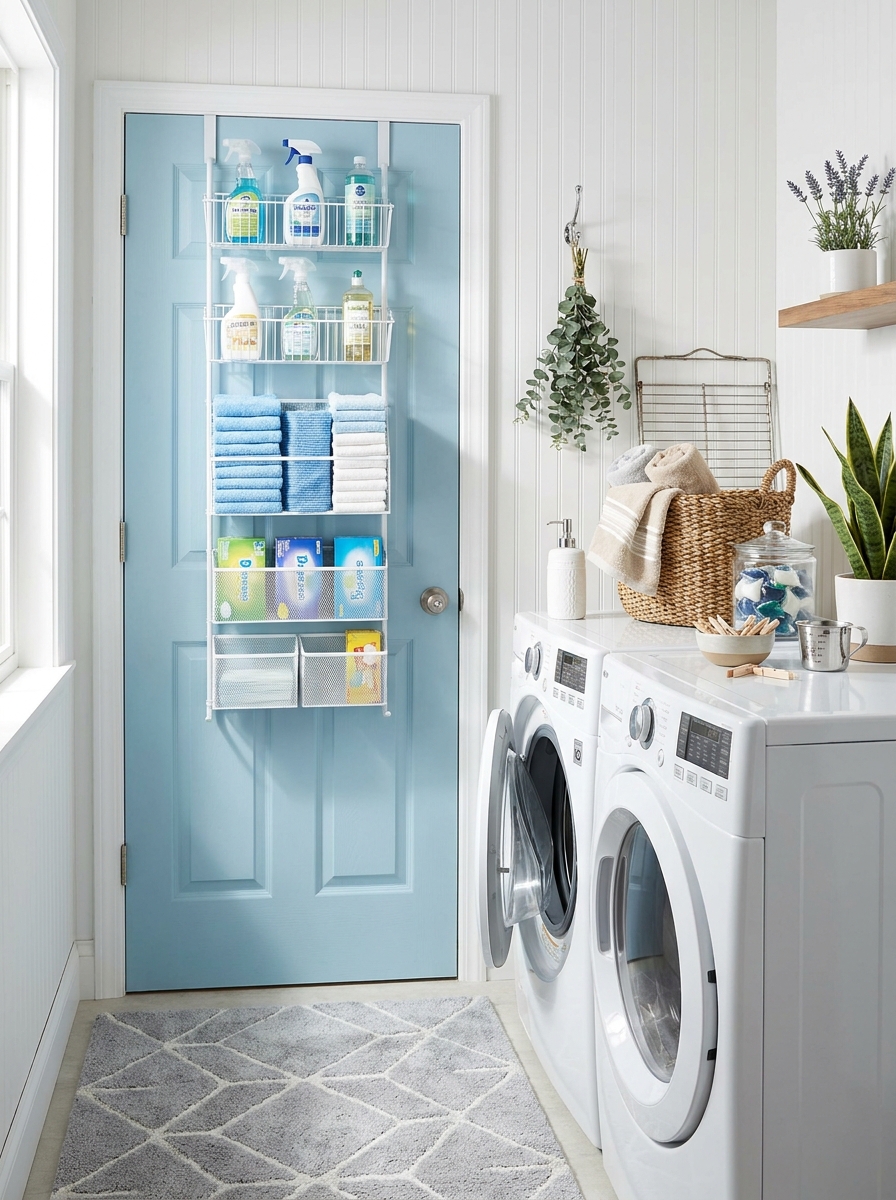
That awkward space behind your laundry room door? It’s prime real estate you’re probably ignoring! Over-the-door organizers are absolute lifesavers for vertical storage, especially in smaller laundry spaces.
I love the clear pocket organizers that let you see everything at a glance. Fill them with dryer sheets, stain sticks, sewing kits, safety pins, and all those little things that usually get lost in drawer chaos. The wire basket versions are perfect for heavier items like spray bottles and cleaning gloves.
The beauty of this solution is how much it frees up your cabinet and counter space. Everything’s visible and accessible, which means you’ll actually use that fancy stain remover instead of forgetting it exists. Plus, installation takes about thirty seconds—just hang it over the door and you’re done. No tools, no commitment, totally renter-friendly.
26. Add a Laundry Pedestal with Built-In Storage Drawers
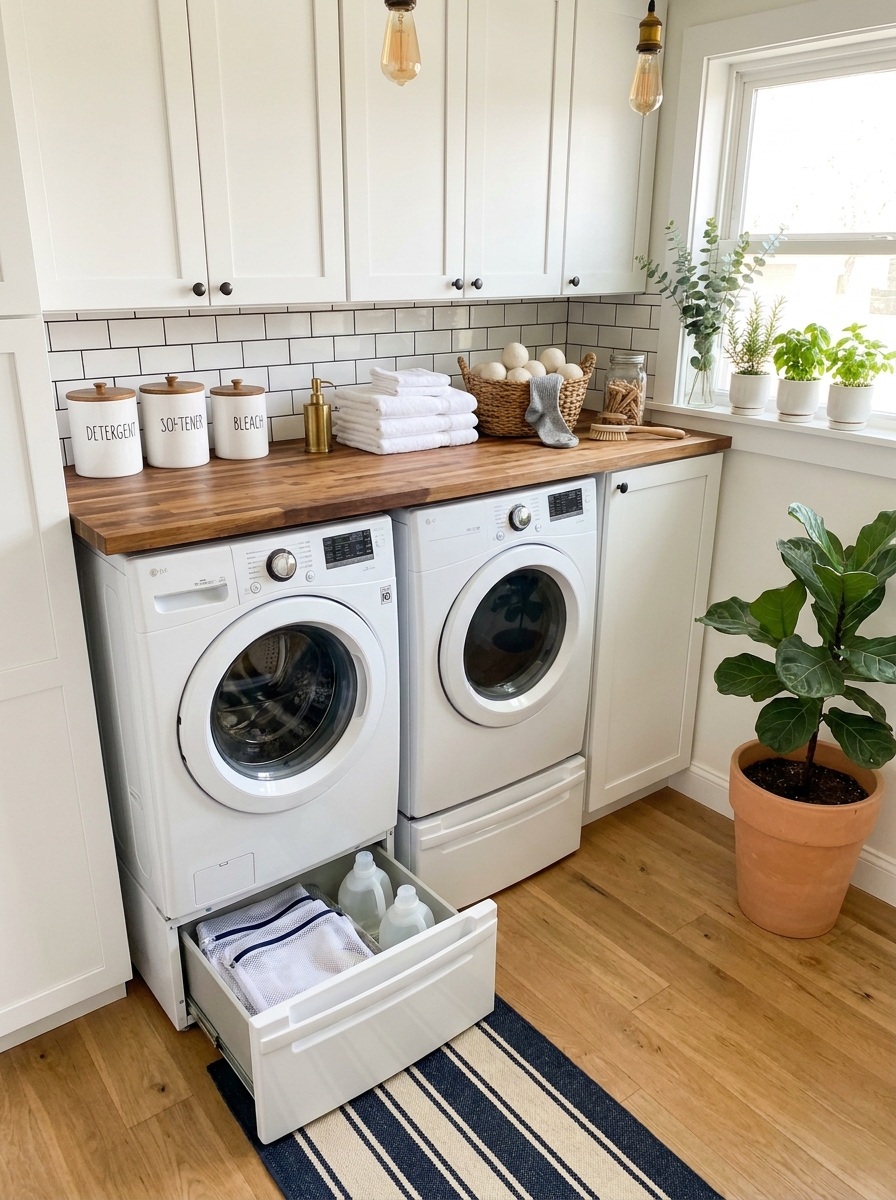
Can we talk about how much easier laundry gets when you’re not bending over constantly? Pedestals that lift your washer and dryer to a more comfortable height are total game-changers for your back—and the built-in drawers are bonus storage gold.
These drawers are perfect for storing all your bulky items like extra detergent bottles, dryer balls, mesh laundry bags, and beach towels you only use in summer. I keep my iron and ironing board cover in mine, along with a basket of mismatched socks waiting for their partners. It’s hidden storage that actually makes sense in a laundry room.
Yes, pedestals are an investment, but if you’re buying new machines anyway or planning to stay in your home for a while, they’re absolutely worth it. The ergonomic difference alone will make you wonder how you ever lived without one.
27. Create a Garment Steamer Station with Wall Hook
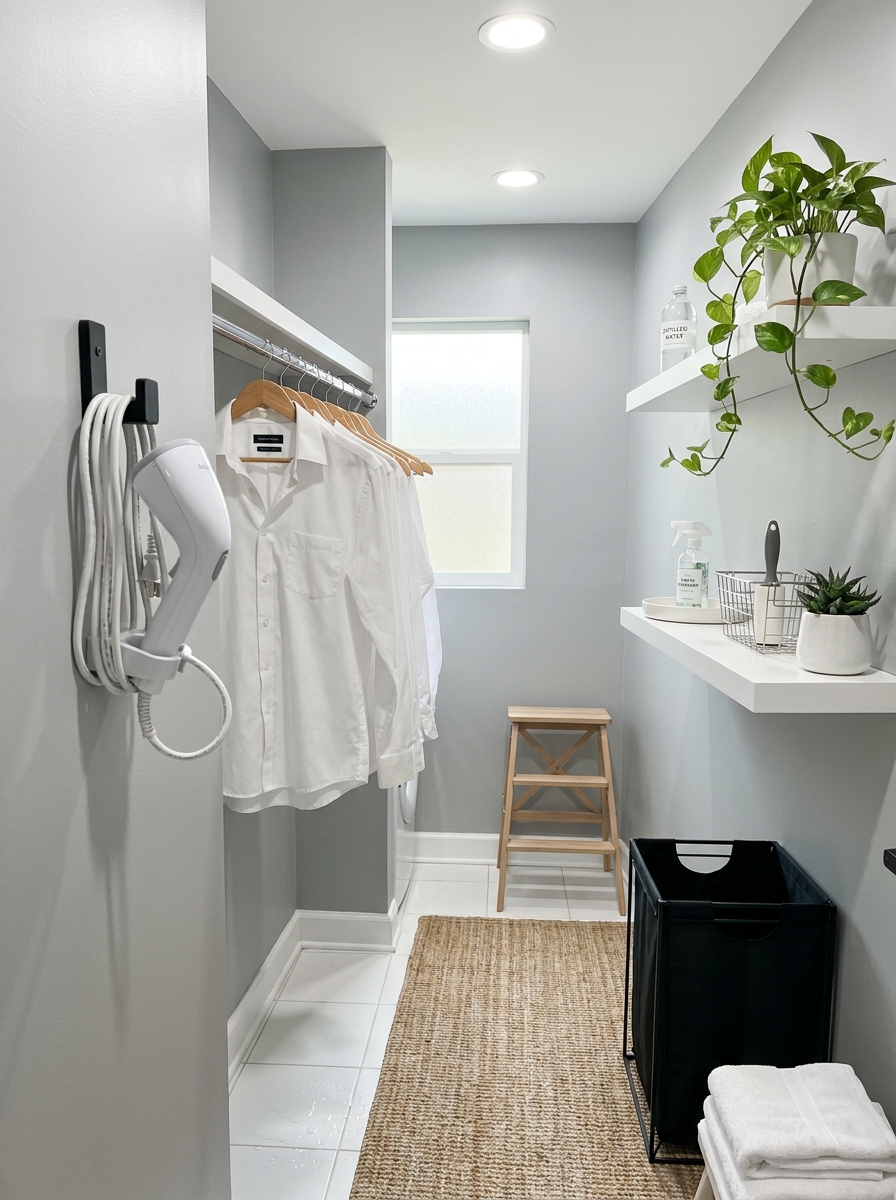
If you’ve discovered the magic of garment steamers, you know they’re way easier than ironing—but where do you actually keep them? Creating a dedicated steamer station keeps everything in one spot and ready to use.
Mount a sturdy hook on the wall (make sure it can handle the weight) and hang your steamer there. Add a small shelf or basket nearby for distilled water and any fabric refresher sprays you use. I keep mine right next to my hanging rod so I can steam clothes and immediately hang them up to cool.
This setup works beautifully in even the tiniest laundry closets. The vertical storage keeps your floor and counters clear, and having the steamer visible means you’ll actually use it instead of letting wrinkled shirts pile up on a chair. Trust me, future-you will be grateful when getting ready becomes infinitely faster.
28. Install a Utility Sink with Overhead Faucet for Soaking
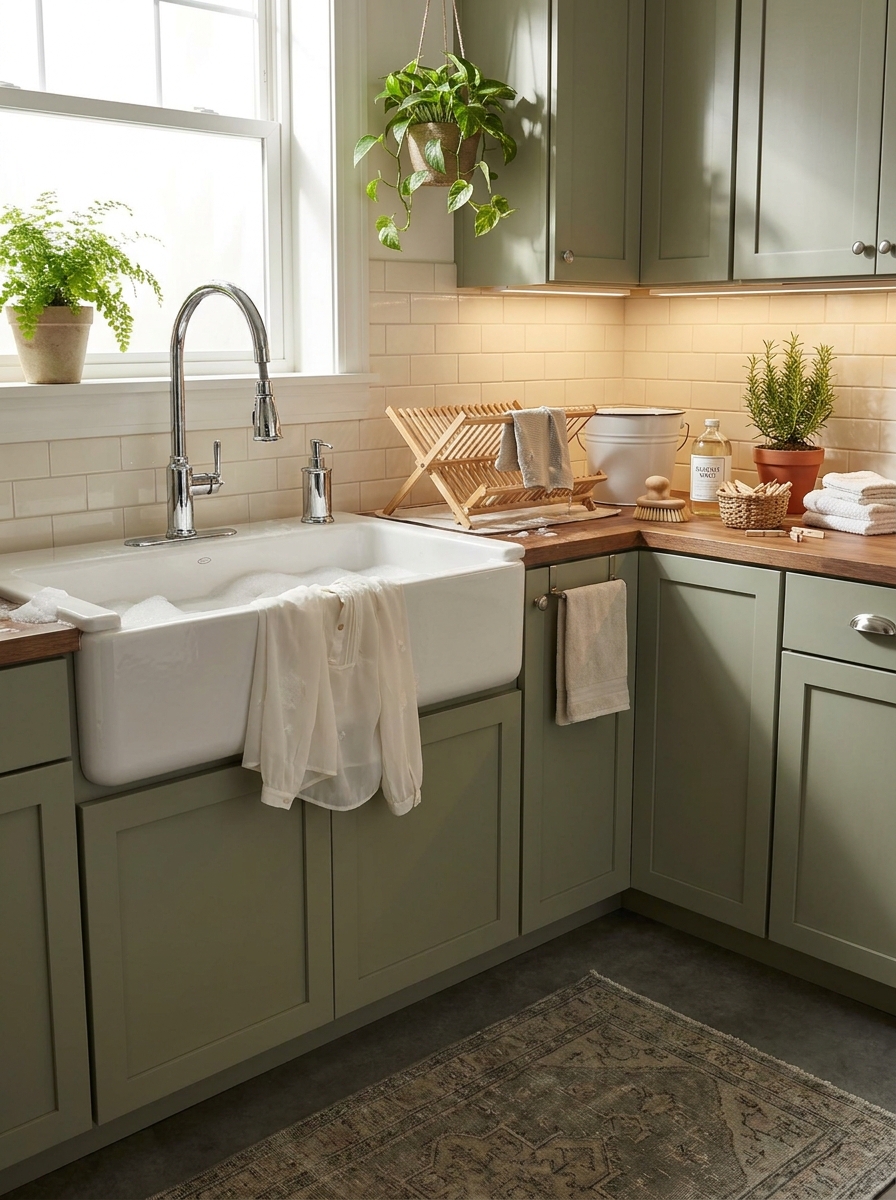
A utility sink in your laundry room is one of those upgrades that seems fancy until you realize how much you actually need it. For hand-washing delicates, soaking stained items, rinsing muddy clothes before washing, or filling mop buckets—it’s endlessly useful.
I’m obsessed with the deep farmhouse-style utility sinks with the high-arc faucets that give you tons of room to work. You can actually fit a bucket underneath! Add a soap dispenser built into the sink, and maybe a small drying rack on the side, and you’ve got a full hand-washing station that looks intentional and pretty.
If you have the space and plumbing access, this is the upgrade that takes your laundry room from basic to seriously functional. You’ll wonder how you managed without it every single time you need to rinse something that doesn’t belong in your kitchen sink.
29. Add a Hanging Rod for Air-Drying Delicates
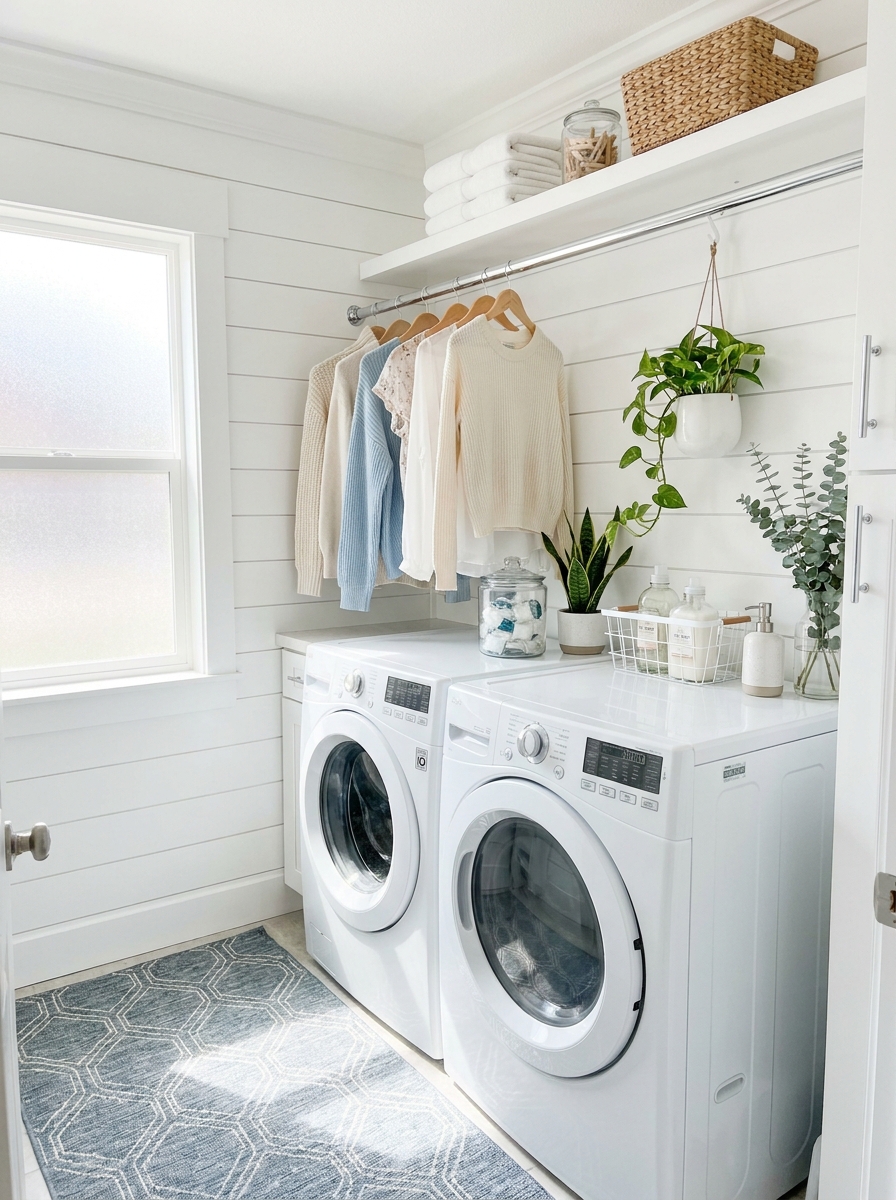
I can’t tell you how many sweaters I ruined before I finally installed a hanging rod in my laundry room. Game changer! A simple wall-mounted rod or ceiling-hung drying bar gives you the perfect spot to air-dry delicates, swimsuits, and anything that can’t go in the dryer.
I love the sleek look of a matte black rod mounted about six feet high on an empty wall. You can hang things on wooden hangers or drape them right over the bar. Some people install two rods at different heights for maximum drying space. The key is placing it where air can circulate—not tucked in a corner where nothing will dry.
What I really love about this setup is how it keeps my bedroom free from drying racks and damp clothes draped everywhere. Everything has its designated drying spot, and it looks intentional rather than messy. Plus, you can style the area underneath with a pretty basket for clothespins or a small stool.
30. Create a Designated Mending and Alteration Corner
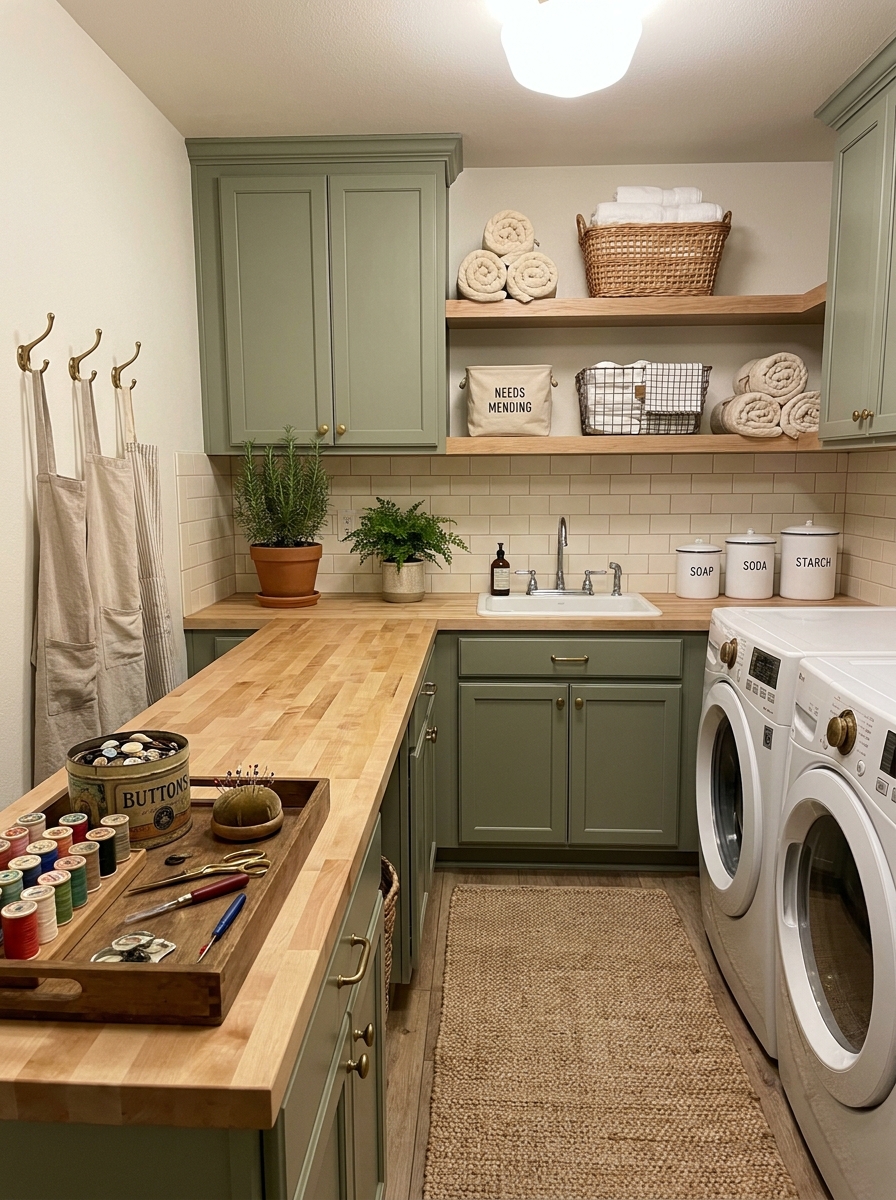
Here’s something I never thought I needed until I had it—a little mending station right in my laundry room. Think about it: you’re already sorting clothes, so why not have a spot to quickly sew on a loose button or hem a pair of pants?
I set mine up with a small wooden tray on the counter that holds thread, scissors, a seam ripper, and safety pins. I keep a cute vintage tin for buttons and a pincushion nearby. Everything stays contained and looks pretty enough that I don’t mind leaving it out. Some people dedicate a drawer or use a hanging organizer, but I love having it visible so I actually remember to use it.
The best part? No more throwing a shirt with a missing button into a pile that becomes a black hole. I just fix it right there while I’m already doing laundry. It takes two minutes, and suddenly I’m wearing clothes I forgot I had.
31. Install Drawer Dividers for Small Laundry Accessories
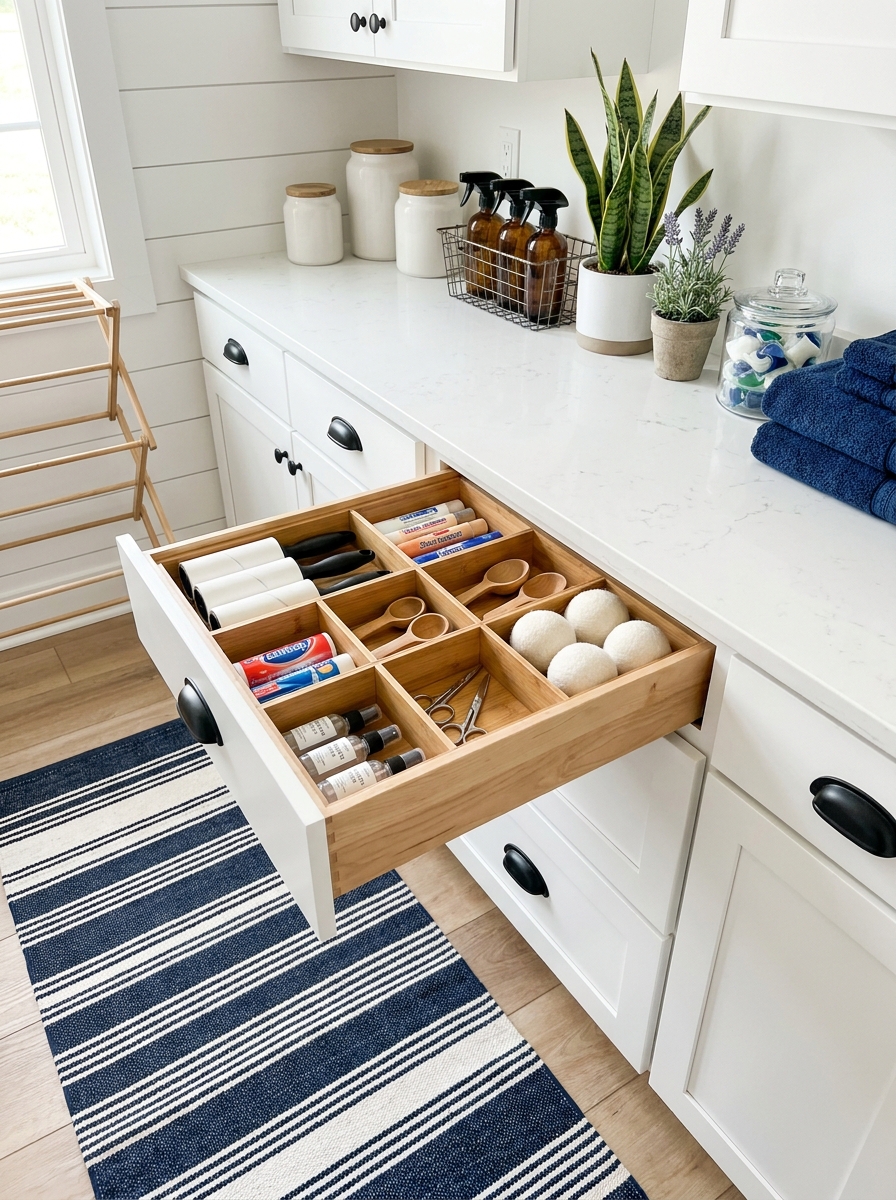
Can we talk about the junk drawer situation that happens in laundry rooms? Mine was a mess of stain sticks, lint rollers, dryer sheets, and who knows what else until I finally added drawer dividers. Now everything has a home, and I can actually find what I need.
I use simple bamboo dividers or even small bins inside my drawers to separate everything. One section for stain removers, one for sewing supplies, one for dryer balls and fabric refreshers. You can customize it based on what you actually use. The key is making sure everything is visible at a glance—no digging required.
This small change made such a difference in my daily routine. I’m not frantically searching for the stain stick when my daughter spills pasta sauce on her shirt. Everything is right where I expect it to be, and the drawer looks so satisfying when I open it.
32. Design a Wall Calendar System for Laundry Schedules
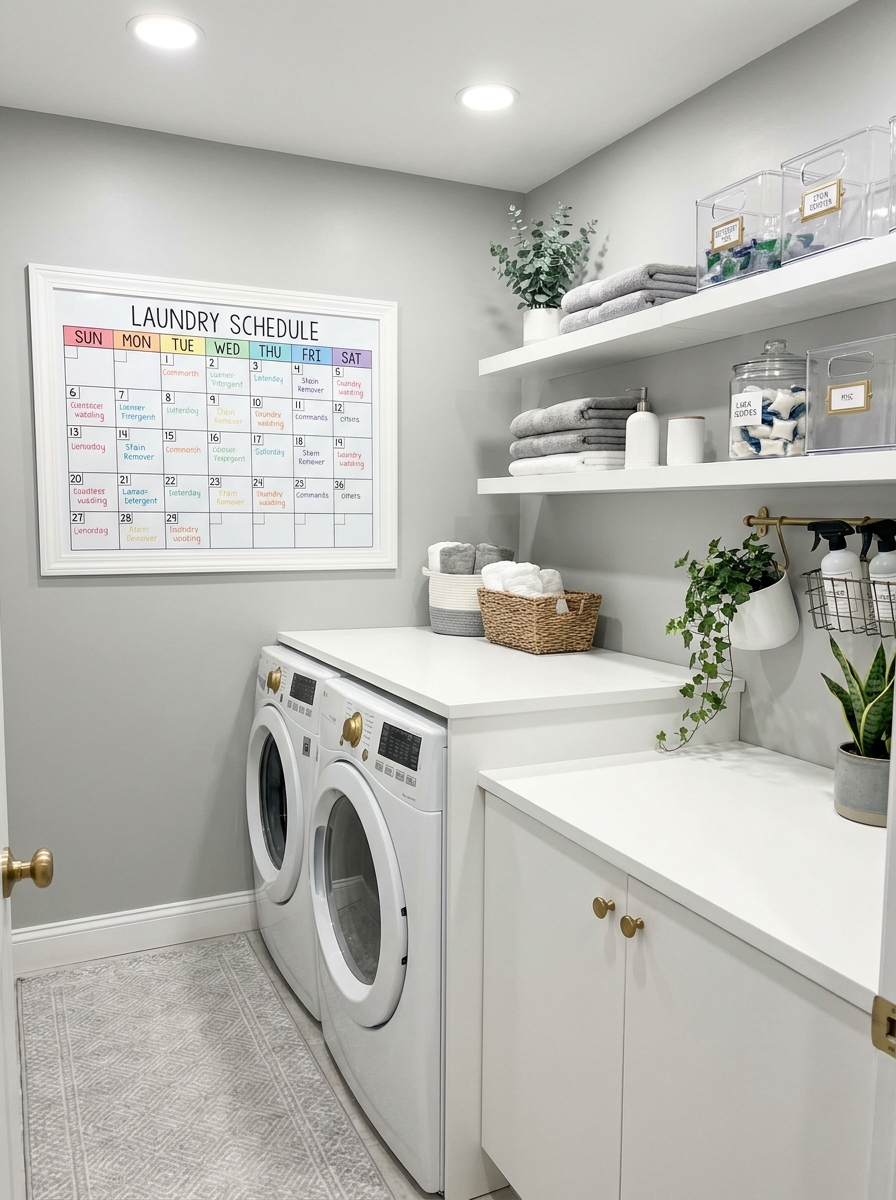
Okay, I know this sounds extra, but hear me out. A simple wall calendar in your laundry room can actually keep your whole household on track. I use mine to note when bedding needs washing, when to clean the washer, and rotation schedules for bath towels and kitchen linens.
You don’t need anything fancy—just a small monthly calendar mounted on the wall or inside a cabinet door. I like the kind with a frame so I can use dry-erase markers. I mark different tasks in different colors: blue for bedding, green for deep cleaning the machines, pink for seasonal items like curtains or couch covers. It takes the mental load off trying to remember when I last washed the shower curtain.
This system especially helps if multiple people do laundry in your house. Everyone can see what needs attention, and nothing gets forgotten for months at a time. Plus, there’s something so satisfying about checking off completed tasks!
33. Add a Dedicated Lint and Pet Hair Removal Station
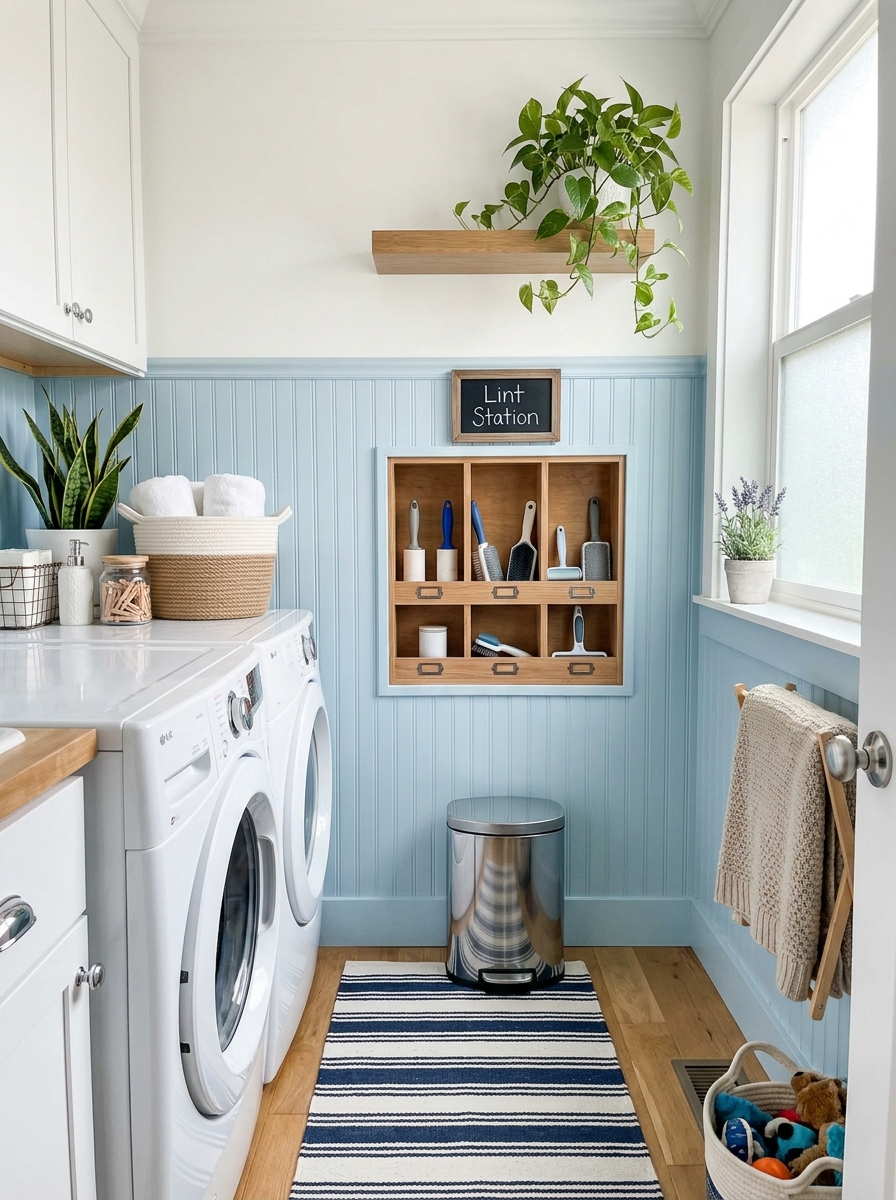
Here’s something nobody talks about but everyone needs—a spot for all those lint rollers and pet hair removers that usually end up scattered everywhere. I created a little wall-mounted station just for this, and it’s honestly one of my favorite tiny fixes.
Mount a small shelf or install a narrow basket holder on your wall to corral lint rollers, fabric brushes, and those sticky refills. Keep a small trash bin directly underneath for all the gross hair sheets. If you have pets, you know exactly how fast you go through these!
I added a little hook beside mine for a reusable lint brush, and now everything lives in one designated spot. No more digging through drawers or finding random lint rollers in every room. It sounds like such a small thing, but when you’re doing laundry and need to de-fur everything before it goes in the wash, having this station right there is a total game-changer. Plus, it keeps the counters clear!
34. Install a Countertop Sorting System with Divided Bins
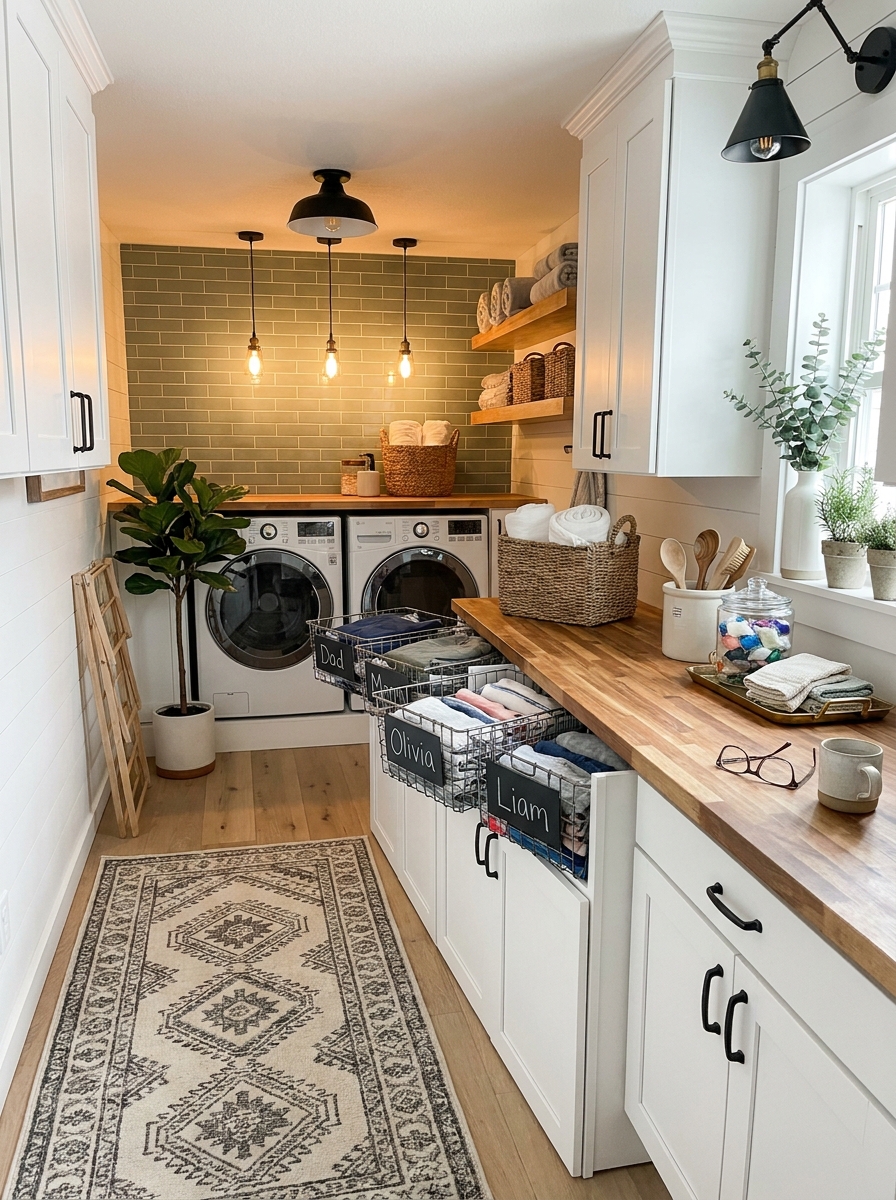
If you share laundry duty with other people (or you’re just tired of re-sorting clothes), you need a proper sorting system right on your countertop. I use divided bins that sit directly on my folding station, and it keeps everything organized as I work.
Get a set of three or four open bins or baskets that fit your counter space. Label them by person or by room—whatever makes sense for your household. As you fold, items go straight into their designated bin. No more stacking everything in one giant pile and sorting it all over again later.
I love using wire baskets because I can see what’s in them, but fabric bins work great too if you want a softer look. The key is keeping them right where you fold so the system is effortless. When laundry’s done, everyone grabs their bin and puts their own stuff away. It’s not revolutionary, but wow does it save time! And honestly, anything that makes laundry feel less like a giant chore gets my vote.
35. Create a Specialty Garment Care Zone with Hanging Tools
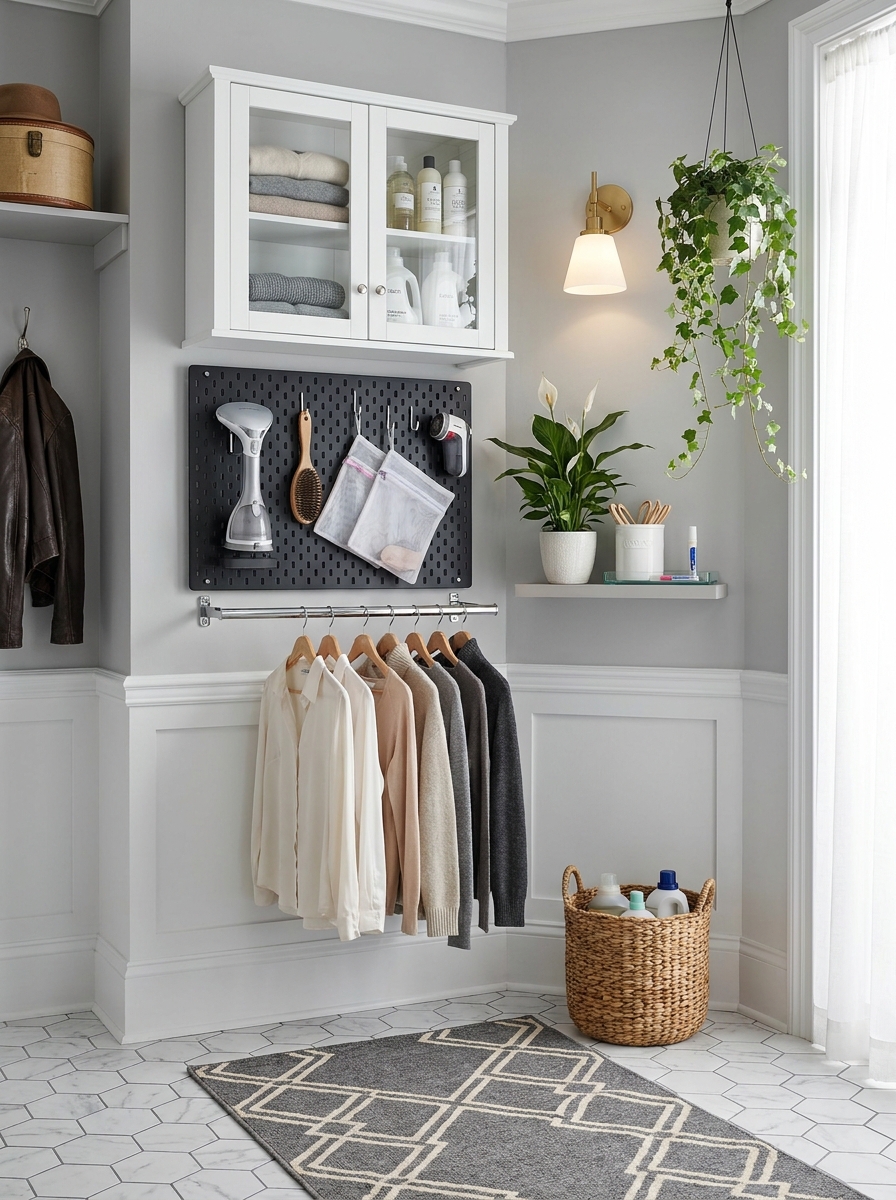
Your fancy clothes deserve better than being tossed in with the regular wash, right? I finally set up a specialty garment zone in my laundry room, and it’s made caring for delicates and dry-clean-only items so much easier.
Designate one wall area or corner specifically for garment care tools. Install hooks for your steamer, garment brush, and delicate wash bags. Add a small hanging rod for items that need to air out before cleaning or storing. Keep a basket nearby with mesh laundry bags, sweater shavers, and fabric freshener spray.
I also keep my at-home dry cleaning kit here along with a small stain treatment pen specifically for delicate fabrics. Having everything in one spot means I actually take care of my nicer pieces instead of letting them pile up until I remember to go to the cleaners. It’s like having a mini alterations shop right at home! This little zone has honestly saved me so much money on dry cleaning bills because I can handle most things myself now.
Quick Guide
Laundry Room Organization: Budget Breakdown
Under $50: Matching baskets, adhesive hooks, glass jars for detergent, labels, small shelf organizers. Focus on containers and simple systems that corral the chaos you already have.
$50-$200: Floating shelves, pegboard setup with hardware, countertop organizers, drying rack, rolling cart. This is where you add actual storage infrastructure.
$200-$500: Custom shelving systems, butcher block countertop, cabinet organizers, upgraded lighting, painted accent wall with professional finish. You’re creating a mini room makeover.
$500+: Built-in cabinetry, countertop installation over machines, tile backsplash, new flooring, complete organizational remodel. This is the full laundry room glow-up.
Best bang for your buck? Start with the $50-$200 range. Shelves and a pegboard will transform your space more dramatically than any single expensive purchase.
Your Laundry Room Can Actually Make You Happy
I know it sounds dramatic to say a laundry room can spark joy, but here we are. Because when you open that door and see matching baskets, labeled jars, and a countertop that’s not covered in mystery stains, something shifts. Laundry is still laundry—it’s never going to be your favorite thing. But doing it in a space that feels organized and maybe even a little pretty? That’s different. You’ve seen thirty-five ways to make it happen, and the truth is you don’t need all of them. Pick three ideas that make you excited. Start there. Maybe it’s finally installing those shelves you’ve been thinking about for six months. Maybe it’s just buying the matching baskets. Whatever it is, you’re not creating a showroom. You’re creating a functional space that works for your actual life and happens to look good while doing it. And that’s the whole point. So grab some paint samples, measure that awkward wall space, and make your laundry room a place you don’t actively avoid. Future you, standing there folding warm towels in a room that doesn’t make you sigh, is going to be so grateful.
Frequently Asked Questions
How do I organize a small laundry room with no storage?
Focus on vertical space first. Install floating shelves above your machines, add a pegboard on any available wall, and use the back of the door for over-door organizers. Stackable bins and wall-mounted drying racks maximize every inch without eating up floor space. Keep only what you actually use regularly—small spaces have no room for that fabric softener you bought two years ago and never opened.
What’s the best way to hide laundry supplies but keep them accessible?
Use matching canisters or apothecary jars on open shelving—they look intentional and pretty while keeping everything visible and easy to grab. For true hiding, install a curtain rod under a shelf and hang a simple fabric curtain to conceal lower storage baskets. Pull-out drawers in base cabinets also work beautifully if you have the space and budget.
How can I make my laundry room smell amazing all the time?
Start with good ventilation so dampness doesn’t linger. Then add a small reed diffuser or essential oil diffuser with eucalyptus or lavender. Keep a bowl of baking soda in the corner to absorb odors. Fresh eucalyptus stems in a vase look gorgeous and smell incredible. And honestly, washing your actual washing machine monthly makes the biggest difference—a clean machine means cleaner-smelling laundry and room.
Should I paint my laundry room or keep it white?
White is classic and makes small spaces feel bigger, but don’t be afraid of color. Soft blues, sage greens, and warm grays all work beautifully in laundry rooms and add personality without overwhelming the space. If you’re nervous about color, try one accent wall or just paint the inside of open shelving. You can always repaint if you hate it, but you might end up loving the character it adds.
What laundry room upgrades actually add home value?
Built-in storage, quality countertops over machines, and good lighting are the top three. Buyers love seeing a laundry room that’s thoughtfully organized with permanent solutions rather than temporary fixes. A utility sink is also a huge plus if you have space. That said, don’t go wild with ultra-personalized decor if you’re selling soon—keep it clean, functional, and neutral enough for buyers to envision their own stuff there.