25 Gorgeous Dollar Store DIY Ideas That Transform Everything
You walk into the dollar store for trash bags and walk out with six bags of random home decor supplies. Sound familiar? I’ve been there so many times, staring at rows of plain glass vases and wooden crates, seeing potential everywhere. The thing is, dollar stores are absolute goldmines for DIYers who know what to look for. That basic picture frame? It’s gorgeous with the right paint. Those plastic planters? They’re showstoppers after a quick makeover. And the best part? You can redo your entire living room for what you’d spend on one store-bought piece. I’ve tested dozens of dollar store projects over the years, and some honestly look like they cost fifty bucks or more. Others… well, let’s just say they taught me what not to do. Today I’m sharing 25 of my absolute favorite transformations that actually work. These aren’t complicated craft projects that require special tools or skills. They’re simple, satisfying DIYs that give you that designer look without the designer price tag. Let’s get into it.
1. Spray-Painted Glass Vase Collection
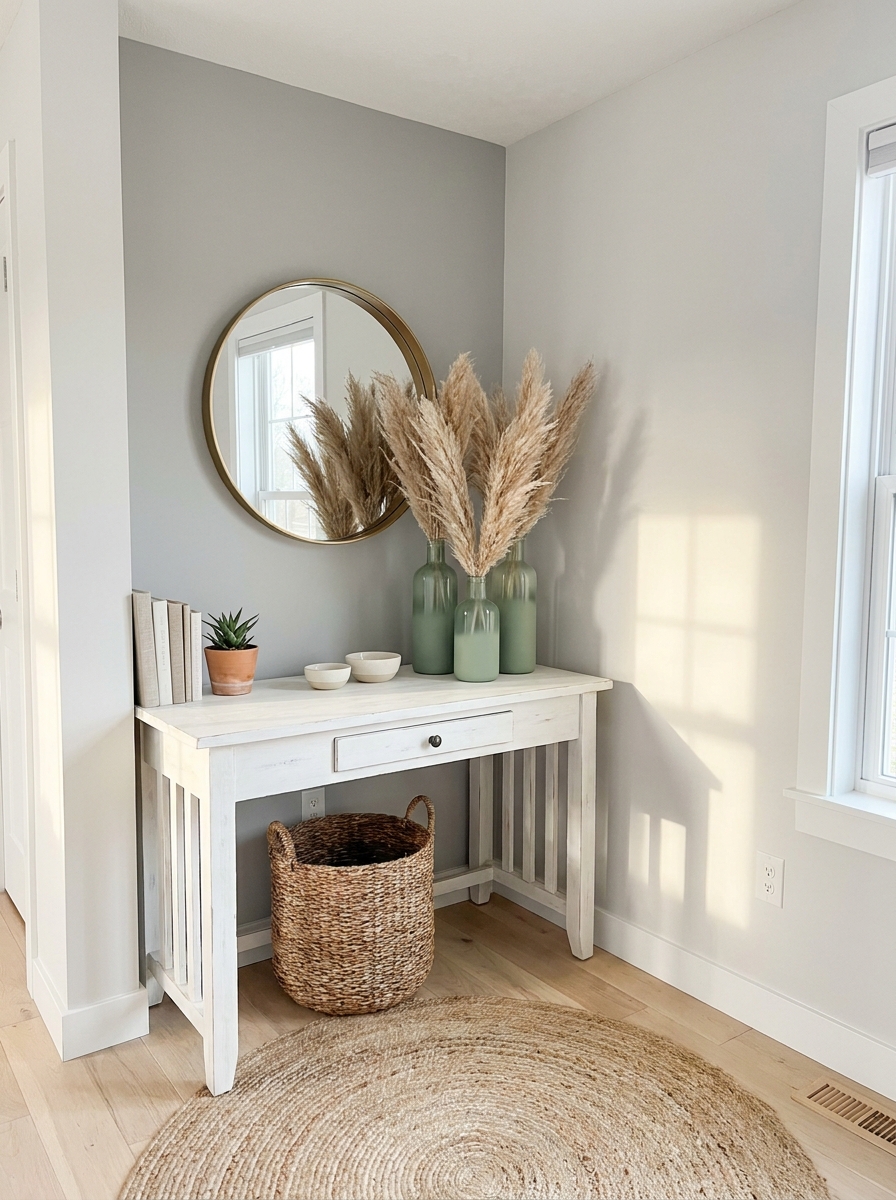
Glass vases from the dollar store are criminally underrated. I’m talking about those plain, slightly boring cylindrical ones that come in different heights. Buy three or five in varying sizes, and you’ve got the foundation for something really special.
Grab a can of matte spray paint in a sophisticated color—sage green, soft blush, or even matte black. Take those vases outside, give them a light coat, let them dry, and repeat. The matte finish is key here because it hides the fact that these cost a dollar each. Suddenly they look like something from a fancy boutique.
I cluster mine on my console table with dried pampas grass or eucalyptus stems. The height variation creates visual interest, and the monochromatic color scheme feels intentional and curated. People always ask where I got them. When I say dollar store, they never believe me. The transformation is that good, and it takes maybe twenty minutes of actual work.
2. Rope-Wrapped Storage Baskets
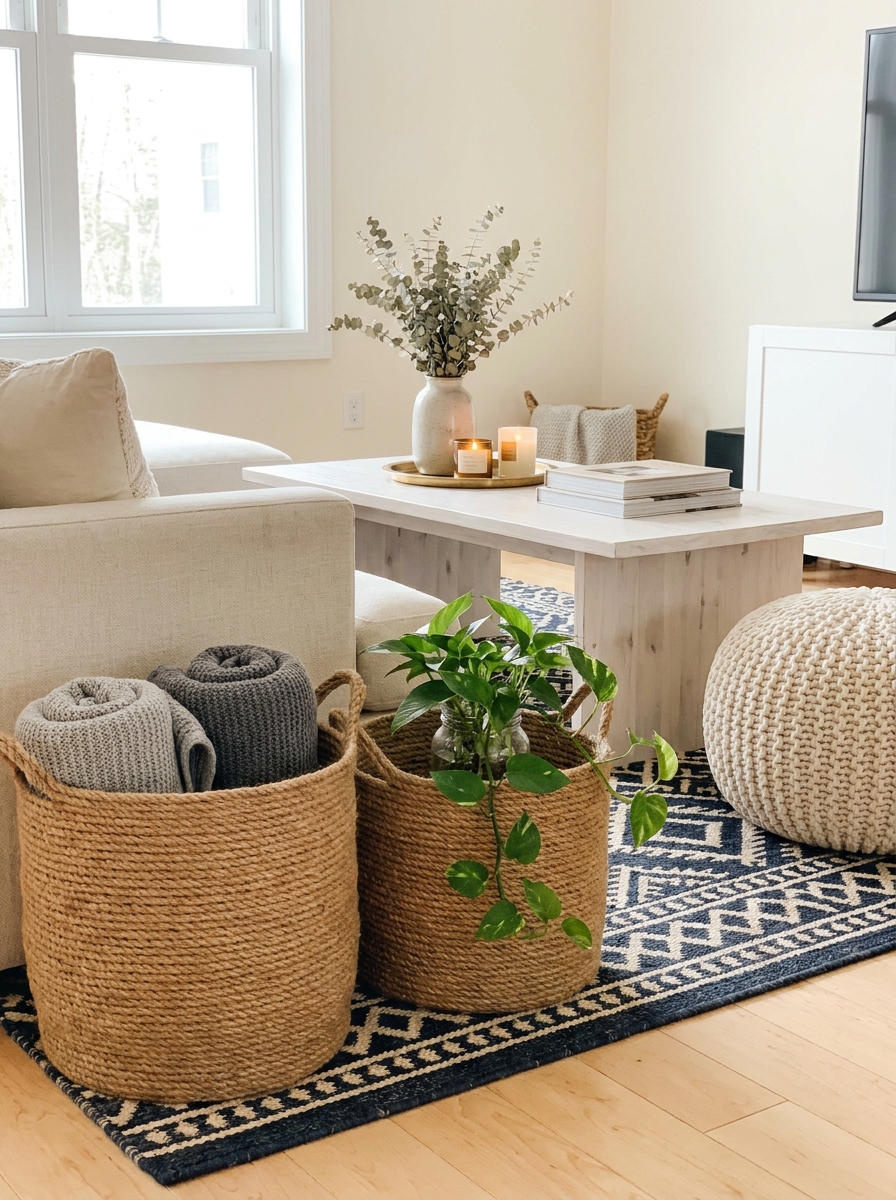
Those cheap plastic bins at the dollar store? They’re actually perfect for a rope makeover. I know they look pretty terrible on their own—thin plastic in boring colors that scream “budget.” But wrap them in natural rope, and they become these beautiful textured storage pieces.
You’ll need a hot glue gun and a few rolls of jute or sisal rope from—you guessed it—the dollar store. Start at the bottom of the container and glue the rope in a spiral, working your way up. Press firmly as you go so the rope adheres well. It’s meditative work, honestly. Put on a podcast and just wrap.
These transformed baskets work everywhere. I use mine to corral throw blankets in my living room, store toilet paper in the bathroom, and organize toys in my kids’ rooms. They look expensive and intentional, with that organic coastal vibe that’s so popular right now. And when people compliment them, I love saying they started as dollar store plastic bins. The shock value alone is worth the effort.
3. Faux Marble Contact Paper Tray Makeover
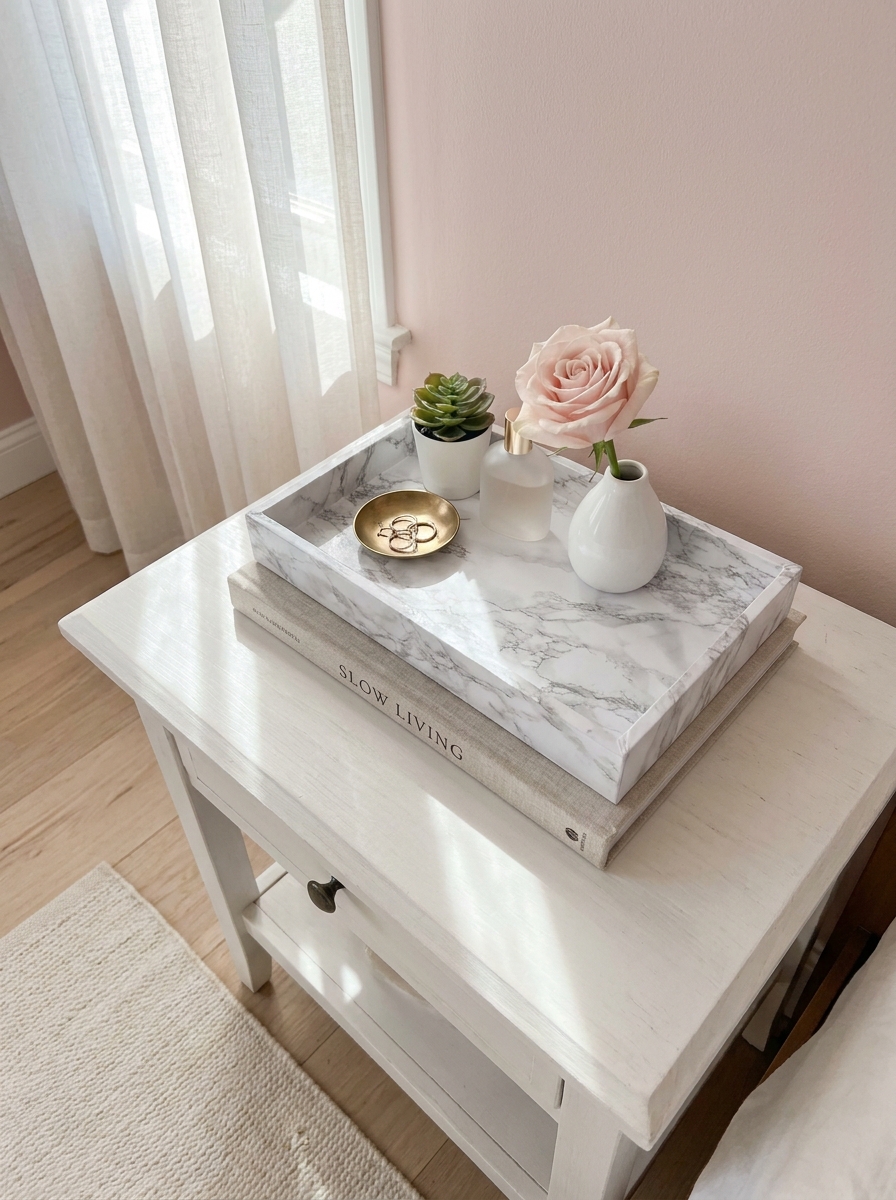
Cheap wooden or plastic trays get a serious upgrade with marble contact paper. I’m obsessed with this trick because it’s so ridiculously easy but looks incredibly high-end. You can find basic trays at the dollar store—the plain wooden ones or even those plastic serving trays work great.
The marble contact paper comes in different patterns, so pick one that looks realistic with natural veining. Clean your tray surface really well, then carefully apply the contact paper, smoothing out bubbles as you go. Use a credit card to push out any air pockets. Trim the edges with a craft knife for a clean finish.
I use my faux marble trays on my nightstand for jewelry and perfume, on the bathroom counter for pretty hand soaps, and on the coffee table for remotes and coasters. They look like real stone pieces that cost thirty or forty dollars minimum. The whole project takes maybe fifteen minutes per tray, and you can make several with one roll of contact paper. It’s one of those DIYs where the effort-to-impact ratio is absolutely unbeatable.
4. Painted Terracotta Pot Display
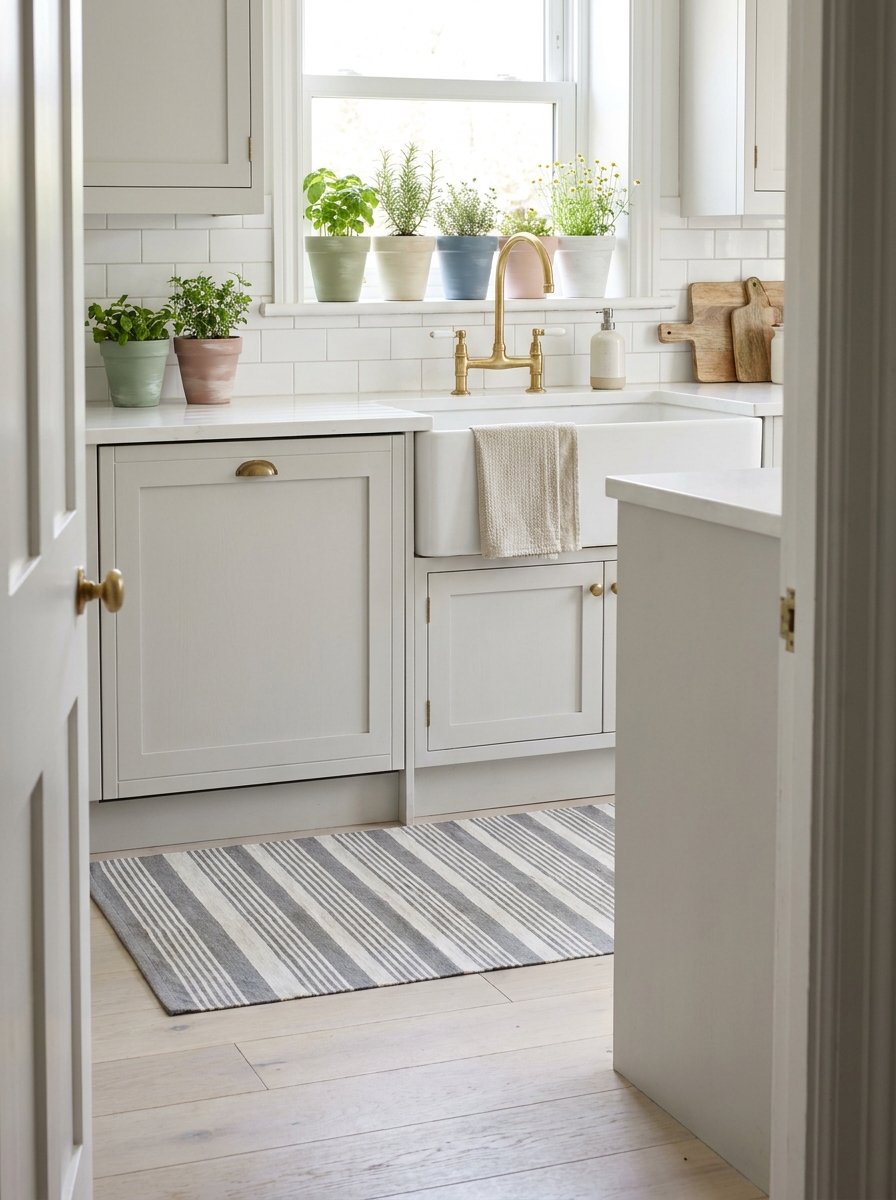
Basic terracotta pots are everywhere at dollar stores, and they’re begging for a paint makeover. I love their classic shape, but that orange-brown color doesn’t always work with my decor. A little acrylic paint changes everything.
You can go monochrome with all white or cream pots for a clean modern look, or paint each one a different soft color for more personality. I’ve done sage green, dusty blue, and pale pink together—it’s such a pretty combination. Use acrylic craft paint and apply two coats for good coverage. You don’t even need to seal them unless you’re using them outdoors.
These painted pots work for actual plants, obviously, but I also use them as utensil holders in my kitchen, pen cups on my desk, and even as small vases for fresh flowers. Group them together on a shelf or windowsill for maximum impact. They look cohesive and intentional, like you bought a matching set from an expensive plant shop. But nope—dollar store terracotta and craft paint you probably already have.
5. Dollar Store Picture Frame Gallery Wall
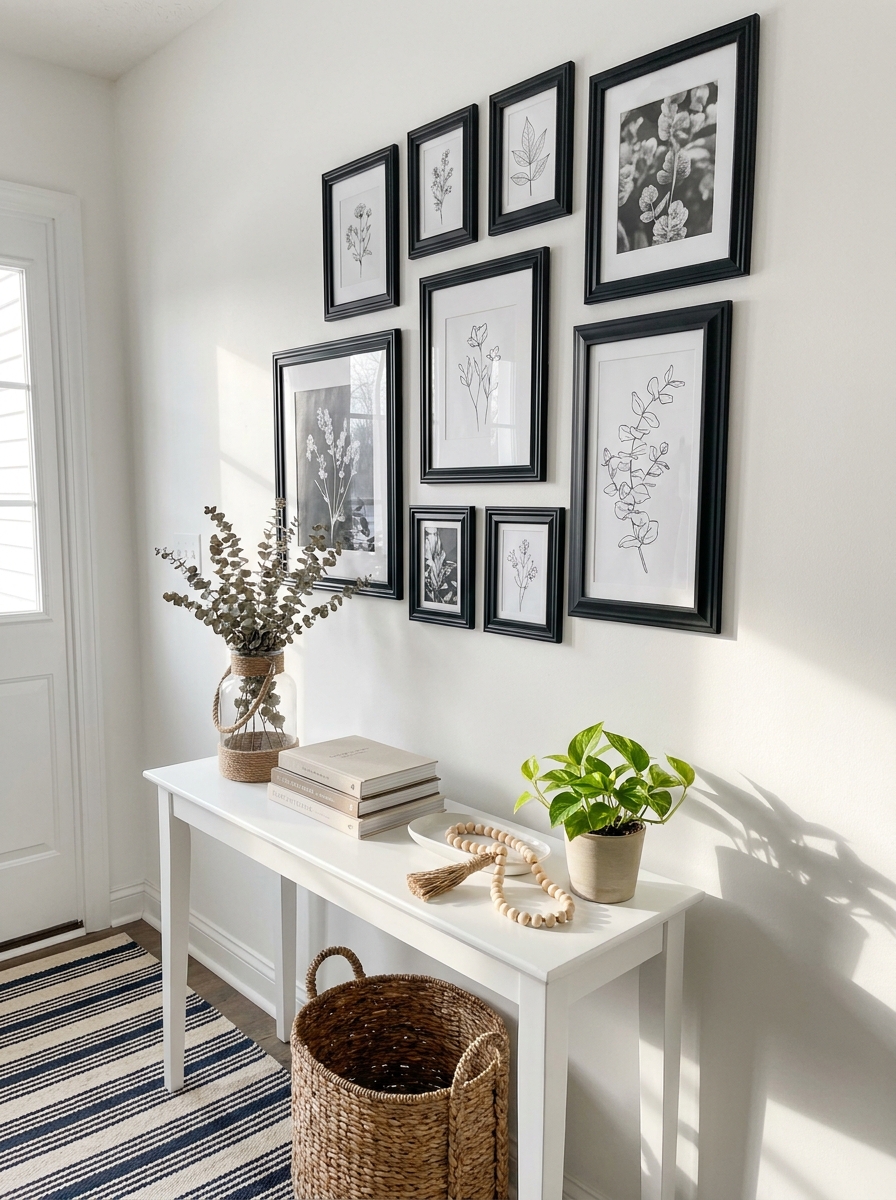
This is hands-down my favorite dollar store hack! Grab a bunch of mismatched frames in different sizes. The trick is to spray paint them all the same color—suddenly they look like they were designed to go together.
I did mine in matte black, but white or gold would be gorgeous too. Mix in some frames with the glass removed to create dimensional shadow boxes. You can display dried flowers, fabric swatches, or even pretty scrapbook paper inside.
The beauty of this project is that it looks SO expensive when you’re done. People always ask me where I got my gallery wall, and they can’t believe it when I say the dollar store. Arrange them on the floor first before you commit to hanging them. Take a photo so you remember your layout. This is one of those projects where the impact is way bigger than the effort you put in.
6. Fabric-Covered Storage Box Set
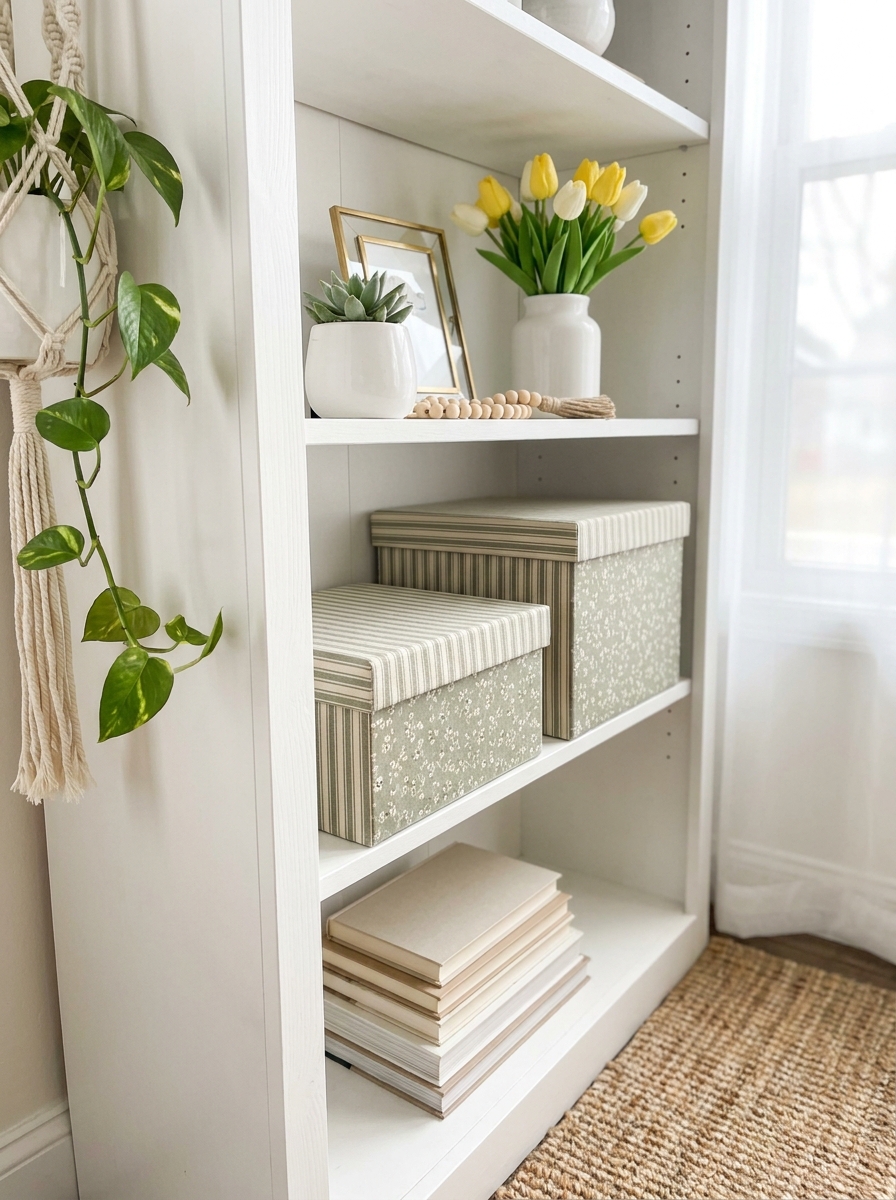
Okay, dollar store cardboard storage boxes are… not cute. But cover them with fabric? Total game-changer. I’m obsessed with how custom these look when you’re finished.
Grab some fabric remnants or even cute dish towels from the dollar store. Use spray adhesive or a hot glue gun to attach the fabric smoothly around the box. Fold the corners like you’re wrapping a present—it doesn’t have to be perfect, nobody will see the inside.
I made a whole set of five boxes in coordinating patterns for my bookshelf, and now my storage actually makes me happy instead of stressed. You can do them all matching or mix patterns for a collected look. These are perfect for corralling mail, craft supplies, kids’ toys, or all those random charging cables that multiply in drawers. They instantly make any shelf look pulled together and intentional instead of cluttered.
7. Tiered Tray Farmhouse Centerpiece
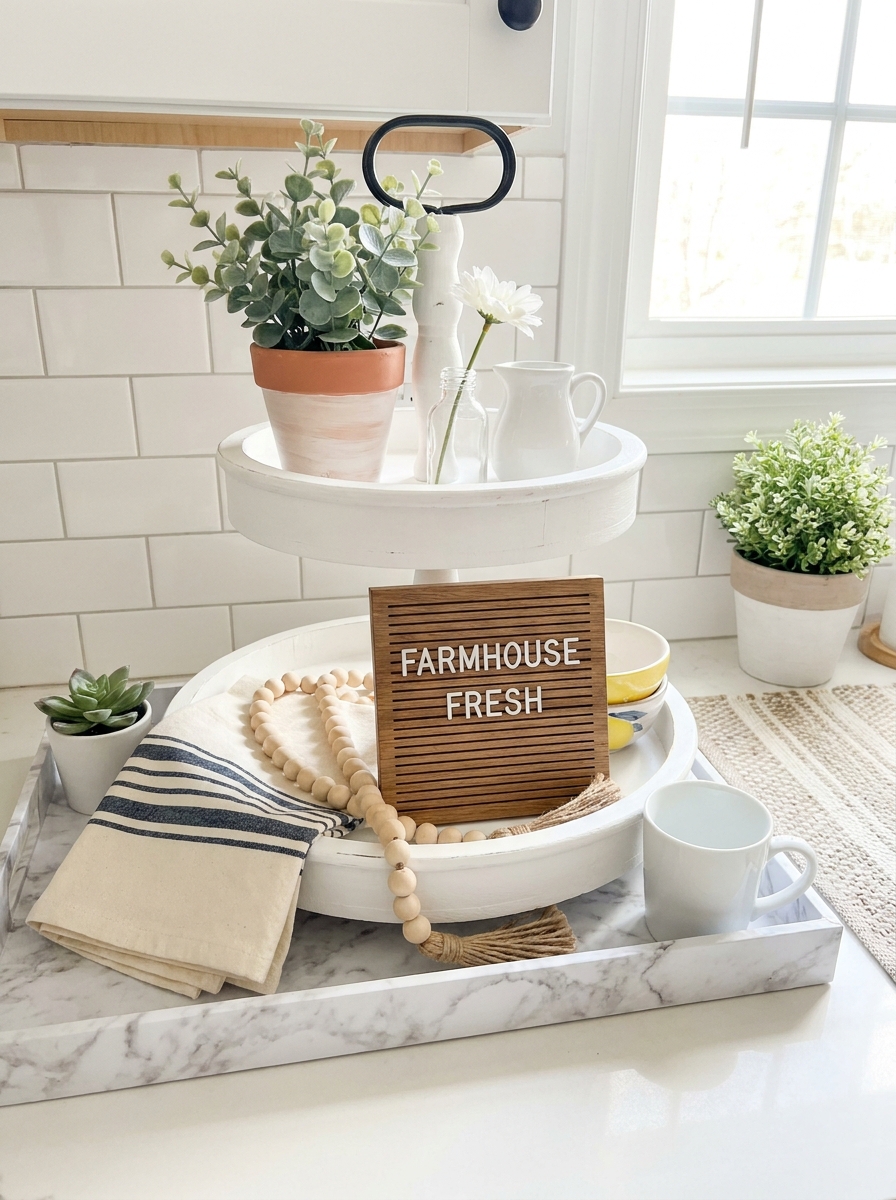
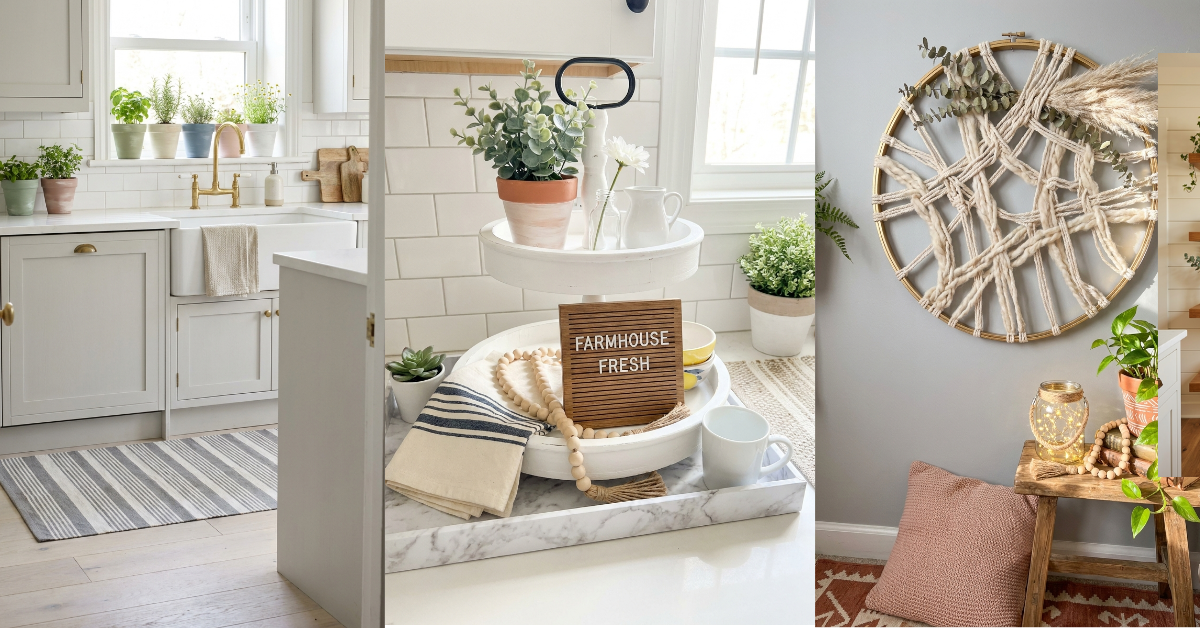
I never thought I’d love tiered trays this much, but here we are! The dollar store sells plain wooden or metal trays that you can transform into those trendy farmhouse centerpieces everyone’s obsessed with.
If your tray is wood, give it a light sand and paint it white or a soft gray. Metal trays look amazing with spray paint—I did mine in matte black. Then comes the fun part: styling it! This is where you get to be creative with other dollar store finds.
I fill mine with mini terracotta pots, little glass bottles, wooden beads, fake greenery, and seasonal touches. The trick is to vary heights and textures. Lean a small sign on the back tier, cluster items in odd numbers, and don’t overthink it. These trays are perfect for kitchen counters, coffee tables, or entryway consoles. Swap out the styling seasonally and you’ve got year-round decor for basically nothing.
8. Woven Wall Hanging from Embroidery Hoops
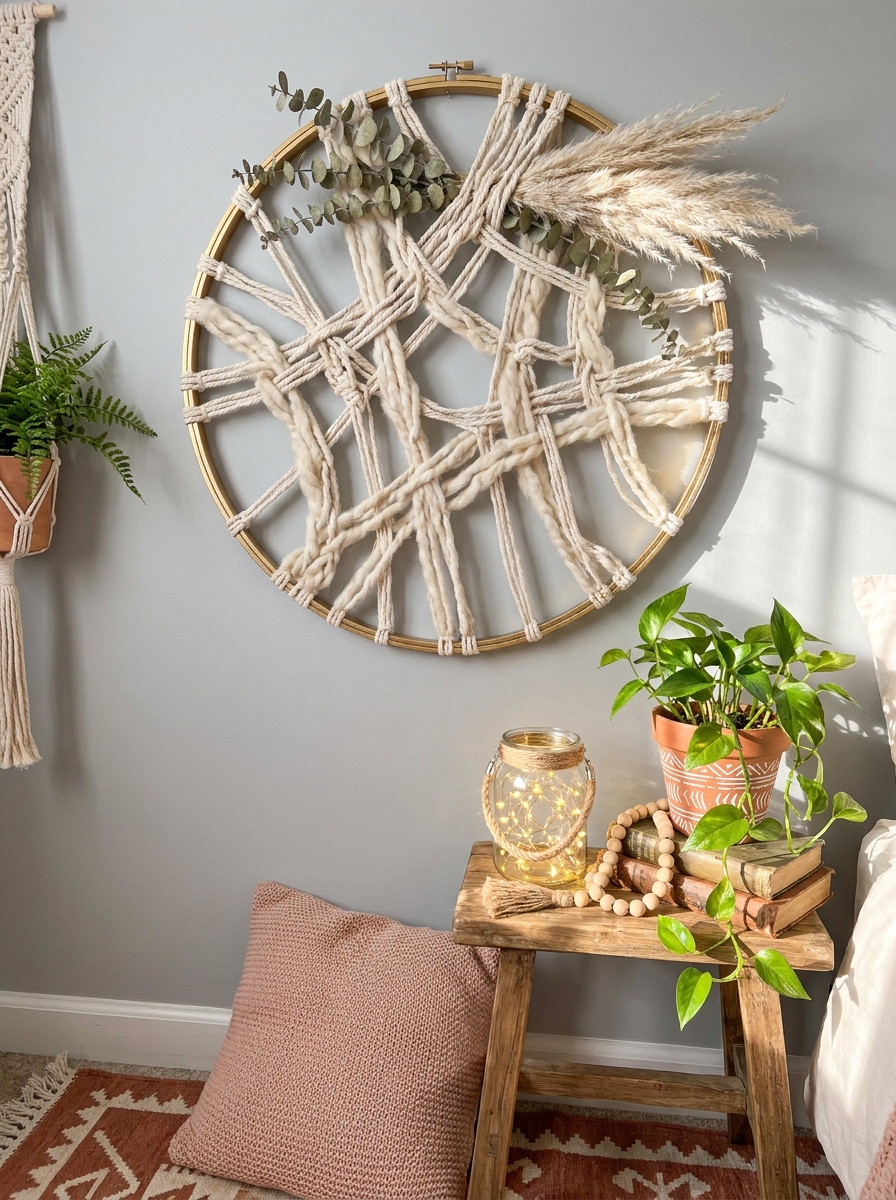
This project makes me so happy because it looks SO boho and expensive, but costs maybe three dollars. Grab a large embroidery hoop from the dollar store and some macrame cord or even chunky yarn.
You can create simple woven patterns, tie basic knots, or just wrap the cord in interesting ways. I love adding dried flowers, feathers, or eucalyptus stems tucked into the top. There’s no wrong way to do this—seriously, the more imperfect and organic it looks, the better.
Hang it on a blank wall that needs something special. It adds so much texture and interest without feeling heavy or overwhelming. I made three in different sizes for my bedroom and I get compliments every single time someone sees them. You can also weave in fabric strips, ribbon, or even fresh greenery that you let dry naturally. It’s one of those projects that feels really meditative and creative while you’re making it.
9. Faux Succulent Garden in Vintage-Style Containers
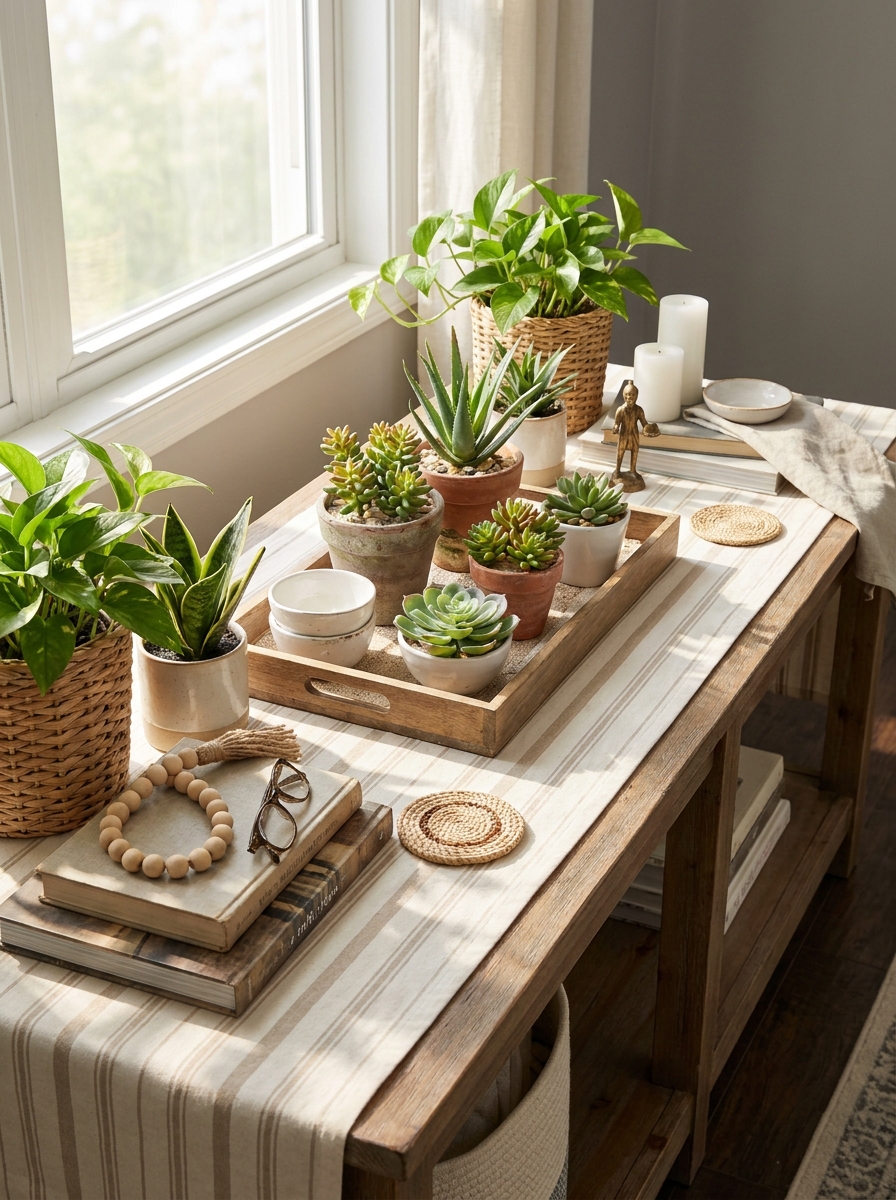
Dollar store faux succulents are honestly incredible these days! I grabbed a bunch of different varieties for literally a buck each and created this gorgeous little garden that looks like I spent way more. The trick is grouping them in odd numbers and mixing different textures and heights.
I used dollar store white ceramic bowls, small terracotta pots, and even repurposed candle holders as planters. Fill them with aquarium gravel or sand from the dollar store for that authentic succulent garden look. Arrange them on a wooden tray or directly on your coffee table for instant desert vibes.
What I love most? Zero maintenance! No watering, no dead plants, no guilt. Just permanent greenery that looks fresh all year long. Layer different sizes together and don’t be afraid to really pack them in there. Real succulent gardens are dense and clustered, so yours should be too. This is seriously one of the easiest projects you can make in under 10 minutes!
10. Beaded Garland Tassel Chandelier
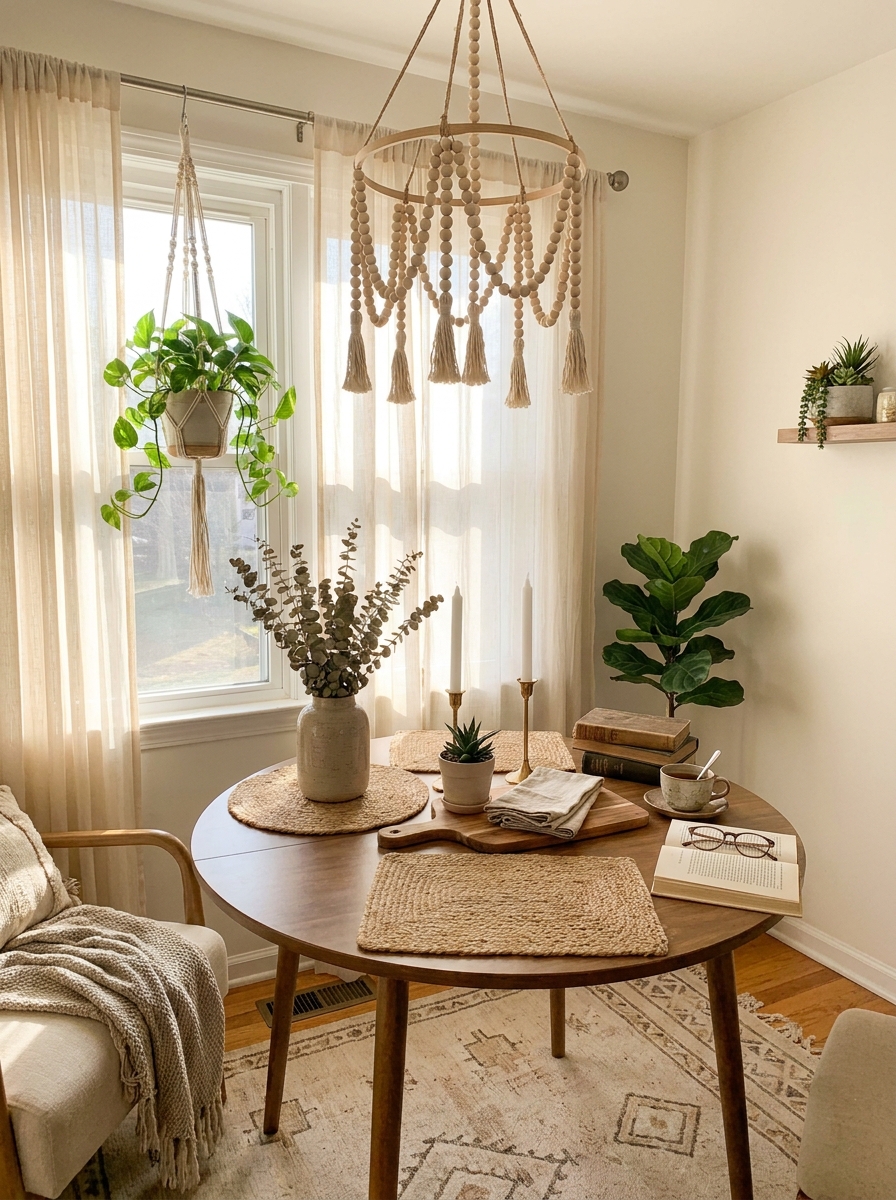
This project makes me giddy every time! You can create the most stunning boho chandelier using dollar store wooden beads and embroidery hoops. It looks like something from a fancy boutique but costs maybe five dollars total.
Grab two embroidery hoops in different sizes and wooden beads in whatever finish you love. String the beads onto twine or jute rope, leaving enough length to create that gorgeous draped effect. Attach the bead strands around the hoops at even intervals, then hang the smaller hoop inside the larger one at different heights. Add tassels to the bottom for extra flair!
Hang it over your dining table, in a corner reading nook, or even in a kid’s room. The way it catches the light is absolutely magical. You can go minimal with just a few strands or create a fuller, more dramatic look with tons of beaded strings. Paint the hoops gold or leave them natural. Either way, people will ask where you bought it!
11. Peel-and-Stick Wallpaper Sample Frame Collection
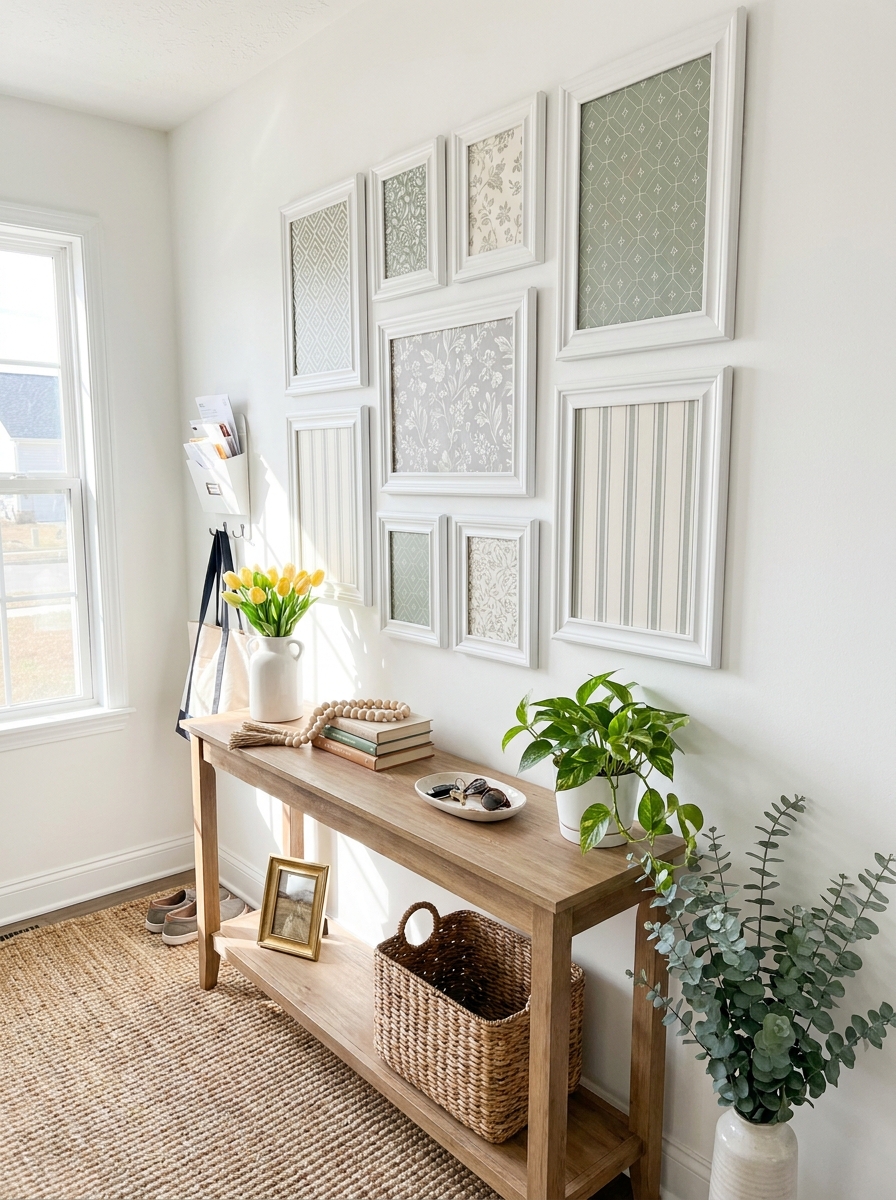
Wait until you see this trick! Dollar stores sell these amazing peel-and-stick wallpaper sheets now, and they’re perfect for creating custom art. I cut them into squares and rectangles, framed them in dollar store frames, and suddenly had a coordinated gallery wall that looks professionally designed.
The best part is you can mix and match patterns while keeping a cohesive color story. Try all geometric prints, or mix florals with stripes. Paint all your frames the same color first for that pulled-together look. Black, white, or gold spray paint works beautifully.
This is genius for renters or anyone who doesn’t want to commit to full wallpaper. You get that bold pattern fix in small, manageable doses. Change them out seasonally if you want! I did a whole set for spring with fresh blues and greens, and I’m already planning my fall version with warm neutrals. Each framed piece costs maybe two dollars. Your gallery wall dreams just became totally achievable!
12. Gold-Dipped Kitchen Utensil Holder Set
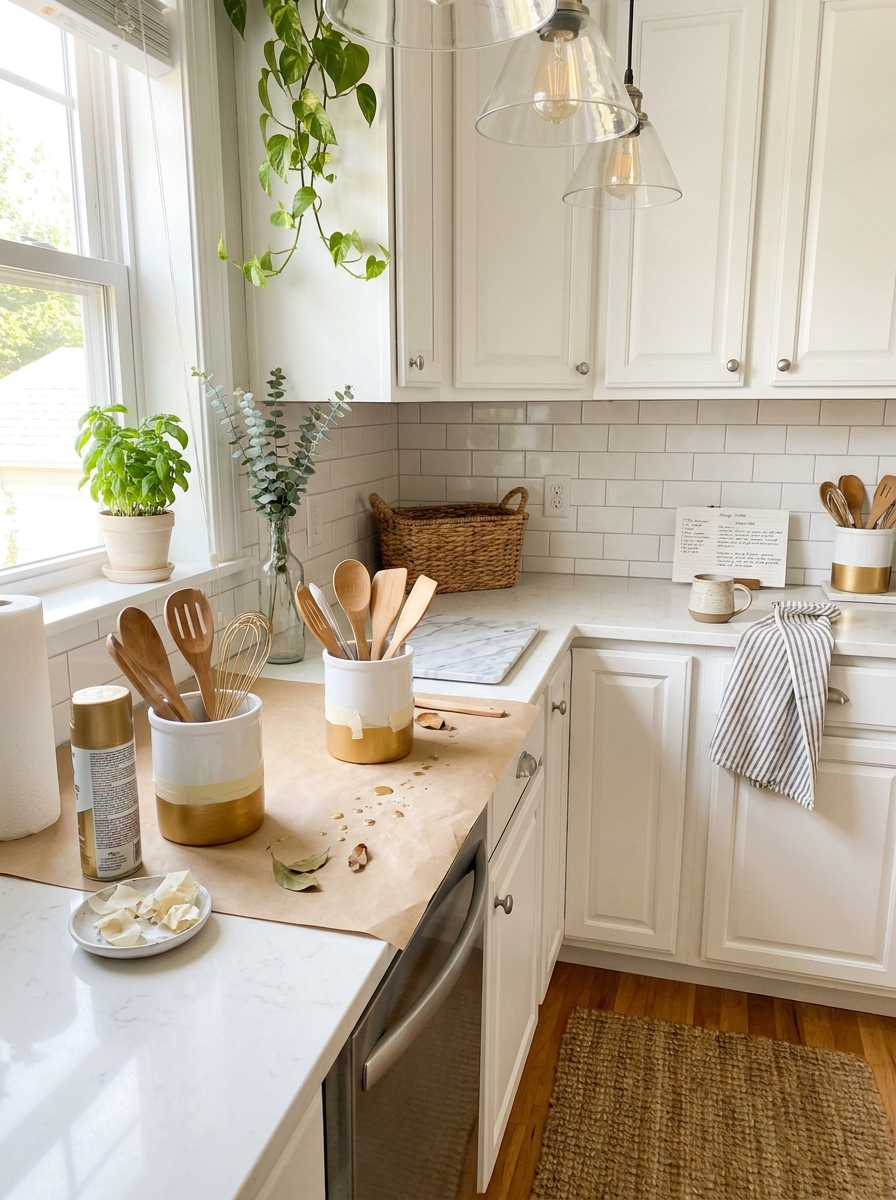
Transform boring dollar store kitchen utensils and containers into chic gold-accented decor pieces that’ll make your kitchen look like it belongs in a magazine! I’m obsessed with this project because it’s so simple but makes such a huge impact.
Grab white ceramic utensil holders or tall cups from the dollar store along with wooden spoons, spatulas, and serving pieces. Use painter’s tape to mark off where you want your gold line, then spray paint just the bottom portion with metallic gold. Let everything dry completely before removing the tape. That crisp line between white and gold? Chef’s kiss!
Display them on your counter near the stove or arrange them on open shelving. The gold dip adds such an elegant, expensive-looking touch. You can do this with vases, planters, or candlesticks too. I’ve gold-dipped practically everything in my kitchen at this point! The whole set costs under ten dollars but looks like high-end boutique finds. Nobody ever believes me when I say they’re from the dollar store!
13. Mirrored Tray Vanity Organizer with Jewelry Display
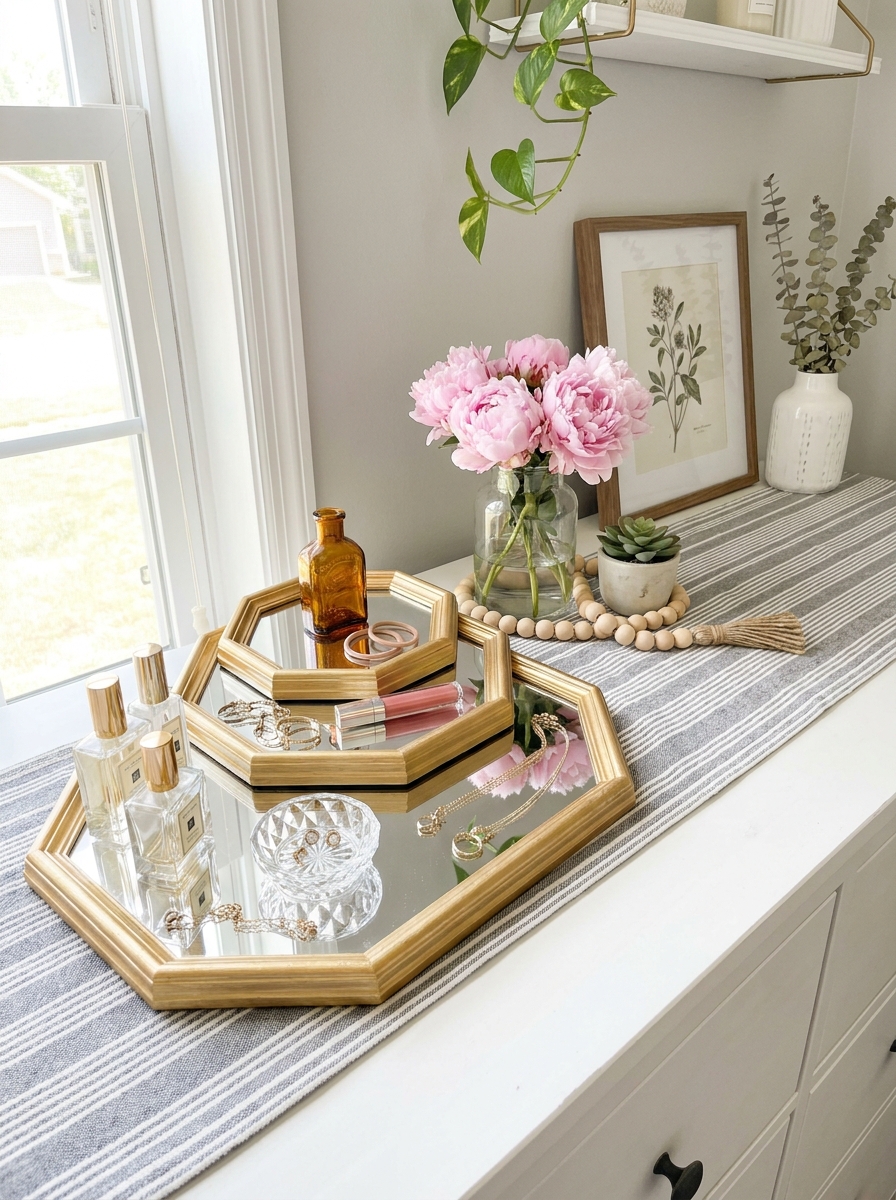
Those cheap plastic trays at the dollar store? They’re begging for a mirror makeover! Grab a square or rectangular tray and some adhesive mirror sheets, and you’ve got yourself a gorgeous vanity organizer that looks straight out of a boutique.
I just cut mirror contact paper to fit the bottom of the tray, smoothed it down carefully (no bubbles!), and suddenly my boring plastic tray looked like something expensive. The mirrored surface makes everything you put on it look more glamorous—perfume bottles, jewelry, skincare products, whatever!
The best part? You can make a whole set for under five bucks. I made three different sizes and stacked them on my dresser. Now my everyday stuff feels like a curated collection instead of random clutter. It’s wild how something so simple makes such a big difference. Every time I walk past my dresser, I feel a little fancy!
14. Wooden Spoon Herb Garden Wall Display
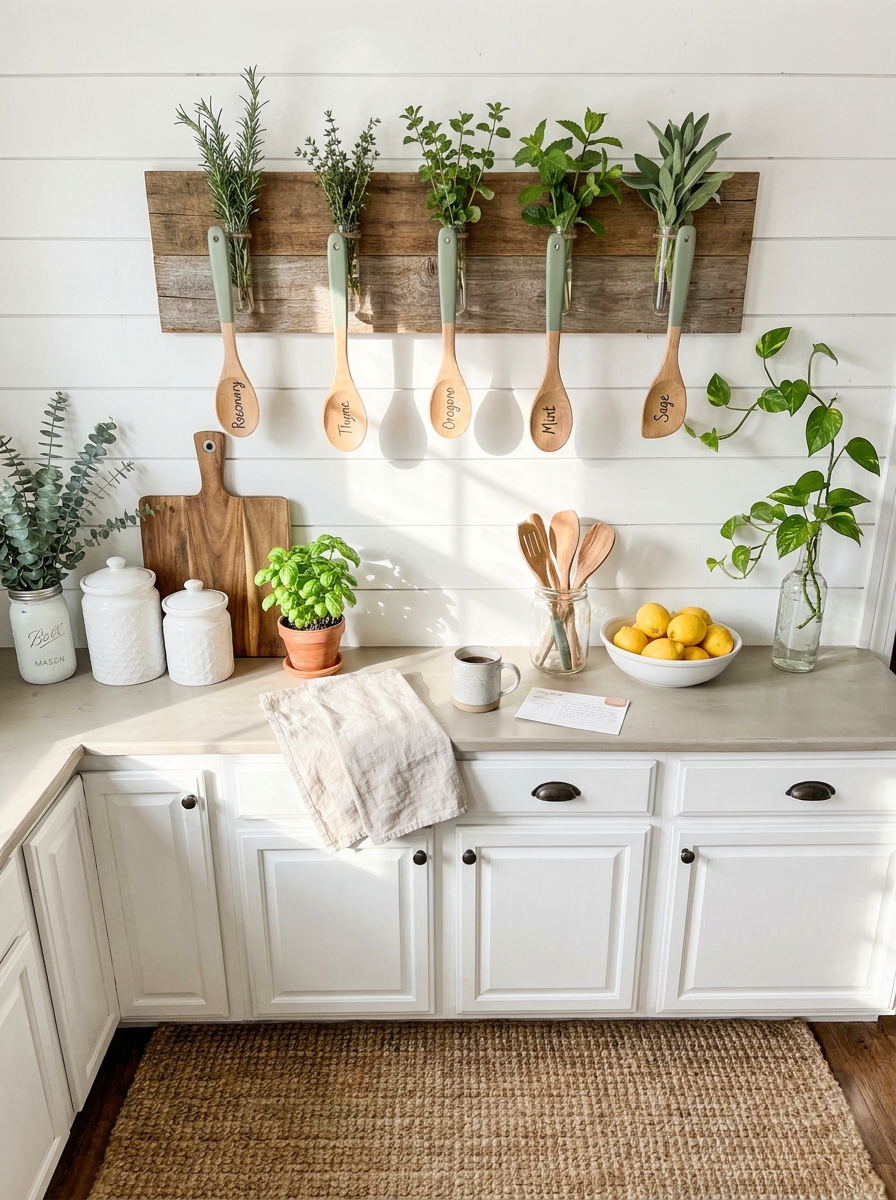
Okay, this one surprised me with how cute it turned out! I grabbed a bunch of wooden spoons from the dollar store and turned them into the sweetest little herb garden markers. But instead of sticking them in dirt, I mounted them on a piece of wood to create a wall display that’s equal parts functional and adorable.
I painted each spoon handle a different color (white, sage green, and natural wood), then used a paint pen to write herb names on the spoon part. Then I hot-glued small test tube vases to each spoon and mounted the whole thing on a stained wood board. Now I’ve got fresh herbs growing right on my kitchen wall!
This is such a conversation starter. Everyone asks where I bought it, and I love saying I made it for basically nothing. You could also use it for single flower stems if you’re not into herbs. Either way, it’s functional art that cost maybe three dollars total.
15. Candlestick Pedestal Display Stands
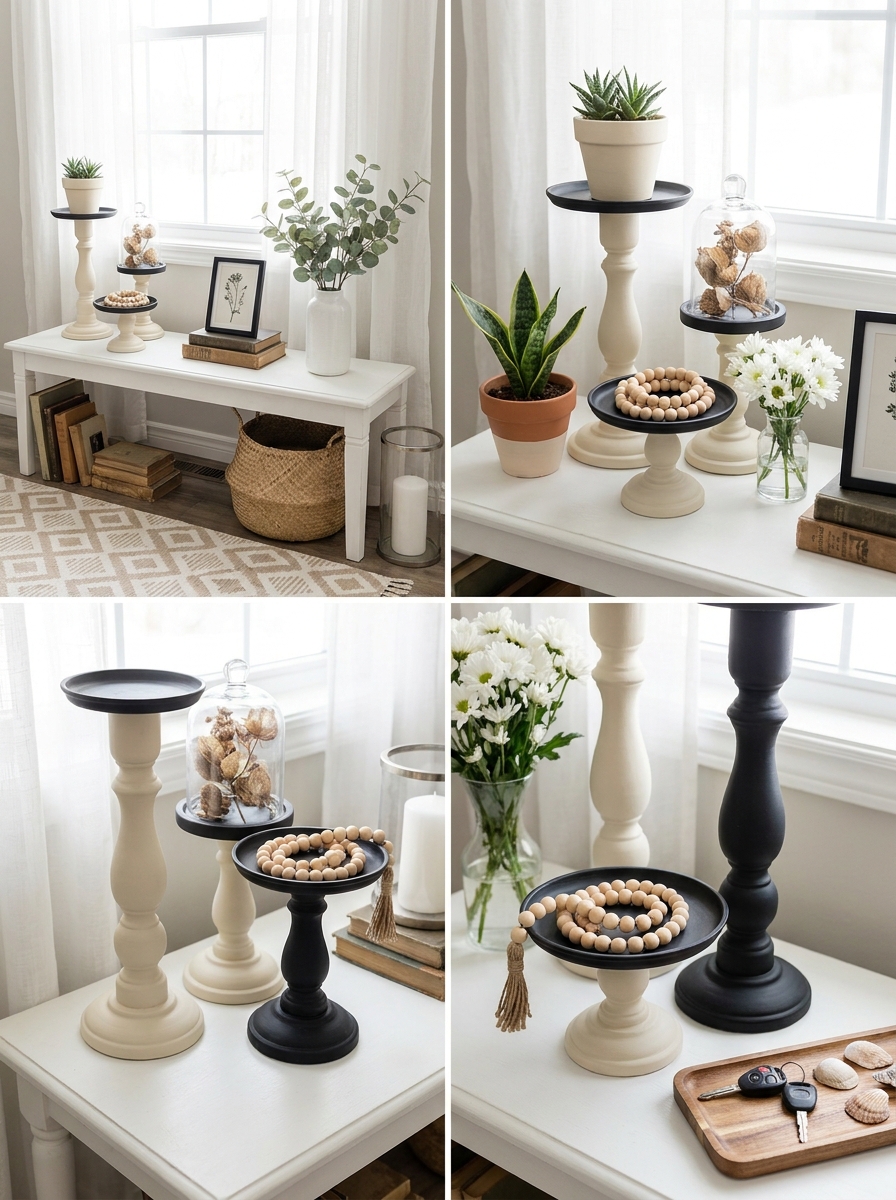
Want to know a designer secret? Pedestals make everything look important. And you can make your own for literally two dollars by stacking candlesticks and small plates or bowls from the dollar store!
I grabbed chunky candlesticks in different heights and some small wooden plaques or shallow bowls. A little super glue later, and boom—I had a whole collection of pedestal stands. I spray-painted some matte black and left others natural wood, and now I use them everywhere. They’re perfect for displaying special objects on bookshelves, holding jewelry on my dresser, or even elevating desserts when I’m pretending to be fancy.
The height variation is what makes this work. I made some short and squat, others tall and dramatic. Now I can create interesting vignettes that have actual dimension instead of everything sitting flat. It’s like giving your decor a stage to perform on!
16. Fabric Napkin Framed Textile Art
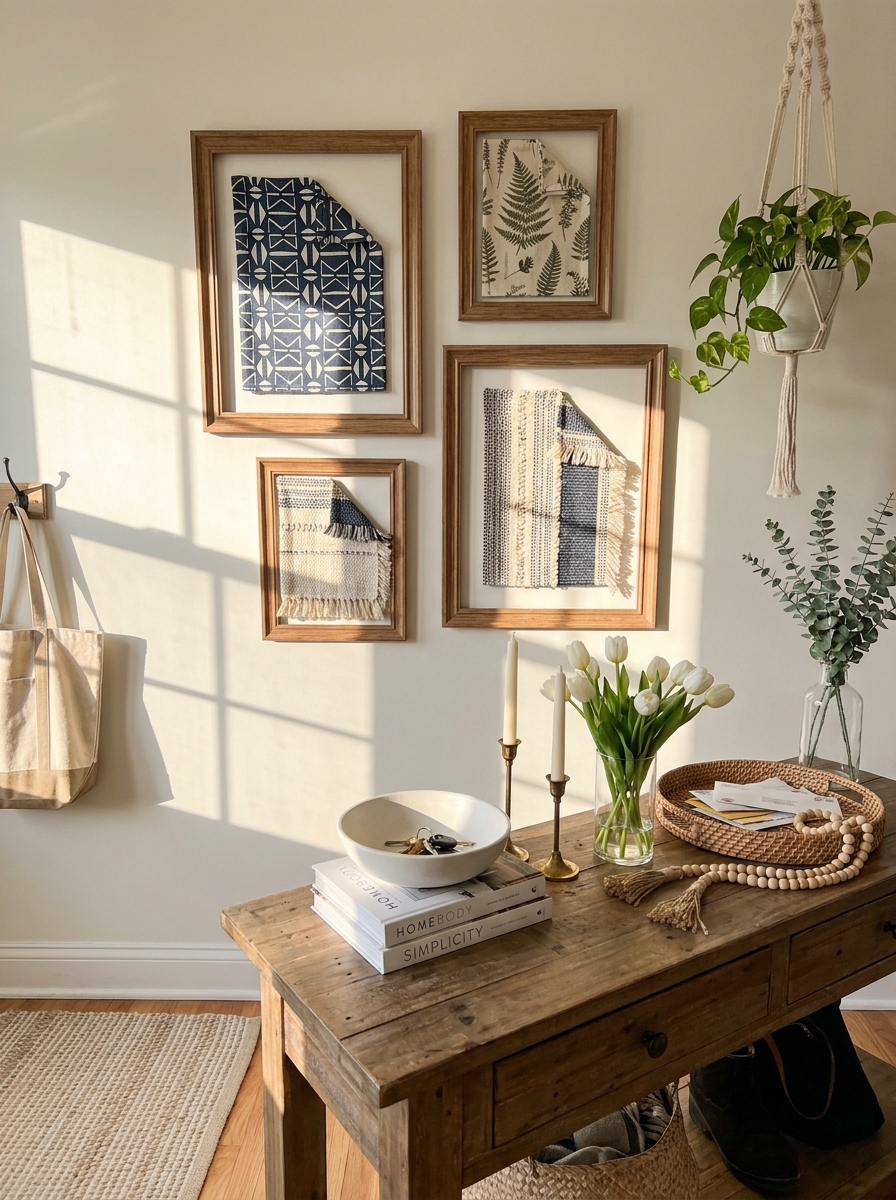
I’m obsessed with this trick! The dollar store has these surprisingly cute fabric napkins, and when you frame them, they look like expensive textile art. No one needs to know you’re basically framing your table linens.
I found napkins with pretty patterns—geometric prints, botanical designs, even some with tassels—and just popped them into cheap frames. Sometimes I fold them to show just a corner of the pattern, other times I stretch them flat. The texture of the fabric adds so much interest compared to regular paper prints.
What I love most is how easy it is to change them seasonally. Spring? Floral napkins. Fall? Plaid or warm colors. You can switch out your wall art for literally one dollar whenever you want a refresh. I have a whole collection now and rotate them like a gallery. My walls never get boring, and my wallet is very happy about it!
17. Floating Shelf Styling with Woven Basket Storage
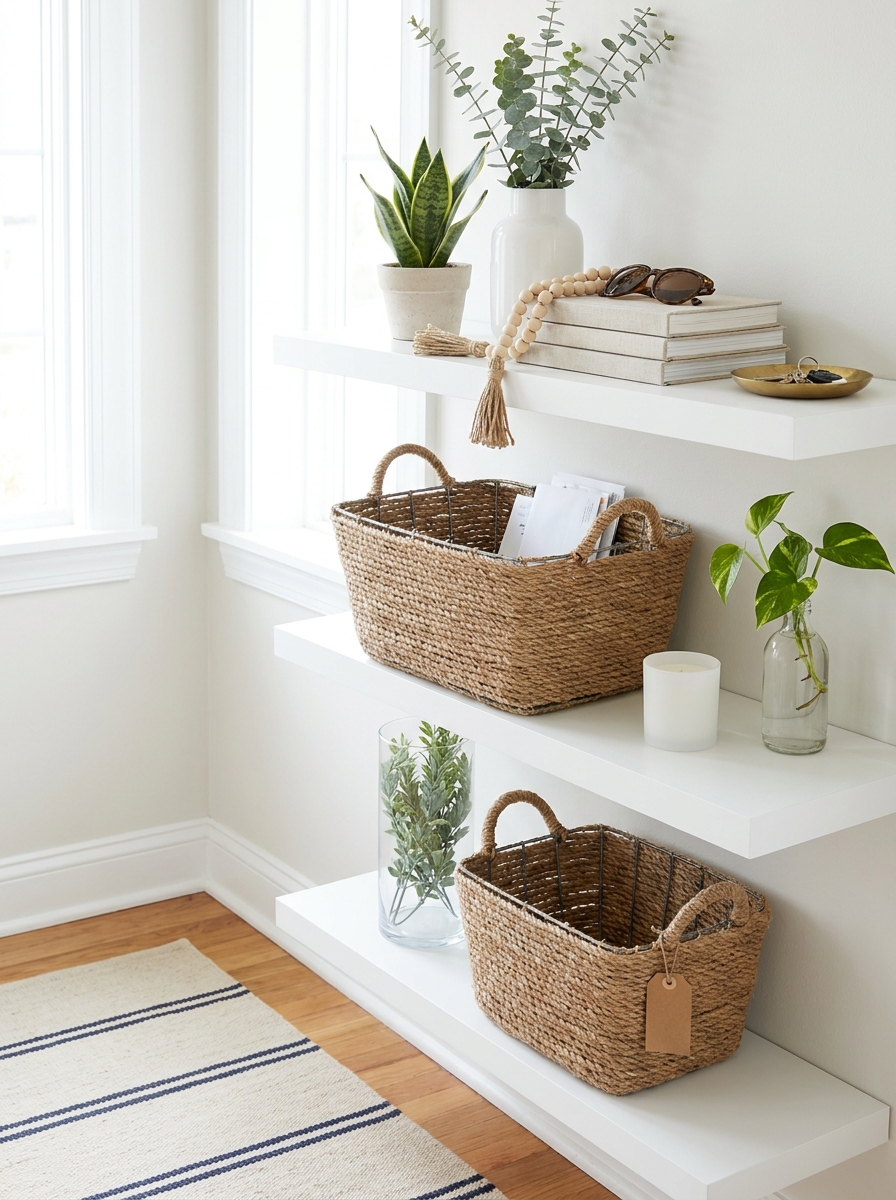
Those simple wire baskets from the dollar store? They’re about to become your new favorite storage solution. Wrap them with chunky rope or jute twine, and suddenly they look like those expensive woven baskets from boutique stores. I secured mine with hot glue as I wrapped, keeping everything tight and even.
Once you’ve got a few baskets finished, arrange them on floating shelves with some pretty props mixed in. I love using these for mail organization in the entryway or for rolled towels in the bathroom. The texture adds so much warmth to plain walls, and nobody would ever guess these started as basic wire bins.
The wrapping process is actually really relaxing—put on your favorite show and just keep winding that rope around. You’ll have a gorgeous basket set in no time. Mix different sizes for visual interest, and don’t stress about perfection. Those little imperfections make them look handmade and special, which they totally are.
18. Decorative Book Stack with Painted Spine Art
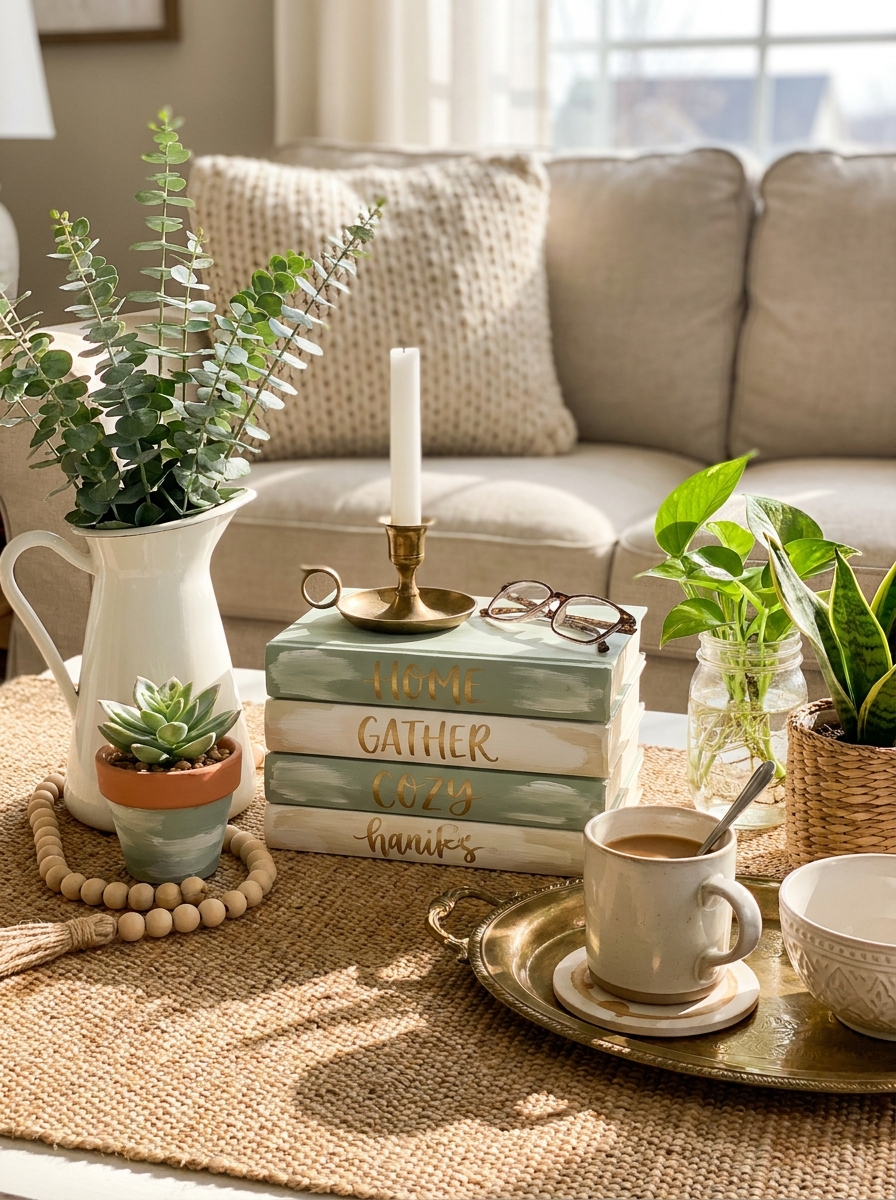
Here’s something nobody talks about enough—those old hardcover books at the dollar store can become gorgeous decor pieces with just a little paint. I grab books with interesting sizes and stack them up, then paint the spines in coordinating colors. Sometimes I add gold lettering or simple designs for extra charm.
These painted book stacks work everywhere. Use them as risers under plants, stack them on coffee tables, or create little vignettes on bookshelves. The best part? You can customize the colors to match any room. I’ve done sage green and cream for my living room, and navy with gold accents for my office.
Don’t overthink the book selection—just grab hardcovers that are similar in width. The titles don’t matter since you’re painting over them anyway. Chalk paint works beautifully for this project because it gives that matte, expensive look without primer. Stack three to five books together for the perfect height.
19. Faux Concrete Planter Set with Textured Finish
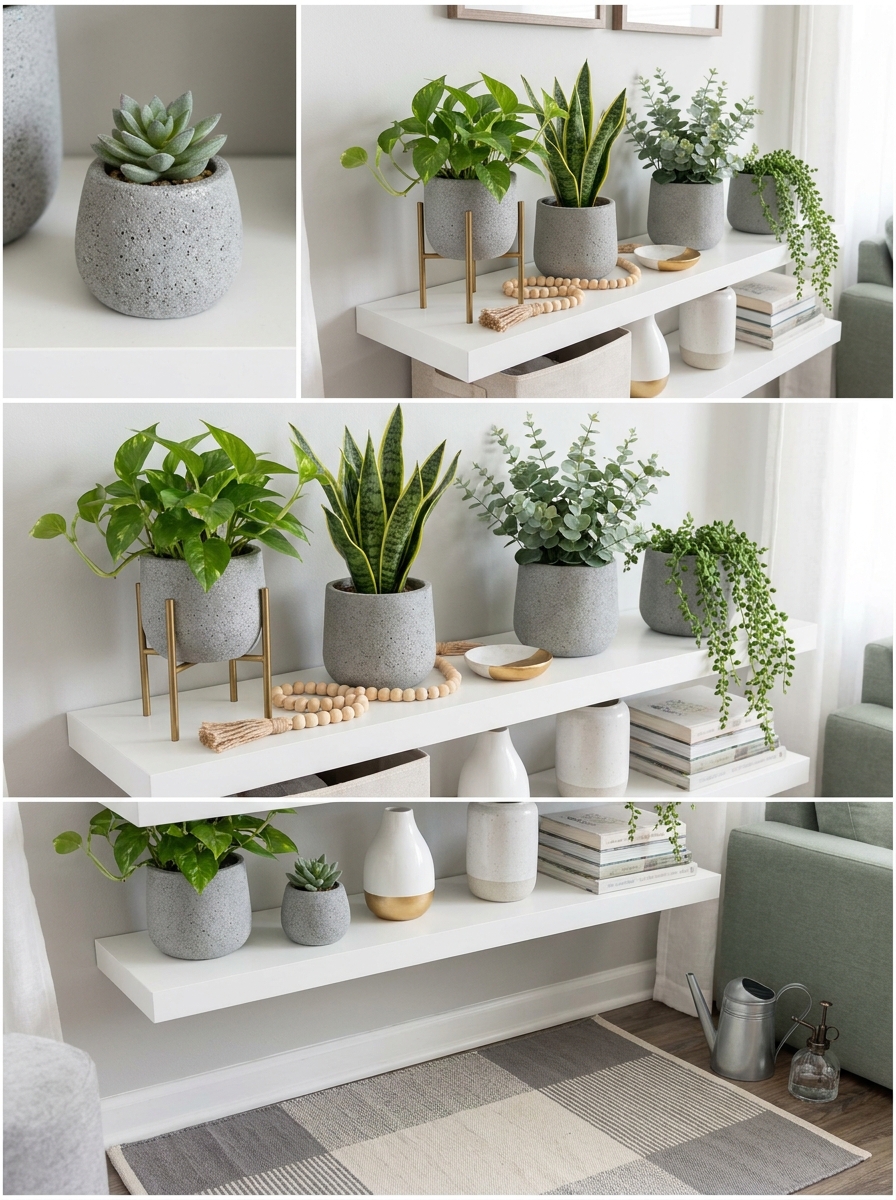
Want that trendy concrete planter look without spending a fortune? Dollar store plastic pots plus textured spray paint equals instant modern magic. I use stone-texture spray paint in gray or white, and the finish seriously looks like real poured concrete. Nobody can tell the difference from three feet away.
The trick is building up thin layers of the textured paint. Don’t try to cover everything in one coat or it’ll get goopy. I do three light coats, rotating the pot between each layer so the texture develops naturally. Once they’re dry, these planters look so high-end sitting on shelves or grouped together on a plant stand.
I love making these in different sizes and clustering them together. The textured finish catches the light beautifully and adds that industrial-chic vibe everyone’s obsessed with right now. Fill them with faux succulents or real pothos cuttings—both look amazing against that concrete-style finish.
20. Layered Serving Tray Coffee Table Display
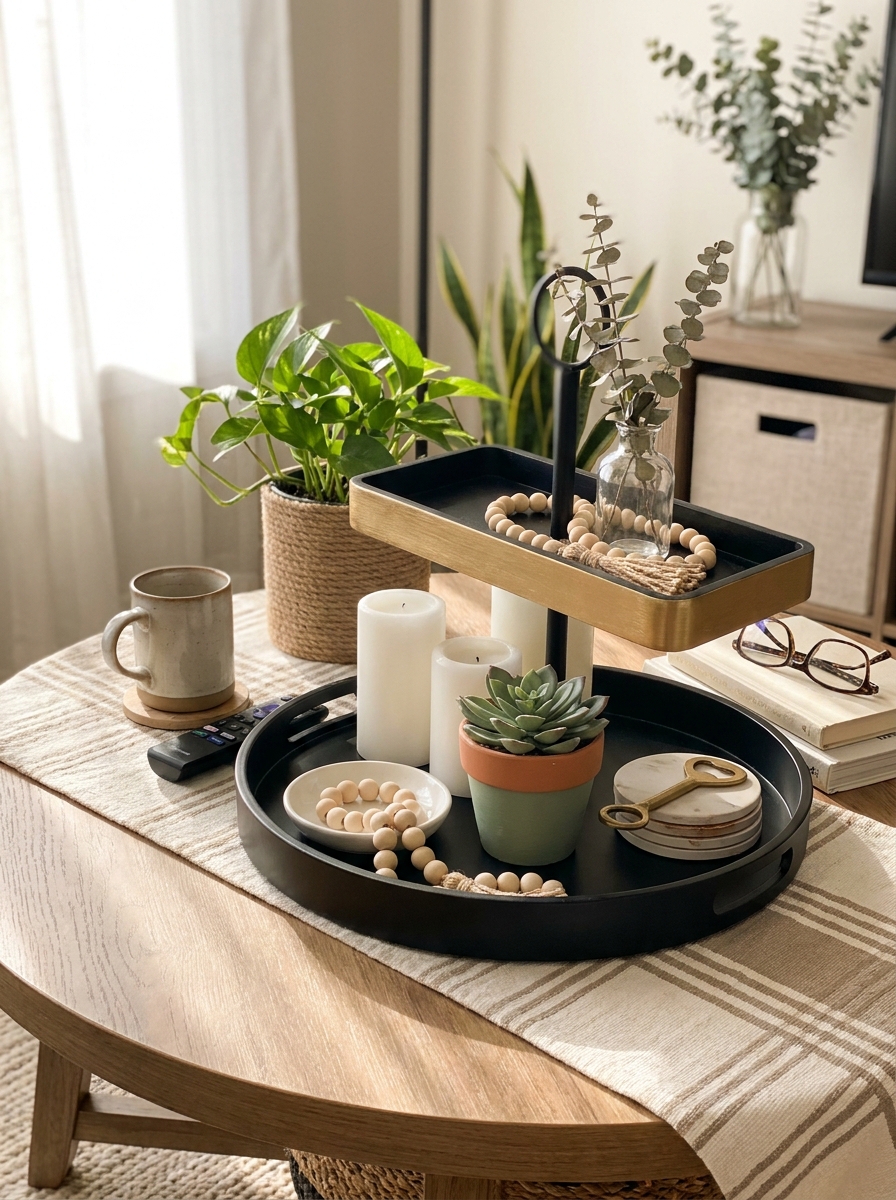
Those basic plastic or wooden trays at the dollar store are blank canvases waiting to happen. I’ve spray-painted mine in matte black, brushed on metallic gold, and even covered them with adhesive marble contact paper. Once they’re transformed, layer them on your coffee table or ottoman for an instantly styled look.
The layering trick is what makes this feel expensive and designer-like. Put your largest tray down first, then stack a smaller one at an angle on top. Fill them with candles, a small plant, coasters, and maybe a pretty dish for remotes. This creates visual height and makes everything look intentional instead of cluttered.
I switch out my tray styling seasonally, but the base trays stay the same. In fall, I add mini pumpkins and warm candles. Summer gets bright flowers and beach-collected shells. The trays ground everything together and make it easy to move things around when you actually need to use the table. Function and beauty in one simple DIY.
21. Washi Tape Geometric Wall Art in Simple Frames
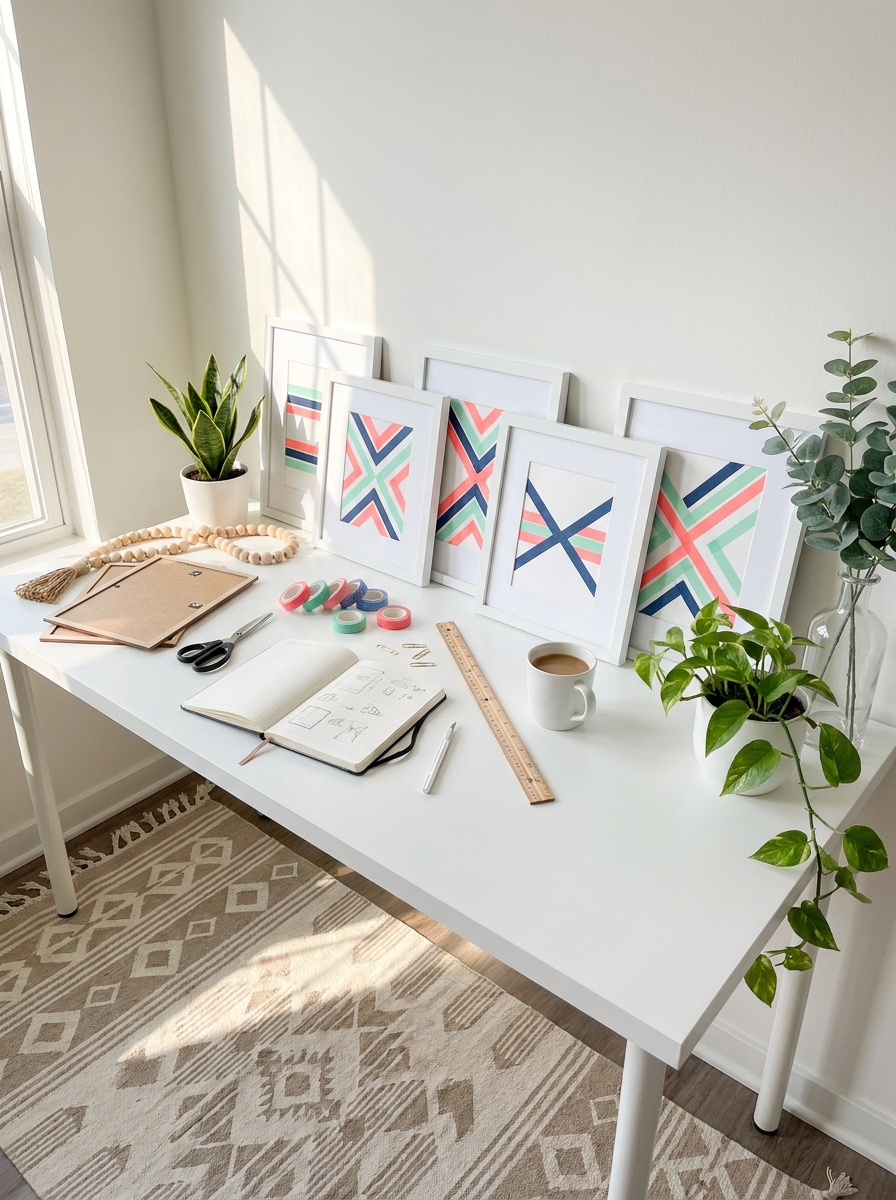
This is the easiest art project you’ll ever make, I promise! Grab a few basic frames from the dollar store and a handful of colorful washi tape rolls. You’re creating custom geometric art that looks like it came from a fancy stationery store.
Pull out the backing from each frame and go wild with the washi tape. Create stripes, chevrons, color blocks, or abstract shapes directly on the white backing. The best part? If you mess up, just peel it off and start over. No paint, no permanent mistakes, no stress.
I love mixing metallic washi tape with soft pastels for a modern look. Or go bold with primary colors for a kids’ playroom. You can literally change these out with the seasons or whenever you get bored. It takes maybe ten minutes per frame, and suddenly you have a whole art collection that cost you less than a latte. Frame them in white, black, or even spray-paint the frames to match your room. It’s the kind of project you’ll want to make for every room.
22. Ribbon-Trimmed Hand Towel Bathroom Refresh
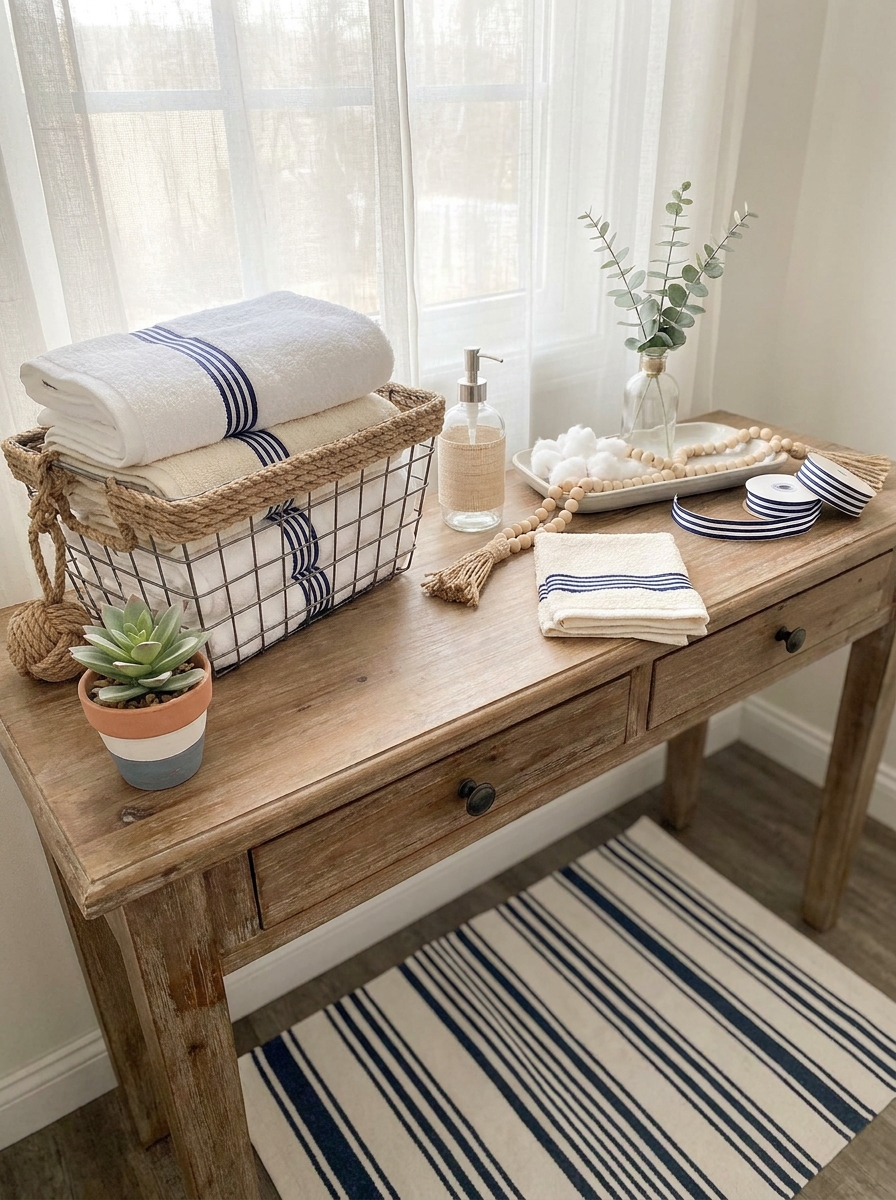
Want to make your basic bathroom towels look expensive? Hit up the ribbon aisle at the dollar store and prepare for the easiest glow-up ever. You’re basically adding designer trim to plain towels for pennies.
Grab solid-colored hand towels and some pretty grosgrain or patterned ribbon. Pin the ribbon horizontally across the towel about two inches from the bottom edge, then stitch it on with a simple straight stitch. If you don’t have a sewing machine, fabric glue works perfectly fine too. I’ve done both and honestly can’t tell the difference after they’re washed.
This works for kitchen towels, bathroom hand towels, even plain throw pillows if you’re feeling ambitious. I like using cream towels with navy striped ribbon for a coastal vibe, or white towels with black and white patterned ribbon for modern farmhouse style. You can find ribbon in every pattern imaginable at the dollar store. Stack these pretty towels in a basket or hang them on your towel bar—instant expensive spa vibes for maybe three dollars total.
23. Layered Cutting Board Wall Decor Display
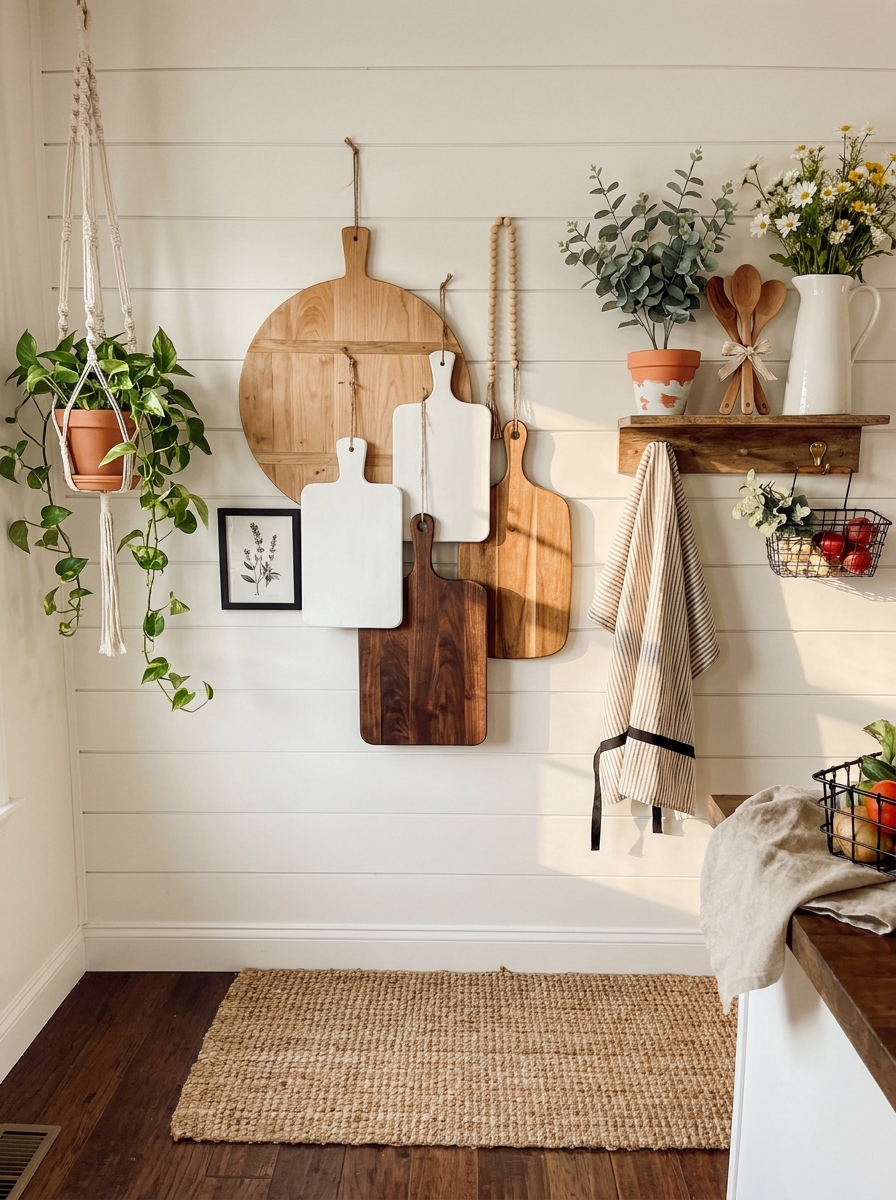
Those plain wooden cutting boards at the dollar store aren’t just for chopping vegetables anymore! I’ve been using them as rustic wall decor and people always think I found them at some fancy farmhouse boutique.
Grab cutting boards in different sizes and shapes—round, rectangular, whatever they have. Sand them lightly if they’re rough, then you can leave them natural, stain them with wood stain, or even paint a few. I like keeping some natural and painting others in matte white or black for contrast. Attach picture hanging strips or small sawtooth hangers to the back.
Layer them on your kitchen wall like art pieces, or prop them on plate stands on your counter. You can also use them as actual serving boards when you need them! I’ve created whole gallery walls mixing cutting boards with small framed prints and hanging plants. The varied wood tones and shapes create such a warm, collected-over-time look. Add some greenery around them and boom—instant European kitchen vibes for five bucks.
24. Fabric-Wrapped Book Bundle Coffee Table Accent
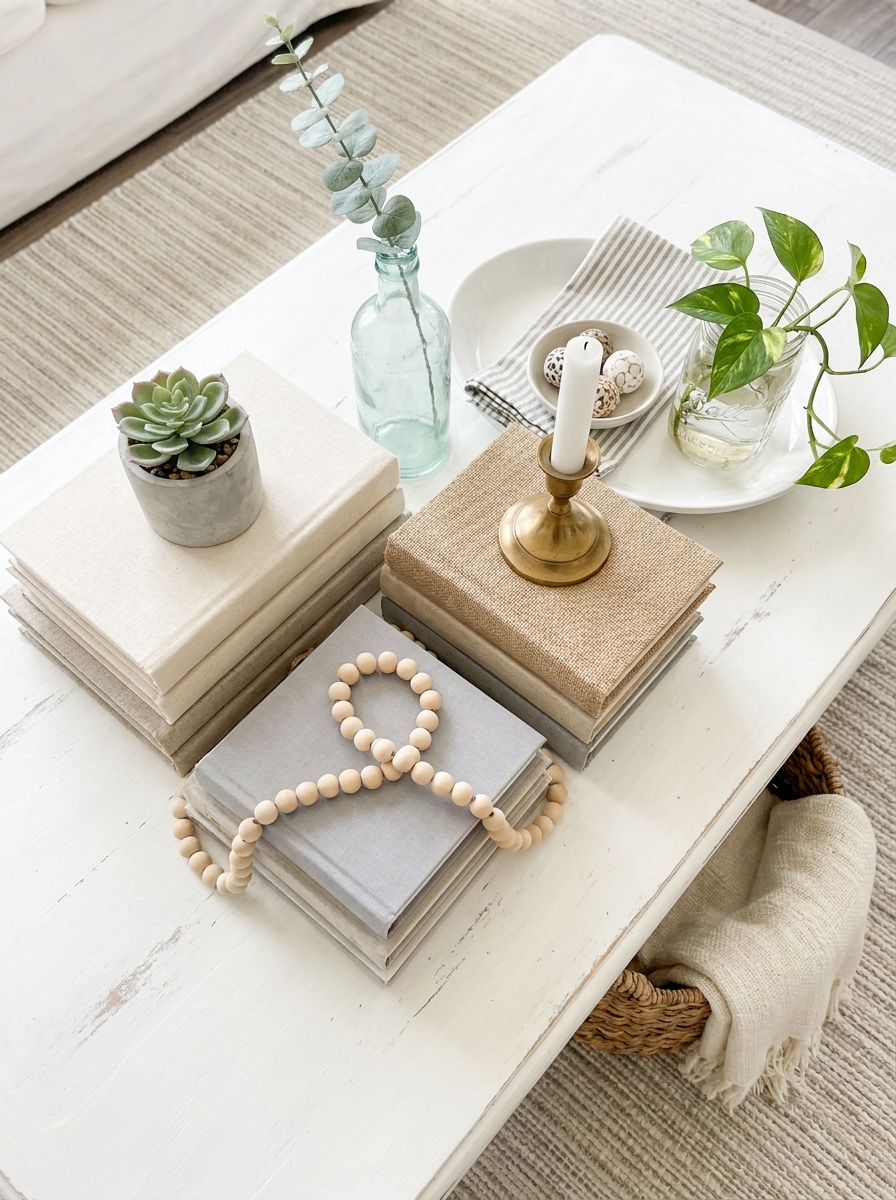
This trick makes even the ugliest old books look like they belong in a design magazine. You’re wrapping dollar store hardcover books in fabric scraps to create gorgeous neutral book stacks that tie your whole room together.
Hit the dollar store for any hardcover books—honestly the content doesn’t matter because you’re covering them completely. Grab some neutral fabric from their craft section or use fabric scraps you already have. Cut fabric large enough to wrap each book like a gift, fold the edges neatly, and secure with hot glue or double-sided tape on the inside covers.
Stack these wrapped books on your coffee table, nightstand, or console table. I love using linen, burlap, ticking stripe, or even pretty tea towels as wrappers. Create stacks in coordinating neutrals or mix textures for interest. Top the stack with a small plant, candle, or decorative object. It instantly adds height and that layered, collected look designers are always talking about. Plus you can rewrap them seasonally if you want to switch up your color scheme!
25. Wicker Charger Plate Wall Medallions
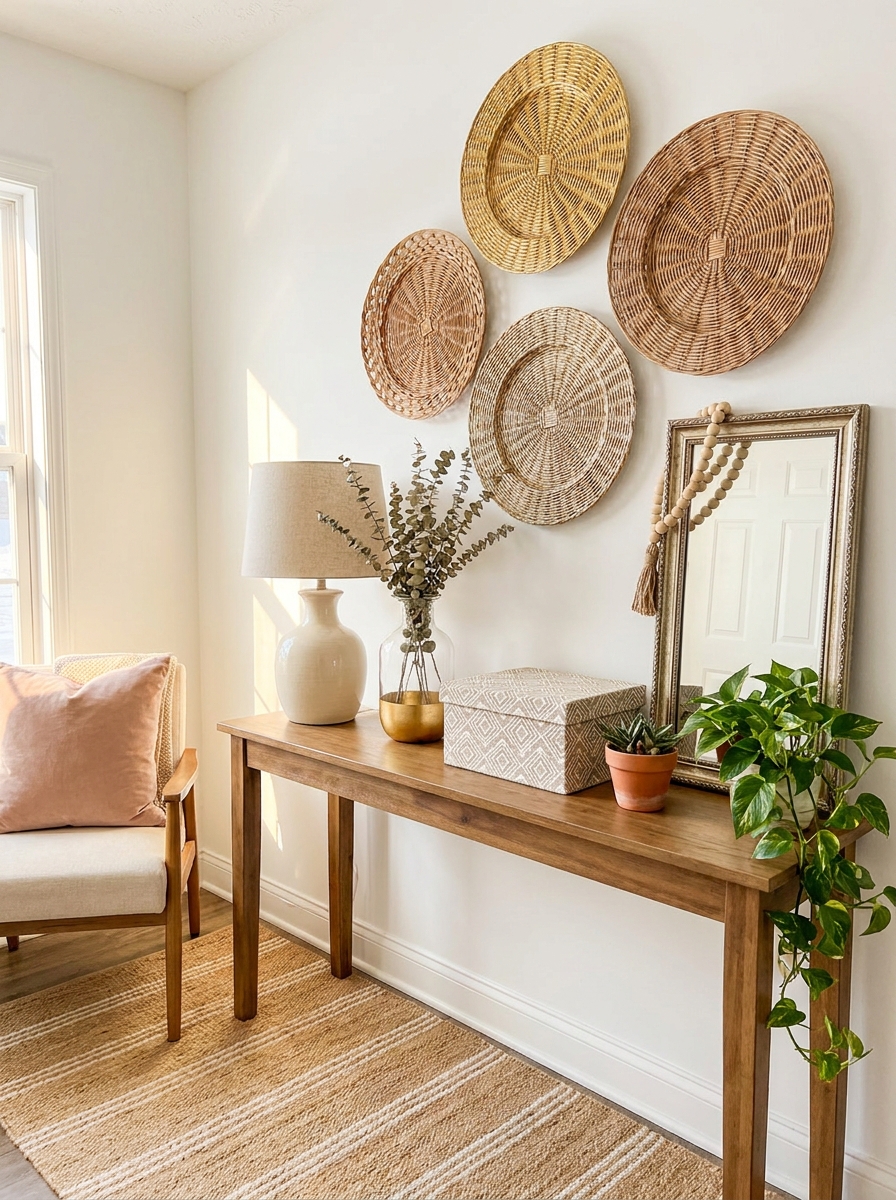
Those round wicker chargers at the dollar store? They’re basically wall art waiting to happen! I’m obsessed with how they instantly add texture and warmth to any blank wall. You can leave them natural, spray paint them in different metallic finishes, or layer them with smaller decorative plates from the dollar store. The woven texture catches light so beautifully.
Hang them in a cluster of three or five for maximum impact. I love mixing sizes if you can find different diameters, but even all the same size looks amazing arranged asymmetrically. You can add ribbon, dried flowers, or even paint designs on them if you’re feeling creative. They work perfectly in dining rooms, entryways, or above a console table.
The best part? They’re lightweight, so you can hang them with command strips without worrying about damage. They give you that expensive boho-chic look for literally a couple of dollars each. I’ve seen similar pieces at home decor stores for $40+ each!
Quick Guide
## Budget Breakdown: What $25 Actually Gets You
Here’s what you can realistically make with a single twenty-five dollar trip to the dollar store:
Spray Paint Projects: 3 cans of spray paint ($3–4 each) + 5–7 glass vases or containers = Full vase collection
Rope Wrapping: 4 rolls of jute rope + 2 plastic bins + hot glue sticks = Two finished storage baskets
Contact Paper Magic: 1 roll marble contact paper + 3–4 wooden trays = Complete tray set for multiple rooms
Paint Transformations: 2–3 bottles acrylic paint + 8–10 terracotta pots + brushes = Entire painted pot collection
Mixed Project Haul: 1 can spray paint + 2 glass vases + 1 roll rope + 1 plastic bin + 3 terracotta pots + paint = Multiple finished projects
The sweet spot? Pick one or two project types per trip and buy everything you need to complete them. You’ll spend less and actually finish what you start.
Your Dollar Store Decor Journey Starts Now
Your Dollar Store Decor Journey Starts Now
Frequently Asked Questions
What are the best dollar store items to buy for DIY home decor projects?
Glass vases, wooden crates and trays, plastic storage bins, terracotta pots, and picture frames are your best bets. These items have good structure and take paint, fabric, rope, or contact paper really well. Avoid anything too flimsy or oddly shaped—stick with classic simple forms that can handle transformation. I also love their candlesticks, wooden beads, and basic mirrors for quick makeovers.
How do you make dollar store crafts look expensive and high-end?
The secret is in the finish details and how you style the final piece. Use quality spray paint with a matte or satin finish, not cheap glossy paint that looks plasticky. Take your time with application—thin even coats always look better. Then style your finished pieces with other nice items like real plants, good books, or quality textiles. The company they keep elevates them.
What supplies do I need to start DIY dollar store home decor projects?
Start with the basics: a hot glue gun and extra glue sticks, spray paint in neutral colors, acrylic craft paint and brushes, and contact paper in marble or wood grain patterns. Add jute rope, scissors, and a craft knife to your kit. These supplies handle about 90% of dollar store transformations. You can find most of these at the dollar store itself, though I recommend buying spray paint from a hardware store for better quality.
How long does it take to complete dollar store DIY decor projects?
Most projects take 20–45 minutes of active work time, plus drying time for paint or glue. Spray painting vases takes maybe 20 minutes spread across two light coats. Rope wrapping a basket takes 30–40 minutes of steady work. Contact paper application is quick—about 15 minutes per tray once you get the hang of it. The actual time commitment is super manageable, even for busy schedules.
Can dollar store DIY home decor projects hold up over time or do they fall apart?
If you prep surfaces properly and use good adhesives, they absolutely hold up. I have spray-painted vases from three years ago that still look perfect. The key is surface prep—clean everything well before painting or gluing. Use the right glue for your material (hot glue for rope and fabric, strong craft glue for heavier items). Seal painted items if they’ll get heavy use. With proper technique, these aren’t temporary fixes—they’re legitimate decor pieces that last.