32 Genius Rental Bathroom Makeovers (No Drill Required!)
You’re staring at that boring builder-grade bathroom again. The one with the yellowing grout, the fluorescent light that makes everyone look slightly ill, and that weird beige tile you’d never pick yourself. But here’s the thing—you don’t own this place, so ripping everything out isn’t exactly an option. I totally get it. I’ve lived in enough rentals to know that sad feeling when you want your space to feel like YOU, but you’re terrified of losing that deposit. The good news? You can completely transform your rental bathroom without a single power tool or permanent change. We’re talking peel-and-stick magic, clever command hooks, and styling tricks that’ll make your landlord think you hired a designer. Some of these ideas cost less than your monthly coffee habit. Others just require you to think a little differently about what’s possible when you can’t renovate. Let’s get into it.
1. Peel-and-Stick Subway Tile Behind the Sink
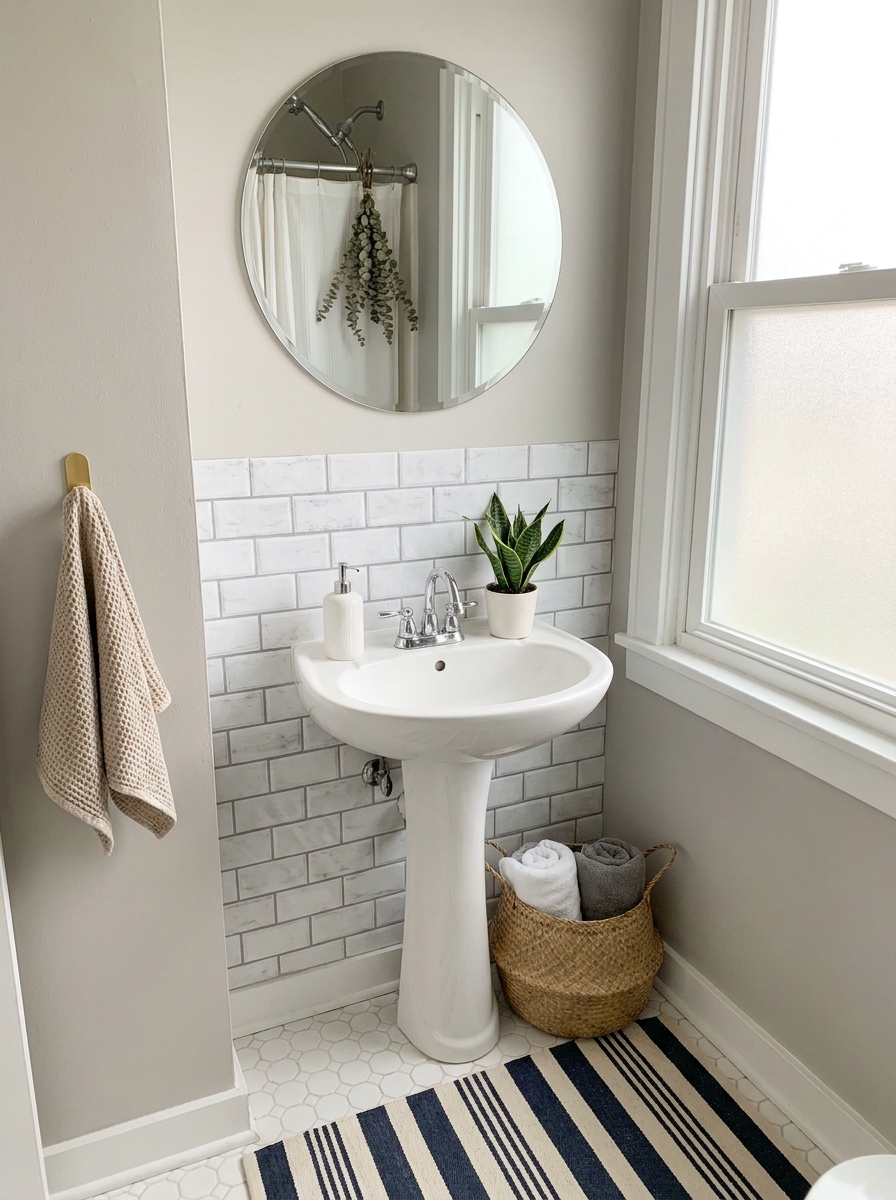
Nothing says rental bathroom like a blank painted wall behind your pedestal sink. It’s just…there. Doing nothing.
Peel-and-stick subway tile changes everything without touching your deposit. The newer versions look shockingly real—like actual ceramic tile with grout lines and everything. You can cover that awkward wall space in an afternoon, and when you move out, it peels right off. I’ve used it in two rentals now and never had an issue. The trick is cleaning the wall really well first with rubbing alcohol so it actually sticks.
Go for classic white subway tile if your bathroom has warm wood tones or brass fixtures. It instantly makes the space feel more finished and expensive. The best part? It protects your wall from water splashes, which your landlord will actually appreciate. You can find decent peel-and-stick tile for around twenty bucks at the hardware store, and one box usually covers a small backsplash area. It’s one of those changes that makes people ask if you renovated.
2. Removable Wallpaper Accent Wall
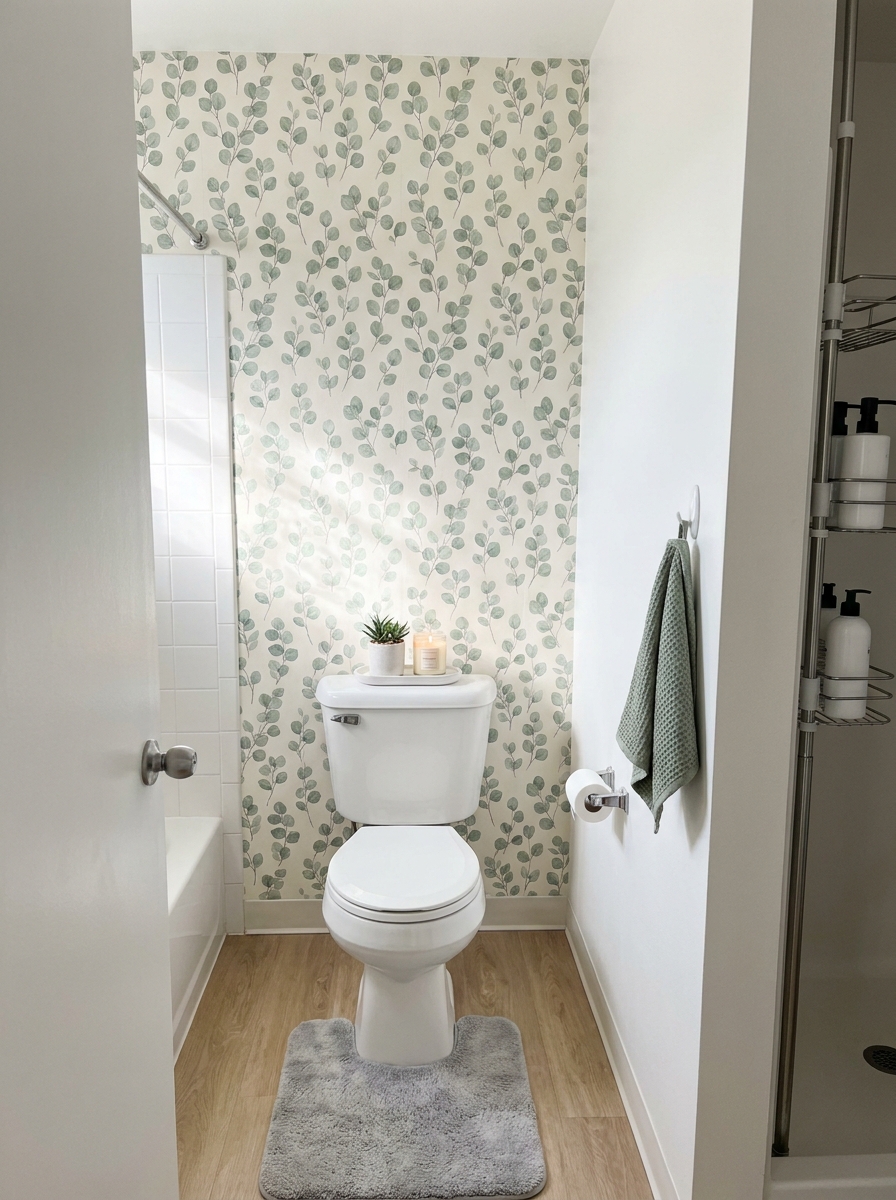
Okay, this one feels bold at first. Wallpaper? In a rental? But removable wallpaper has come SO far. It’s not that weird plasticky stuff from ten years ago.
Pick one wall—usually the one behind the toilet or across from the door—and cover it in a pattern that makes you stupidly happy every time you walk in. Florals, geometric prints, subtle textures, whatever speaks to you. The application is easier than you think. You just peel, stick, smooth out bubbles with a credit card, and trim the edges. When you move, it peels off cleanly without taking paint with it. I learned this the hard way: buy an extra roll. You’ll inevitably mess up a piece or want to touch up a seam later.
A pretty accent wall tricks the eye into thinking your whole bathroom got a designer makeover. It adds personality and covers up that weird paint color you hate. Plus, it’s way more interesting than staring at blank beige walls while you’re brushing your teeth every morning.
3. Adhesive Mirror Frame Upgrade
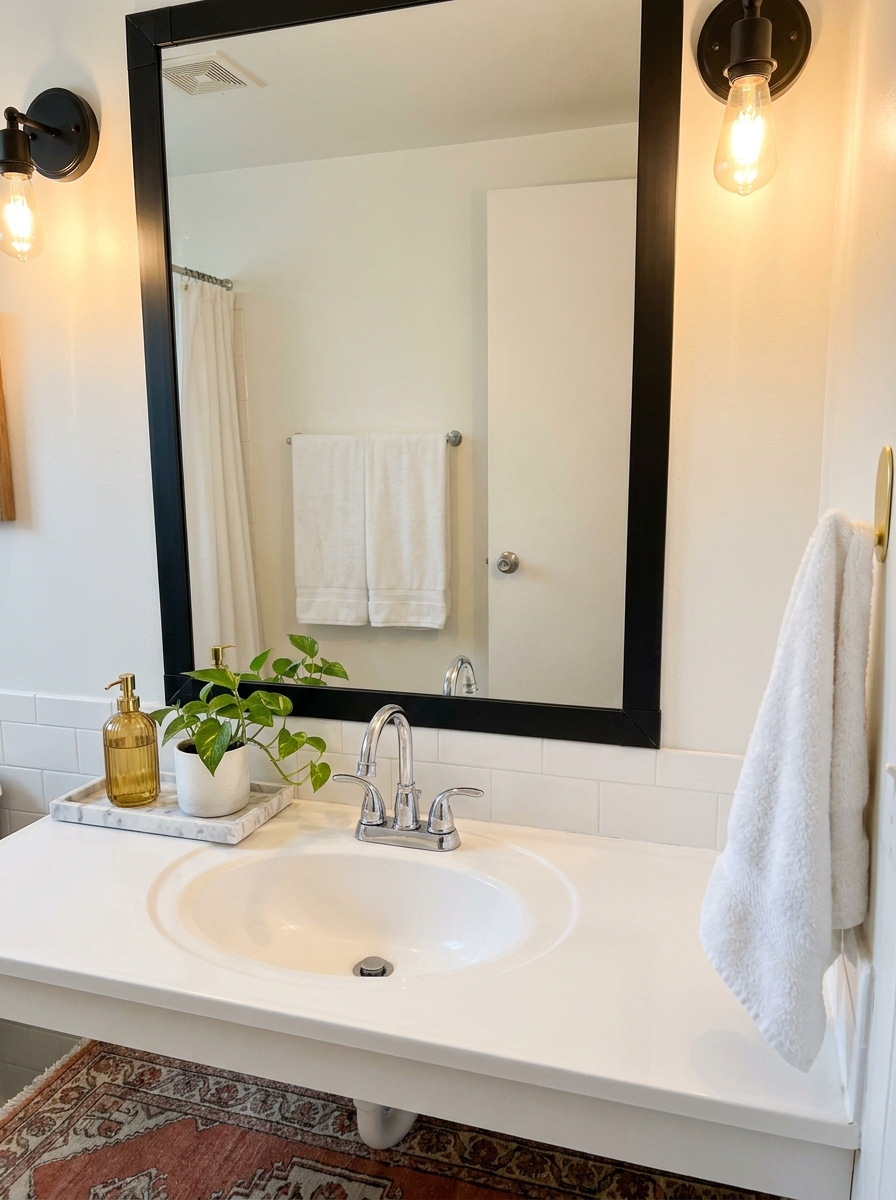
That plain builder-grade mirror above your sink isn’t doing you any favors. It’s functional, sure, but it’s also boring and makes your whole bathroom feel like a hotel you didn’t want to stay at.
You can buy adhesive mirror frame kits that literally stick right onto your existing mirror. They come in different finishes—black matte, brushed gold, white wood grain, whatever matches your vibe. The frames attach with strong adhesive strips that won’t damage the mirror when you peel them off later. It takes maybe twenty minutes to install, and suddenly your sad basic mirror looks custom and expensive.
This tiny change makes such a visual impact. Your eye immediately goes to the mirror when you walk into any bathroom, so framing it properly elevates the entire space. I did this in matte black in my last rental and got so many compliments. People thought I’d replaced the whole mirror. Nope—just stuck some trim pieces around the edges and called it a day.
4. Contact Paper Countertop Refresh
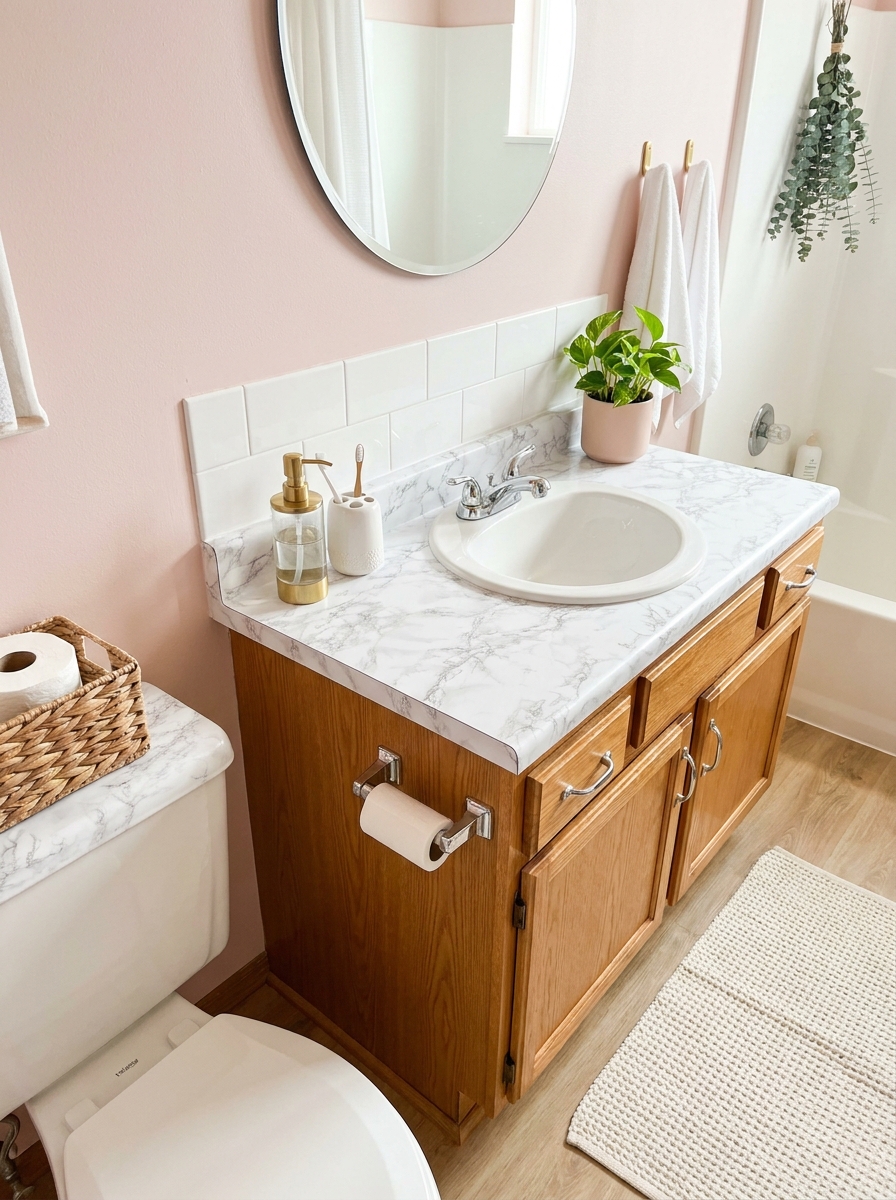
If you’re stuck with an ugly laminate countertop—you know, the kind with that weird speckled pattern from 1987—contact paper is about to become your best friend.
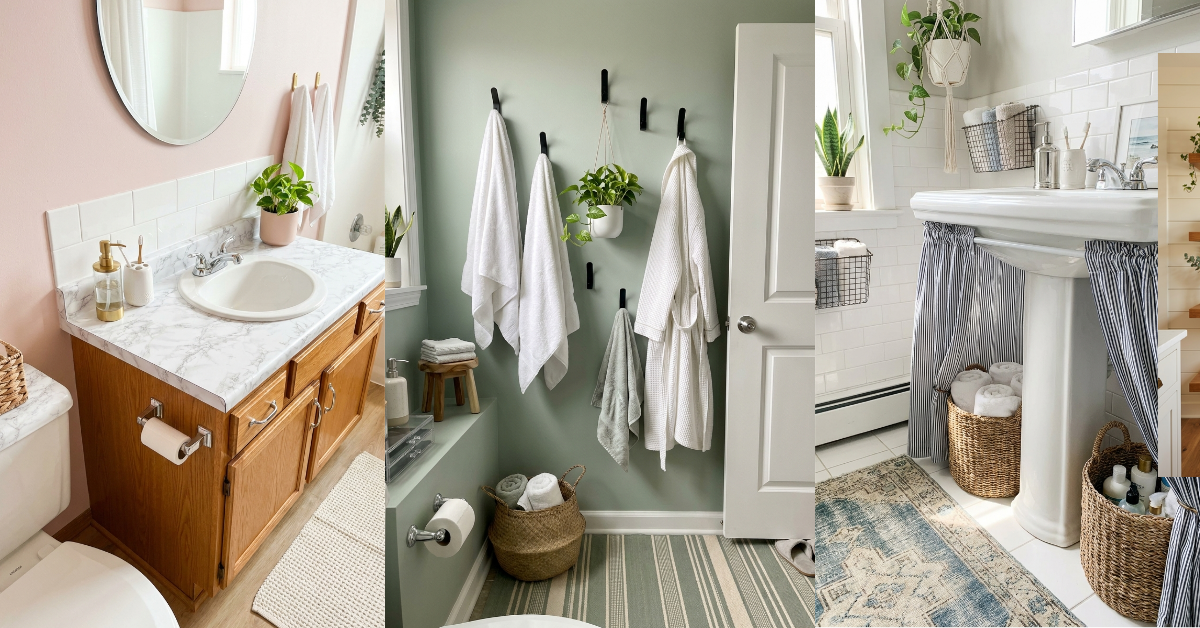
Marble-look contact paper has gotten ridiculously realistic. From even two feet away, it looks like actual stone. You measure your counter, cut the paper to size, peel off the backing, and smooth it down carefully. Go slow to avoid air bubbles. A squeegee or credit card helps. When you leave, you peel it right back off. The countertop underneath is exactly as you found it, just protected from two years of your toothpaste splatters.
This works on any flat surface—counters, the top of your toilet tank, even that weird shelf above the toilet if your bathroom has one. White marble contact paper makes everything look cleaner and more expensive. The whole project costs maybe fifteen bucks and takes an hour. But suddenly your bathroom looks like you invested hundreds in new countertops. It’s genuinely wild how much difference a surface change makes.
5. Tension Rod Shower Curtain Layering
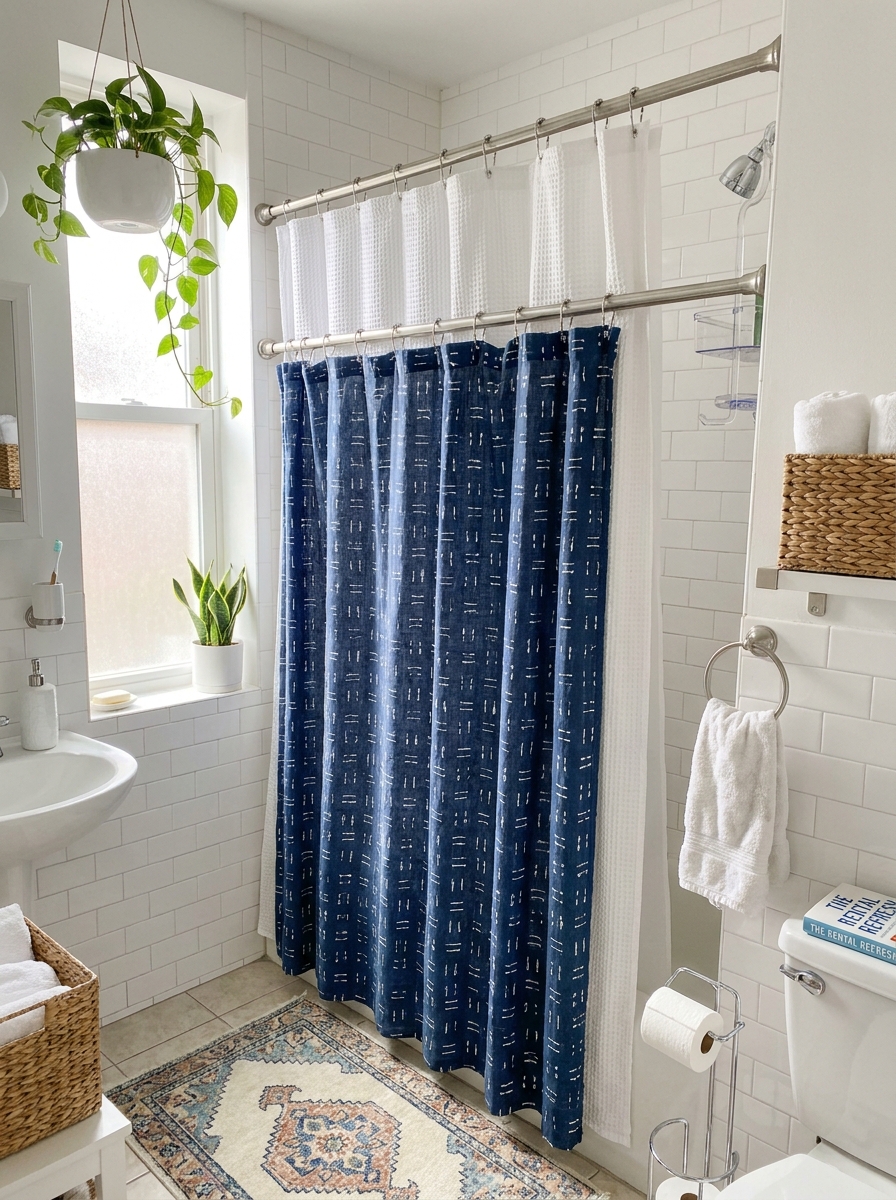
This trick completely changed how I look at shower curtains! Instead of one sad curtain doing all the work, use two tension rods to layer a fabric curtain over your liner. It adds instant dimension and makes your bathroom feel so much more designed.
I love picking a patterned outer curtain that brings in color and personality while the clear or white liner does the actual water-blocking. The best part? Tension rods mean zero drilling into tile. You can switch out the outer curtain seasonally or whenever you get bored.
The layered look makes even the smallest bathroom feel pulled together. Go for a curtain that picks up colors from your towels or rug to tie everything together. And here’s the thing—this is one of those changes that photographs really well, so your bathroom suddenly looks magazine-worthy in listing photos when you move out.
6. Vinyl Decal Tile Stickers
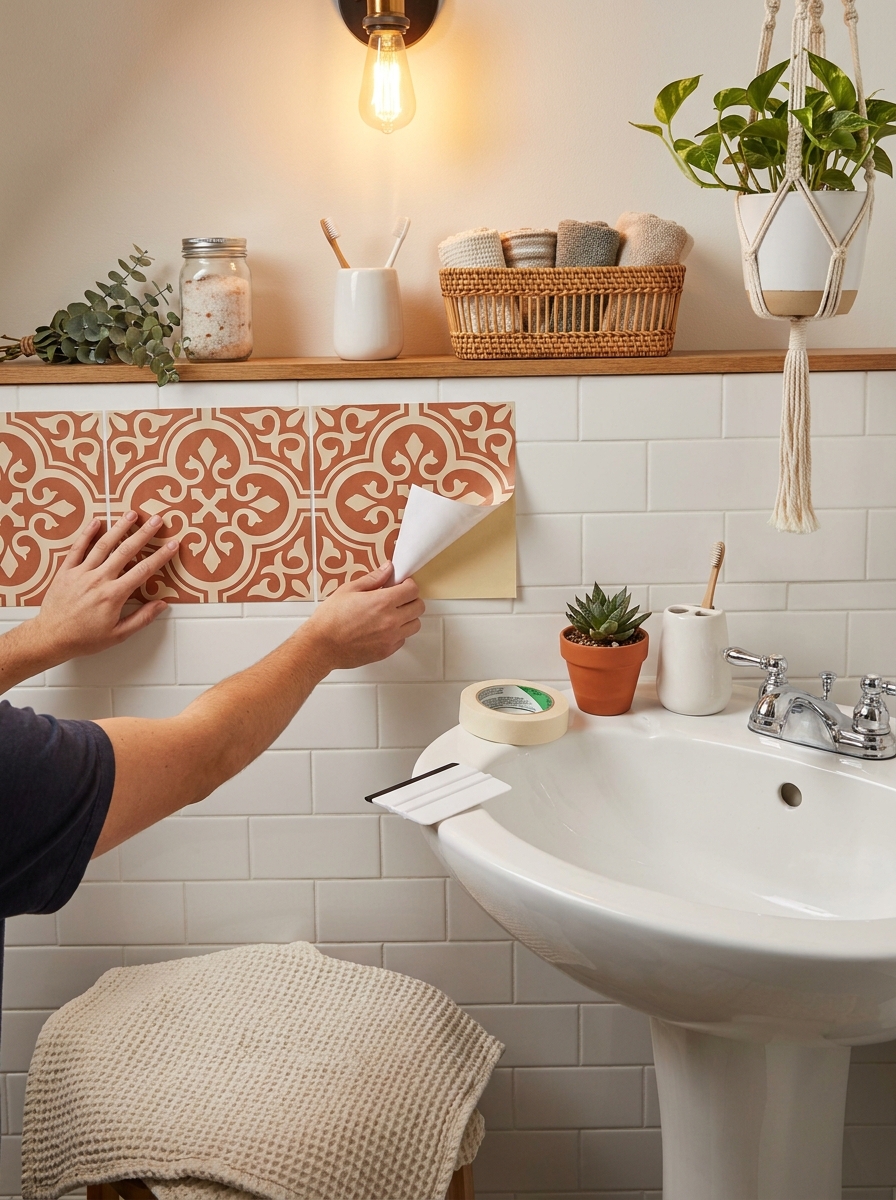
Okay, if you’re stuck with boring builder-grade tile, vinyl decals are about to become your best friend. These little stick-on squares transform plain white or beige tiles into something that looks custom and intentional. I’m obsessed!
You can go full Mediterranean with blue and white patterns, add a pop of color with geometric designs, or keep it subtle with tone-on-tone details. Apply them in a scattered pattern or create a border—whatever speaks to you. They peel off cleanly when you move, which is exactly what landlords love to hear.
I usually start with a small section to test the look before committing to the whole wall. The application is super satisfying too—just peel, stick, and smooth. No grout, no mess, no commitment. Within an hour, your bathroom goes from basic to “wait, did you retile?” And that feeling is absolutely priceless.
7. Command Hook Towel and Robe Station
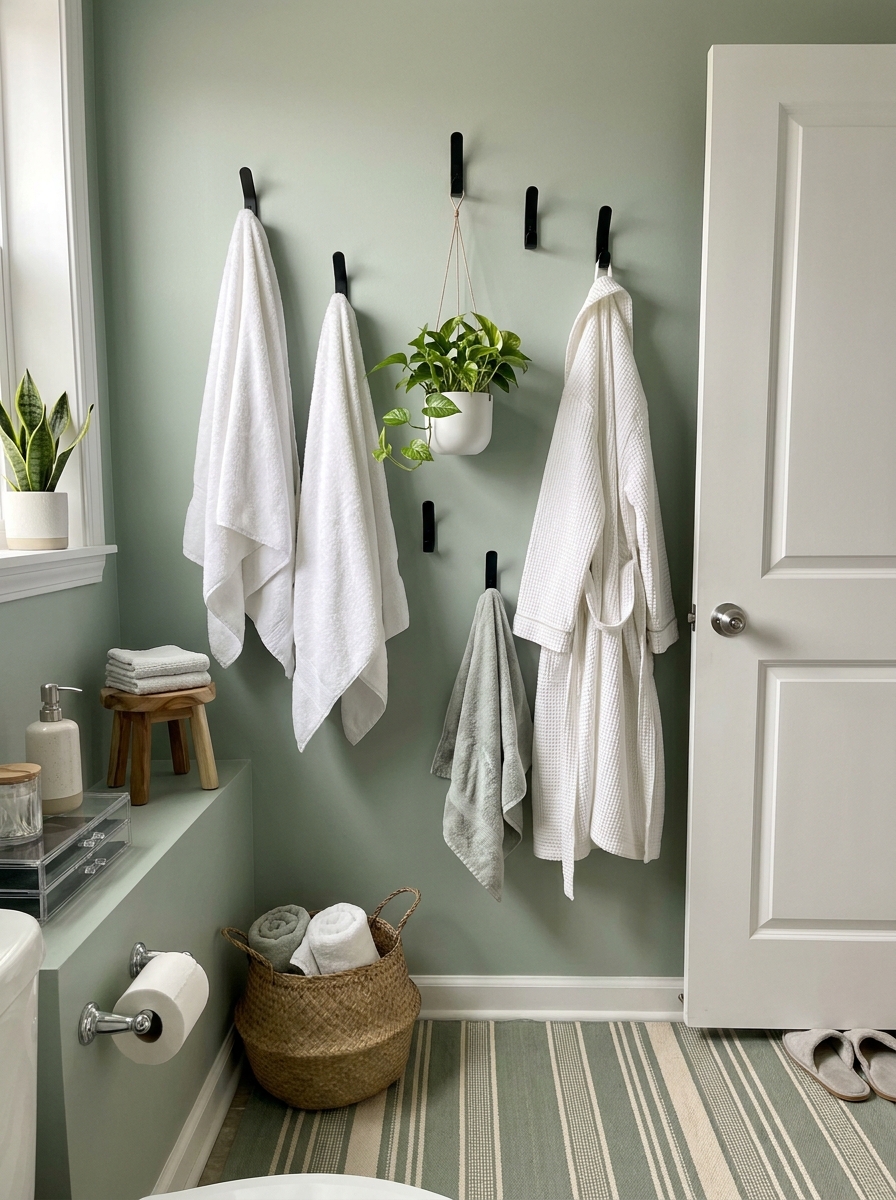
Let’s talk about the unsung hero of rental bathrooms: Command hooks. Seriously, a few strategically placed hooks completely solve the “where do I put anything” problem that plagues most rental bathrooms. No towel bars? No problem!
I create little stations using different hook styles. Behind the door gets a robe hook. Near the shower, I add two hooks for towels. Maybe another by the sink for a hand towel. The variety in finishes now is amazing—brushed nickel, matte black, brass—so you can match whatever vibe you’re going for.
The damage-free aspect is what makes this so perfect. Your landlord can’t complain, and you’re not losing your deposit over holes in the wall. Plus, you can rearrange them whenever you want to change up your layout. It’s functional and flexible, which is exactly what renters need.
8. Freestanding Over-Toilet Ladder Shelf
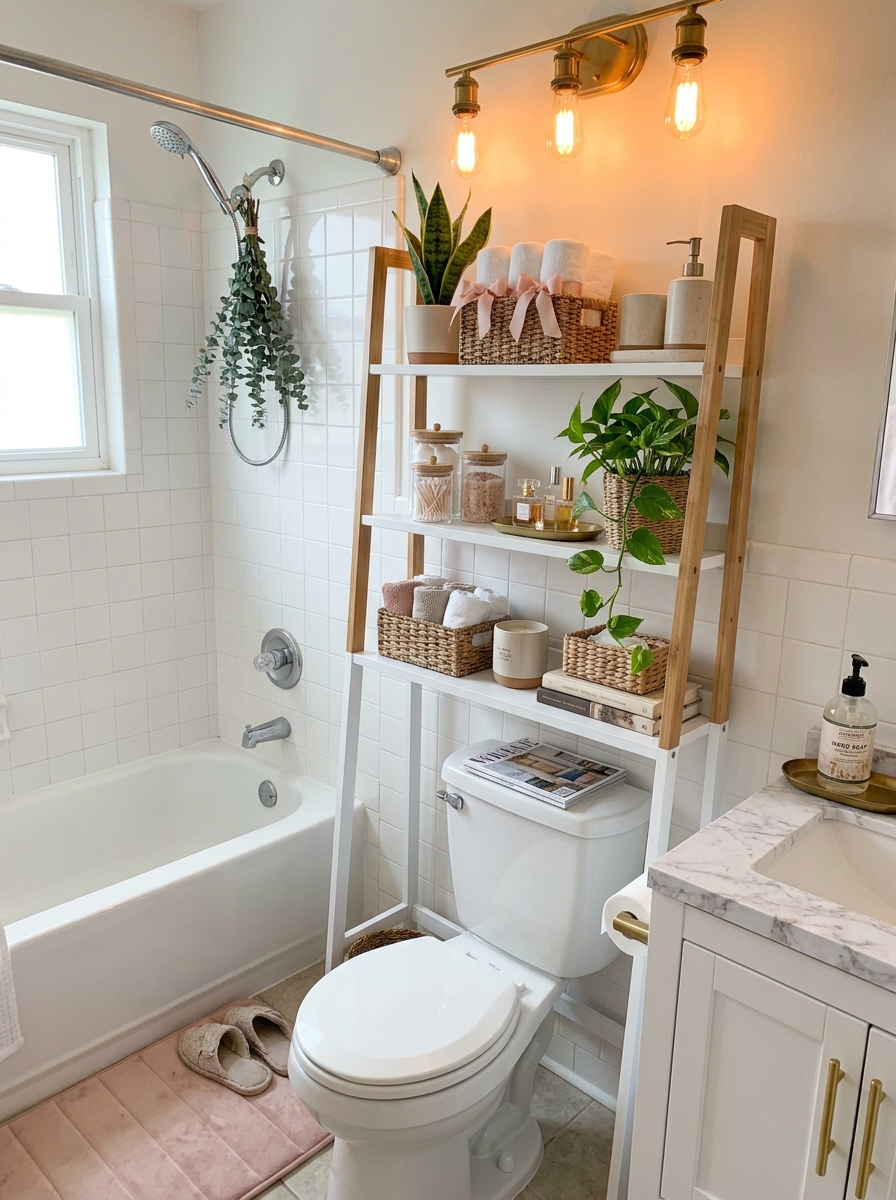
Storage is the biggest challenge in rental bathrooms, right? You can’t install shelves, and counter space is basically nonexistent. Enter the over-toilet ladder shelf—my favorite freestanding storage hack that looks intentional instead of desperate.
These lean against the wall and use that awkward space above your toilet for beautifully styled storage. I load mine with rolled towels, pretty baskets for toiletries, a plant or two, and maybe a candle. It instantly makes the bathroom feel more spa-like and way more functional.
The freestanding design means zero installation. You just place it and start styling. When you move, you take it with you—no patching holes or explaining anything to your landlord. Look for one in a finish that coordinates with your other metals, and suddenly your random rental bathroom feels completely cohesive and thought-out.
9. Floating Fabric Skirt Under Pedestal Sink
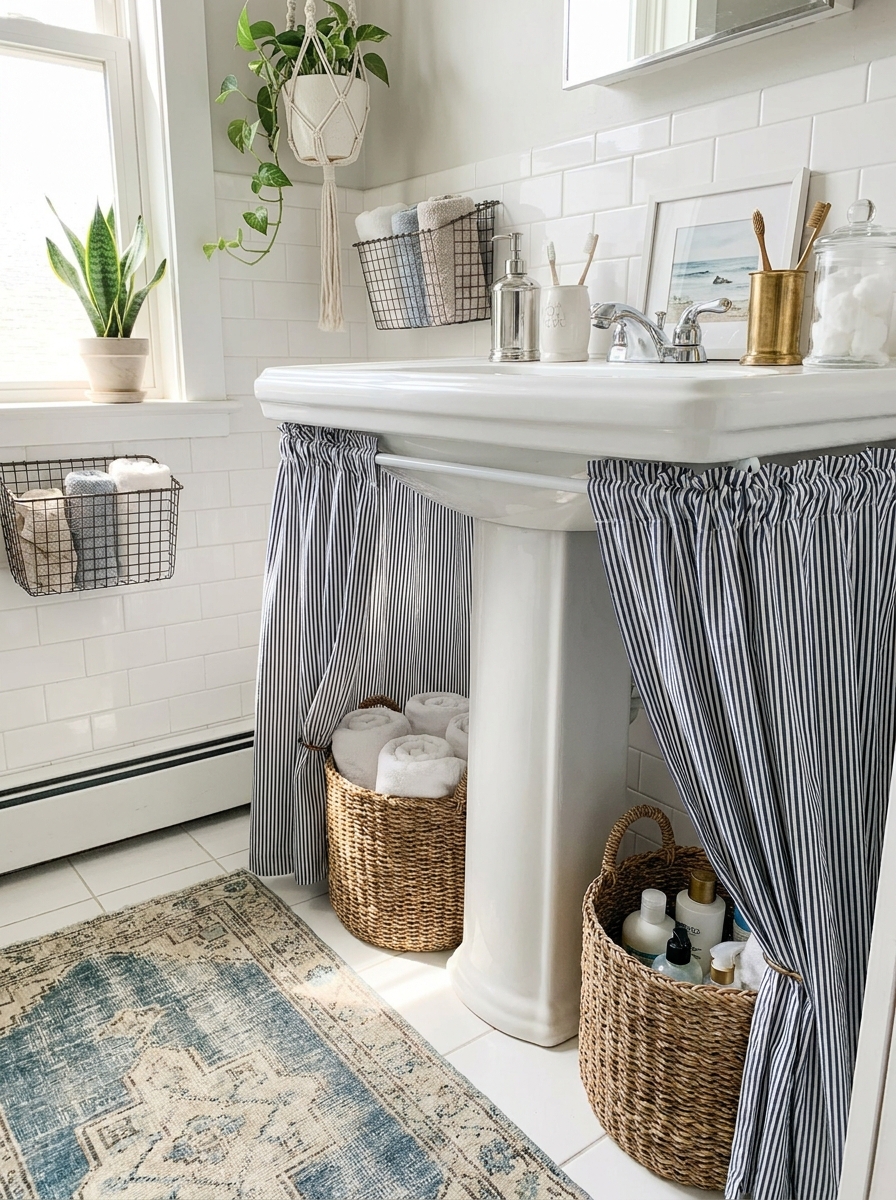
That awkward space under a pedestal sink? Total missed storage opportunity. A fabric sink skirt hides cleaning supplies and toilet paper without drilling a single hole. I use tension rods (one at the front, one at the back if your sink allows) and a pretty fabric panel that coordinates with my bathroom vibe.
The best part is how much visual warmth fabric adds to a cold, builder-grade bathroom. I went with a navy and white stripe that feels coastal and clean, but you could do anything from cheerful florals to sophisticated linen. Just measure your sink circumference, add a few inches for gathering, and hem the top to create a rod pocket.
This trick instantly makes your bathroom feel more finished and cottage-like. Plus, you can swap the fabric seasonally if you get bored. When you move out, remove the tension rod and you’re done. The hidden storage bonus means all those ugly cleaning bottles disappear behind something pretty.
10. Battery-Powered LED Mirror Lighting Strip
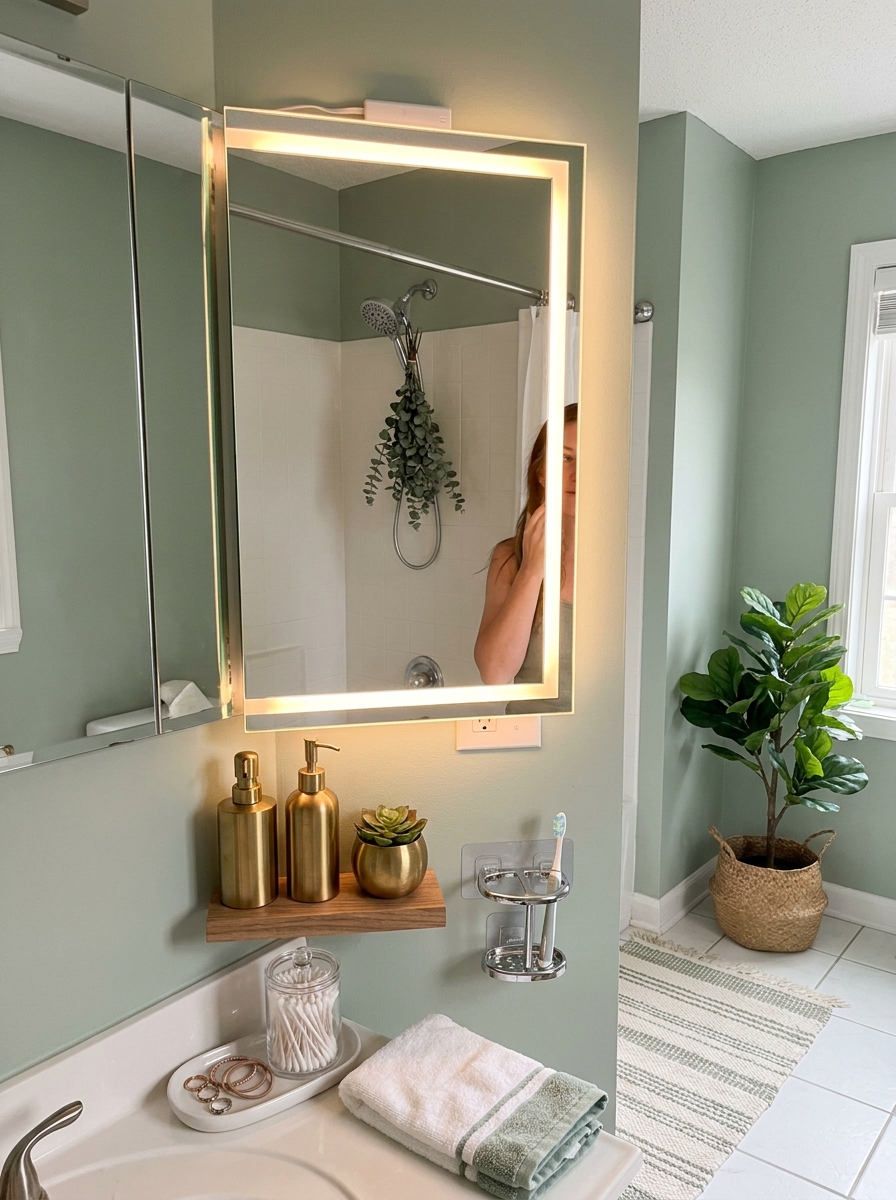
Terrible lighting is the number one bathroom buzzkill, and most rentals have that one sad overhead bulb that makes everyone look like a zombie. Battery-powered LED strips that stick right to your existing mirror change everything. No electrician, no hardwiring, just peel-and-stick magic.
I added a warm-white LED strip around my medicine cabinet mirror and suddenly my makeup actually matches my face in daylight. The adhesive backs stick firmly to glass or mirror frames, and most come with a remote so you can adjust brightness. Some even have different color temperatures if you want cooler light for detailed tasks.
The glow-up is immediate and dramatic. Your whole bathroom feels more expensive and spa-like with proper vanity lighting. I’ve had mine up for eight months and the batteries are still going strong. When you move, peel them off carefully (a little heat from a hairdryer helps) and take them with you.
11. Swappable Shower Curtain Hardware in Matte Black
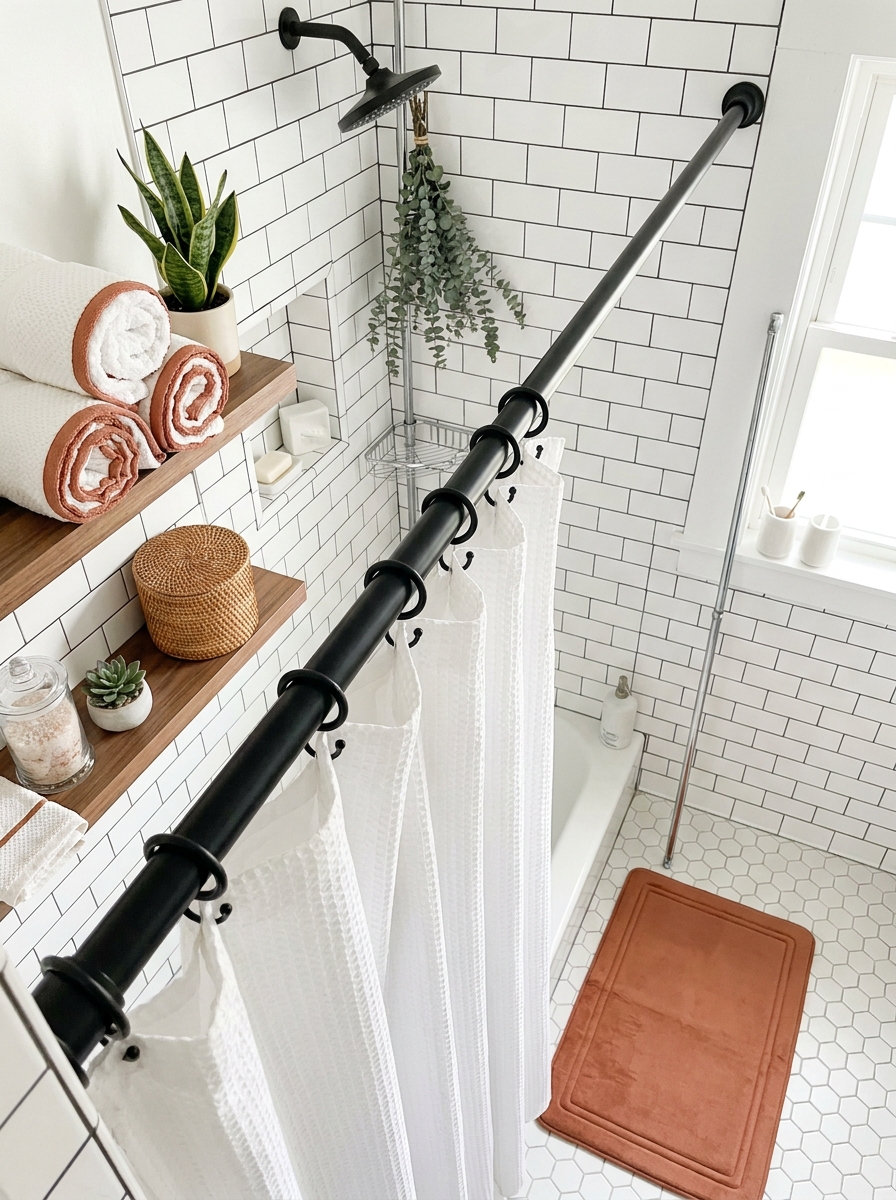
Switching out that builder-grade chrome shower rod and rings for matte black hardware is a two-minute upgrade that looks like a full renovation. Most tension rods just twist into place, no tools required. I replaced my sad, rusty chrome situation with a matte black tension rod and matching curtain rings and felt instantly fancy.
The dark hardware creates this really sophisticated contrast against white tile and makes everything else in the bathroom look more intentional. It’s one of those small changes that photographs beautifully and makes guests think you did way more than you actually did. The matte finish also doesn’t show water spots like shiny chrome does.
I paired mine with linen shower curtain rings that have those satisfying roller clips instead of cheap plastic hooks. The whole upgrade cost less than forty bucks and took literally five minutes. Keep your original rod in the closet and reinstall it before you move out. This tiny swap has massive visual impact.
12. Adhesive Wood-Look Shelf Above Toilet Tank
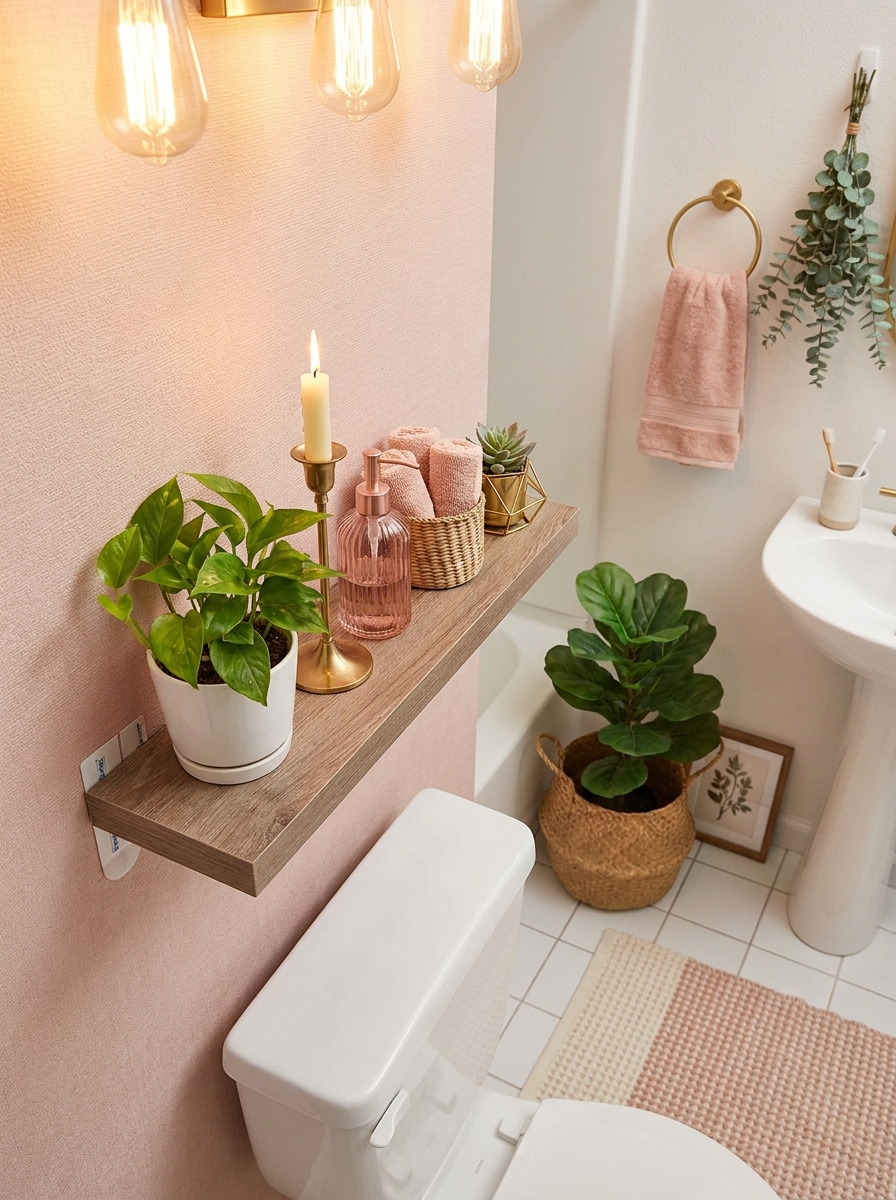
That flat space on top of your toilet tank is prime real estate you’re probably wasting. An adhesive floating shelf (or even a pretty wood cutting board propped up on non-slip pads) creates instant styling space without drilling into tiles. I used heavy-duty adhesive strips to mount a shallow wooden shelf right above my tank and now I have a cute display spot for plants and pretty things.
This little shelf makes your toilet area feel like an intentional vignette instead of just… a toilet. I keep a small potted plant, a candle, and a little tray with extra toilet paper rolls that actually look decorative. The wood tone warms up all that cold white porcelain and adds a layer of visual interest at eye level.
The key is keeping it shallow so it doesn’t block your tank access or look bulky. Even a rustic wood board that’s just sitting there transforms the space. Style it like a mini shelf with small objects that make you happy every time you see them.
13. Removable Cabinet Hardware Swaps
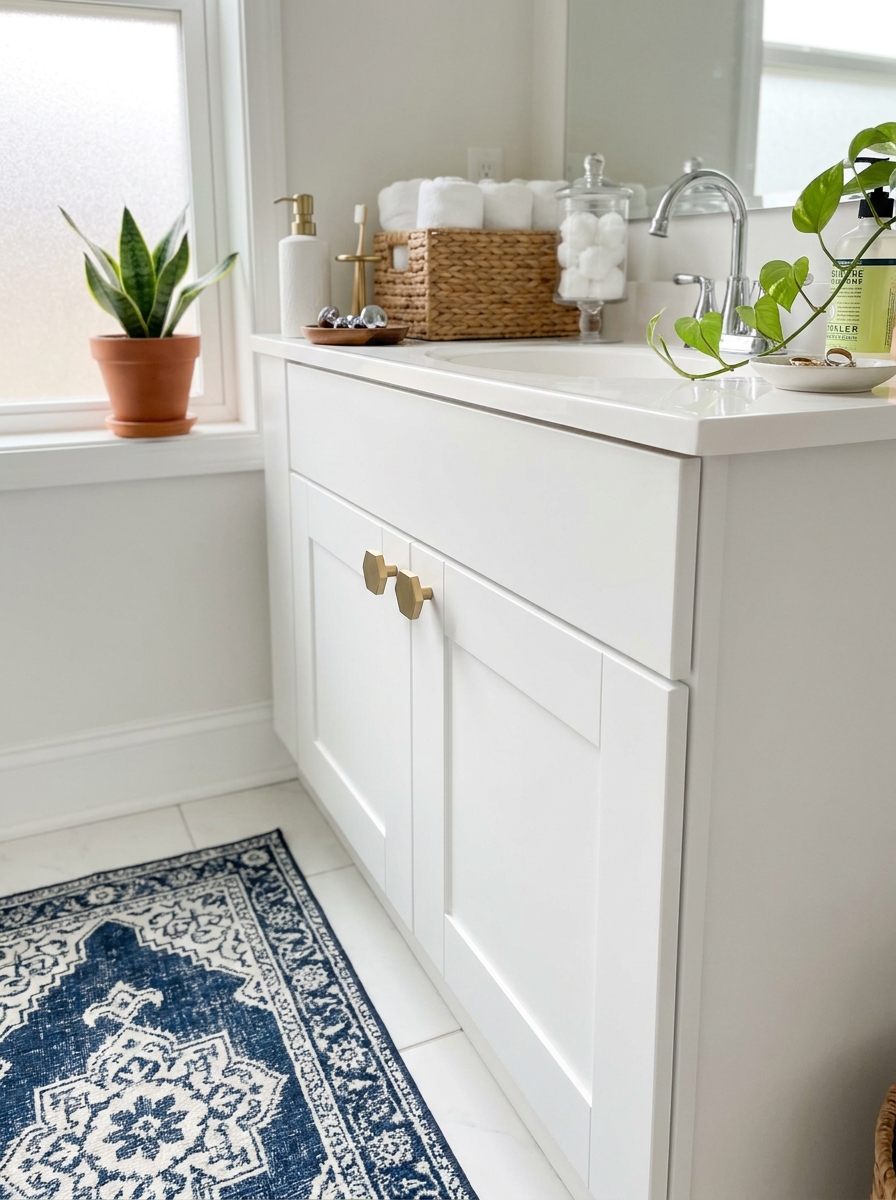
Those boring builder-grade cabinet pulls are screaming for a makeover. And here’s the secret most people don’t know: you can absolutely swap them out in a rental without causing damage. Just save the original hardware in a labeled baggie, and swap them back before you move out.
I switched mine to brushed brass hexagon knobs and it felt like I got a whole new vanity. The transformation is instant and costs maybe twenty bucks total. You can find gorgeous options at any hardware store or online, and installation takes about five minutes per pull.
Go for finishes that complement your other updates. If you added matte black shower hardware, maybe try black cabinet pulls too. Or if you’re going warm and cozy, brass or copper handles add that expensive look. The tiny screws usually fit the existing holes perfectly, but if they don’t, you can use a small piece of wood filler on move-out day. Nobody will ever know.
14. Grout Pen Touch-Up for Dingy Tile
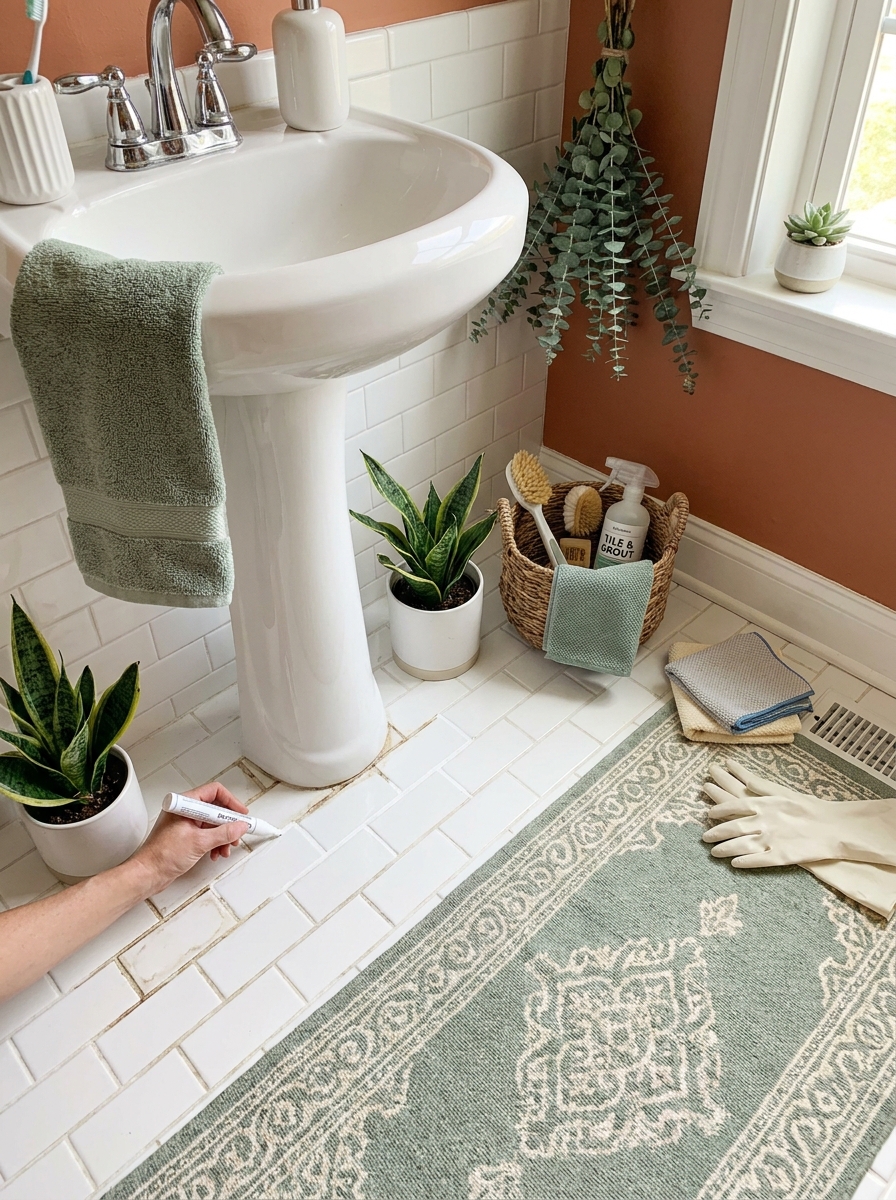
Can we talk about grout for a second? Because rental bathroom grout is usually… rough. Years of buildup and staining that no amount of scrubbing can fix. But before you give up and hide it with rugs, try a grout pen.
These miracle markers are filled with paint that covers discolored grout lines and makes everything look fresh again. I did my entire bathroom floor in one afternoon while watching Netflix. You just shake the pen, press the tip to activate it, and trace over each grout line. It’s oddly satisfying, honestly.
The white ones are most popular, but you can also find gray or even black for a dramatic modern look. It’s not permanent, so it won’t damage anything, but it lasts surprisingly long. Just hit the high-traffic areas if you don’t want to do every single line. The difference around your toilet and sink area alone will blow your mind.
15. Stick-On Faux Marble Contact Paper for Builder-Grade Surfaces
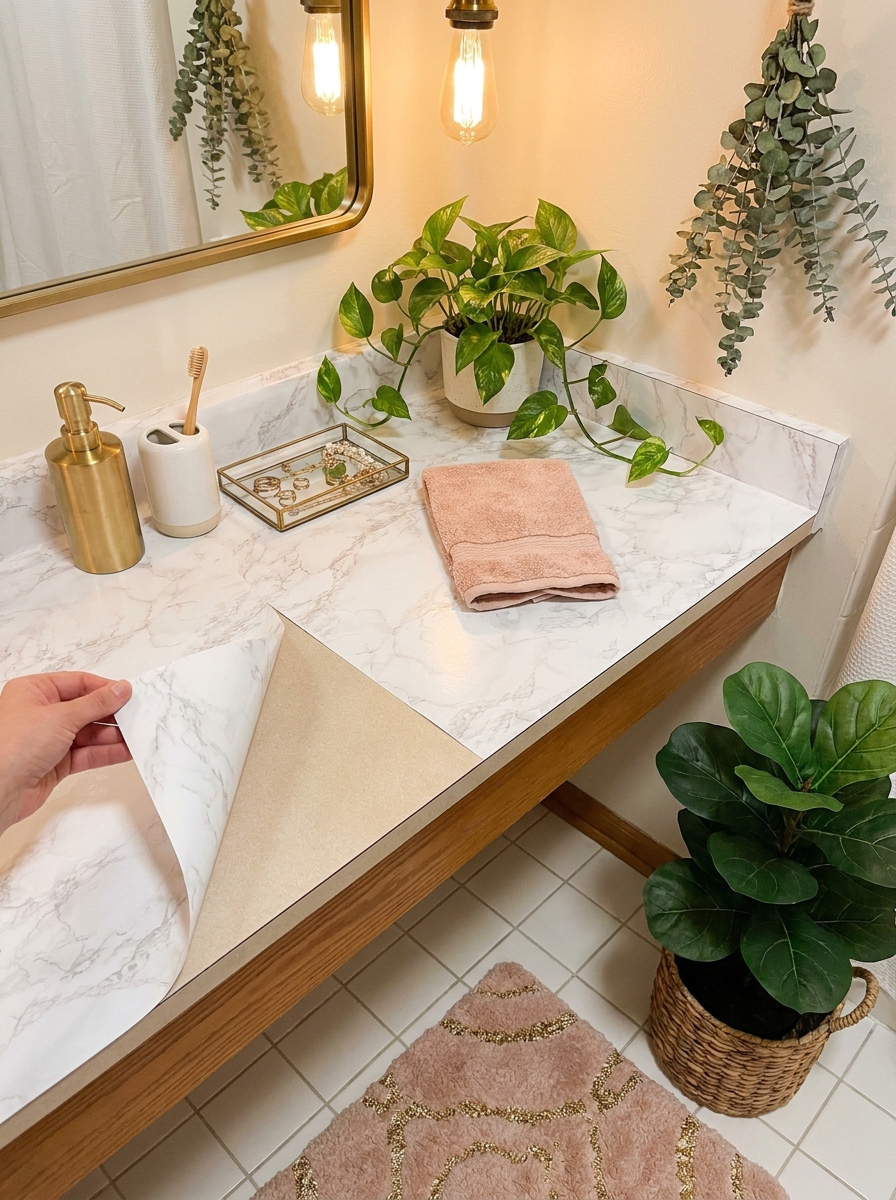
That beige laminate vanity top or plastic bathtub surround doesn’t have to stay ugly forever. Faux marble contact paper is the budget hack that looks way more expensive than it is. I covered my boring vanity counter in white Carrara marble contact paper and people genuinely think I upgraded to real stone.
The key is going slow and using a squeegee to smooth out bubbles as you apply it. Measure twice, cut once, and work in sections. It’s basically fancy shelf liner, so it peels right off when you move without leaving residue. You can do countertops, the side of your tub, even the tank of your toilet for a cohesive look.
Pick a marble pattern with subtle veining for the most realistic effect. Super busy patterns can look fake, but soft gray or gold veining on white gives you that expensive spa vibe. And it’s waterproof, which is clutch in a bathroom.
16. Removable Window Film for Privacy and Style
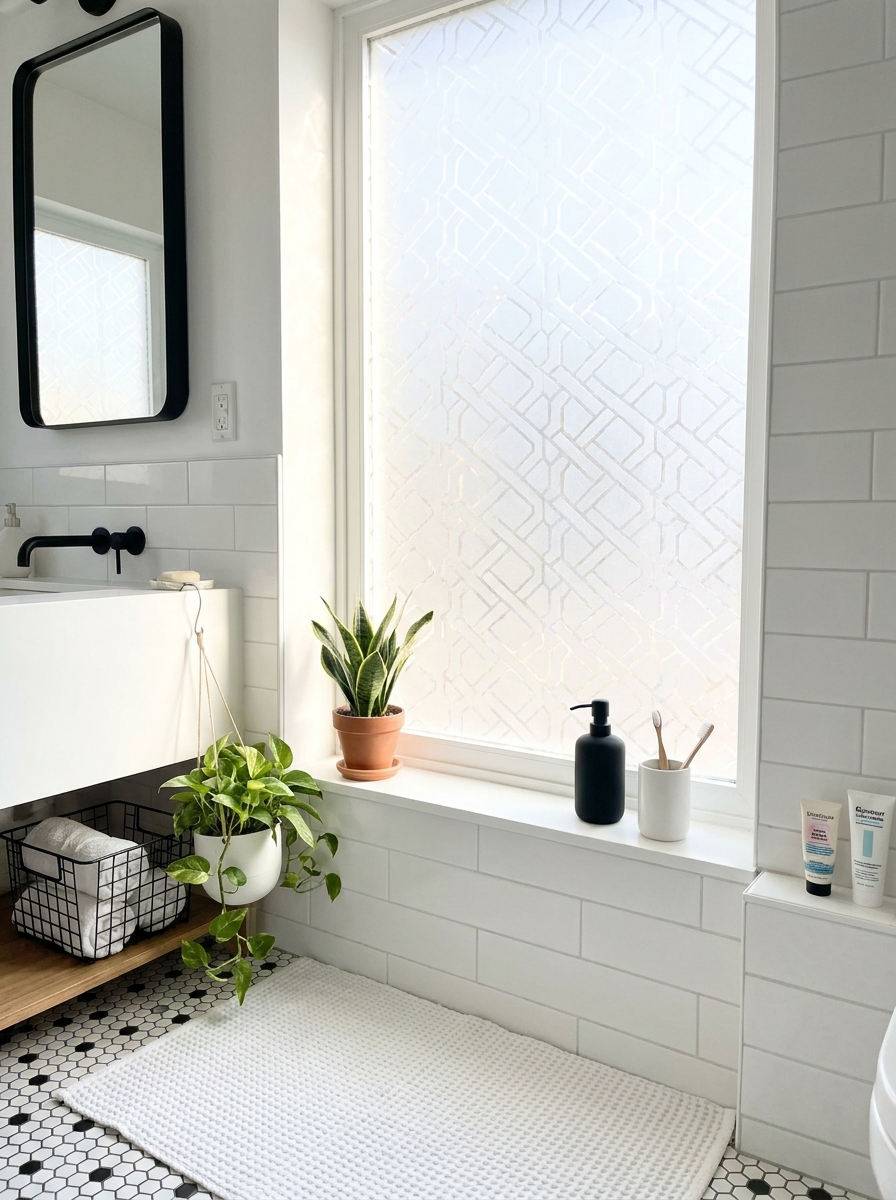
Bathroom windows are tricky. You want natural light but also, you know, privacy. Frosted window film is the answer and it’s completely removable. It sticks with static cling, no adhesive, so it won’t damage anything.
I put a geometric pattern film on my bathroom window and it filters light beautifully while keeping things private. You can find designs from simple frosted to stained glass patterns to modern geometric prints. Installation is easier than you’d think—spray the window with soapy water, apply the film, squeegee out the bubbles, trim the edges. Done.
The best part? It blocks the view from outside but still lets in tons of natural light. No more showering with the blinds closed in a cave. And if you get tired of the pattern or move, it peels right off. Some films even block UV rays, which is a bonus for preventing sun damage to your towels and decor.
17. Removable Frosted Glass Film for Shower Doors
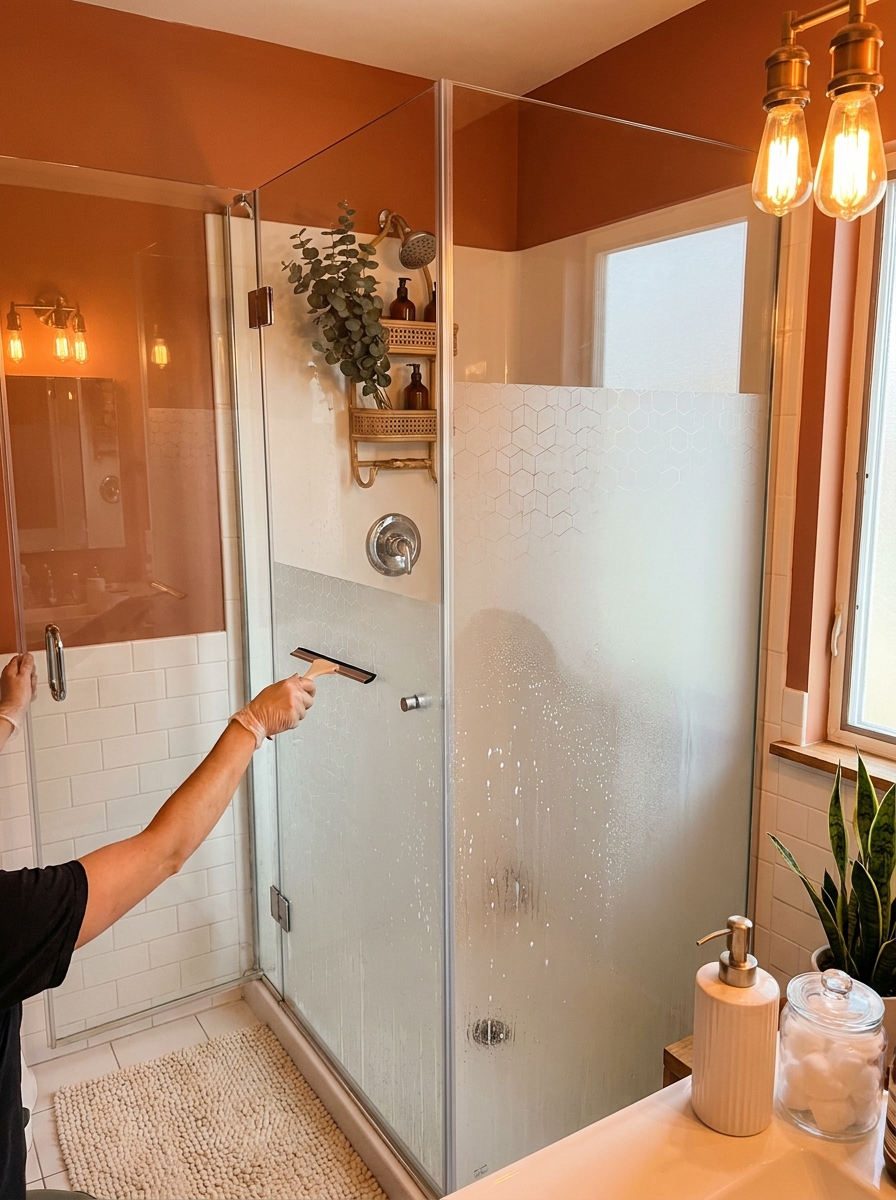
If your rental came with those crystal-clear shower doors that leave absolutely nothing to the imagination, frosted window film is about to become your best friend. This stuff applies with just water and a squeegee, and it transforms boring glass into something that looks like expensive etched glass. I’m obsessed with how much more spa-like it makes the whole bathroom feel.
The best part? You can find it in tons of patterns beyond basic frost. There’s geometric designs, subtle textures, even ones that look like rain glass. I installed the bamboo pattern in my last rental and it completely elevated the whole shower situation. Application takes maybe twenty minutes, and when you move out, it peels right off without leaving any residue.
This is also genius for those awkward bathrooms where the shower is right across from the toilet or the door opens directly to the shower. Instant privacy upgrade without replacing a single thing. Plus it hides water spots and soap scum way better than clear glass, which means less scrubbing for you.
18. Clip-On Shower Caddy Organizer System
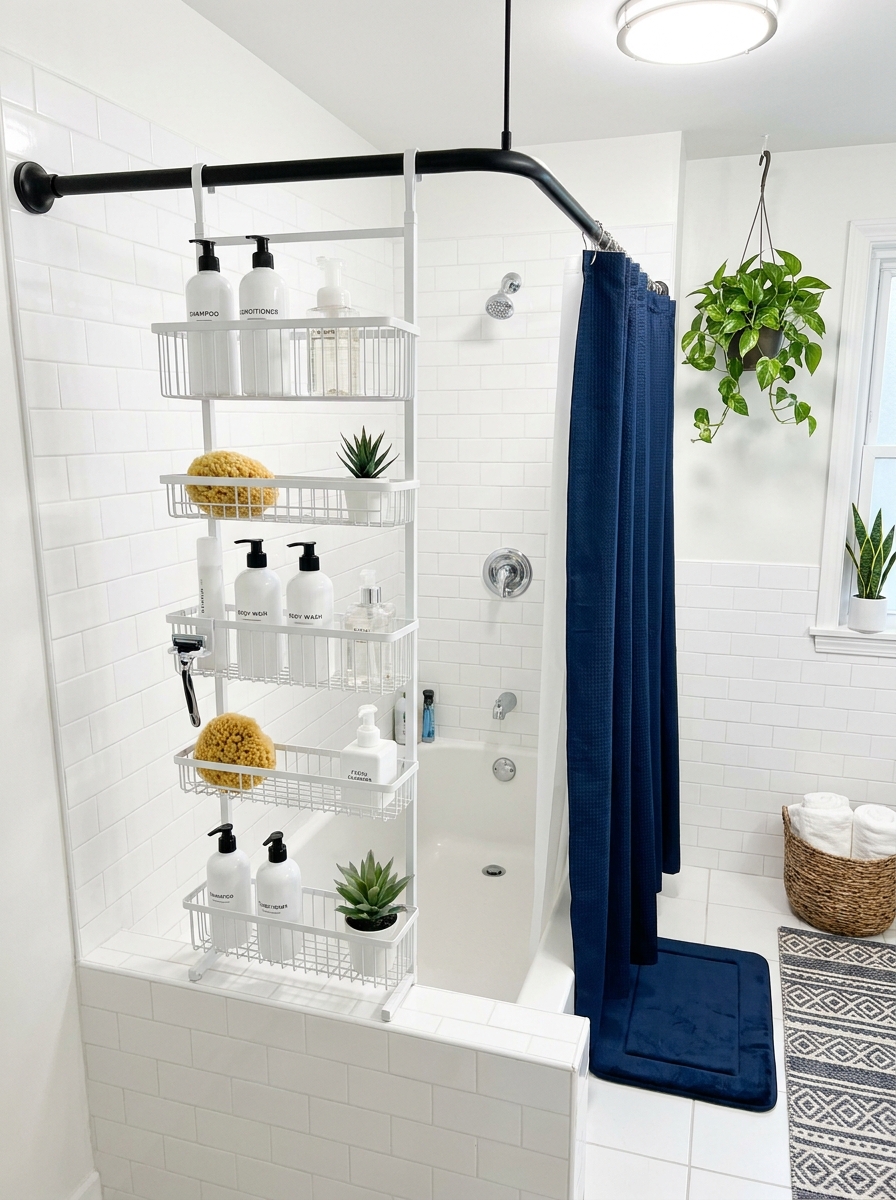
Can we talk about how most rental showers have exactly zero built-in storage? Like, where are we supposed to put our seventeen different hair products and that face mask we swear we’ll actually use? A really good clip-on shower caddy changes everything, and I’m not talking about those sad suction cup ones that crash down at 3am.
Look for the kind that clips directly onto your shower arm or hangs from a tension shower rod. They hold way more weight and don’t damage anything. I found one with multiple baskets that fit all my stuff plus my roommate’s entire skincare routine. The best ones have drainage holes so nothing gets gross and mildewy, plus hooks for razors and loofahs.
This is one of those upgrades that makes your shower feel like it was actually designed for humans who own things. No more balancing shampoo bottles on tiny ledges or doing that awkward floor-bottle shuffle. Everything has a spot, the shower looks cleaner, and you can take it with you when you move.
19. Temporary Faux Shiplap Wall Panels
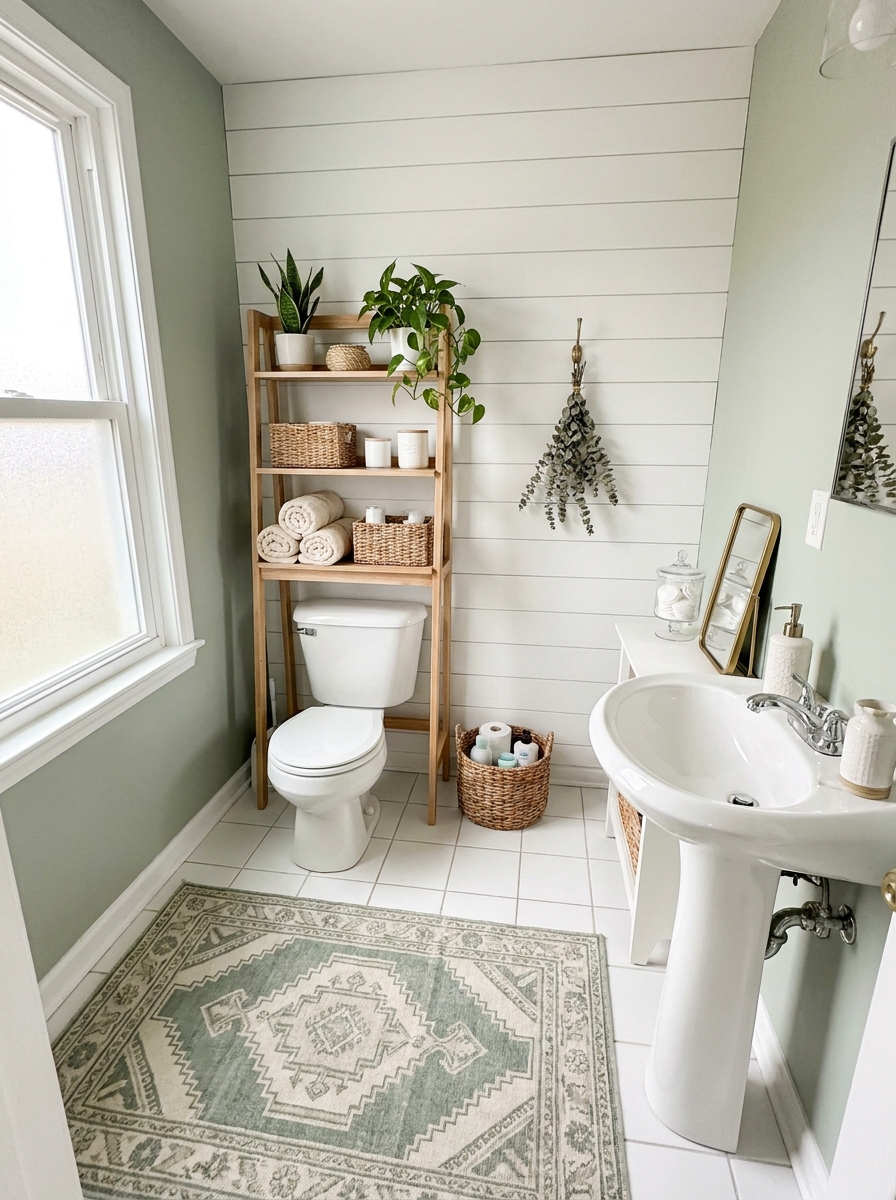
Okay, this one feels a little extra, but hear me out. Removable shiplap wall panels are like the ultimate bathroom glow-up for renters. They’re basically lightweight panels that attach with double-sided tape or adhesive strips, and they instantly make your boring drywall look like a custom farmhouse bathroom. The transformation is absolutely wild.
I installed these behind my toilet in my last apartment, and every single person who came over asked if I’d renovated. Nope, just stuck some panels to the wall! They come in white, gray, even weathered wood finishes. The vertical lines make low ceilings feel taller, and they add so much texture and dimension to flat, boring walls.
Installation is easier than you’d think. Most panels are peel-and-stick or use command strips, so no power tools required. When you move out, they peel off clean. I used them to cover up some weird paint patches my landlord never fixed, and suddenly that wall became the star of the whole bathroom instead of an eyesore.
20. Adhesive Backsplash Behind Pedestal Sink
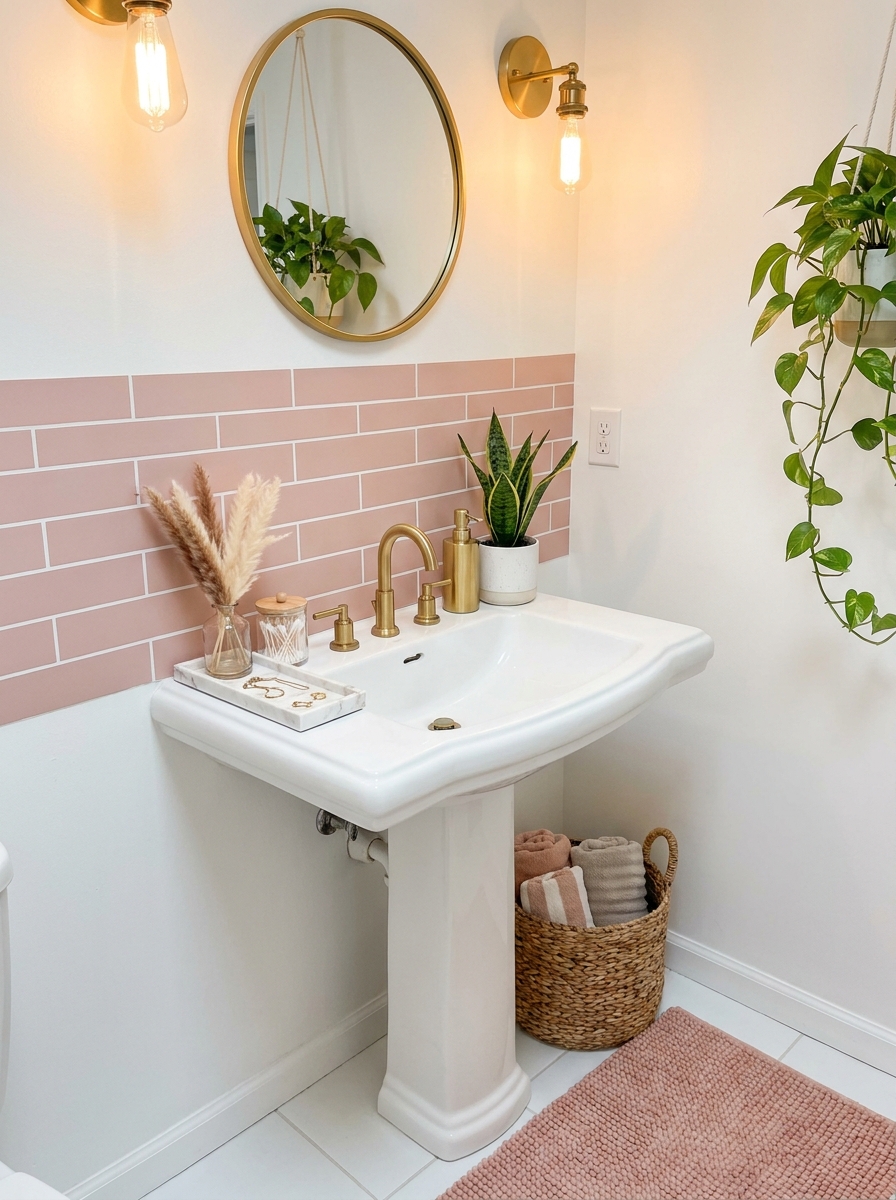
That wall behind your pedestal sink? It’s prime real estate for a mini backsplash moment. I’m talking about those peel-and-stick tile sheets that make it look like you hired someone to install real tile. This little detail makes such a huge difference, especially in bathrooms where the pedestal sink feels like it’s just floating awkwardly against a blank wall.
You can go classic subway tile, fun zellige-look tiles, or even geometric patterns. I did a small section of faux marble hexagon tiles behind mine, and it completely grounded the sink and made the whole setup look intentional instead of builder-basic. The best part is you only need a small amount, so even the fancier tile options are super affordable.
This is also brilliant for protecting your wall from toothpaste splatters and water spots. The tile surface wipes clean way easier than paint, and it adds a custom look without any permanent changes. Takes maybe an hour to measure, cut, and stick up, but looks like a weekend renovation project.
21. Magnetic Spice Rack Turned Bathroom Organizer
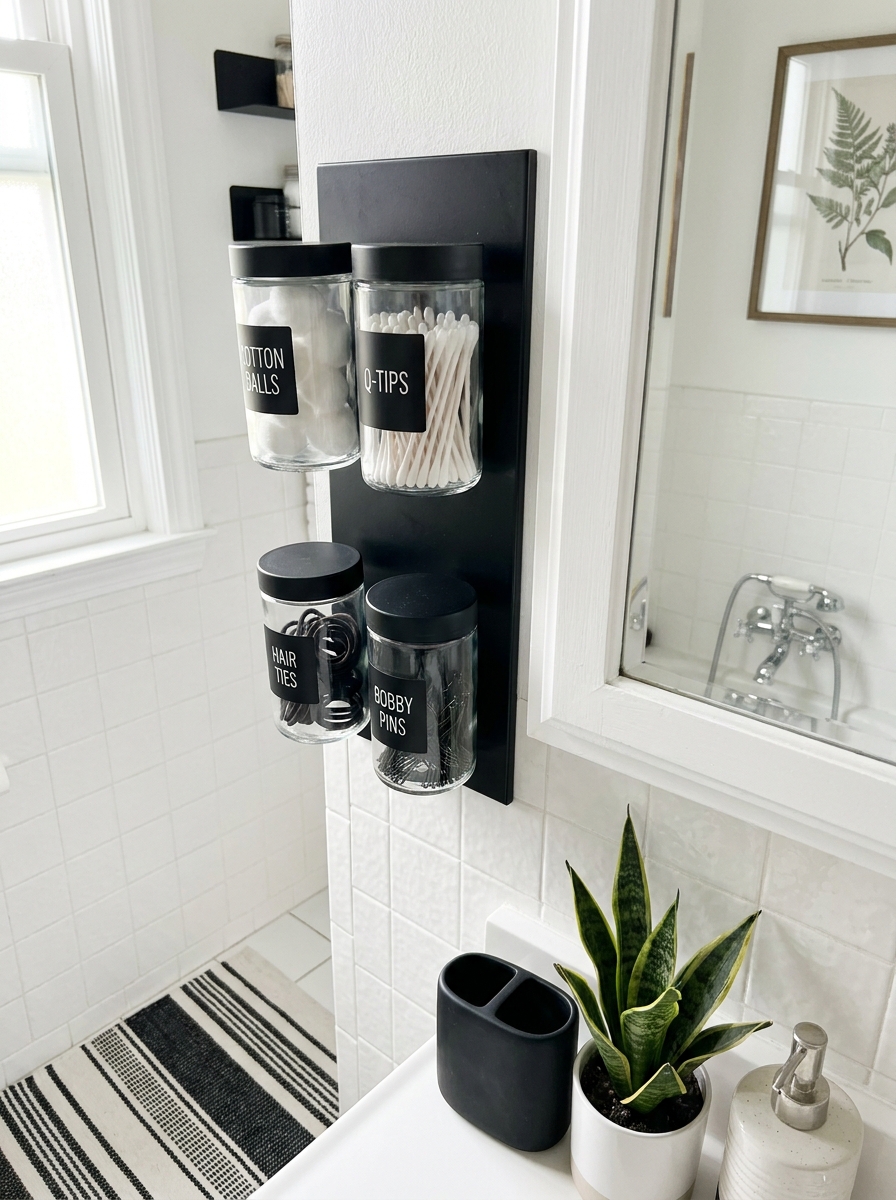
Okay, this might sound wild, but those magnetic spice racks from IKEA? Total game-changer for rental bathrooms. Mount one (or three!) on the side of your medicine cabinet or any metal surface with adhesive magnetic strips if you don’t have metal to work with. Suddenly you’ve got the cutest little storage for cotton swabs, bobby pins, hair ties, and all those tiny things that usually clutter your counter.
I love using small glass jars or those tiny metal tins so everything looks intentional instead of chaotic. You can even label them with a paint pen if you’re feeling extra. The best part? When you move, everything pops right off. No holes, no damage, no explaining to your landlord why there are mysterious drill marks by the mirror.
This works especially well in those tiny rental bathrooms where counter space is basically nonexistent. Mount it inside a cabinet door if you want hidden storage, or make it a feature on the wall. Either way, you’re getting organized without losing your security deposit.
22. Rope Basket Wall Pocket Storage
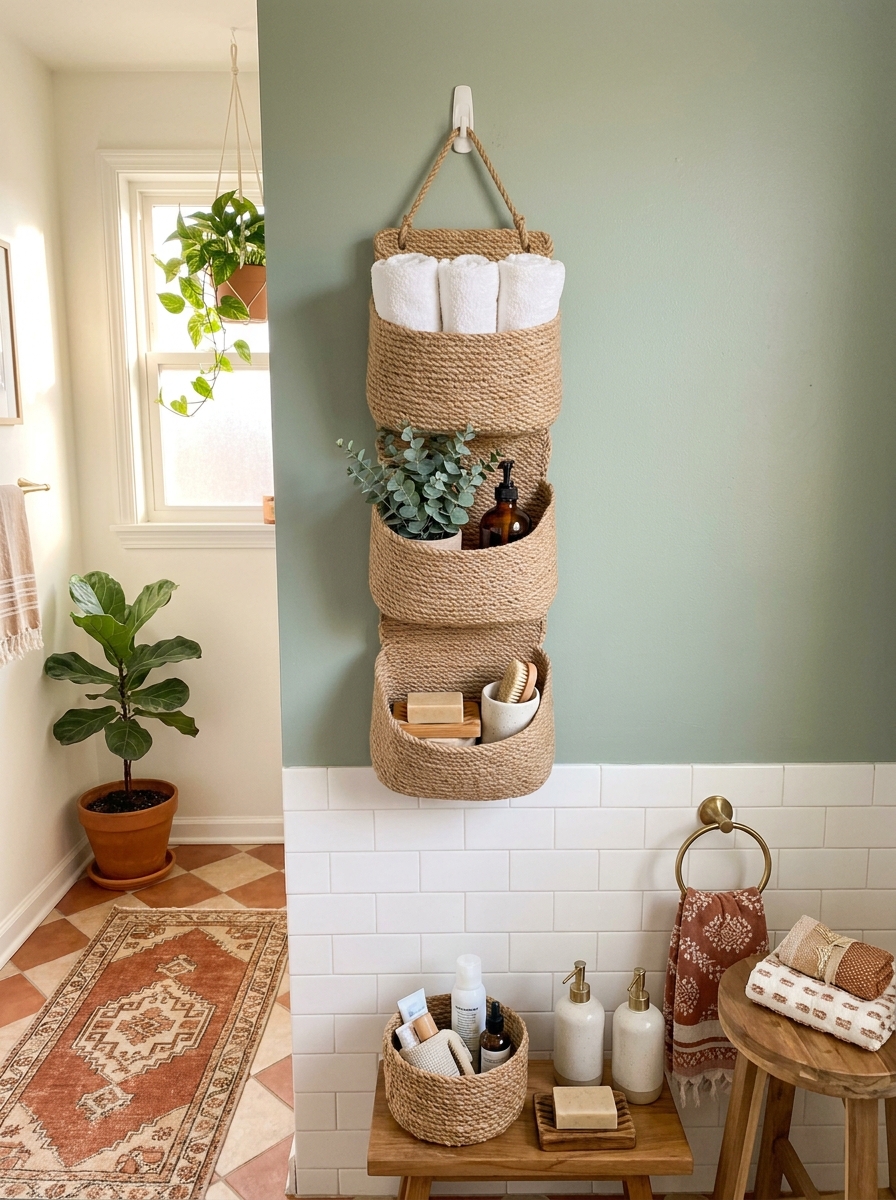
Wall pockets are having such a moment, and I’m obsessed with using them in rental bathrooms. These woven rope or fabric wall organizers hang from a single command hook, so there’s zero commitment. I use mine to hold everything from hand towels to hair tools to extra toilet paper. It’s vertical storage that doesn’t eat up any floor space, which is crucial in tiny rental bathrooms.
The trick is choosing one that matches your vibe. I’m loving the natural rope ones right now because they add texture without feeling too themed. But there are canvas ones, jute ones, even water-hyacinth versions if you want something more structured. Hang it next to the toilet, beside the shower, or on the back of the door. Wherever you’ve got a blank wall and need storage, this works.
What makes this so genius for renters is that it’s completely damage-free. One hook, one pocket, instant storage. When you move out, it comes down in two seconds. But until then, it’s doing some serious heavy lifting in the organization department.
23. Removable Wallpaper on Cabinet Doors
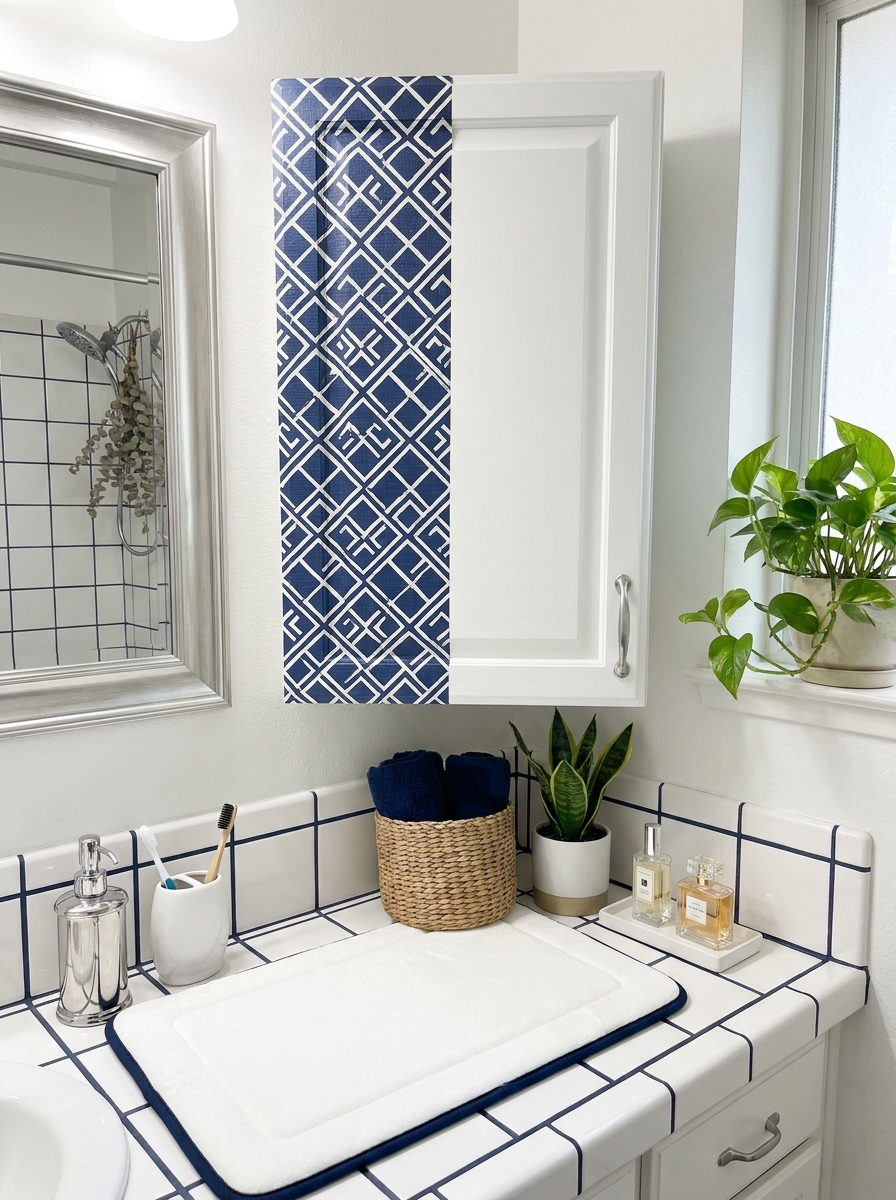
If you’ve got those boring builder-grade cabinets or a sad vanity that came with your rental, listen up. You can completely transform them with removable wallpaper on the door fronts. I’m talking about adding pattern, color, and personality to the most boring bathroom furniture without touching a paintbrush or risking your deposit.
The process is so satisfying. Measure your cabinet doors, cut the wallpaper to size with a little extra around the edges, and carefully smooth it on. I like using a credit card to push out bubbles as I go. You can do a bold pattern, a subtle texture, or even a faux wood grain if you want to fake expensive cabinet doors. When you move, it peels right off and the original surface is totally fine underneath.
This works on vanity doors, medicine cabinets, even those weird storage cabinets above the toilet. It’s such a small change that makes a huge visual impact. Your bathroom goes from rental-beige to custom-looking in like an hour.
24. Freestanding Towel Ladder for Spa Vibes
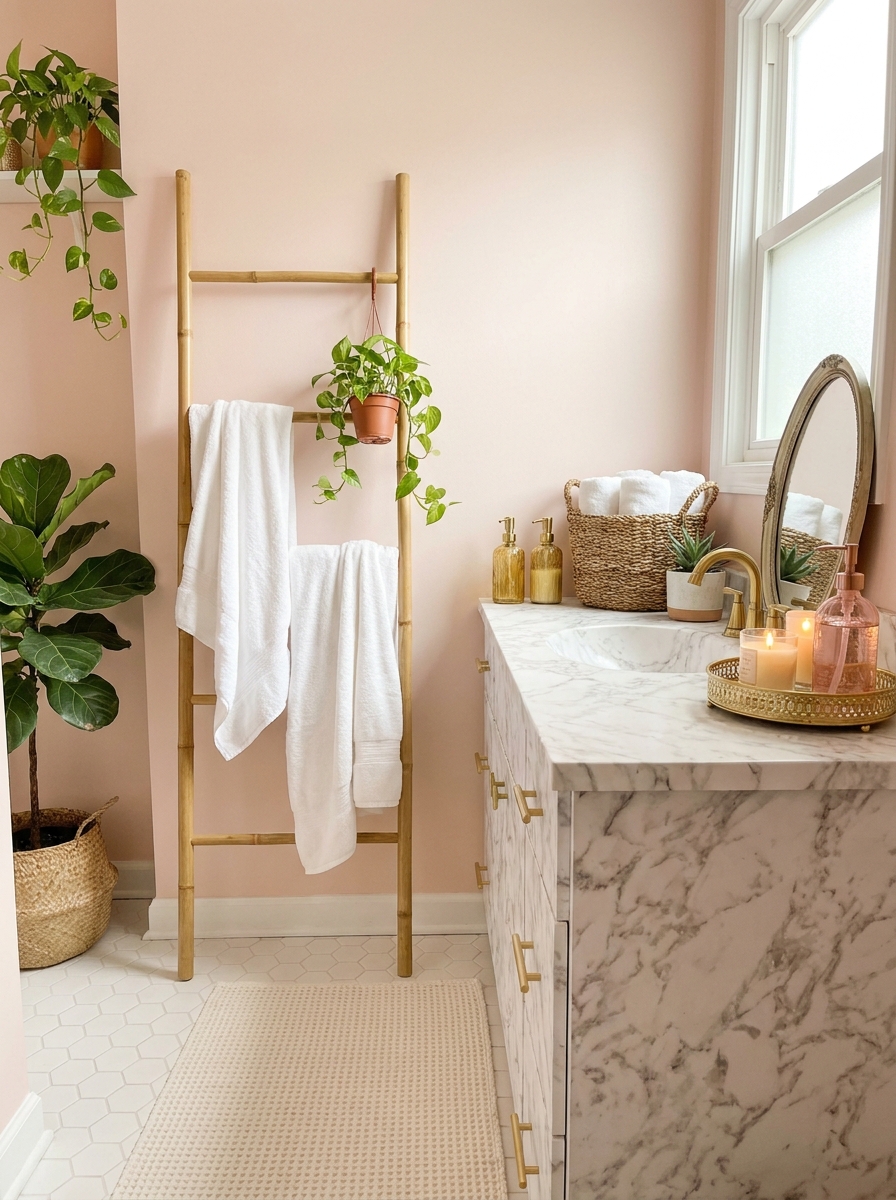
A freestanding towel ladder is basically the easiest way to make your rental bathroom feel like a boutique hotel. No installation, no holes, just lean it against the wall and instantly you’ve got beautiful towel storage that actually looks intentional. I have one in my bathroom and people always ask where I got it because it looks so much more elevated than a regular towel bar.
You can find these in wood, bamboo, or metal finishes to match whatever vibe you’re going for. I love the natural wood ones because they add warmth to cold tile bathrooms. Drape your towels over the rungs instead of folding them on a shelf, and suddenly everything feels more spa-like. You can also hang a small plant from the top rung or drape a bathrobe for that layered, styled look.
The best part? When you move, you just pick it up and take it with you. It works in literally any bathroom layout, fits in tight corners, and gives you way more towel storage than those sad single hooks that come standard in rentals.
25. Stick-On Crown Molding for Ceiling Drama
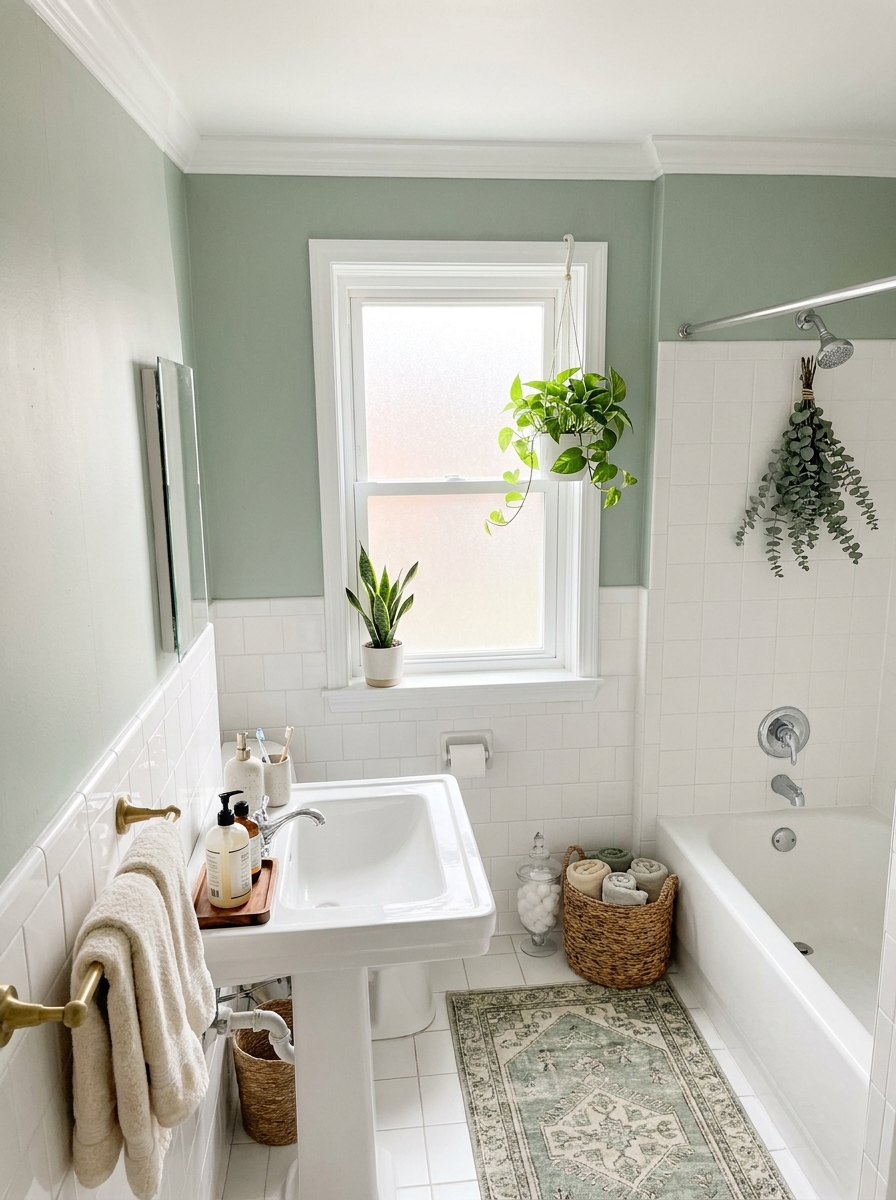
I never thought about the ceiling until I stuck some peel-and-stick crown molding up there. Now? Can’t stop staring at it.
This foam molding comes with adhesive backing and completely changes how tall and finished your bathroom feels. It’s especially perfect for those builder-grade bathrooms that just end abruptly where the wall meets the ceiling. The molding adds this polished, expensive look that makes people think you hired someone. You can paint it to match your trim or leave it white for that classic look. Installation takes maybe an hour, and when you move out, it peels right off without damaging the paint.
I love how this one detail makes everything else look more intentional. Your peel-and-stick backsplash suddenly looks like part of a real design plan instead of a random update. The whole room feels more cohesive and thought-out. And honestly, for something that costs under thirty bucks and lives near the ceiling where nobody touches it, it’s shockingly low-commitment for such high impact.
26. Faux Wood Beam Shelf with Adhesive Brackets
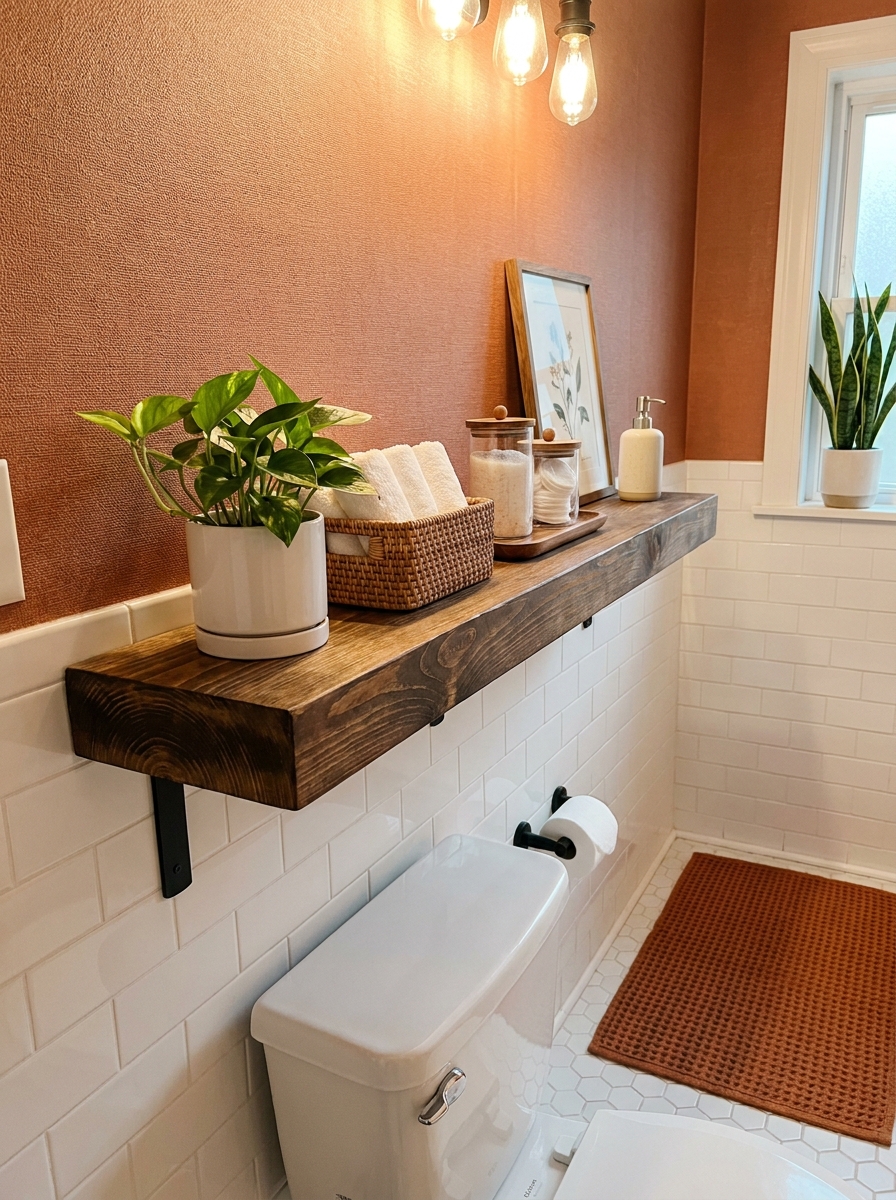
Okay so this one sounds fancy but it’s just a wood board with stick-on brackets. Game changer.
You can find adhesive mounting brackets that hold surprisingly well, and when you pair them with a stained wood plank, you get this chunky floating shelf situation that looks custom. I put mine above the toilet and suddenly had space for all my pretty stuff instead of hiding everything in that sad cabinet under the sink. The wood adds warmth to all that white tile and chrome, and you can style it with plants, baskets, and those candles you never actually burn but look really good.
The best part is choosing your own wood. You can go rustic with a rough-cut board, sleek with a smooth poplar plank, or even paint it to match your cabinets. Hardware stores will cut it to size for you, so you don’t need any fancy tools. Two brackets, one board, and you’ve added storage plus a whole design moment that completely changes the vibe.
27. Color-Drenched Ceiling Paint (Get Permission First)
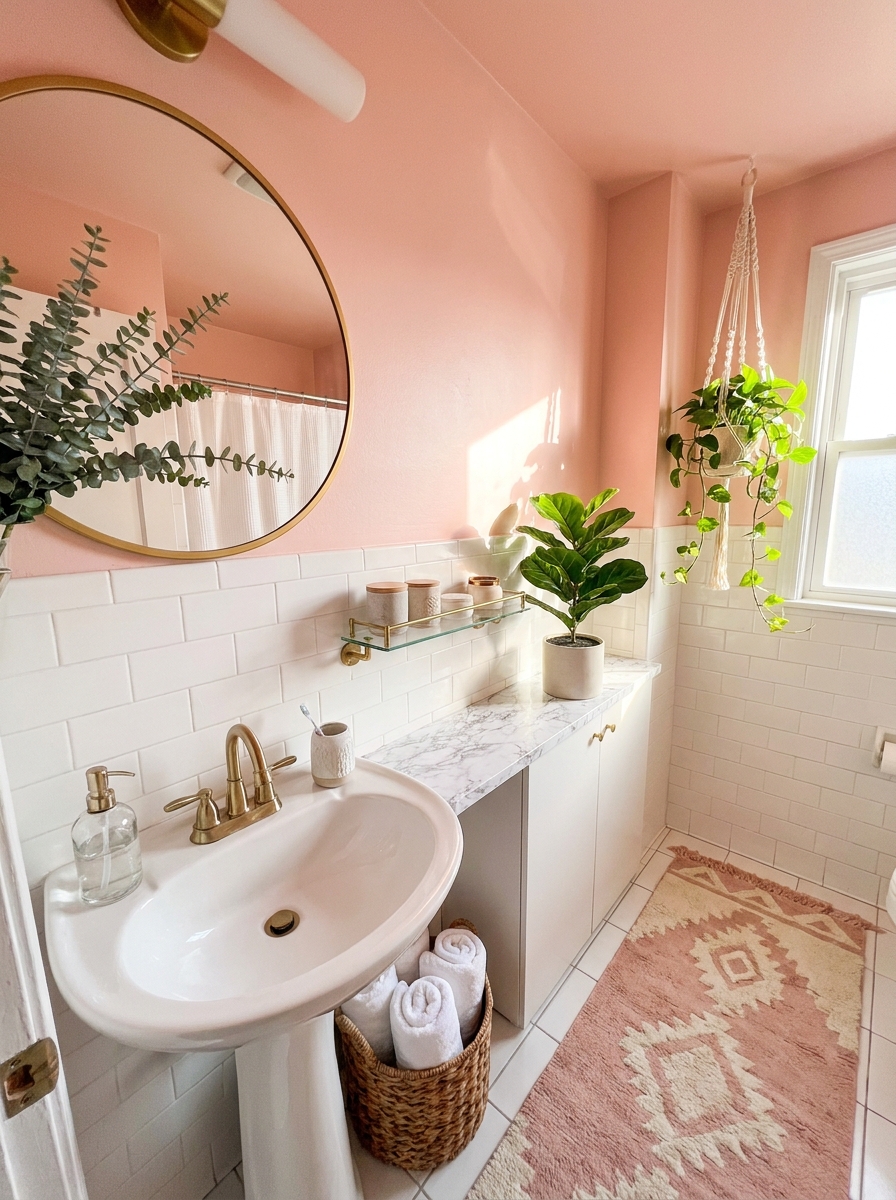
If your landlord is cool with painting, do the ceiling. Everyone expects you to paint walls, but the ceiling? That’s where the magic happens.
I painted mine a soft blush pink and it completely transformed the entire bathroom without touching a single wall. The color reflects down and makes everything feel wrapped in this warm, glowing light. It’s unexpected and so much more interesting than boring white. Plus, when you move out, it’s way easier to touch up a ceiling than four walls with a million edges and corners. You can go moody with navy, fresh with pale blue, or dramatic with charcoal.
This works especially well in small bathrooms because it draws your eye up and makes the space feel bigger instead of boxed in. Pair it with white walls and suddenly you’ve got this really editorial look that feels designer. Just make sure you get written permission and keep some extra paint for touch-ups when you leave.
28. Removable Chalkboard Wall for Daily Affirmations
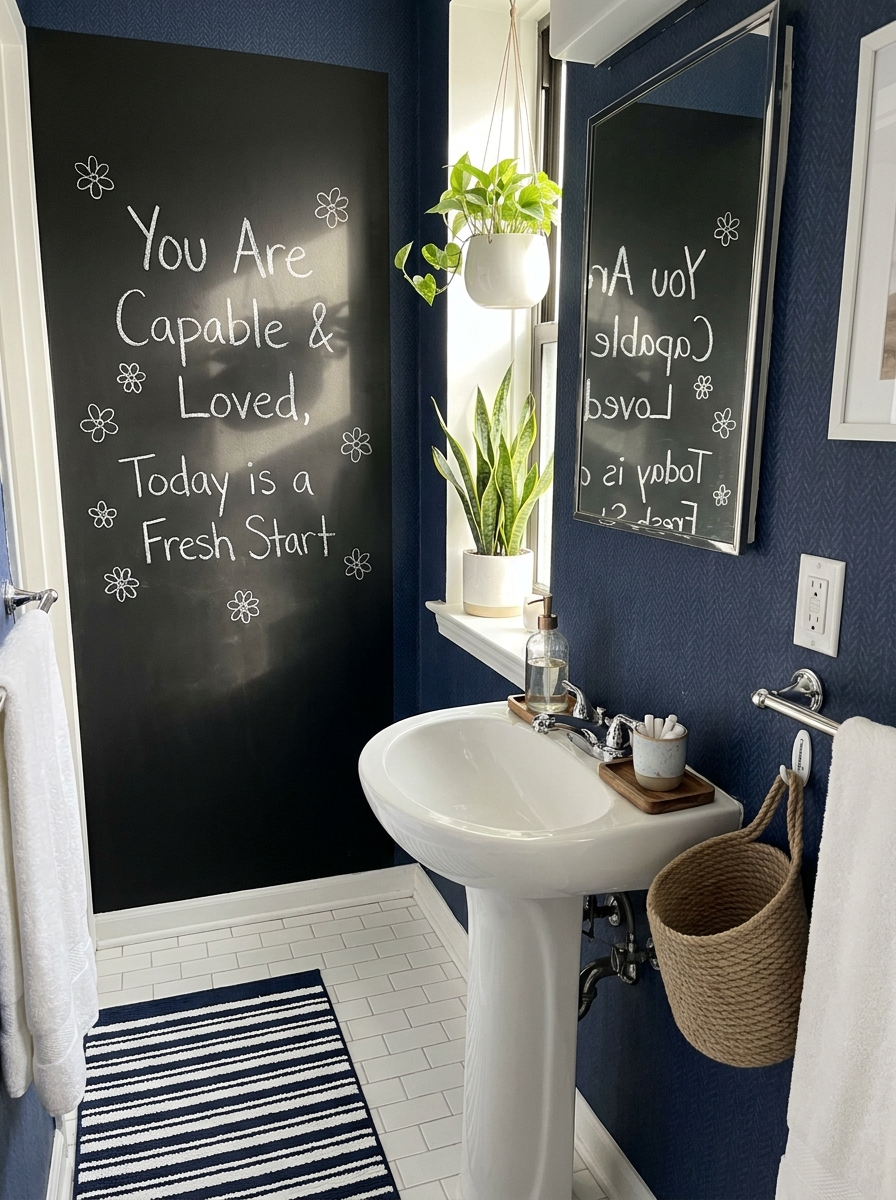
This idea started as a joke and now I genuinely love my little chalkboard wall section. It’s fun, it’s functional, and it’s totally removable.
Peel-and-stick chalkboard contact paper turns any wall space into a place you can write on. I put mine next to the mirror and use it for everything from motivational quotes to reminding myself which skincare product I’m testing this week. It adds this playful element that makes the bathroom feel less serious and more like your space. You can frame it with washi tape or leave the edges raw for a more casual look. Change what’s written whenever you want, and boom, instant bathroom refresh.
It’s especially great if you’re someone who gets bored easily with decor. Instead of swapping out art, you just grab some chalk. Write a quote, draw a little doodle, make a checklist, whatever feels right that week. When you move out, it peels off cleanly and you can take it with you or toss it. Zero commitment, maximum personality.
29. Faux Terrazzo Stick-On Flooring Squares
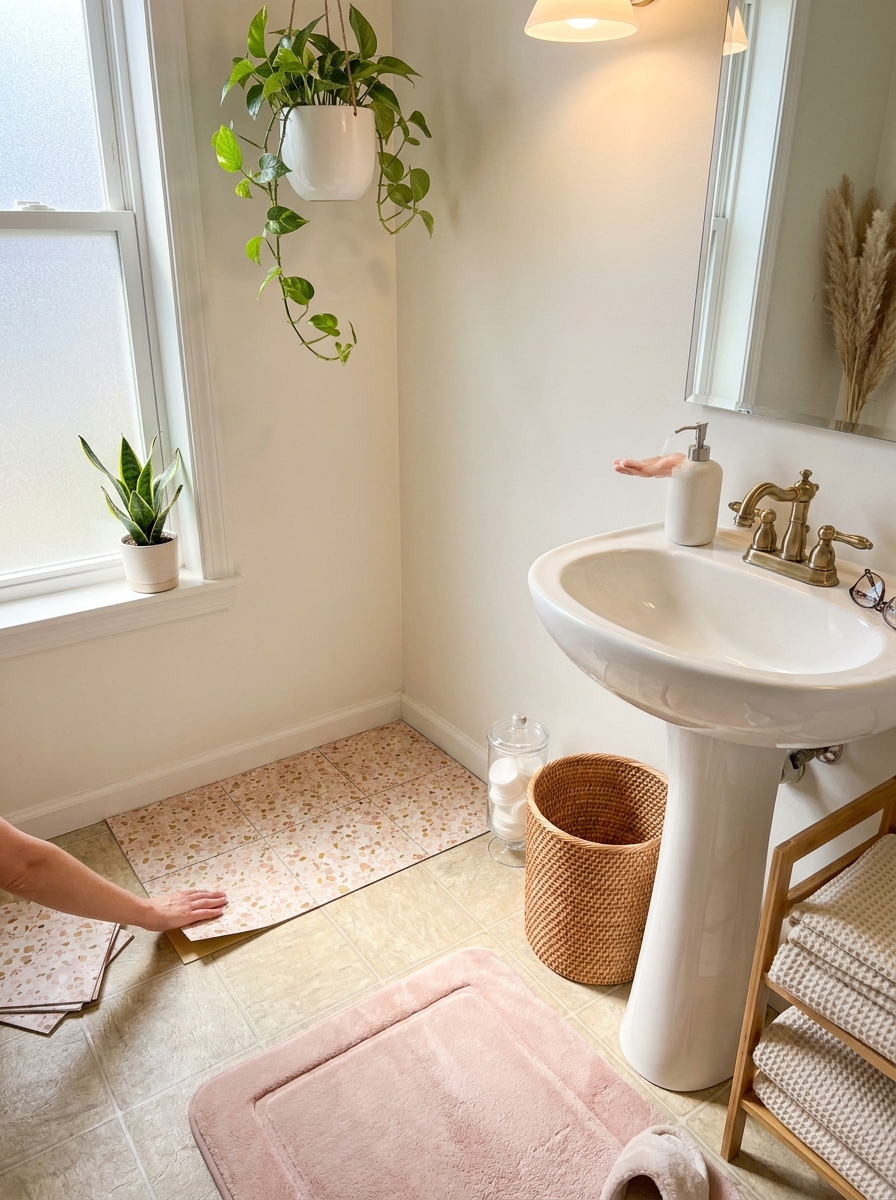
Okay, this one absolutely transformed my rental bathroom floor situation. Those awful builder-grade vinyl tiles? We’re covering them up with these gorgeous peel-and-stick terrazzo-look tiles that make the whole space feel custom and expensive.
The beauty of stick-on flooring is you can do it in a weekend afternoon, no special tools needed. Just clean your existing floor really well, measure twice, and start laying tiles from the center of the room outward. The adhesive is strong enough to stay put through shower steam and foot traffic, but it lifts cleanly when you move out.
I went with a soft pink terrazzo pattern with flecks of gold and white, and it completely elevated my boring beige bathroom. The best part? If one tile gets damaged, you just peel it up and replace that single square. No need to redo the whole floor. It’s like giving your bathroom a brand new foundation without losing your security deposit.
30. Magnetic Makeup Board on Medicine Cabinet Door
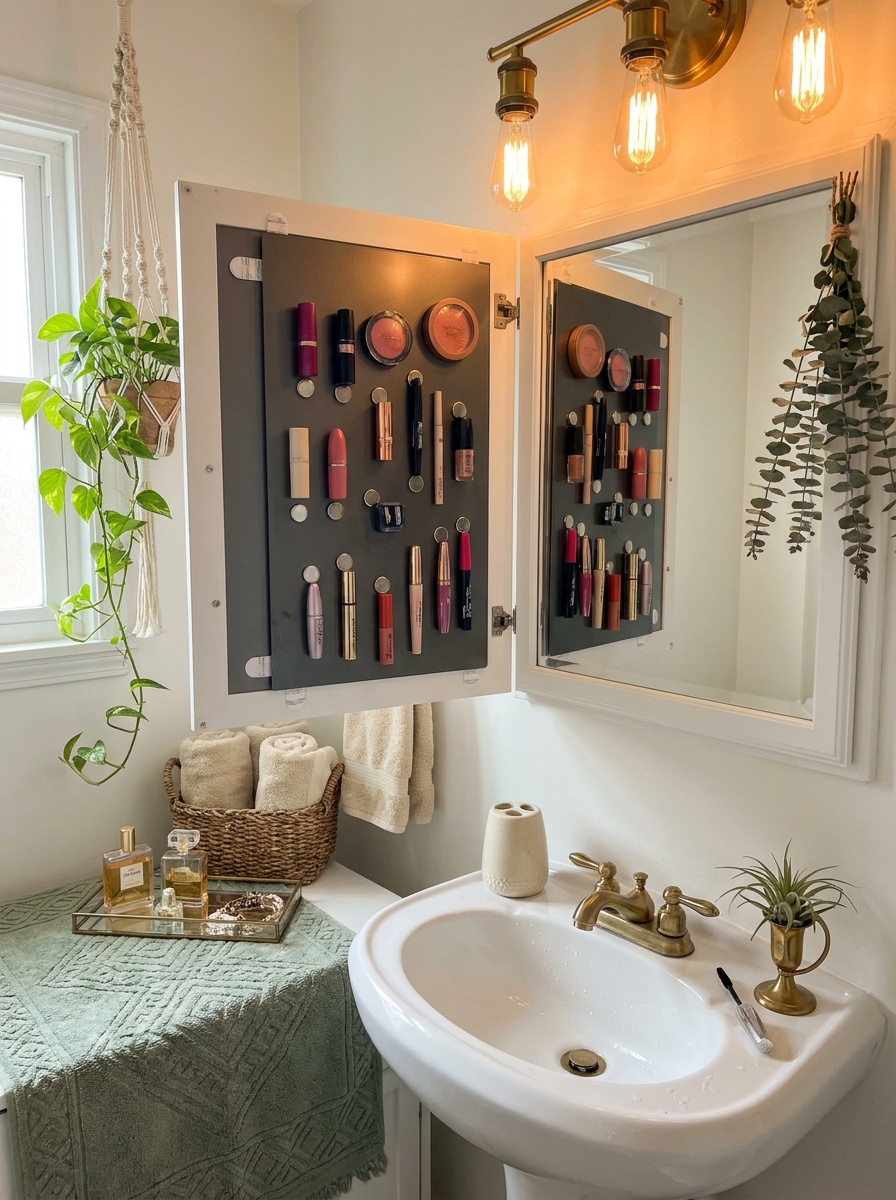
This idea changed my entire morning routine, I’m not even kidding. Instead of digging through drawers for makeup, I attached a thin magnetic board to the inside of my medicine cabinet door using removable adhesive strips. Now all my makeup (with tiny magnets glued to the back) is visible, organized, and takes up zero counter space.
You can buy pre-made magnetic boards or just use a cookie sheet from the dollar store—seriously! Attach it with heavy-duty Command strips to the inside of your cabinet door, stick small circular magnets (craft store, super cheap) to the bottom of your makeup items, and boom. Instant vertical storage that you can take with you when you move.
The genius part is you see everything at once. No more buying duplicate mascara because you forgot you had one buried in a drawer. Plus, it keeps your counters completely clear, which makes your tiny rental bathroom feel so much more spacious. When you close the cabinet, everything’s hidden. When you open it, it’s like your own little beauty boutique.
31. Removable Wainscoting Wallpaper Panels
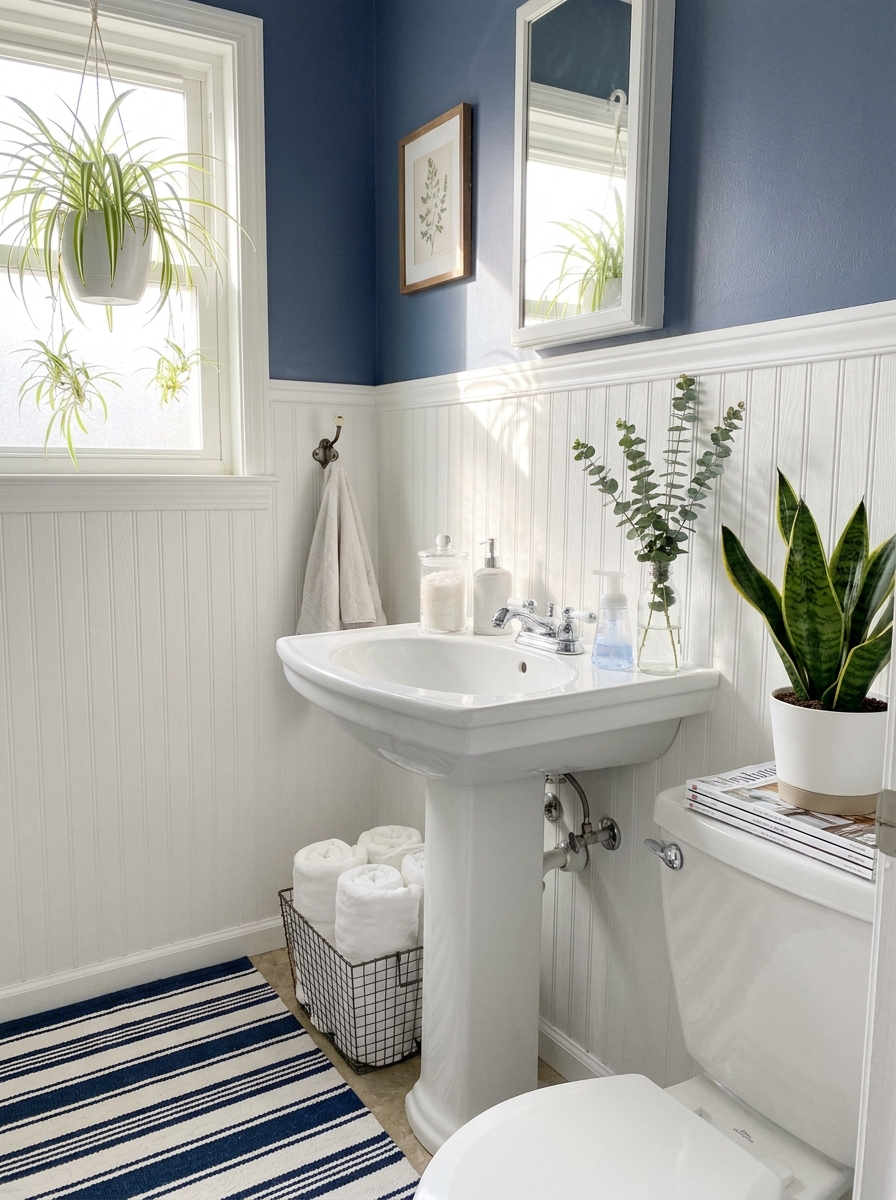
Want that classic wainscoting look without the carpentry skills or the landlord’s approval? Removable wallpaper that mimics beadboard or board-and-batten paneling is your answer, and it looks shockingly real.
I applied mine about three feet up the wall (traditional wainscoting height) and it instantly gave my builder-grade bathroom so much more character and charm. The textured varieties actually have dimension to them, so they don’t look flat or fake. I topped mine with a peel-and-stick trim piece to really sell the custom millwork illusion.
This trick works especially well in bathrooms because it protects your lower walls from splashes and scuffs while adding serious visual interest. Go crisp white for a coastal cottage vibe, or try a soft blue-gray for something more sophisticated. The two-tone wall effect makes your ceiling look higher and your whole bathroom feel more expensive. And when you move? It peels right off without damaging the paint underneath. Landlord-friendly luxury!
32. Reversible Shower Liner with Bold Pattern
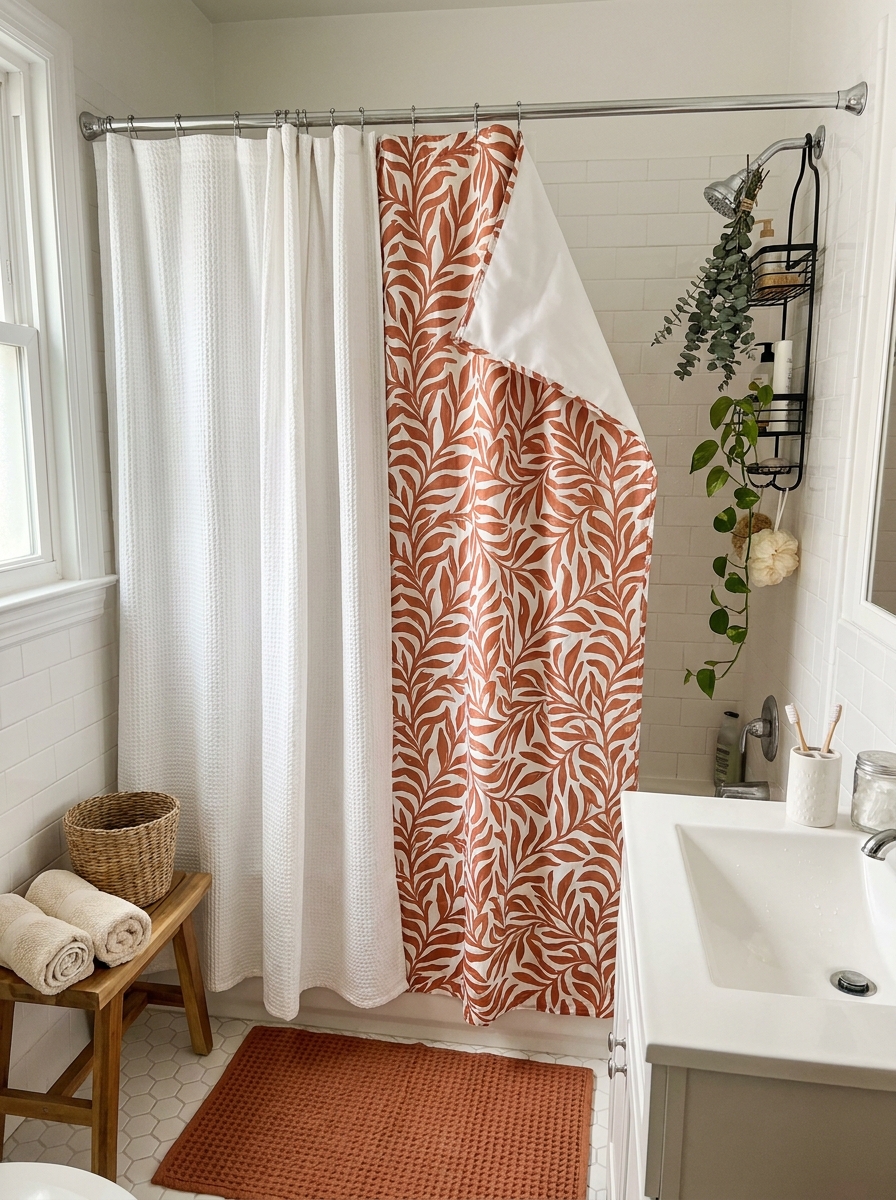
Here’s the easiest bathroom refresh that costs about fifteen dollars: swap your boring clear shower liner for a reversible one with a bold pattern. I’m talking geometric prints, botanical designs, or even a fun striped pattern that shows through your neutral outer curtain.
Most people think the liner is just functional, but it’s actually prime real estate for adding personality! A patterned liner peeks through and adds depth and interest without overwhelming your space. Plus, reversible ones give you two looks in one—flip it when you’re ready for a change or when one side needs a wash.
I love how this tiny change makes such a big visual impact every time you pull back your shower curtain. It’s that little surprise detail that makes your bathroom feel thoughtfully designed rather than thrown together. And because you’re just swapping the liner (not the decorative curtain), you can change it seasonally or whenever the mood strikes. It’s the definition of low-commitment, high-reward decorating.
Quick Guide
Quick Budget Breakdown: What Actually Costs What
Under $20: Contact paper, adhesive hooks, new shower curtain, bath mat, small storage baskets, plants
$20-$50: Peel-and-stick tile (small area), removable wallpaper (single roll), mirror frame kit, tension rod organizers, matching soap dispensers and accessories
$50-$100: Larger wallpaper project (full wall), extensive peel-and-stick tile backsplash, over-toilet storage ladder, multiple organizational systems, upgraded lighting with plug-in fixtures
$100-$150: Full bathroom styling package (multiple surfaces, complete accessory refresh, lighting upgrades, extensive storage solutions)
Most impactful combo for $75 or less: Peel-and-stick backsplash + mirror frame + matching accessories + fresh towels. That’s the sweet spot where your bathroom goes from “meh” to “wait, did you move?” and you still have money left for coffee.
Your Bathroom, Your Rules (Deposit Intact)
Here’s what I want you to remember: rental doesn’t mean boring. It just means you have to get a little creative with how you make changes. And honestly? Some of these temporary solutions look better than permanent renovations I’ve seen. The peel-and-stick tile I installed looked more intentional than the weird builder choices in half the houses I’ve toured.
You don’t need your landlord’s permission to make your bathroom feel like yours. You don’t need thousands of dollars or a contractor on speed dial. You just need a free Saturday, a vision for what would make you happier every morning, and maybe a trip to the hardware store. Start with one thing—just one. Frame that sad mirror or stick up a pretty backsplash behind your sink. See how it makes you feel. Then keep going if you want, or stop right there if that one change is enough.
Your rental bathroom has so much potential. It’s just waiting for you to see it differently. So grab some peel-and-stick something, put on a good playlist, and start making this space actually yours.
Frequently Asked Questions
Will peel-and-stick tile damage my rental bathroom walls when I remove it?
Good quality peel-and-stick tile shouldn’t damage walls if you prep and remove it correctly. Clean the wall with rubbing alcohol before applying, and when you move out, use a hairdryer to warm the adhesive before slowly peeling it off. The heat softens the glue and prevents paint from pulling. I’ve removed it from three rentals without any issues or lost deposits.
How do I make a small rental bathroom look bigger without permanent changes?
Use light colors on removable surfaces, add a large mirror or mirror frame to reflect light, and keep the floor as clear as possible with wall-mounted storage using adhesive hooks. A glass or light-colored shower curtain instead of dark fabric also helps. Vertical storage like an over-toilet ladder draws the eye up and makes ceilings feel higher without taking up floor space.
What’s the best way to cover ugly rental bathroom tile temporarily?
For floor tile, use a large washable bath mat or rug that covers most of the visible area—just make sure it has a non-slip backing. For wall tile, peel-and-stick tile can go right over existing tile if the surface is clean and dry. You can also use removable wallpaper on smooth wall tiles, though it works better on painted walls. Both peel off cleanly when you leave.
Can I change the lighting in my rental bathroom without hardwiring anything?
Absolutely! Swap your existing light bulbs for brighter or warmer LED bulbs—that alone makes a huge difference and costs maybe ten dollars. Add plug-in wall sconces using adhesive hooks to hold the cord neatly, or use battery-operated LED strip lights under cabinets or around mirrors. You can also replace a basic light fixture if you keep the original to reinstall when you move, though check your lease first.
How much does a typical rental bathroom makeover cost using removable materials?
You can do a noticeable transformation for $50-$75 if you focus on one or two key changes like a peel-and-stick backsplash and new accessories. A more complete makeover with wallpaper, tile, mirror frame, and new storage typically runs $100-$150. The beauty of these projects is you can spread them out over time and do one upgrade per paycheck instead of everything at once.