27 Dreamy DIY Home Decor Projects That Actually Look Expensive
You know that moment when you’re scrolling Pinterest at 11 PM and thinking, ‘I could totally make that’? But then morning comes and suddenly hot glue guns feel intimidating and you’re convinced your version will look like a kindergarten craft project. Here’s the truth: most beautiful home decor isn’t actually hard to make. The gorgeous stuff you see in those perfectly styled photos? Half of it started as a beginner project. The difference is just knowing where to start and having a little confidence. I’ve rounded up 27 projects that are genuinely easy—like, you-can-do-this-on-a-Tuesday-night easy—but look like you spent way more money and effort than you actually did. No special skills required. Just a willingness to try something new and maybe get a little paint on your hands. Let’s get into it.
1. Painted Terra Cotta Pot Garden
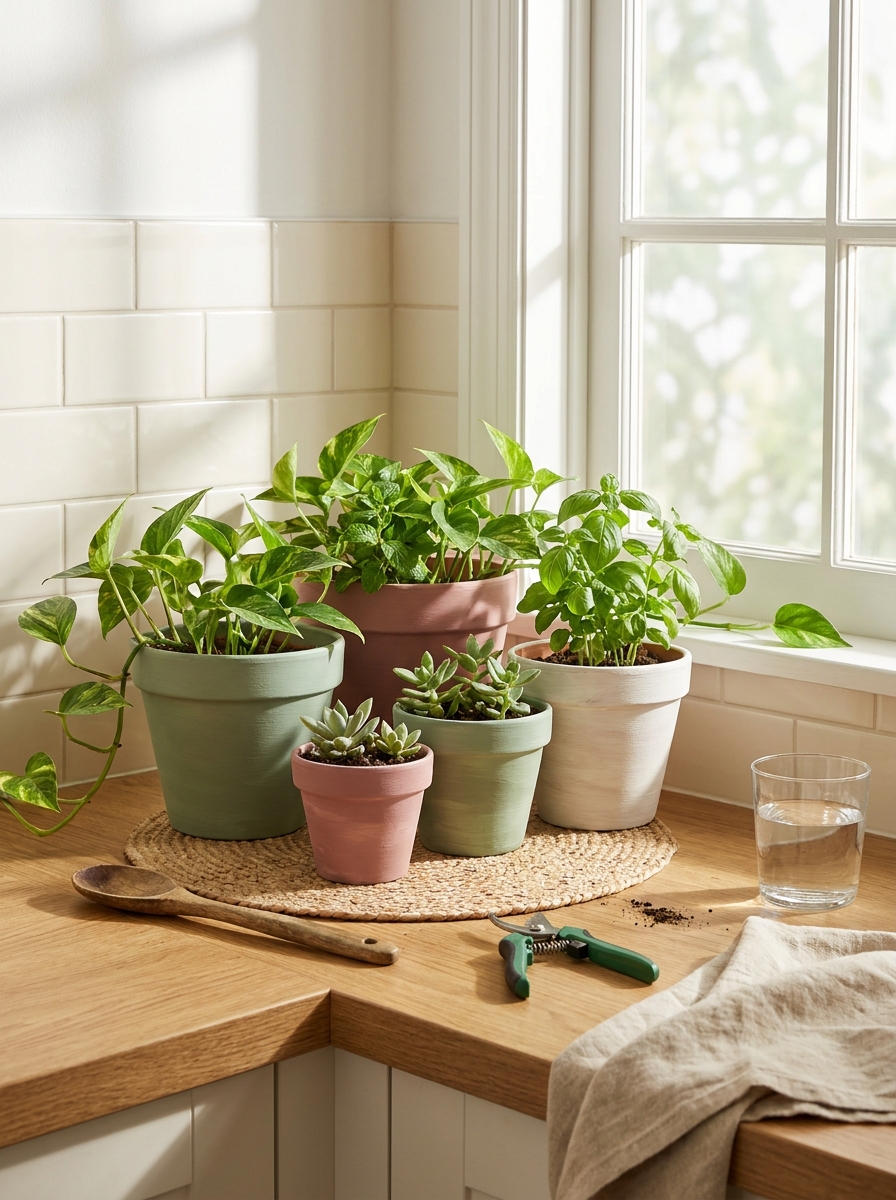
Terra cotta pots cost about two dollars each, but somehow when you paint them in a cohesive color palette, they look like you raided an expensive boutique. This project is ridiculously forgiving because there’s no wrong way to do it. You can go minimalist with solid matte colors, add geometric patterns with painter’s tape, or even try a trendy ombré effect.
Start with clean, dry pots and use acrylic craft paint—the cheap stuff works perfectly fine. Two coats usually does it. I love grouping three or five pots in varying sizes, all painted in shades from the same color family. Sage green, dusty rose, and warm terracotta are having a major moment right now.
The best part? You can change them seasonally. Paint a set in spring pastels, then do moody autumn tones for fall. Your windowsill or porch instantly looks curated and intentional, and guests will absolutely ask where you bought them. Don’t tell them it took twenty minutes and cost less than your morning coffee.
2. Macramé Wall Hanging From Scratch
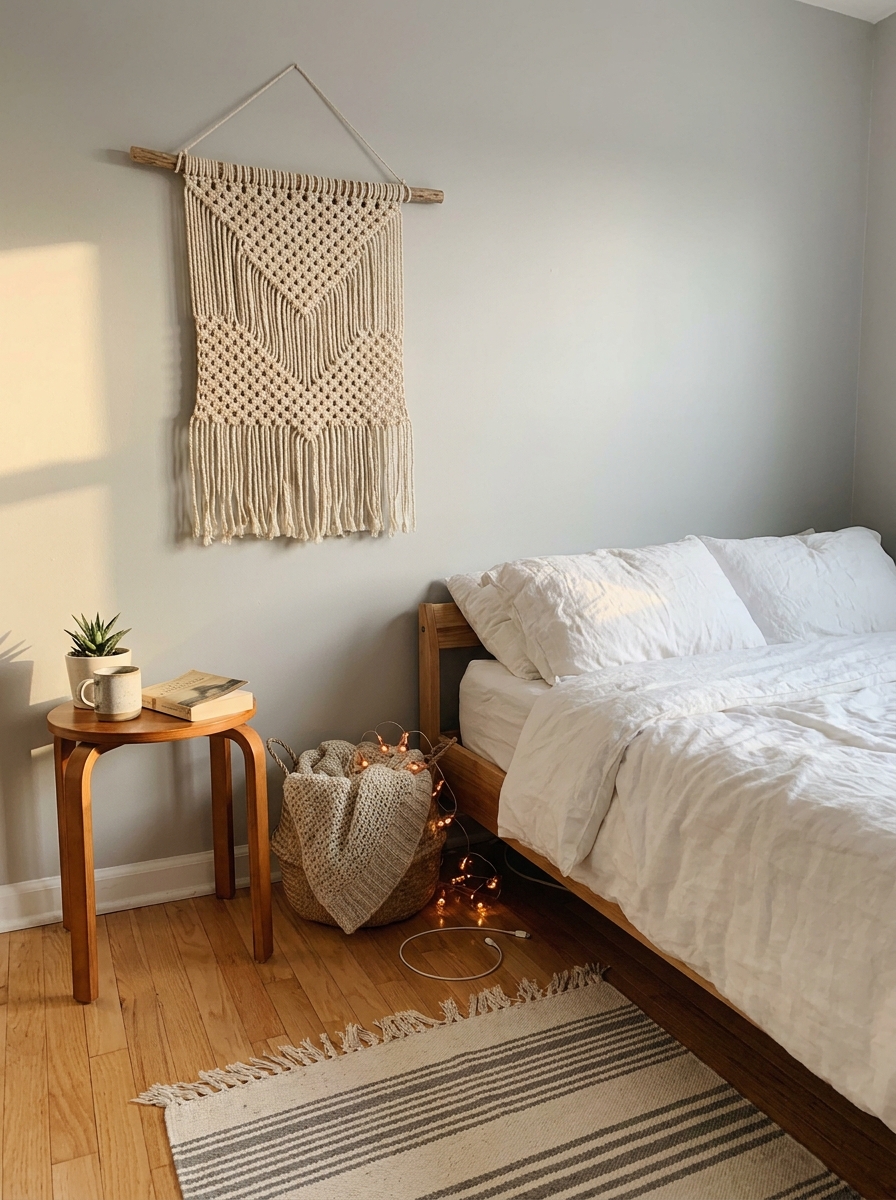
Macramé sounds fancy and complicated, but it’s really just glorified knot-tying. If you can braid hair or tie your shoes, you can make a wall hanging that looks like it came from that boutique where everything costs three times what it should. All you need is macramé cord (or even cotton rope from the hardware store) and a wooden dowel.
The square knot is your best friend here. It’s the foundation of most beginner macramé patterns, and once you get the rhythm, it’s actually kind of meditative. YouTube has about a million tutorials, and you can start with something small—maybe a simple twelve-strand hanging that takes an hour.
What makes this project so satisfying is watching it come together strand by strand. And the texture it adds to a blank wall is instant coziness. I hung mine above my bed, and suddenly the whole room felt more intentional. Plus, there’s something deeply satisfying about telling people you made it yourself when they inevitably compliment it.
3. Custom Picture Frame Gallery Wall
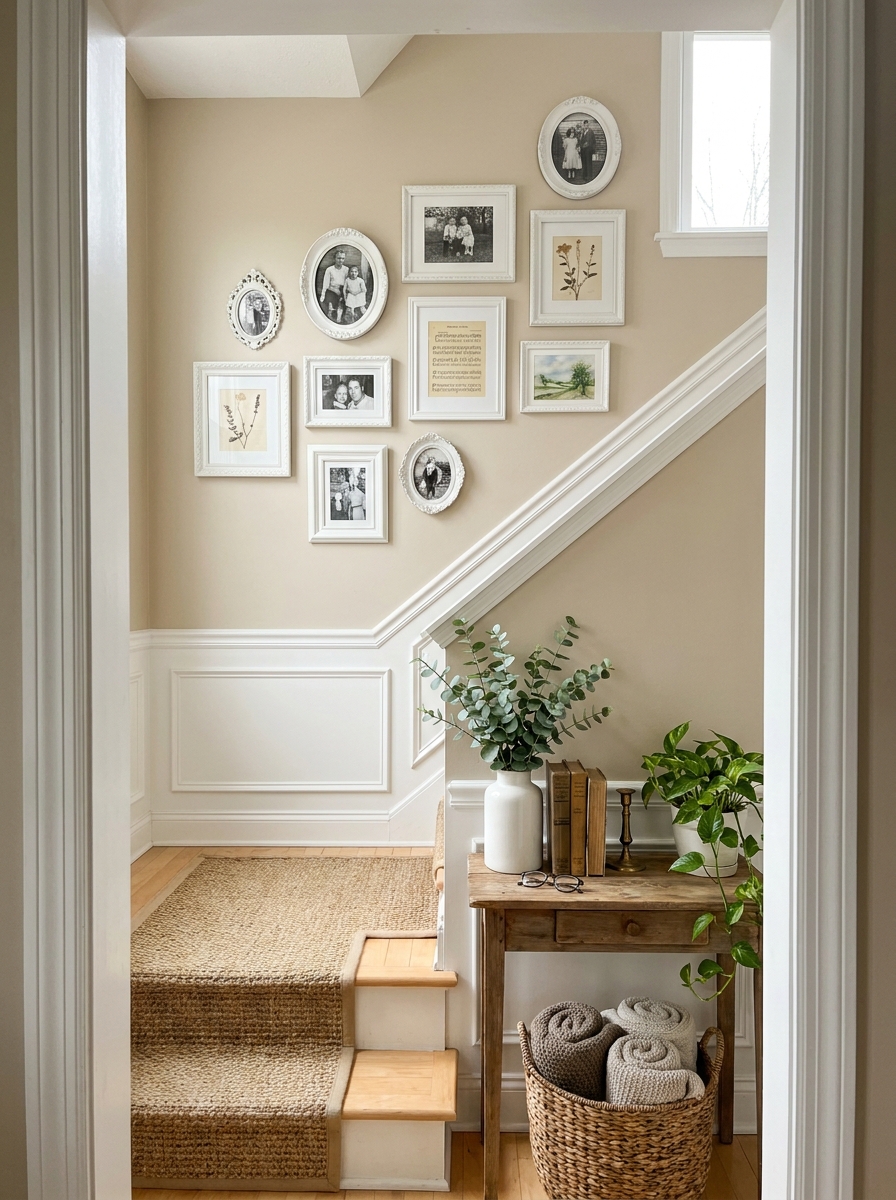
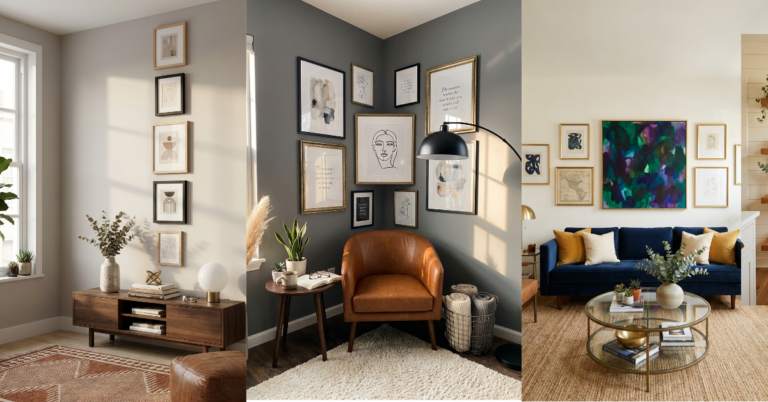
Gallery walls look intimidating, but here’s the secret: you don’t need expensive frames or professional photos. Hit up the thrift store, grab six to eight mismatched frames, and paint them all the same color. Suddenly, chaos becomes cohesion. White, black, or even a soft sage green works beautifully.
The content matters less than you think. Mix family photos with pressed flowers, pages from old books, fabric swatches, or prints you download and print at home for pennies. The key is varying the sizes and arranging them on the floor first before hammering a single nail. Take a photo of your layout so you remember where everything goes.
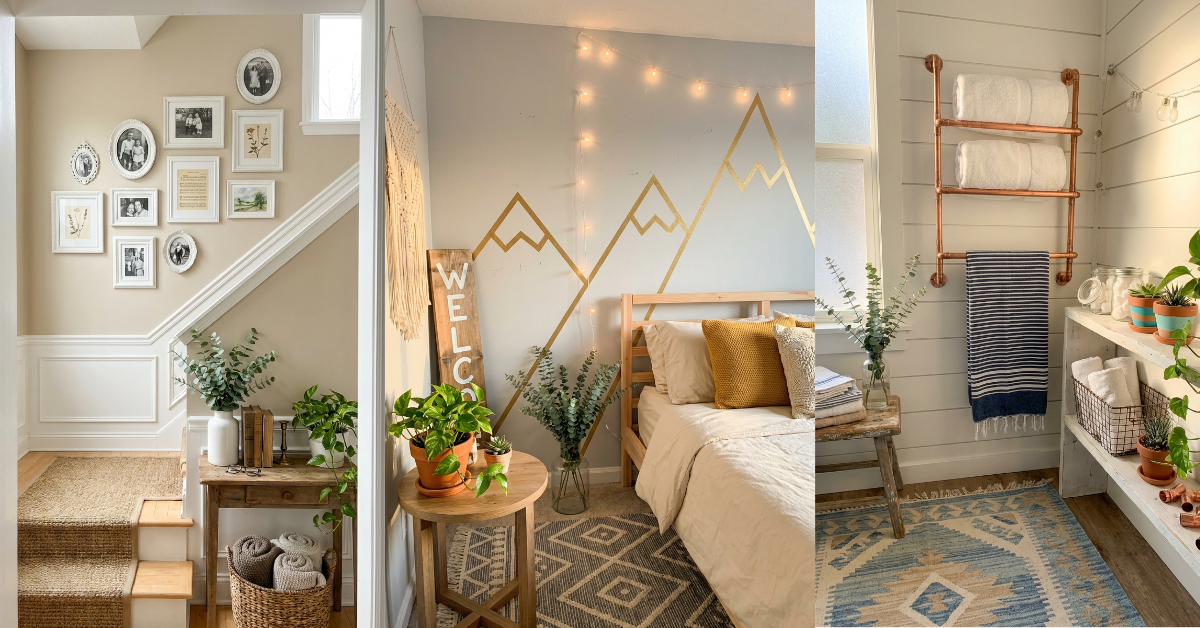
This project transforms a boring wall into a conversation piece for maybe thirty bucks total. I did mine on a stairway wall, and it’s the first thing people notice when they walk in. The best part? You can swap out the contents seasonally or whenever you get bored. The frames stay, but the vibe can completely change with what’s inside them.
4. Hand-Painted Wooden Welcome Sign
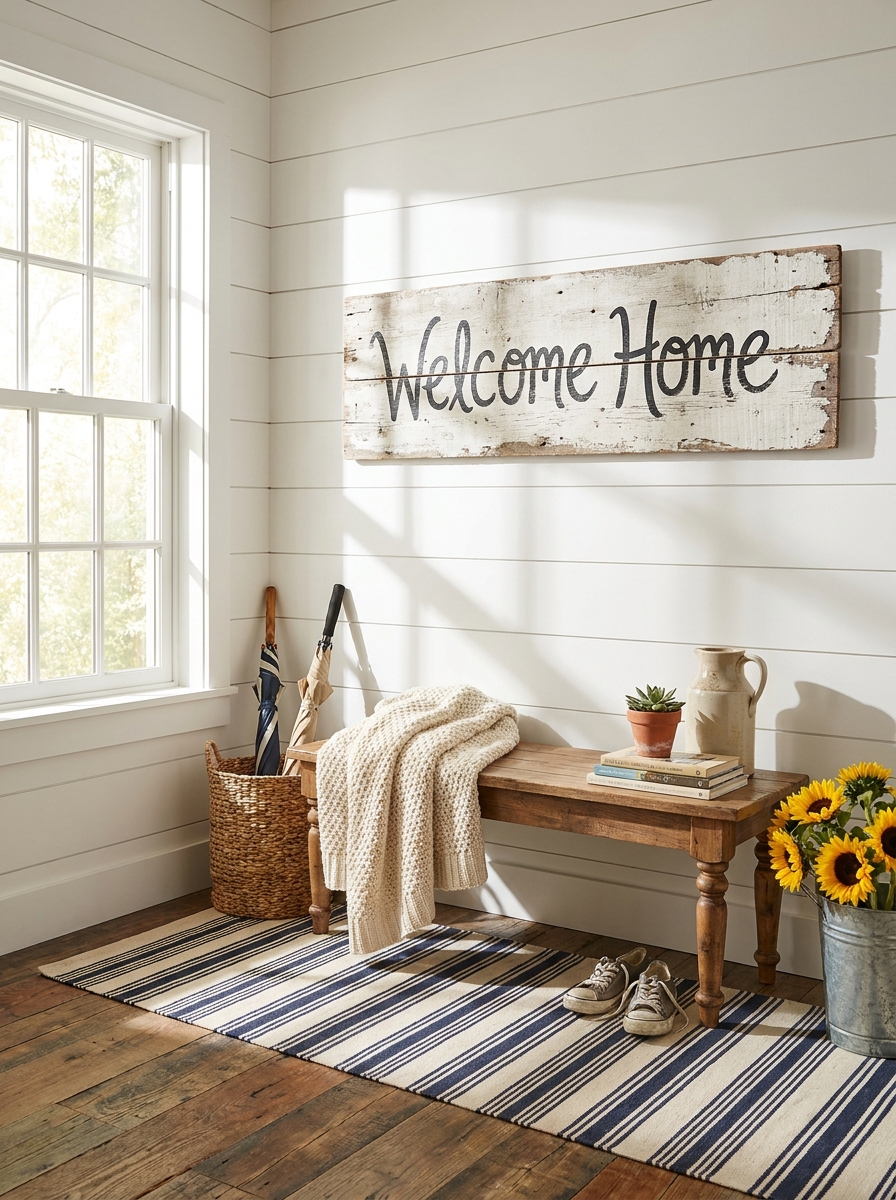
Those rustic wooden signs everyone pins on Pinterest? You can make them for about five dollars. Grab a piece of unfinished wood from the craft store—or honestly, a fence board from the hardware store works great and has that weathered look already built in. Sand it lightly, pick your phrase, and paint.
You don’t need perfect handwriting. Seriously. Print out your words in a font you love, trace them onto the wood with pencil, then paint over the pencil lines. Or use letter stencils if tracing feels too fussy. A small artist’s brush and acrylic paint are all you need. I like black or white paint on natural wood, but you could also stain the background first for more contrast.
Hang it by your front door, in your kitchen, or even in a bedroom. It’s one of those projects that takes maybe an hour but makes your space feel custom and personal. Plus, you can make them as gifts—everyone loves a personalized sign with their family name or a meaningful quote. Just pick something that doesn’t feel too trendy unless you’re okay repainting it in a year.
5. Floating Rope Shelf for Plants
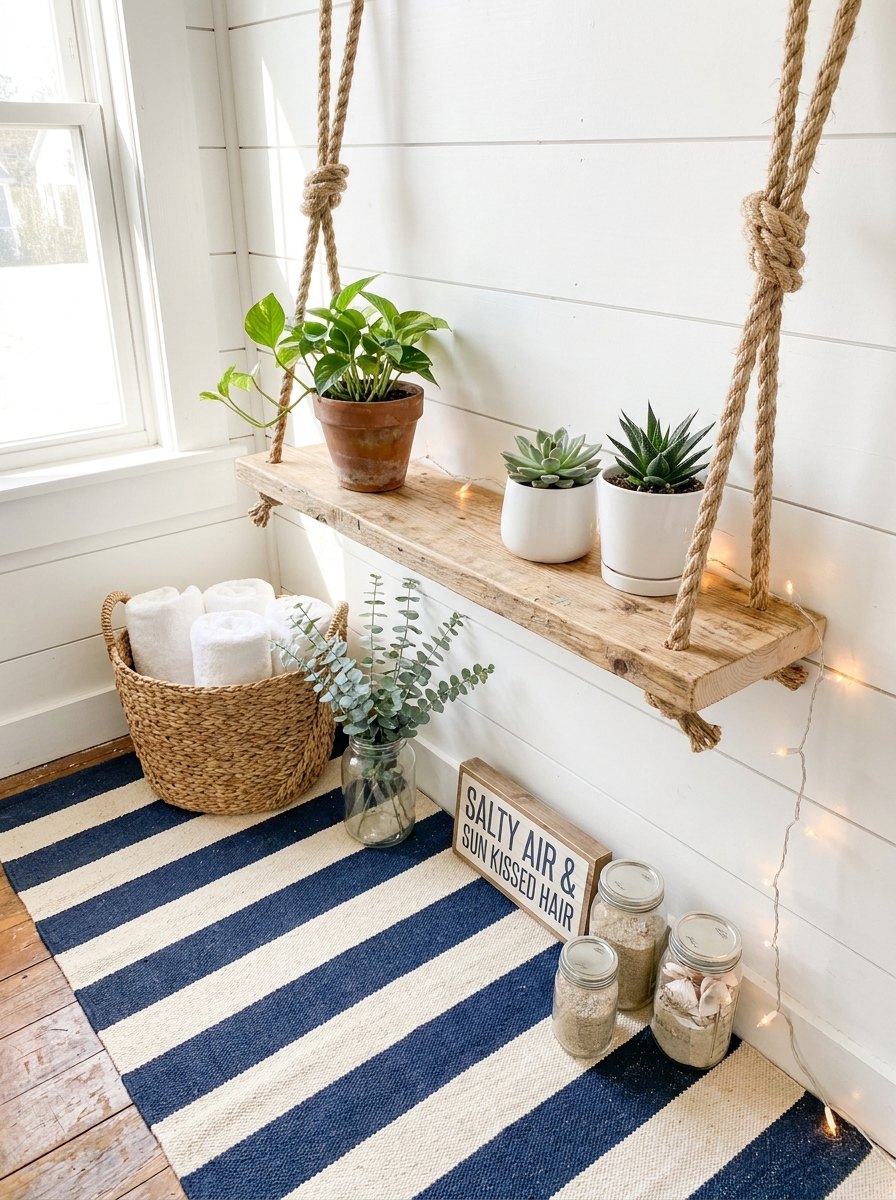
This project is so fun and looks way fancier than it actually is. You’re basically drilling two holes through a wooden board, threading thick rope through them, and hanging it up. That’s it!
I love using reclaimed wood or a simple pine board from the hardware store. The rope adds this amazing nautical-coastal vibe that works in literally any room. You can stain the wood or leave it natural—both look gorgeous.
The best part? You can make multiple shelves at different heights and create this cascading effect on your wall. It’s perfect for displaying small plants, books, or little decorative objects. I hung mine in my bathroom for rolled towels and a trailing pothos, and everyone asks where I bought it. The rope gives it texture and warmth that regular shelves just don’t have. Plus, you can adjust the height super easily by just re-tying the knots. It’s one of those projects that takes maybe thirty minutes but looks like you hired a designer.
6. Fabric-Covered Bulletin Board
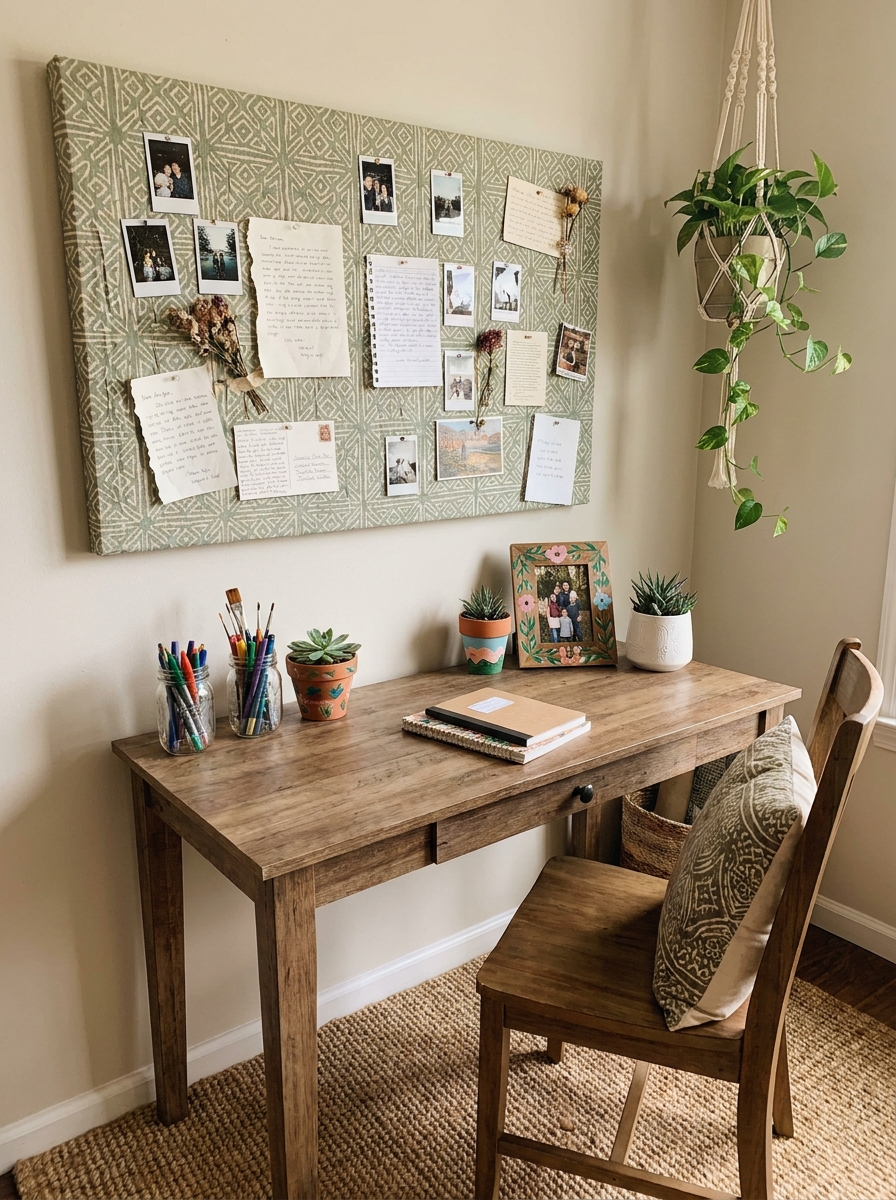
If you’ve never worked with fabric before, this is your gateway project. You’re wrapping a corkboard with pretty fabric and securing it on the back. Seriously, that’s the whole thing.
I used a cute floral fabric I found at the craft store, but you could use literally anything—geometric prints, solid linen, vintage scarves, whatever makes you happy. The fabric instantly transforms a boring bulletin board into actual art for your wall.
What I love is how functional it is while looking decorative. You can pin up photos, reminders, inspiration cards, whatever you need. I made one for my home office and one for my daughter’s room, and they both get used constantly. The fabric adds softness and color to the wall in a way that regular cork just can’t. You can even add ribbon in a crisscross pattern for a super polished look. It takes maybe twenty minutes, and you’ll use it every single day. Mine has become my favorite spot to display my kids’ artwork without making the walls look cluttered.
7. Painted Clay Pot Herb Garden
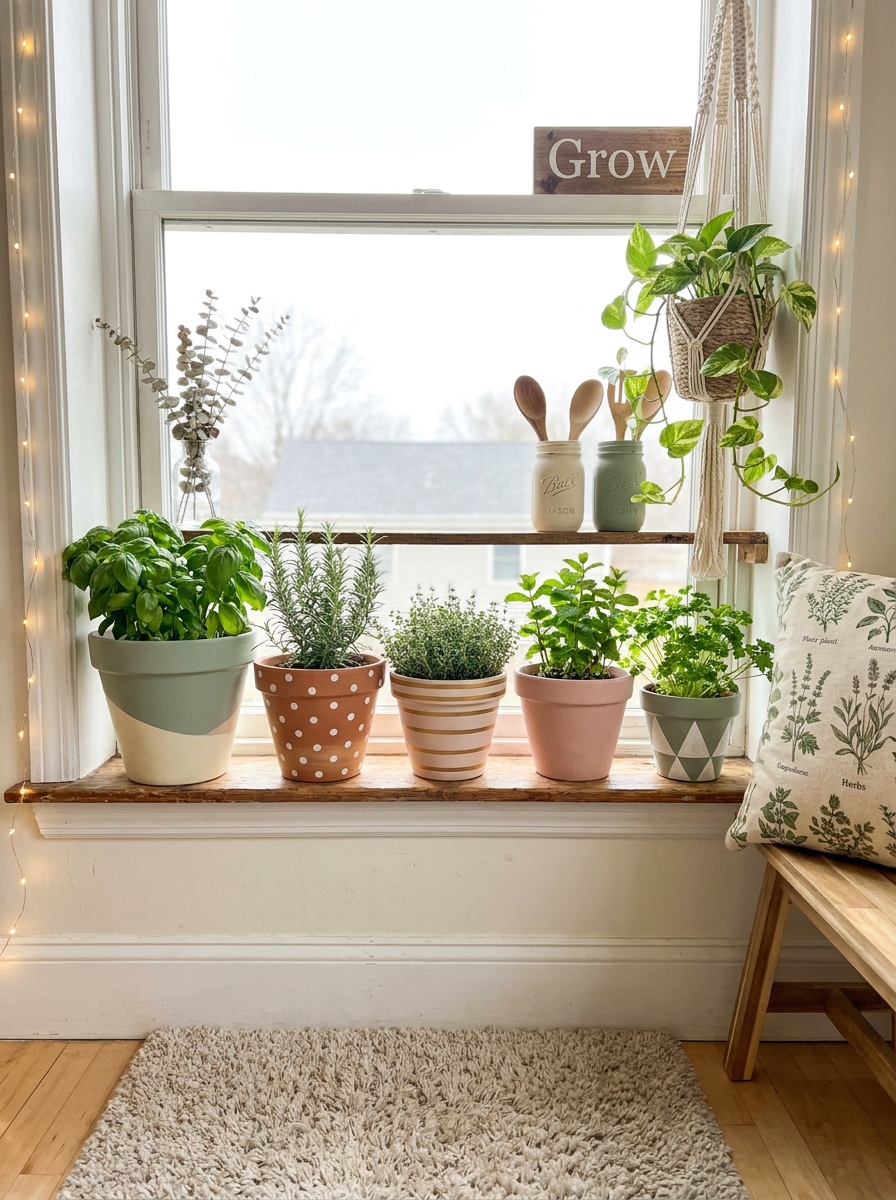
This one makes me so happy every time I walk past it. You’re painting terracotta pots with simple designs—stripes, dots, color blocking—and planting herbs in them. It’s kitchen decor that’s actually useful!
I line mine up on my windowsill, and they look like little pieces of art while giving me fresh basil and rosemary for cooking. The clay pots are super cheap, and acrylic paint sticks to them beautifully. You don’t need to be artistic at all—even solid colors look amazing.
What’s great is you can match them to your kitchen’s color scheme. I did a whole set in whites and soft greens, but I’ve seen gorgeous ones in terracotta and navy, or blush pink and gold. The herbs grow like crazy in these pots because terracotta breathes so well. Plus, there’s something incredibly satisfying about snipping fresh herbs from pots you decorated yourself. It makes cooking feel special. I’ve given these as housewarming gifts, and people absolutely love them. It’s practical, pretty, and so ridiculously easy.
8. Washi Tape Accent Wall Design
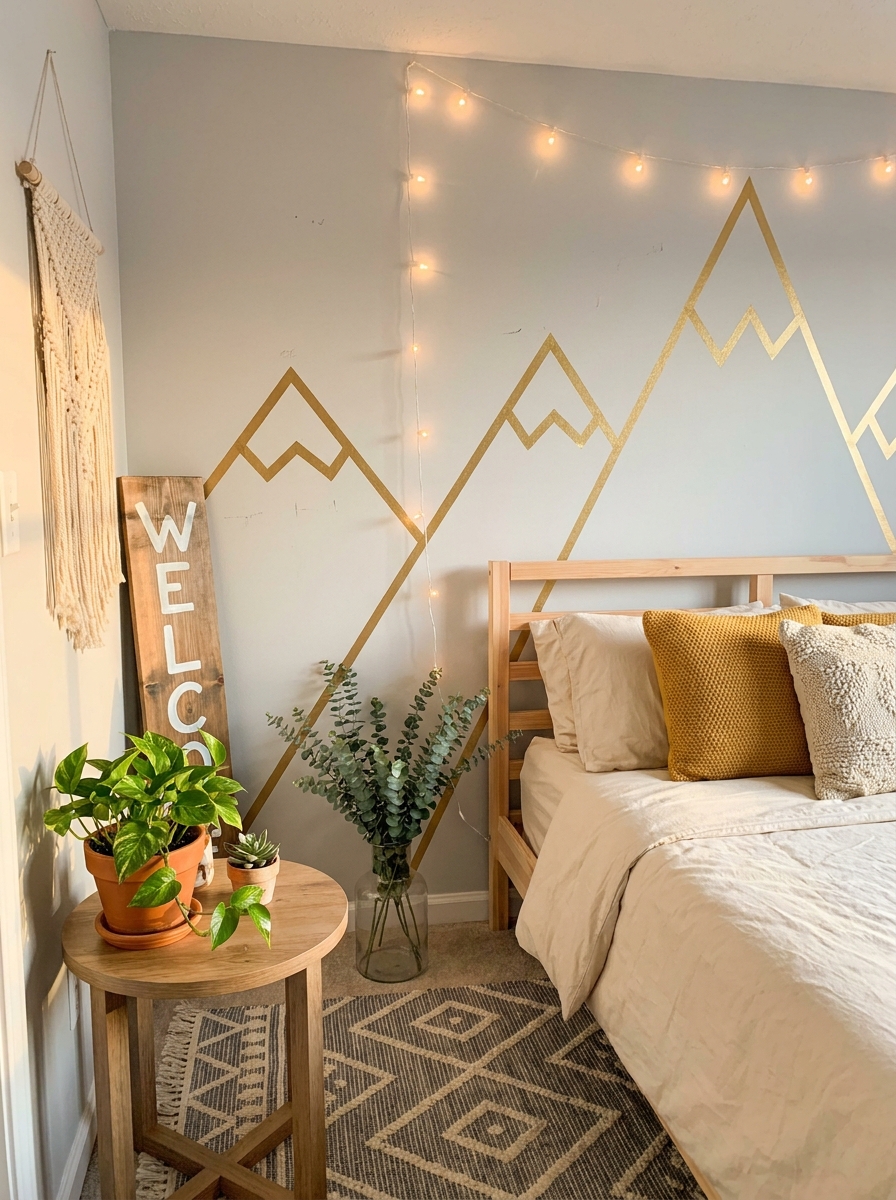
Okay, this might be my favorite project for renters or anyone scared of commitment. You’re using washi tape—that pretty Japanese masking tape—to create patterns directly on your wall. No paint, no permanent changes, just removable tape magic.
I created a geometric pattern behind my bed, and it looks like custom wallpaper. You can do stripes, chevrons, grids, mountain shapes, whatever your heart desires. The tape comes in every color and pattern imaginable, so the possibilities are endless.
What makes this so genius is that if you mess up or change your mind, you just peel it off and start over. No stress, no commitment. I’ve seen people frame doorways, create headboards, make giant sunbursts—it’s incredibly versatile. The tape is thin enough that it doesn’t look bulky on the wall, but it creates real visual impact. It’s perfect for adding color to a boring rental or testing out a bold idea before committing to paint. My daughter changes hers every few months, and it takes like an hour. It’s the ultimate low-risk, high-reward project.
9. Wine Cork Trivet or Coaster Set
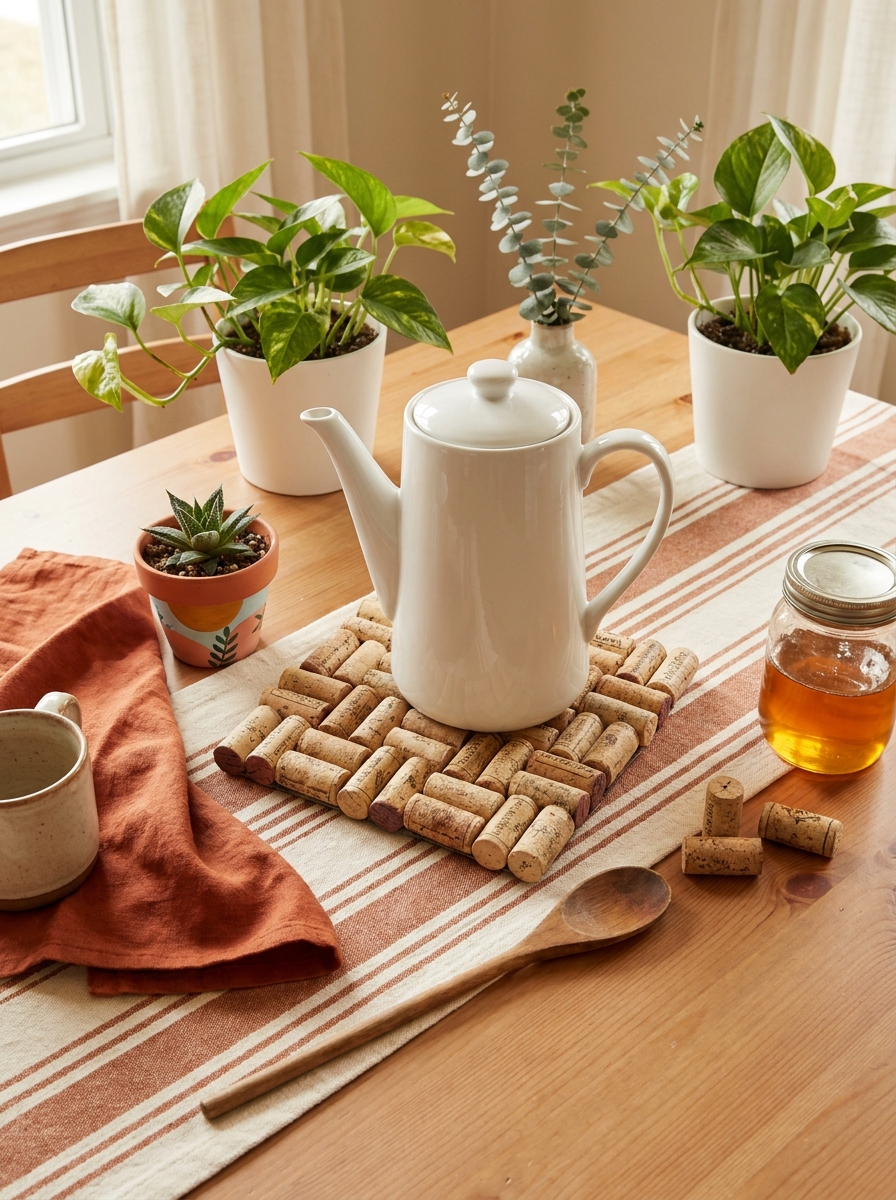
You know those wine corks you’ve been hoarding because they felt too pretty to toss? Here’s your moment. A wine cork trivet is ridiculously easy and looks way more expensive than it is. You literally just glue corks together in whatever shape makes you happy—circle, square, hexagon if you’re feeling fancy. The natural texture is gorgeous, and they actually work as heat-resistant trivets.
I love making a matching set of coasters and one big trivet for hot pots. The corks have this warm, organic vibe that goes with everything from modern to farmhouse. Plus, every cork tells a story, right? Some people arrange them in patterns, but honestly, a random layout looks just as good. Hot glue is your friend here—just work in small sections so it doesn’t cool before you place your corks. The whole project takes maybe thirty minutes, and you’ll use these constantly. They make amazing gifts too, especially if you tie a set with twine and add a little tag.
10. Rope-Wrapped Vase Makeover
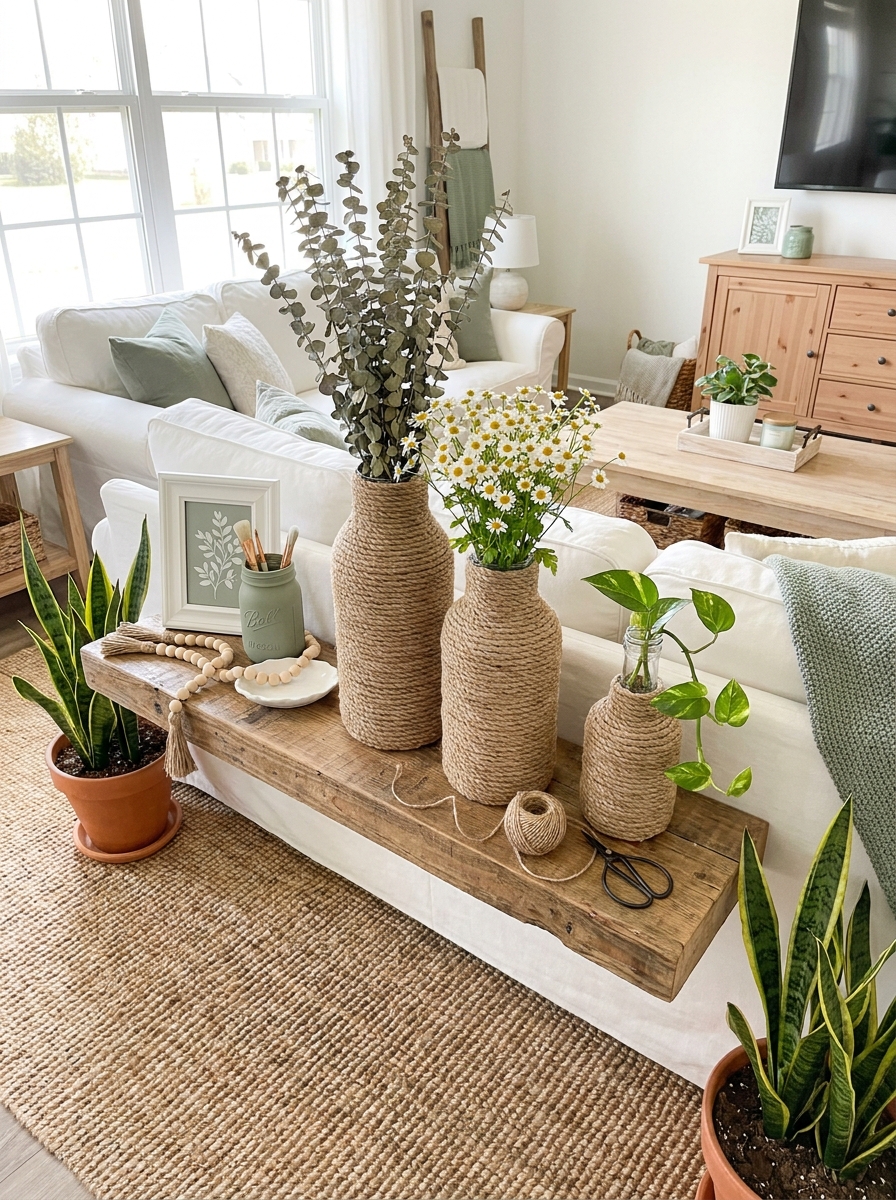
Got a boring glass vase that needs a serious glow-up? Wrap it in rope or jute twine and watch it transform into something you’d totally see at Anthropologie. This is one of those projects that feels almost too easy to work this well. You start at the bottom, add a dot of hot glue, and just keep wrapping. The rope hides completely random vases—I’ve done this with old pickle jars, thrift store finds, even that weird vase your aunt gave you.
The texture is everything. Rope adds this chunky, natural element that makes fresh flowers pop like crazy. I usually do a full wrap for a clean look, but you can also wrap just the bottom half or create patterns with different rope thicknesses. It takes about fifteen minutes per vase, depending on size. The best part? If you mess up, just unwrap and start over. No commitment, no stress. These look amazing grouped together on a mantel or shelf, especially with simple grocery store flowers that suddenly look boutique-level fancy.
11. Fabric Napkins With Simple Hand-Stitched Edges
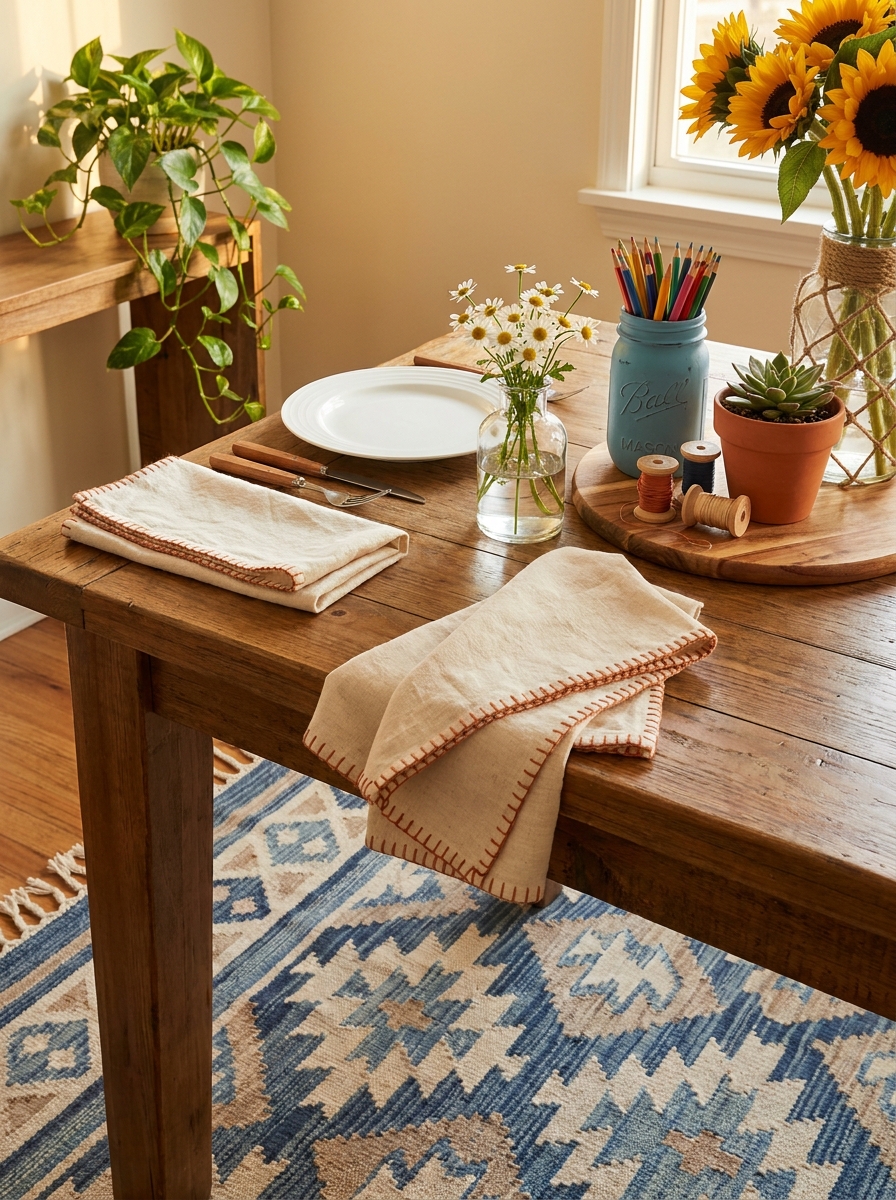
Okay, hear me out—making your own napkins sounds fancy, but it’s actually the easiest sewing project on earth. You don’t even need a machine. Grab some cotton fabric you love, cut squares, and hand-stitch a simple running stitch around the edges. That’s it. The imperfect stitches make them look artisanal and charming, not sloppy. I promise.
I’m obsessed with making seasonal sets. Spring florals, fall plaids, linen for summer—it’s a tiny change that makes your table feel completely different. Each napkin takes maybe twenty minutes if you’re watching Netflix and stitching. Use embroidery thread in a contrasting color to make those stitches pop, or go tone-on-tone for something subtle. They’re washable, reusable, and so much prettier than paper. Plus, there’s something really satisfying about using something you made with your own hands every single day. Start with four napkins, see how you feel. I bet you’ll want to make a whole drawer full.
12. Painted Wooden Bead Garland
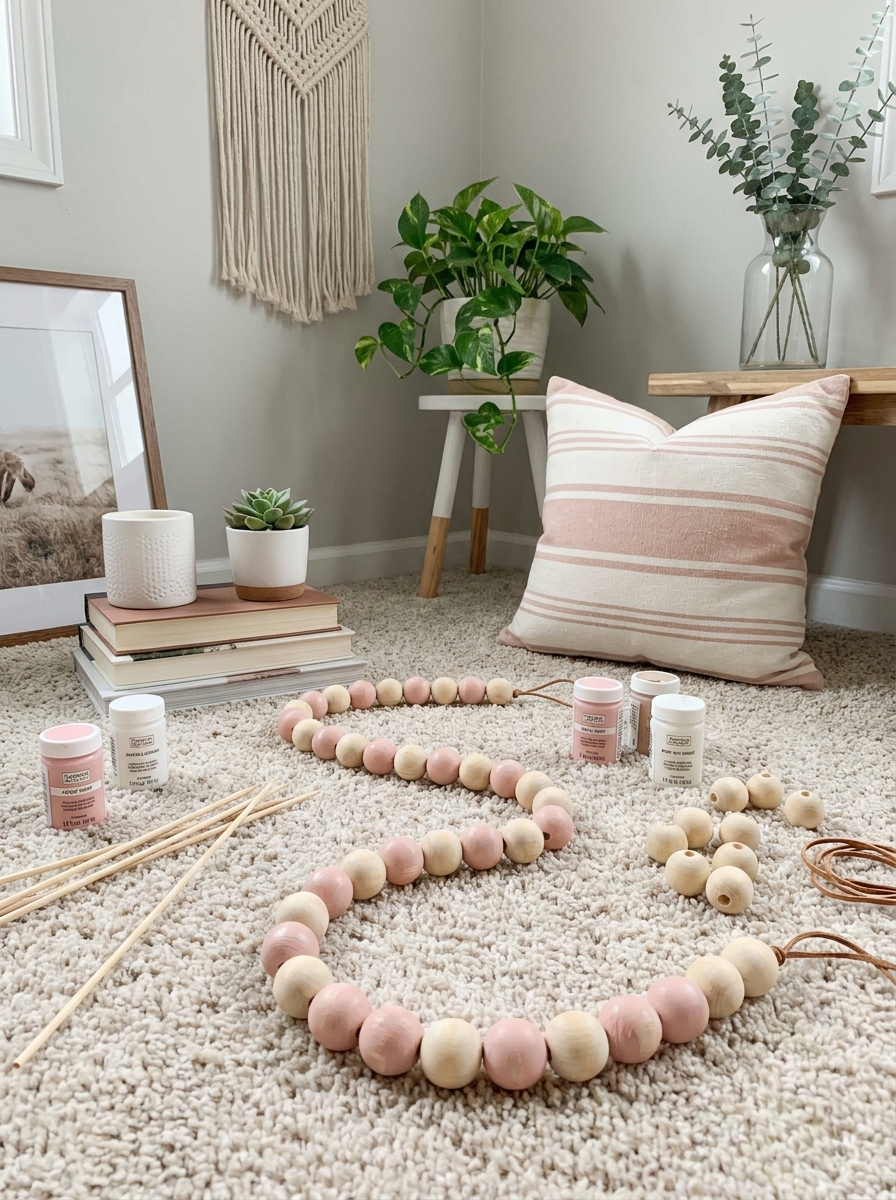
Wooden bead garlands are having a major moment, and making your own is so much cheaper than buying one. You just need wooden beads from the craft store, some paint, and twine or leather cord. Thread them in whatever pattern makes your heart happy—all one color, ombre, rainbow, alternating painted and natural. There’s no wrong answer here. The beads give you this gorgeous Scandinavian-boho vibe without trying too hard.
I drape mine over books on my coffee table, but they look killer on mantels, shelves, even hanging on a doorknob. The painted wood has this matte, soft texture that feels really high-end. You can make them as long or short as you want—I usually go for about three feet because it’s the perfect draping length. String your beads while watching a show, tie knots at the ends, maybe add tassels if you’re feeling extra. The whole thing takes maybe an hour including paint drying time. It’s one of those projects that looks way harder than it actually is.
13. Stenciled Pillowcase With Fabric Paint
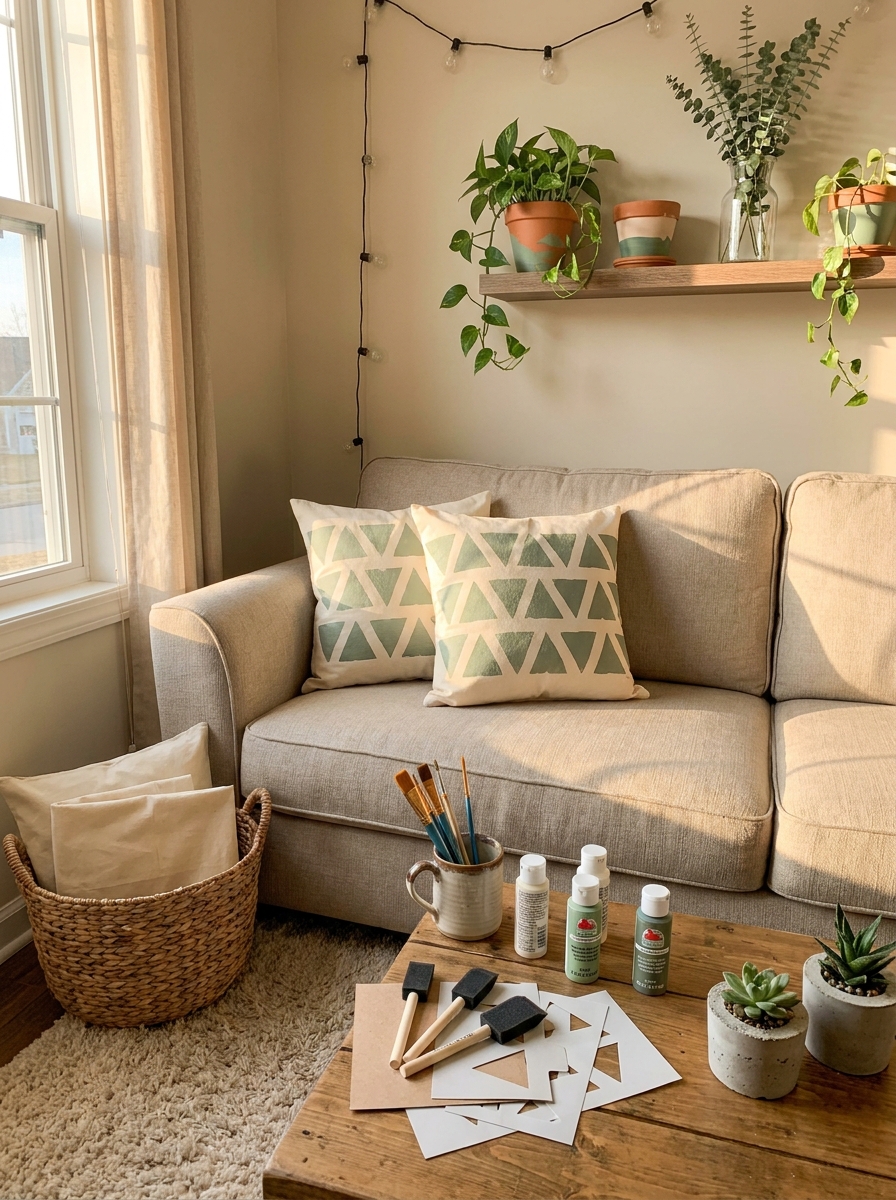
Plain pillows are basically begging for personality, right? A simple stencil and some fabric paint can turn boring into beautiful in about twenty minutes. You don’t need fancy equipment—just cardstock or a plastic stencil, a foam brush, and fabric paint from any craft store.
I love this project because you literally can’t mess it up. Even if your edges aren’t perfect, that handmade vibe is the whole point! Geometric patterns work great for beginners—think triangles, dots, or simple stripes. You can also freehand letters if you’re feeling brave.
The best part? You can coordinate with whatever colors are already in your room. Need more green? Stencil some leaves. Want a boho look? Go for sun and moon shapes. These pillows instantly make your couch or bed feel custom and collected, not cookie-cutter. Once the paint dries (usually overnight), just toss them on your furniture and watch everyone ask where you bought them.
14. Simple Wooden Tray With Paint Dipped Edges
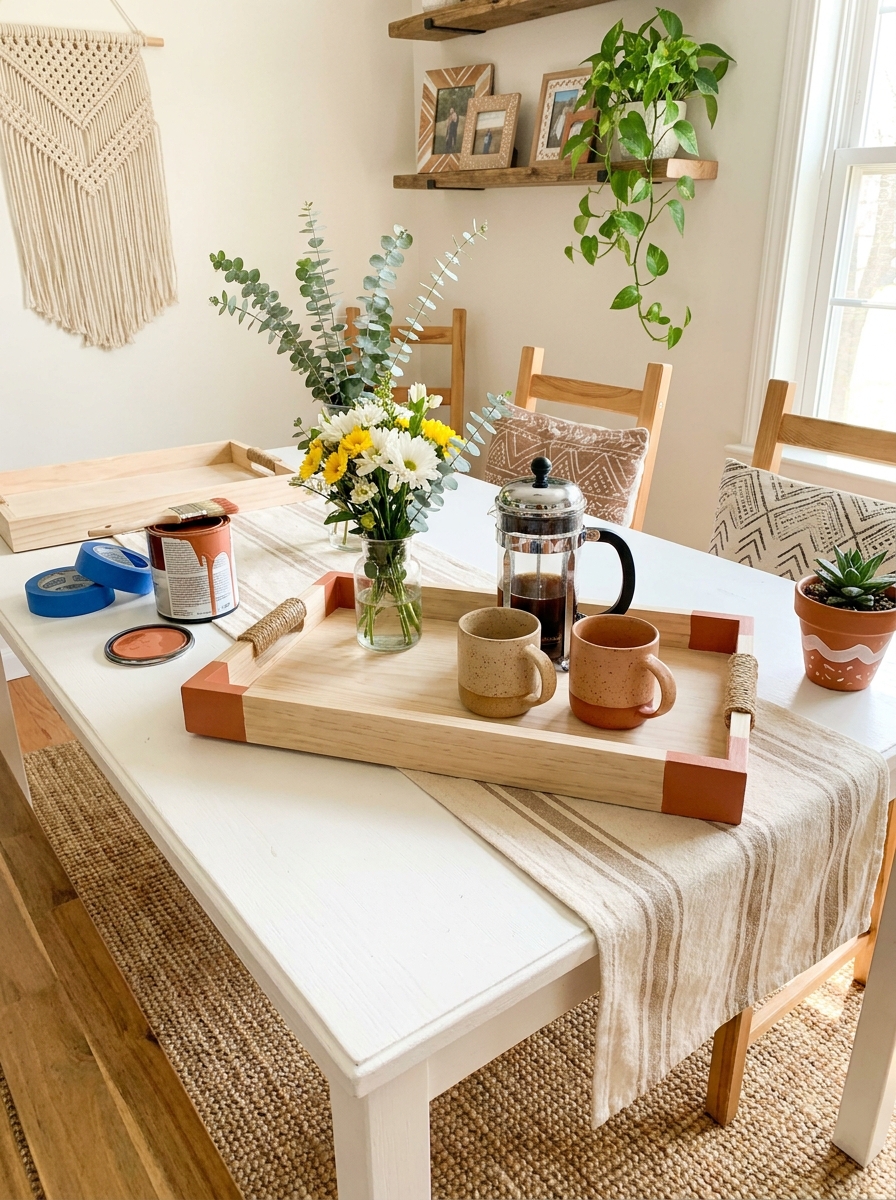
Wooden trays are crazy useful and surprisingly easy to make look expensive. Grab an unfinished wooden tray from the craft store for under ten bucks, then give it a paint-dipped edge treatment that looks like it came from an upscale boutique.
You can dip just the handles or go bold and dip the entire bottom edge in a fun color. The contrast between natural wood and a crisp painted section is so satisfying! I usually go with white, blush pink, or mustard yellow because they feel fresh without being too matchy.
This tray becomes your new favorite thing for everything—corralling remotes, serving coffee, displaying candles, organizing bathroom stuff. You’ll wonder how you lived without it. The whole project takes maybe thirty minutes plus drying time, and you’ll use that tray literally every single day. It’s one of those DIY wins that feels really grown-up and put-together.
15. Copper Pipe Towel Rack DIY
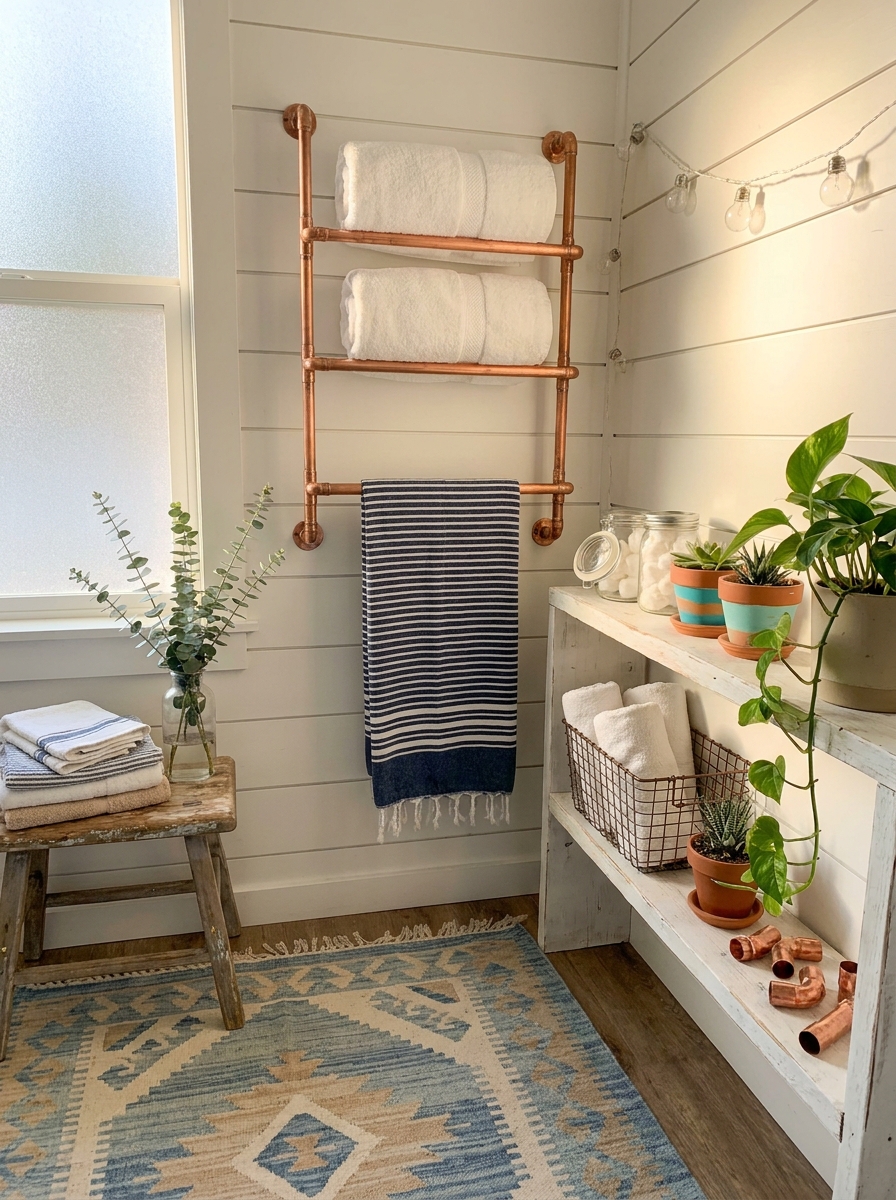
This one makes you feel like a total badass builder, even though it requires zero actual construction skills. Copper pipes from the hardware store plus a few elbow fittings equal the chicest towel rack you’ve ever seen. No cutting required if you buy pre-cut lengths!
The warm metallic look of copper adds instant sophistication to bathrooms, and the industrial-meets-modern vibe works with practically any style. You just fit the pieces together like grown-up Legos, mount it to the wall with pipe brackets, and boom—you’ve got a designer-looking towel rack.
I’ve made these for bathrooms, kitchens (for dish towels), and even mudrooms. The copper develops this gorgeous patina over time that makes it look even better as it ages. People always assume it cost a fortune, but the whole thing usually runs under twenty-five bucks. Plus, you get to casually mention that you “built” your towel rack, which feels pretty cool.
16. Dip-Dyed Canvas Storage Baskets
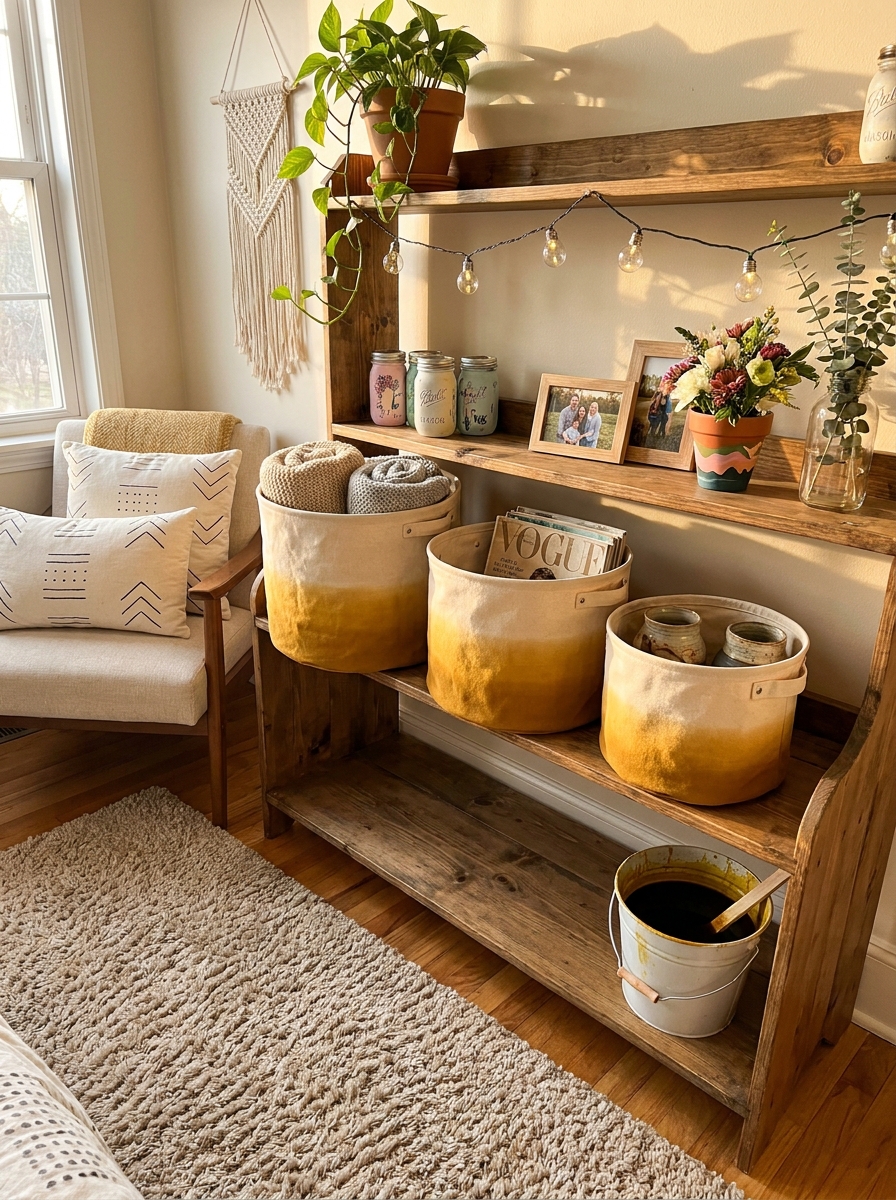
Canvas storage baskets are everywhere, but plain beige ones can feel a little blah. Enter fabric dye and five minutes of your time! Dip-dyeing creates this gorgeous ombre effect that looks way fancier than the effort required.
You literally just mix up some fabric dye in a bucket, dip your canvas basket halfway in, hold it for a few minutes, and let it dry. The gradual color fade from saturated at the bottom to natural canvas at the top is so pretty and modern. I’ve done whole sets in coordinating colors for my living room shelves.
These baskets are perfect for storing throw blankets, toys, magazines, or literally anything that needs wrangling. They look custom and expensive but cost maybe eight dollars total to make. Stack them on shelves, tuck them under console tables, or line them up in your closet. Suddenly your storage doesn’t look like storage—it looks like décor.
17. Hand-Stamped Tea Towel Set
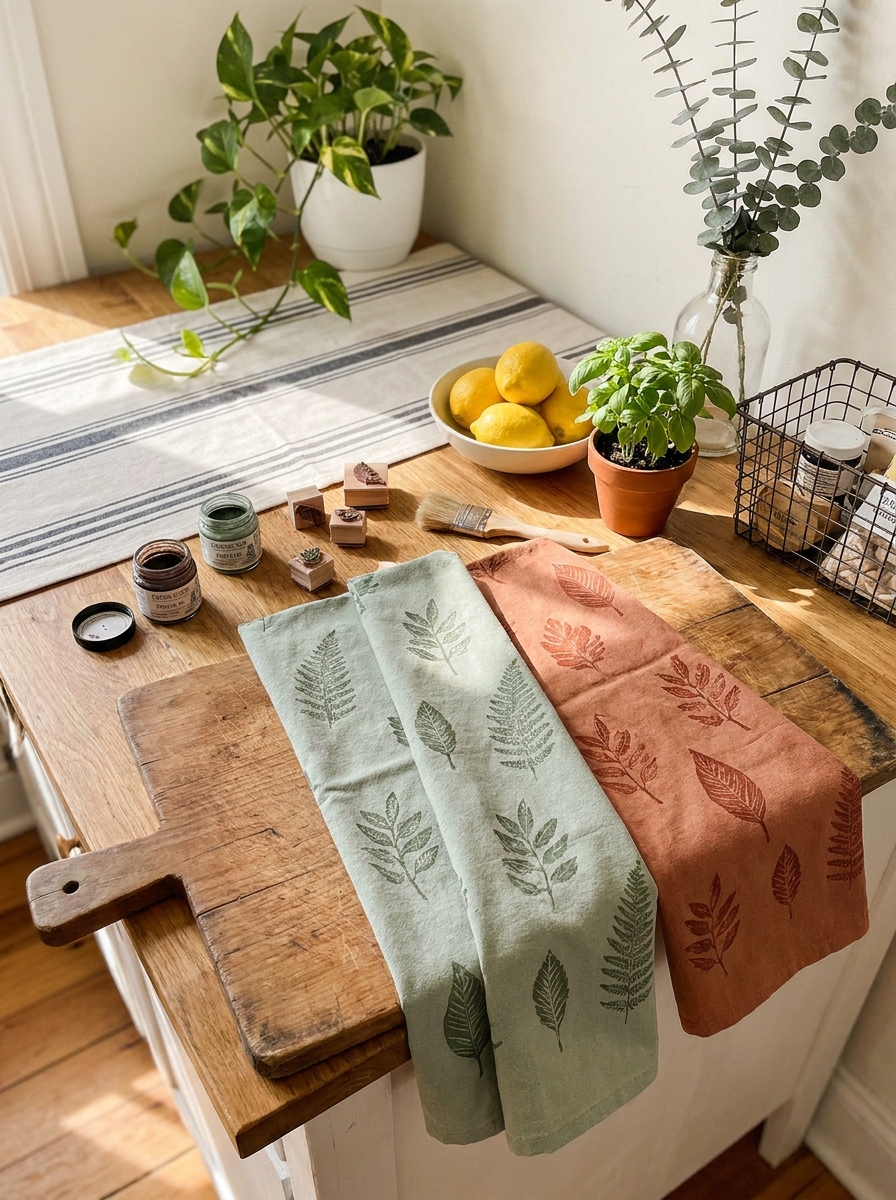
Okay, can we talk about how expensive cute kitchen towels are? Like, seriously. But here’s the thing—you can make your own gorgeous custom tea towels for a fraction of the price, and it’s honestly one of the most satisfying projects ever.
All you need are plain white or natural linen tea towels (grab a pack from Target or Amazon), some fabric ink, and stamps. You can use store-bought rubber stamps, carve your own from potatoes (yes, really!), or even use things like wine corks and cookie cutters. The stamping process is so forgiving—if you mess up, it just looks charmingly handmade.
I love making sets of three or four with the same stamp pattern but different colors. Arrange them in a pretty basket by your sink, and suddenly your kitchen looks like it belongs in a magazine. Plus, these make incredible gifts! Everyone needs nice kitchen towels, and when they’re handmade? Even better. Pro tip: heat-set the ink with an iron so they’re actually washable and last forever.
18. Painted Glass Jar Lantern Collection
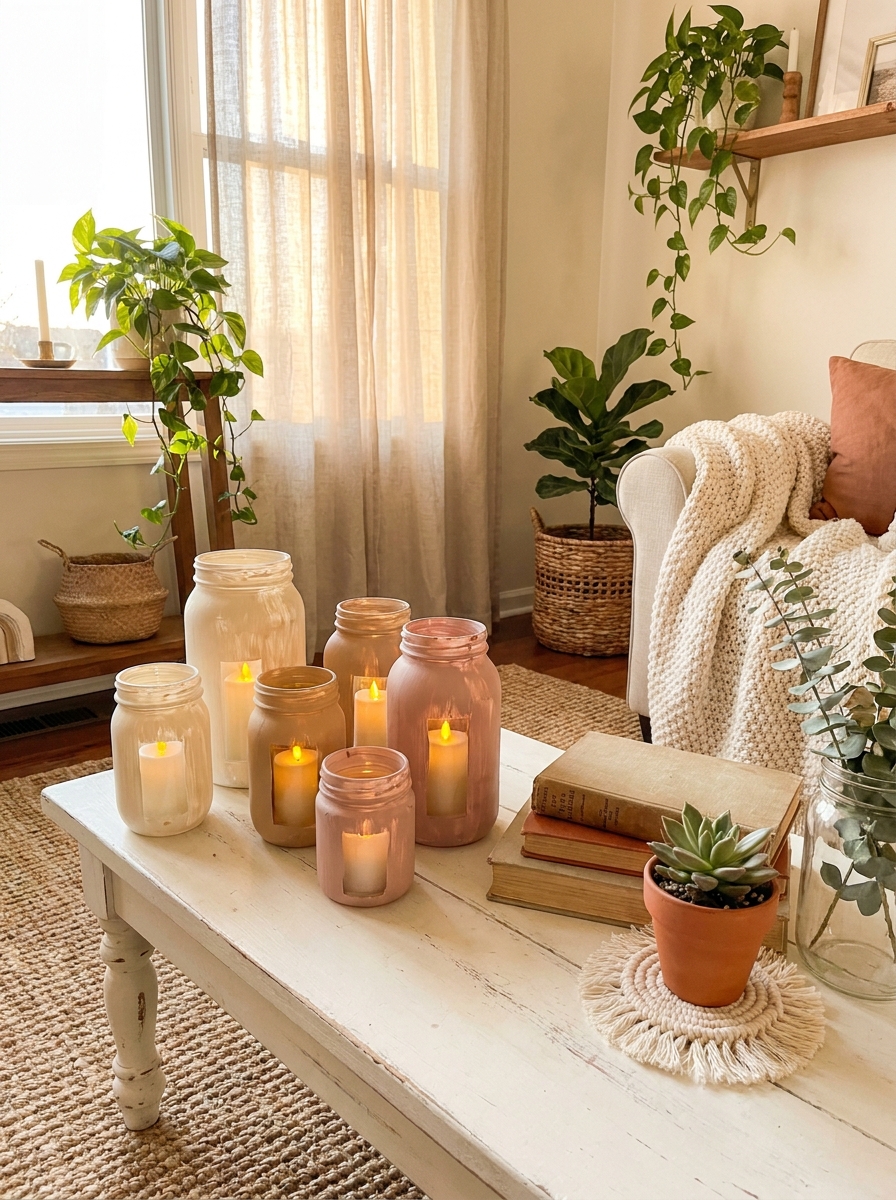
There’s something so magical about soft candlelight, right? And these painted glass jar lanterns create the coziest atmosphere without any fancy skills required. I’m talking instant ambiance for zero dollars if you save your jars!
Grab any glass jars—pasta sauce, pickle jars, mason jars, whatever you’ve got. Clean them really well, then paint the outside with chalk paint, acrylic craft paint, or even spray paint. You can go solid colors, do an ombre effect, or get fancy with patterns. I love doing a mix of matte white, soft gray, and blush pink for a romantic look.
Once they’re dry, pop a tea light or battery-operated candle inside. The light glows through the painted glass in the most beautiful way, creating this soft, dreamy effect. Cluster a few different sizes together on a coffee table, mantel, or outdoor table for instant coziness. They’re perfect for dinner parties, romantic evenings, or just making a random Tuesday feel special. Total game-changer for mood lighting!
19. Fabric Scrap Pom Pom Garland
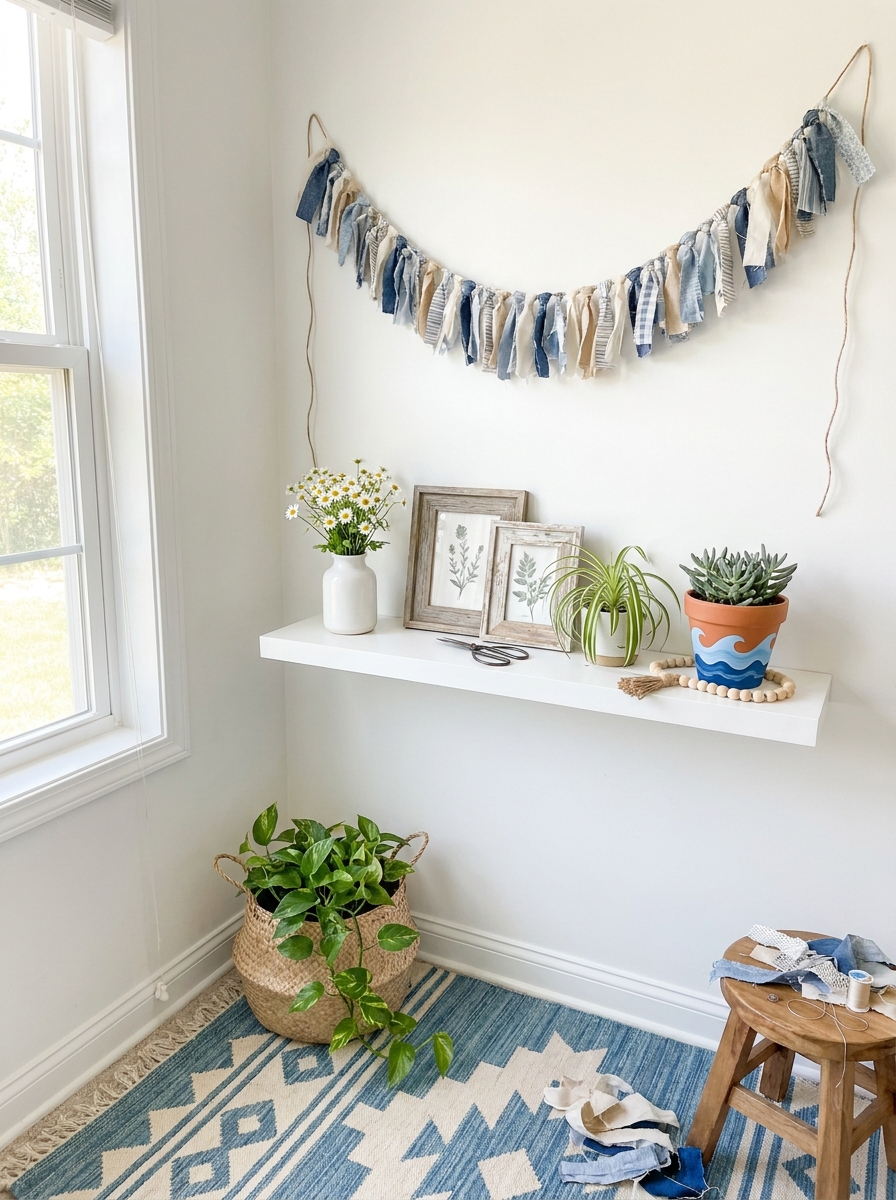
If you have fabric scraps lying around from other projects, this is about to become your new favorite way to use them up! This garland is playful, textured, and adds such a fun pop of personality to any space.
You don’t need to sew a single stitch—promise. Just cut your fabric scraps into strips (cotton works best), then tie them onto a long piece of twine or rope, spacing them about an inch apart. Keep tying until you’ve got a nice full garland. The fabric strips naturally puff up and create these adorable pom-pom-like clusters that are seriously charming.
I love mixing patterns and colors that go together—maybe all pastels, or a bold rainbow, or even just neutrals for a more subtle look. Hang your garland across a mantel, along a bookshelf, above a bed, or even in a nursery. It adds texture and movement without being too precious. And the best part? It costs literally nothing if you’re using scraps, and it takes maybe thirty minutes while you’re watching TV. My kind of project!
20. Concrete Planter With Gold Leaf Accent
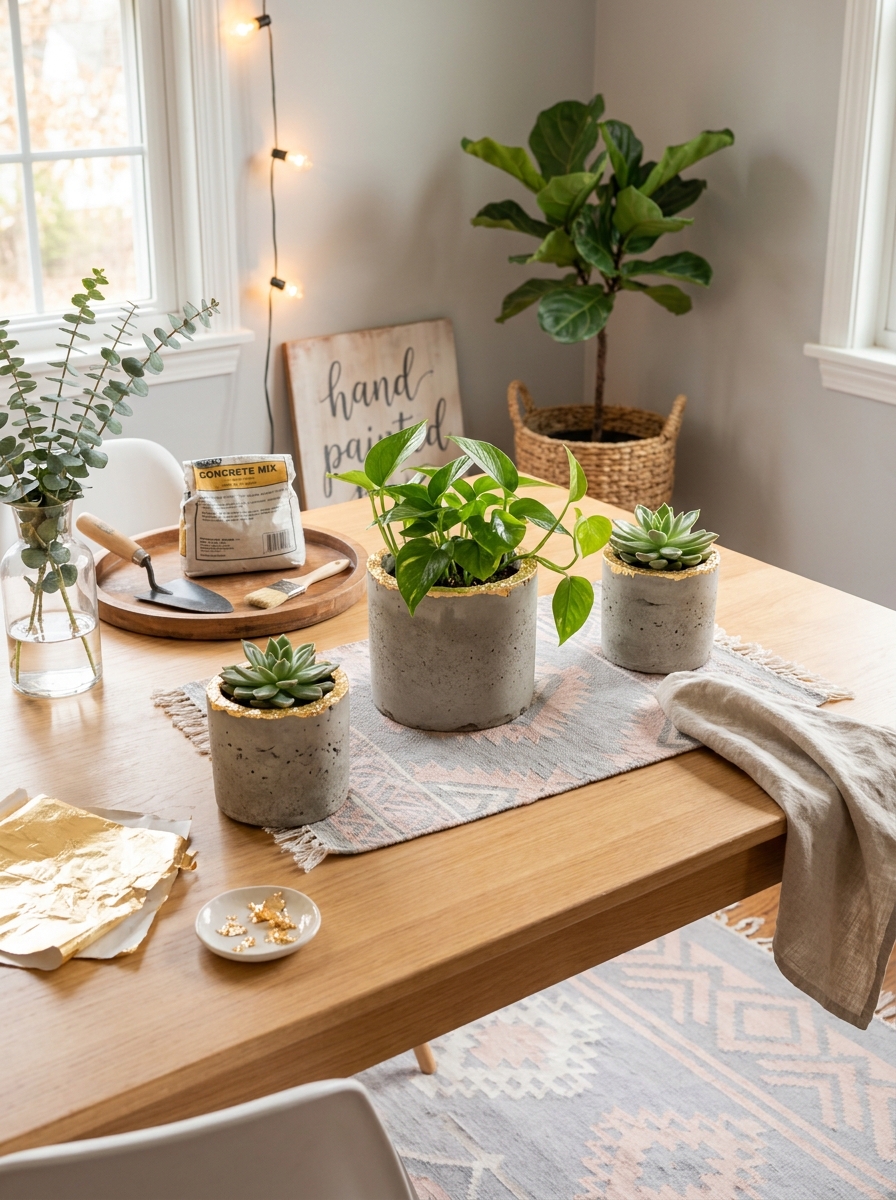
Okay, I know concrete sounds intimidating, but hear me out—this is SO much easier than it looks, and the result is seriously impressive. We’re talking modern, chic, and totally Pinterest-worthy.
You’ll need concrete mix (from any hardware store), two containers in different sizes (plastic cups or old yogurt containers work great), and some gold leaf sheets. Mix your concrete, pour it into the larger container, then press the smaller container into the center to create the planter shape. Let it set for 24 hours, pop it out of the molds, and boom—you’ve got a custom concrete planter.
Here’s where it gets fun: add little touches of gold leaf to the edges or corners. Just brush on some adhesive, press the gold leaf on, and it instantly looks expensive and designer. The contrast between rough concrete and shimmery gold is *chef’s kiss*. These make incredible gifts, and people will absolutely think you bought them from some fancy boutique. Fill yours with a succulent or small plant and prepare for compliments!
21. Painted Wooden Serving Tray With Handles
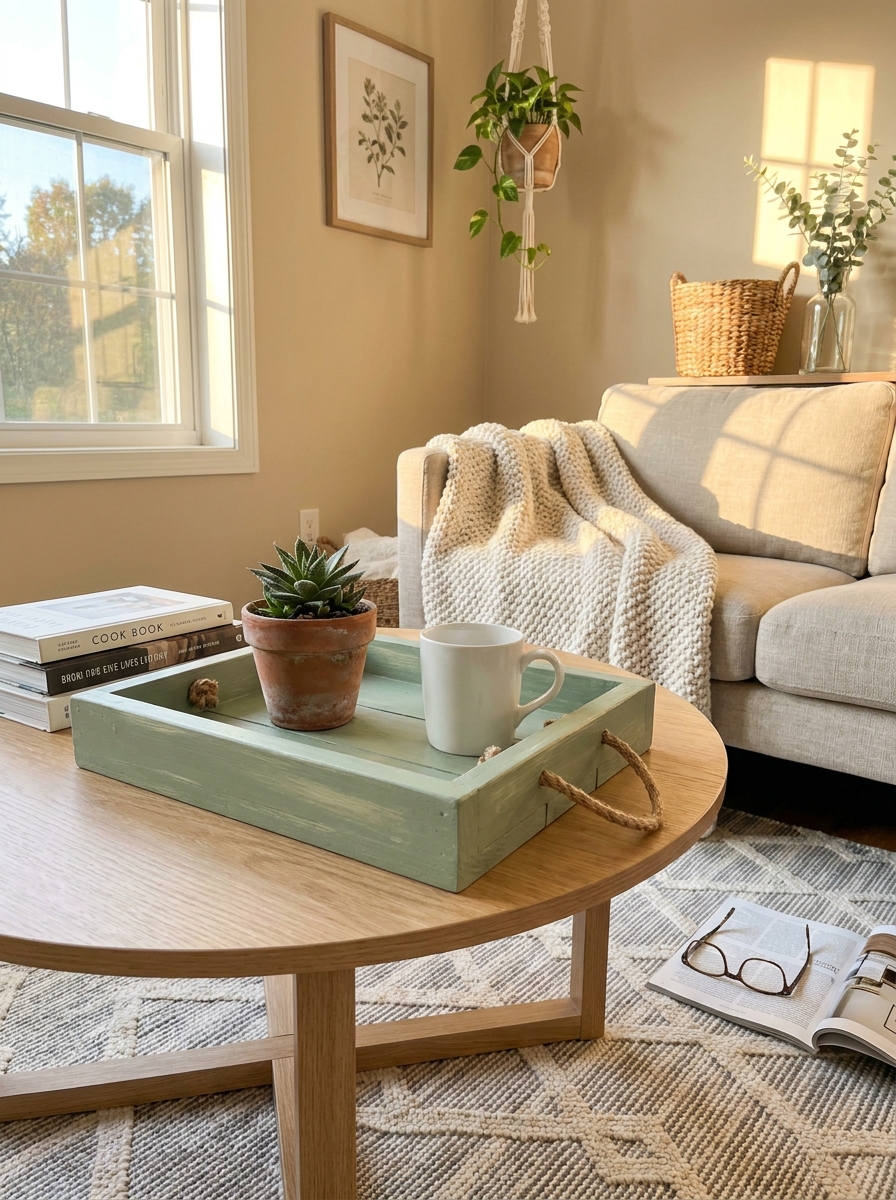
A beautiful serving tray makes your coffee table instantly more polished. This project turns a plain wooden tray into a statement piece with just paint and handles.
I love using two-toned paint for this. Paint the inside one color and the outside another. Or go bold with a geometric pattern on the bottom. You can find unfinished wooden trays at craft stores for under fifteen dollars, and adding simple rope handles or leather pulls gives it that expensive boutique look.
The best part? You can customize it to match your exact color scheme. I made mine in soft sage green with natural wood handles, and it lives on my ottoman holding remotes and coasters. My sister went full coastal with navy blue and gold brass handles. Both look like we spent a fortune, but we each spent maybe twenty bucks total. This is one of those projects that makes you look like you really know what you’re doing.
22. Fabric-Wrapped Embroidery Hoop Wall Art
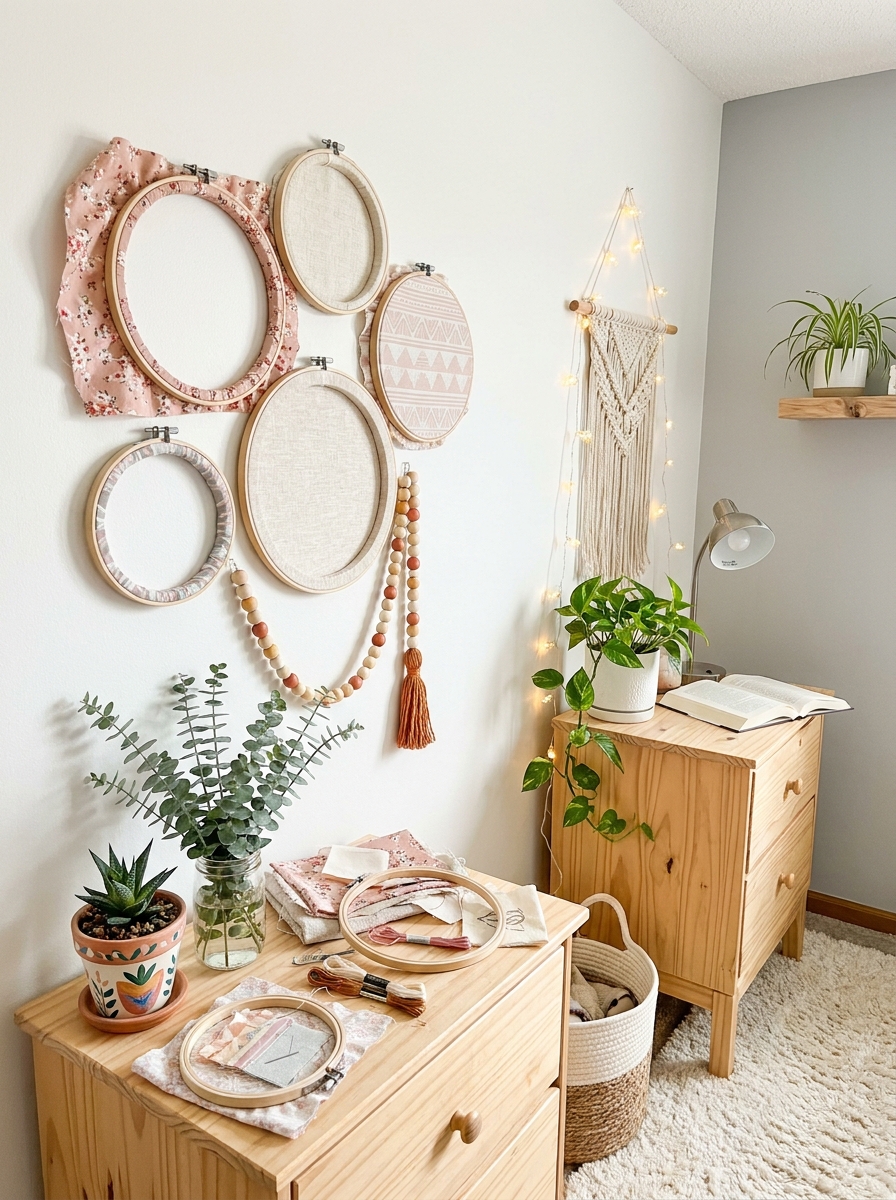
Embroidery hoops aren’t just for needlework anymore. Stretch pretty fabric across them and you’ve got instant wall art that looks gallery-worthy.
This is seriously the easiest art project ever. You buy wooden embroidery hoops in different sizes, choose fabric that makes you happy, stretch it tight across the hoop, and trim the excess. Done. I like using three or five hoops in varying sizes for a cool clustered gallery wall effect. The fabric options are endless—vintage floral, modern geometric, textured linen, bold stripes.
I made a set using blush pink and cream fabrics with delicate patterns for my bedroom, and everyone asks where I bought them. The secret? Fabric store remnants that cost like three dollars per piece. You can swap them out seasonally too. Fall florals in October, coastal blues in summer. They’re lightweight enough to hang with command strips, so no commitment or wall damage required.
23. Colorful Painted Stair Risers
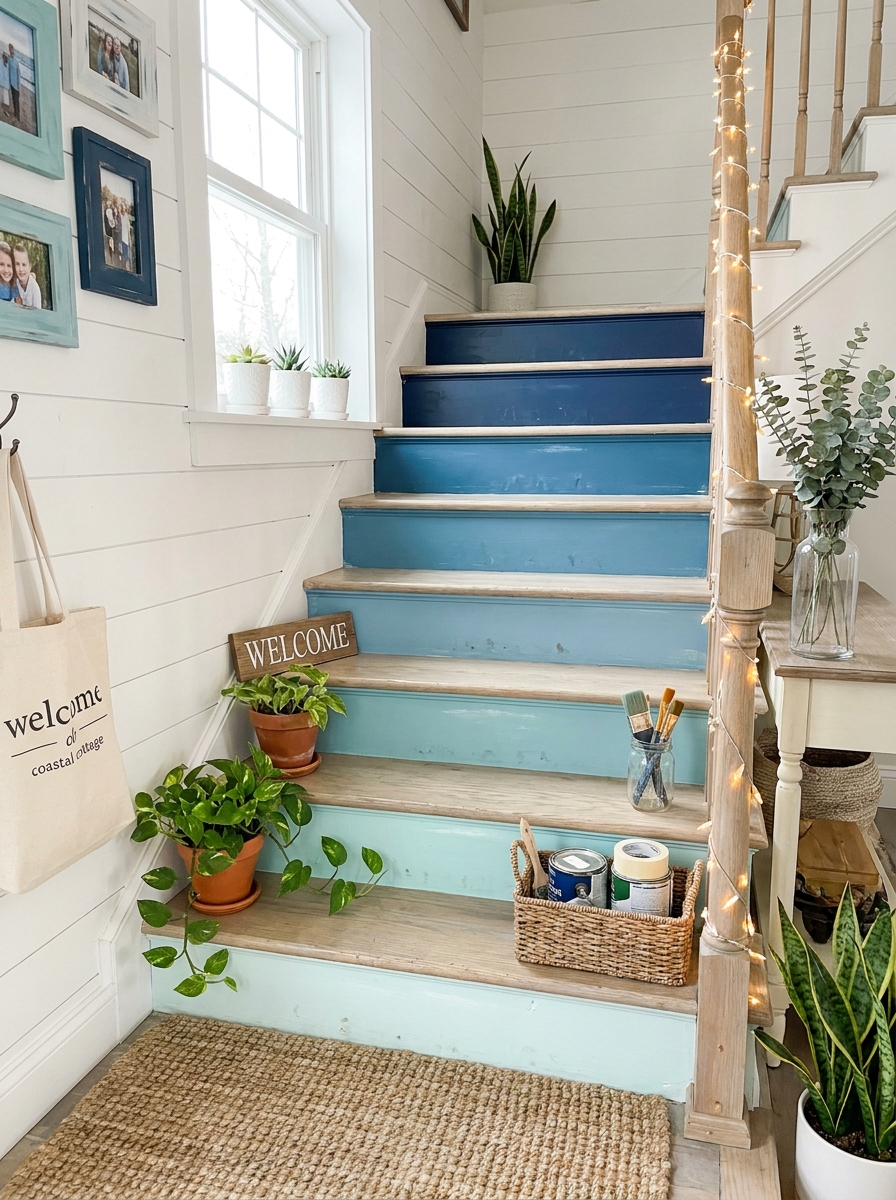
Want to make a big visual impact without a huge commitment? Paint your stair risers. This project transforms boring stairs into a showstopping feature.
You’re not painting the part you walk on, just the vertical risers. That means less wear and tear, and you can go wild with color or pattern. I’ve seen people do ombre effects from light to dark as you go up, alternating colors, geometric patterns, even stenciled designs. It’s like artwork you walk past every single day.
Start with one coat of primer, then two coats of your chosen paint color. I went with a fresh coastal vibe using three shades of blue that graduate from pale aqua at the bottom to deep navy at the top. The whole project took one weekend, and now my staircase is the first thing people notice when they visit. It’s bold, it’s fun, and honestly? It makes me smile every time I see it.
24. Simple Leather Drawer Pulls Upgrade
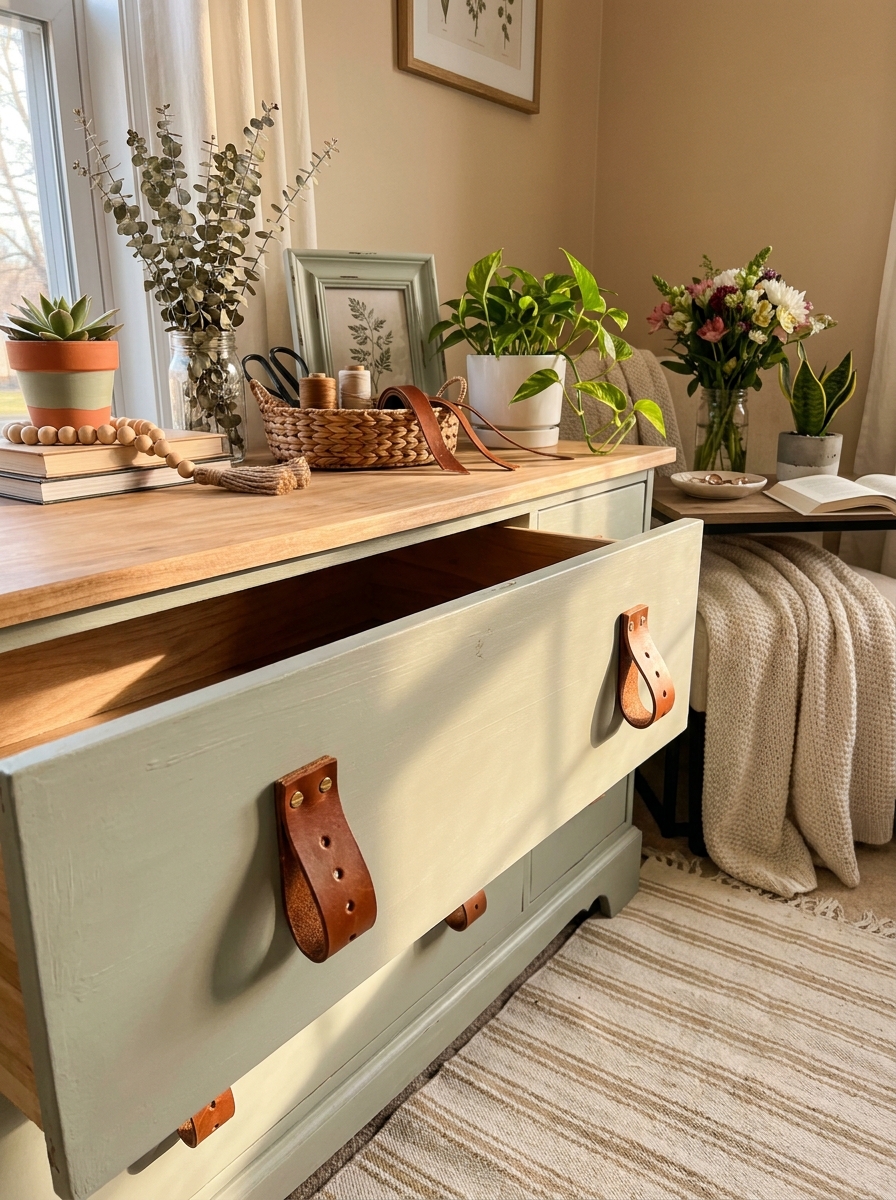
Sometimes the smallest change makes the biggest difference. Swapping basic drawer pulls for DIY leather ones transforms furniture instantly.
You need leather strips, a hole punch, and screws. Cut the leather to your desired length, fold it in half, punch holes where the screws go, and attach. The whole process takes about five minutes per drawer. Leather adds this warm, organic texture that feels expensive and custom.
I replaced all the pulls on my plain IKEA dresser with cognac brown leather, and suddenly it looks like a West Elm piece. You can use different leather colors—black for modern vibes, tan for farmhouse, or even dyed bright colors for a playful look. My mom did hers in soft gray leather and everyone thinks she bought a designer dresser. The leather also gets better with age, developing a beautiful patina over time. It’s one of those upgrades that makes you wonder why you didn’t do it sooner.
25. Tassel Bookmark Set From Embroidery Floss
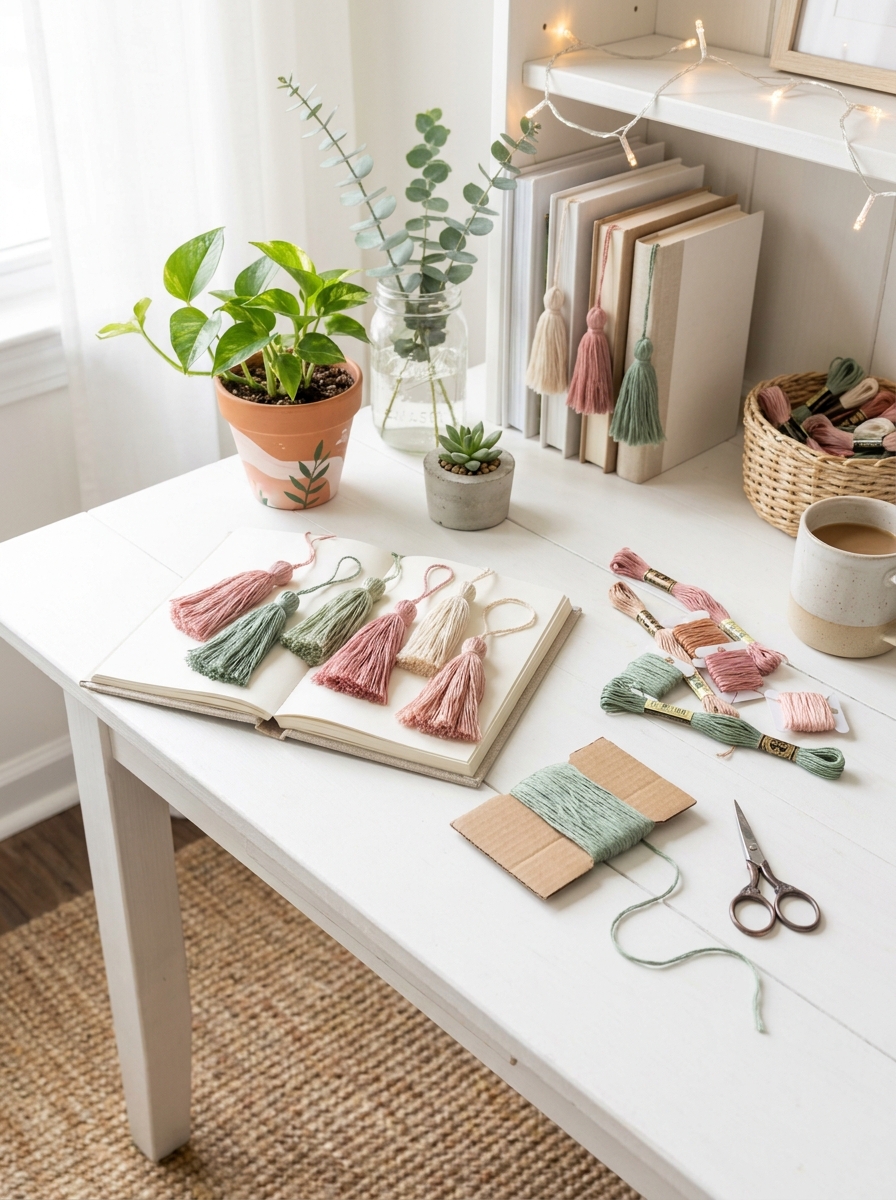
Okay, this is one of those projects that costs practically nothing and makes you feel like a crafting genius. Grab some embroidery floss in your favorite colors, and you’ll have a stack of gorgeous tassels in about twenty minutes. They’re perfect as bookmarks, gift toppers, or even tied onto drawer pulls.
The technique is super simple. Wind the floss around a piece of cardboard, tie it at the top, cut the bottom, and wrap a piece around the neck. That’s it! The best part? You can customize colors to match any room or season. I made a whole set in dusty pinks and sage greens for my nightstand.
These make amazing last-minute gifts too. Tie one onto a journal or tuck it into a book, and suddenly you’ve got a thoughtful handmade present. I keep a little basket of them on my coffee table, and guests always ask where I bought them. The look on their faces when I say I made them? Priceless.
26. Painted Wooden Bead Trivet for Hot Dishes
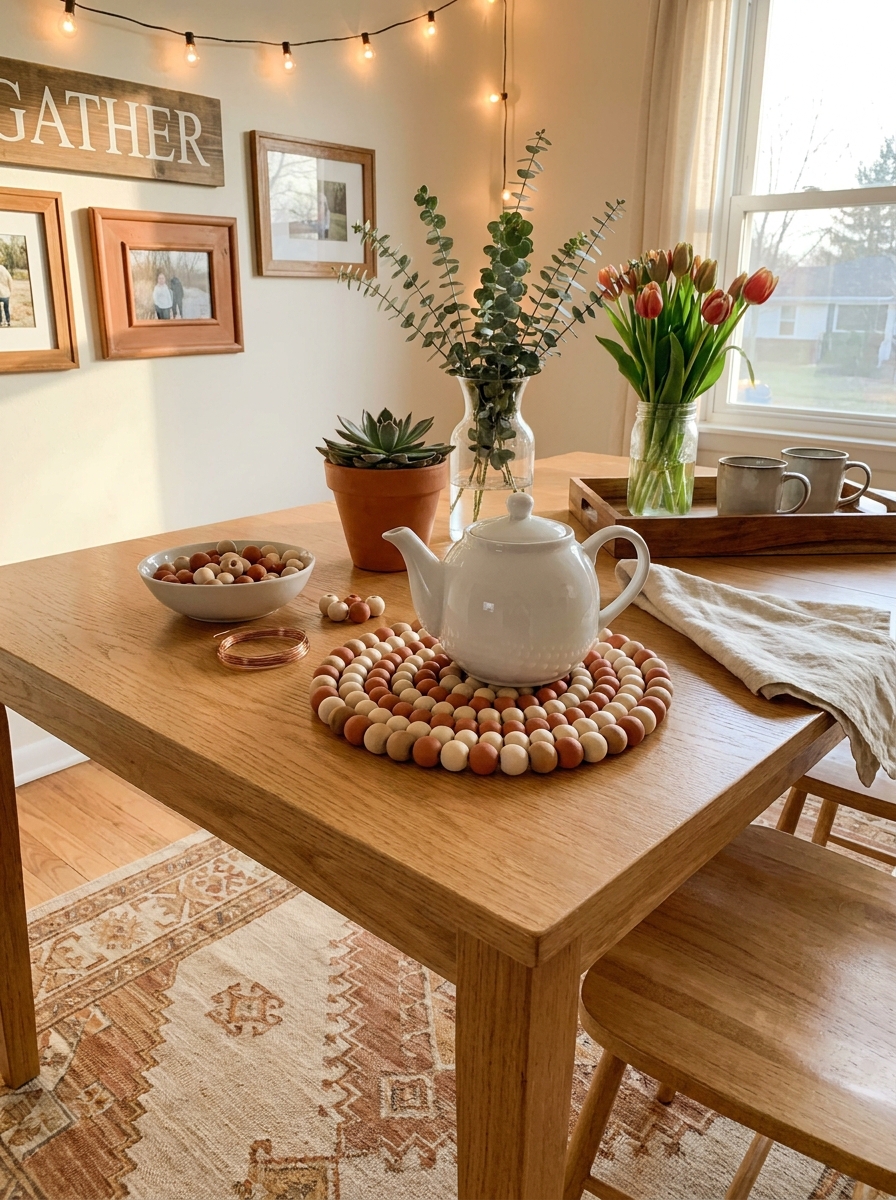
I love a project that’s both pretty and practical, and this wooden bead trivet checks both boxes. You’re basically stringing wooden beads onto wire or sturdy cord in a coiled pattern, then painting some of them for pops of color. It protects your table from hot pots and looks gorgeous doing it.
You can find wooden beads at any craft store, and they’re so cheap. I like mixing sizes for visual interest—some 20mm beads with a few smaller ones keeps it from looking too uniform. The painting part is where you get creative. I did a pattern with terracotta and cream, but you could go bold with navy and gold or keep it natural.
The coiling technique sounds fancy, but it’s just wrapping the beaded wire around itself in a spiral until you’ve got a trivet-sized circle. Secure the end with a dab of hot glue, and you’re done. Now you’ve got a conversation piece that actually serves a purpose. Mine sits on my dining table even when I’m not using it because it’s too pretty to hide.
27. Fabric-Lined Woven Basket Upgrade
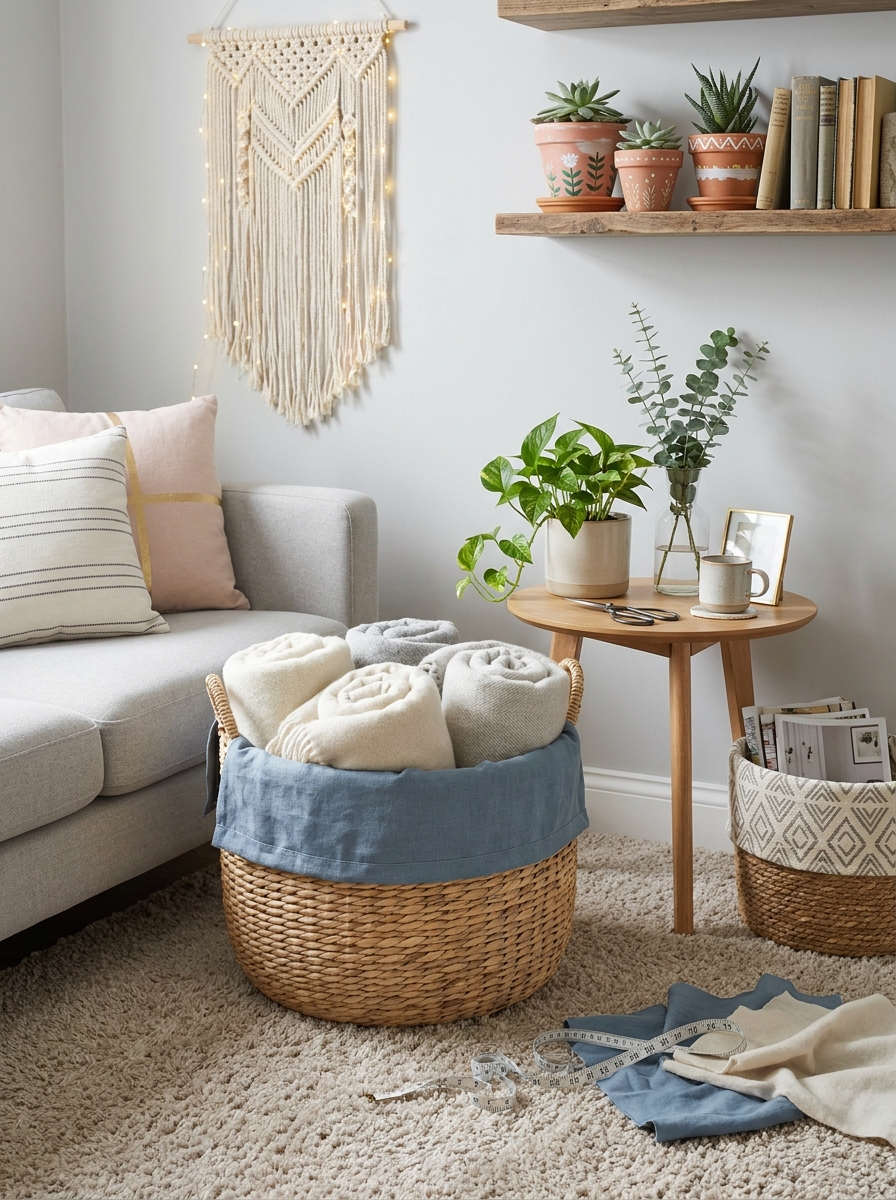
Here’s the thing about plain woven baskets—they’re functional but kind of boring. Add a fabric liner, though? Suddenly they’re magazine-worthy. This is one of those projects that looks way harder than it actually is. You’re basically making a fabric bag that drops into your basket. No complicated sewing required.
Pick a fabric that makes you happy. I used a soft linen in dusty blue for my living room basket, but a fun geometric print would be adorable too. Measure your basket, cut your fabric with a little extra for hemming, sew the sides, fold over the top edge, and you’re basically done. Even if your stitches aren’t perfect, they’ll be hidden inside the basket.
The best part is how much more versatile these baskets become. They’re perfect for storing throw blankets, magazines, kids’ toys, or bathroom towels. The fabric liner keeps small items from falling through the weave, and it adds that custom touch that makes your space feel intentional. I have three of them now in different rooms, and they make everything look so much more pulled together.
Quick Guide
Quick Cost Breakdown: Budget-Friendly DIY
| Project Type | Materials Cost | Time Required | Skill Level |
|————–|—————|—————|————-|
| Painted Pots | $5–$15 | 30 minutes | Super Easy |
| Macramé Hanging | $10–$20 | 1–2 hours | Easy |
| Gallery Wall | $20–$40 | 1 hour | Easy |
| Wooden Sign | $5–$12 | 45 minutes | Easy |
| Fabric Projects | $8–$25 | 1 hour | Easy |
Most projects cost less than brunch and use supplies you can find at any craft store. The real investment is your time, but even that’s pretty minimal. And here’s the thing—you’ll mess up sometimes. A wonky letter on your sign or uneven macramé knots just add character. Save those receipts, though. If you genuinely hate how something turns out, most craft stores have generous return policies on unused portions of materials.
Your Home, Your Hands, Your Style
Here’s what nobody tells you about DIY home decor: the imperfections are actually the best part. That slightly wobbly gallery wall arrangement? It has personality. The macramé hanging where one side is a tiny bit longer? It’s charming. These projects aren’t about achieving Pinterest perfection—they’re about making your space feel like yours.
Start with just one project. Maybe the painted pots because they’re quick and almost impossible to mess up. Or the wooden sign if you’ve got a phrase that means something to you. You don’t need to tackle all 27 this weekend. But I promise once you finish that first project and step back to admire it, you’ll want to try another.
Your home should tell your story, and store-bought stuff can only do so much of that work. When you make something with your own hands, even something small, it changes how you feel in that space. So grab some paint, crank up a good playlist, and just start. Your living room is waiting for a little handmade magic.
Frequently Asked Questions
What are the easiest DIY home decor projects for complete beginners?
Painted terra cotta pots, wooden signs, and simple pillow covers are perfect starting points. They require minimal tools, forgive mistakes easily, and give you visible results quickly. Most beginners can complete these in under an hour with supplies from any craft store.
How much money do I need to start DIY home decorating projects?
You can start with as little as $5-$15 for most beginner projects. Painted pots, simple macramé, and wooden signs are all budget-friendly. Many projects use supplies you might already have at home, like paint, fabric scraps, or recycled materials. Thrift stores are goldmines for frames and base materials.
Do I need special tools to make DIY home decor?
Not really. Most beginner projects only need basics like paintbrushes, scissors, a hot glue gun, and maybe a hammer for hanging. You probably already own most of what you need. As you get more into DIY, you can invest in specialty tools, but they’re not required to create beautiful, professional-looking pieces.
How do I make DIY projects look professional and not homemade?
The secret is cohesive color palettes and clean finishing. Choose 2-3 colors that work together, take your time with paint edges, and seal your work when appropriate. Also, styling matters—display your DIY projects alongside nice store-bought items, and they’ll look intentionally curated rather than craft-project-ish.
What’s the best DIY home decor project to try first?
Painted terra cotta pots or a simple wooden sign are ideal first projects. They’re quick, inexpensive, and nearly impossible to ruin. You’ll get immediate satisfaction from completing something tangible, which builds confidence for tackling more complex projects like macramé or gallery walls later.